C++实现自定义vector以及allocator
Posted Redamanc
tags:
篇首语:本文由小常识网(cha138.com)小编为大家整理,主要介绍了C++实现自定义vector以及allocator相关的知识,希望对你有一定的参考价值。
前言
不知道大家有没有这种感觉,学习了一段时间后,总想着自己能够实现一些标准库里已经提供的东西,比如说STL容器vector、比如数据类型string。
一方面是对这个知识可以有进一步的一个认识和了解,另一方面也可以检验自己的掌握程度。
基于此,我们今天实现自定义的vector。
初步实现
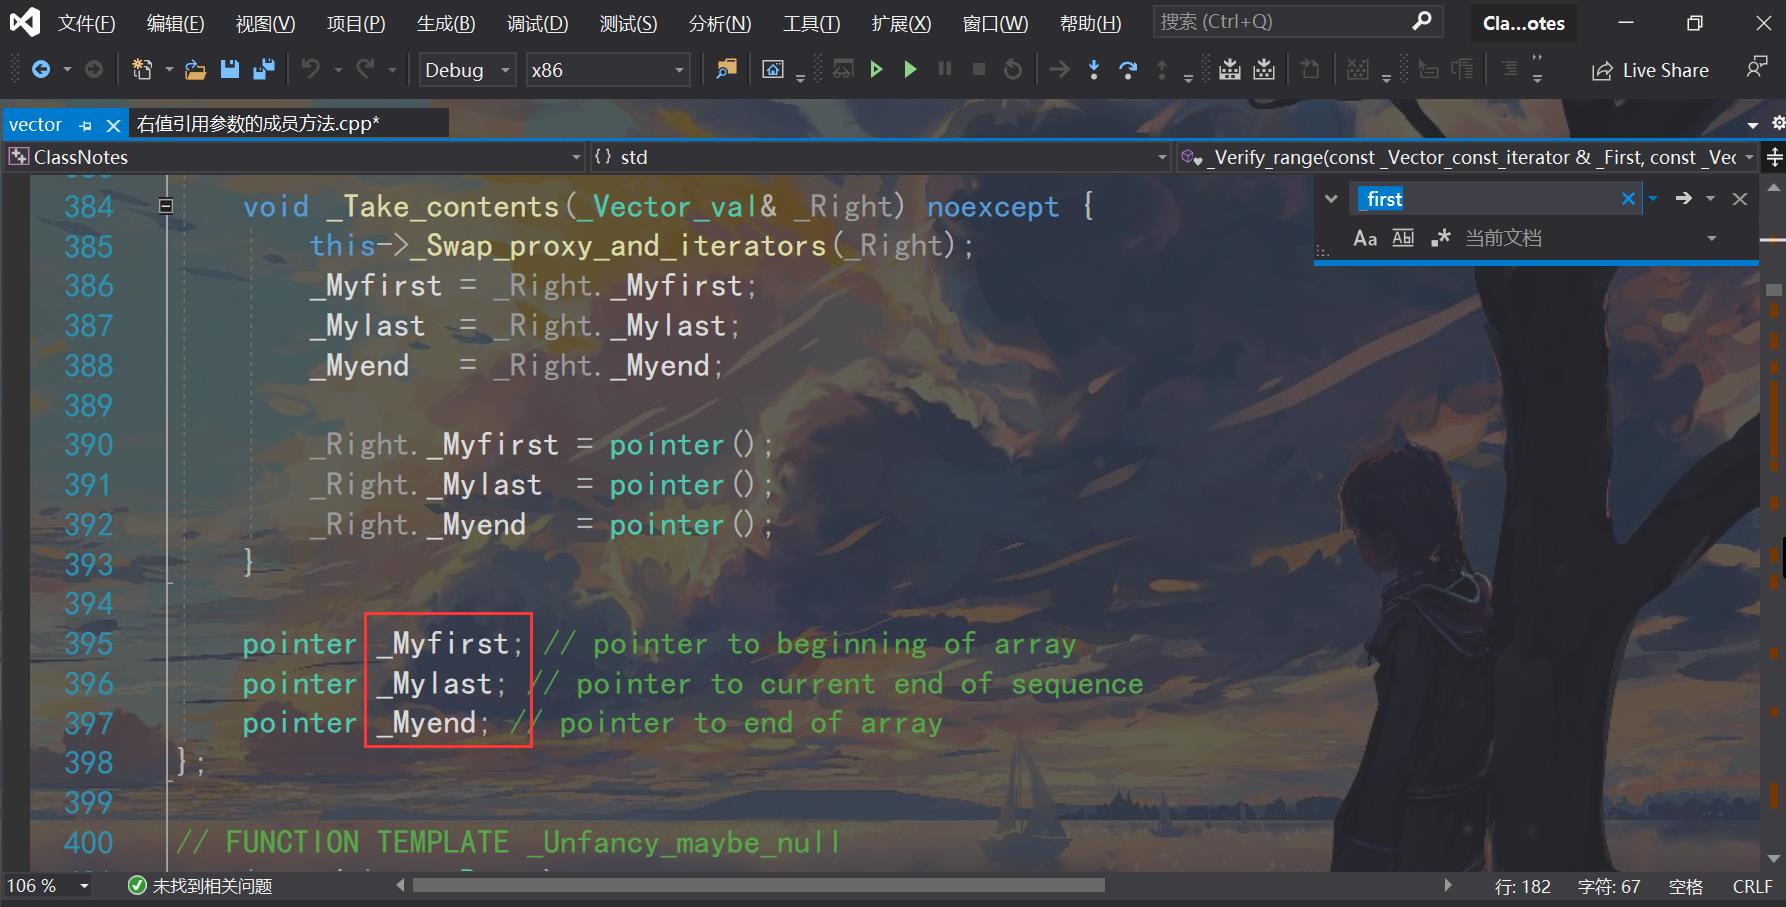
通过包含头文件#include <vector>转到文档,我们可以查看系统自带vector的实现:

主要包含了三个指针:
- 指向数组起始位置的指针;
- 指向数组中最后一个有效元素位置的后继位置;
- 指向数组空间的后继位置。
了解了这些后,我们就可以自定义vector了:
代码如下:
template<typename T>
class vector
{
public:
	vector(int size = 10)
	{
		_first = new T[size];
		_last = _first;
		_end = _first + size;
	}
	~vector()
	{
		delete[]_first;
		_first = _end = _last = nullptr;
	}
	vector(const vector<T>& rhs)
	{
		int size = rhs._end - rhs._first;
		_first = new T[size];
		int len = rhs._last - rhs._first;
		for (int i = 0; i < len; ++i)
		{
			_first[i] = rhs._first[i];
		}
		_last = _first + len;
		_end = _first + size;
	}
	vector<T>& operator=(const vector<T>& rhs)
	{
		if (this == &rhs)
			return *this;

		delete[]_first;


		int size = rhs._end - rhs._first;
		_first = new T[size];
		int len = rhs._last - rhs._first;
		for (int i = 0; i < len; ++i)
		{
			_first[i] = rhs._first[i];
		}
		_last = _first + len;
		_end = _first + size;
		return *this;
	}
	void push_back(const T& val) // 向容器末尾添加元素
	{
		if (full())
			expand();
		*_last++ = val;
	}
	void pop_back() // 从容器末尾删除元素
	{
		if (empty())
			return;
		--_last;
	}
	T back()const // 返回容器末尾的元素的值
	{
		return *(_last - 1);
	}
	bool full()const { return _last == _end; }
	bool empty()const { return _first == _last; }
	int size()const { return _last - _first; }
private:
	T* _first; // 指向数组起始的位置
	T* _last;  // 指向数组中有效元素的后继位置
	T* _end;   // 指向数组空间的后继位置

	void expand() // 容器的二倍扩容
	{
		int size = _end - _first;
		T *ptmp = new T[2 * size];
		for (int i = 0; i < size; ++i)
		{
			ptmp[i] = _first[i];
		}
		delete[]_first;
		_first = ptmp;
		_last = _first + size;
		_end = _first + 2 * size;
	}
};
出现的问题
我们知道,对于一个容器来说,里面存放的数据类型可以是系统自带的默认类型,比如:int、char等等,也可以是自己定义的class XXX类型。
对于默认类型来说,我们上面的代码是没有问题的(可以自行验证),但是对于自定义类型来说,就会出现问题:
比如我们加上自己定义的简单类型,分别给构造函数、析构函数、拷贝构造函数都加上打印信息:
class Test
{
public:
	Test() { cout << "Test()" << endl; }
	~Test() { cout << "~Test()" << endl; }
	Test(const Test&) { cout << "Test(const Test&)" << endl; }
};
接下来运行代码:
int main()
{
	vector<Test> vec;

	return 0;
}
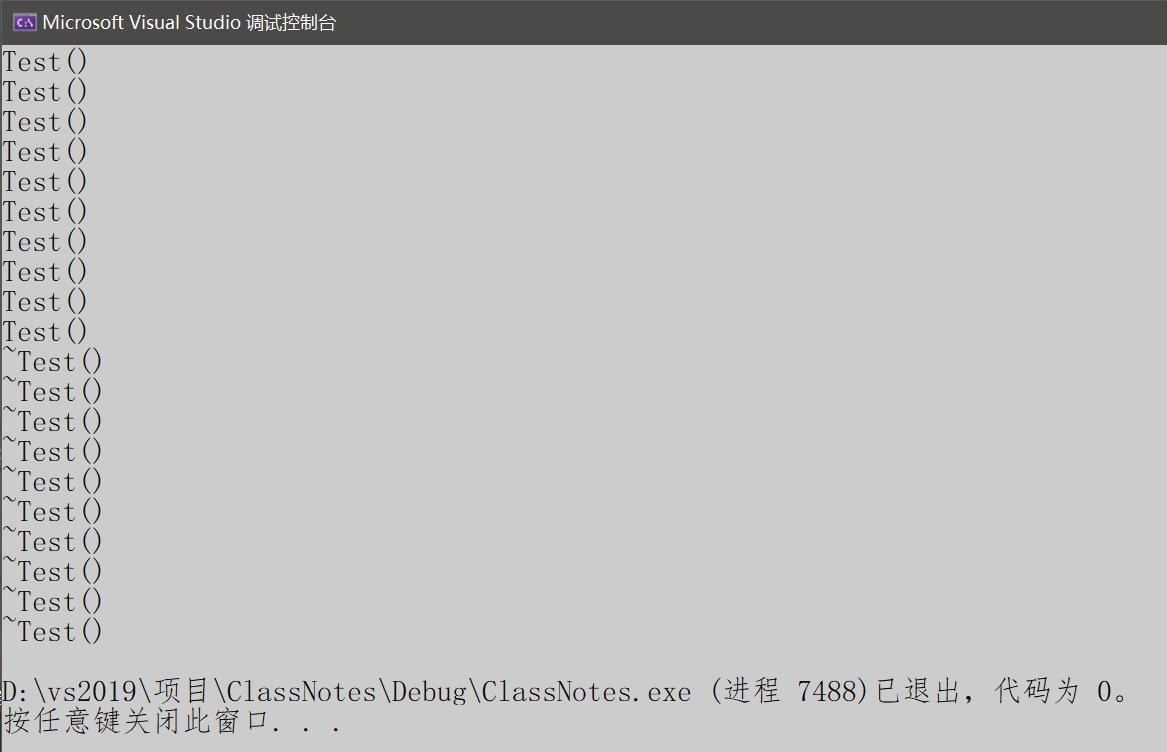
结果如下:

我们会发现,我只是定义了一个空的容器,
但是它却自动给我添加了十个对象。
这,,于情于理都说不过去。
解决问题
Allocator(空间配置器)
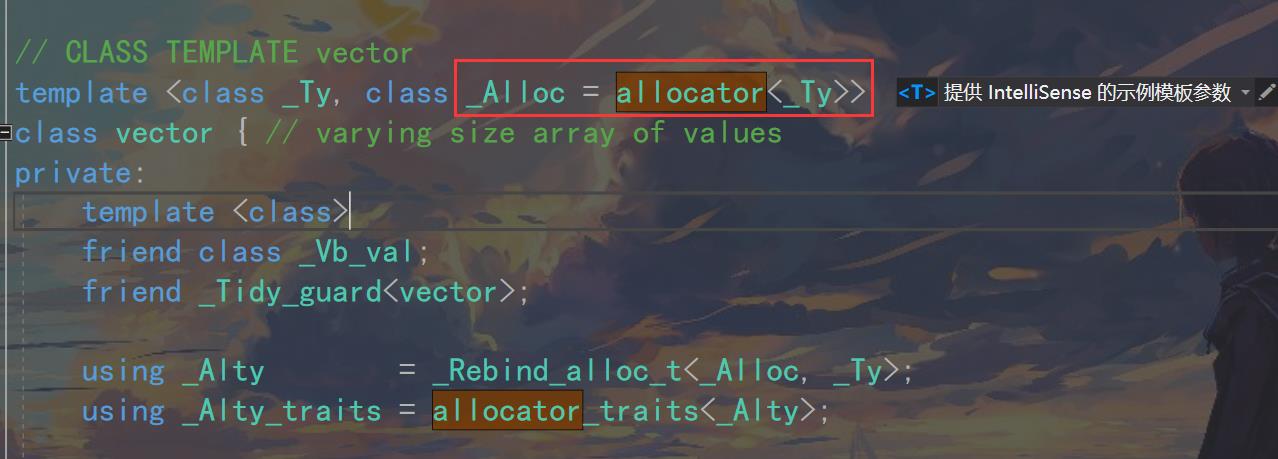
分析完问题后,我们可以继续查看系统自带vector是如何做的?

可以看到,系统的实现,除了数据类型外,还有一个allocator。而这个,就是解决问题的办法了!
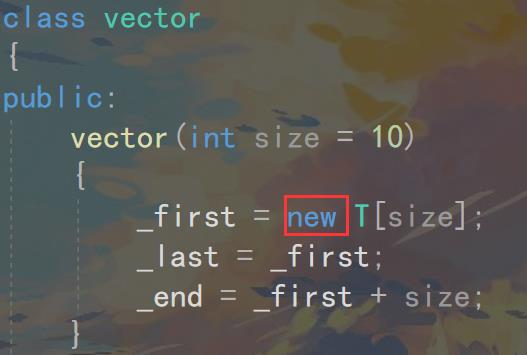
我们再来回过头看看问题,其实问题主要出在了构造函数的new上:

对于new来说,它要做两件事情:
- 开辟空间;
- 数据初始化(对于自定义类型来说就是要调用
构造函数)
可问题是,我们既然选择把它作为容器,那么就只需要它提供一个场所(空间),至于这个场所里存放什么数据,是由程序员来决定的,不应该由容器来擅作主张。
那么,问题的关键就在于将开辟空间和构造对象分离开。
而这,也就是空间配置器做的工作;
于是我们添加容器的空间配置器:
// 定义容器的空间配置器,和C++标准库的allocator实现一样
template<typename T>
struct Allocator
{
	T* allocate(size_t size) // 负责内存开辟
	{
		return (T*)malloc(sizeof(T) * size);
	}
	void deallocate(void* p) // 负责内存释放
	{
		free(p);
	}
	void construct(T* p, const T& val) // 负责对象构造
	{
		new (p) T(val); // 定位new
	}
	void destroy(T* p) // 负责对象析构
	{
		p->~T(); // ~T()代表了T类型的析构函数
	}
};
可以看到,空间配置器主要有四个功能:
- 内存开辟 allocate(底层调用
malloc); - 内存释放 deallocate(底层调用
free); - 对象构造 construct(调用
构造函数); - 对象析构 destroy(调用
析构函数)。
并且,修改自定义的vector:
template<typename T, typename Alloc = Allocator<T>>
class vector
{
public:
	vector(int size = 10)
	{
		// 需要把内存开辟和对象构造分开处理
		_first = _allocator.allocate(size);
		_last = _first;
		_end = _first + size;
	}
	~vector()
	{
		// 析构容器有效的元素,然后释放_first指针指向的堆内存
		for (T* p = _first; p != _last; ++p)
		{
			_allocator.destroy(p); // 把_first指针指向的数组的有效元素进行析构操作
		}
		_allocator.deallocate(_first); // 释放堆上的数组内存
		_first = _last = _end = nullptr;
	}
	vector(const vector<T>& rhs)
	{
		int size = rhs._end - rhs._first;
		_first = _allocator.allocate(size);
		int len = rhs._last - rhs._first;
		for (int i = 0; i < len; ++i)
		{
			_allocator.construct(_first + i, rhs._first[i]);
		}
		_last = _first + len;
		_end = _first + size;
	}
	vector<T>& operator=(const vector<T>& rhs)
	{
		if (this == &rhs)
			return *this;

		for (T* p = _first; p != _last; ++p)
		{
			_allocator.destroy(p); // 把_first指针指向的数组的有效元素进行析构操作
		}
		_allocator.deallocate(_first);

		int size = rhs._end - rhs._first;
		_first = _allocator.allocate(size);
		int len = rhs._last - rhs._first;
		for (int i = 0; i < len; ++i)
		{
			_allocator.construct(_first + i, rhs._first[i]);
		}
		_last = _first + len;
		_end = _first + size;
		return *this;
	}
	void push_back(const T& val) // 向容器末尾添加元素
	{
		if (full())
			expand();

		_allocator.construct(_last, val);
		_last++;
	}
	void pop_back() // 从容器末尾删除元素
	{
		if (empty())
			return;

		// 不仅要把_last指针--,还需要析构删除的元素
		--_last;
		_allocator.destroy(_last);
	}
	T back()const // 返回容器末尾的元素的值
	{
		return *(_last - 1);
	}
	bool full()const { return _last == _end; }
	bool empty()const { return _first == _last; }
	int size()const { return _last - _first; }
private:
	T* _first; // 指向数组起始的位置
	T* _last;  // 指向数组中有效元素的后继位置
	T* _end;   // 指向数组空间的后继位置
	Alloc _allocator; // 定义容器的空间配置器对象

	void expand() // 容器的二倍扩容
	{
		int size = _end - _first;
		T* ptmp = _allocator.allocate(2 * size);
		for (int i = 0; i < size; ++i)
		{
			_allocator.construct(ptmp + i, _first[i]);
		}
		for (T* p = _first; p != _last; ++p)
		{
			_allocator.destroy(p);
		}
		_allocator.deallocate(_first);
		_first = ptmp;
		_last = _first + size;
		_end = _first + 2 * size;
	}
};
最终结果
修改完之后,我们再来运行如下代码:
int main()
{
	Test t1;
	cout << "-------------------" << endl;
	vector<Test> vec;
	vec.push_back(t1);
	cout << "-------------------" << endl;

	return 0;
}
想要实现的效果是:
用户定义了多少个对象,容器里面包含多少个对象;
容器不会自己定义多个对象出来。
运行结果如下:

可以看到,开辟空间和构造对象分离开了。
对比系统自带的
我们还可以使用系统自带的vector来对比:
#include <iostream>
#include <vector>
using namespace std;

class Test
{
public:
	Test() { cout << "Test()" << endl; }
	~Test() { cout << "~Test()" << endl; }
	Test(const Test&) { cout << "Test(const Test&)" << endl; }
};
int main()
{
	Test t1;
	cout << "-------------------" << endl;
	vector<Test> vec;
	vec.push_back(t1);
	cout << "-------------------" << endl;

	return 0;
}
运行结果:

可以看到,是一样的!
以上是关于C++实现自定义vector以及allocator的主要内容,如果未能解决你的问题,请参考以下文章