pygame教你从0到1一步步实现点到点的智能追踪系统(其一)
Posted dhjabc_1
tags:
篇首语:本文由小常识网(cha138.com)小编为大家整理,主要介绍了pygame教你从0到1一步步实现点到点的智能追踪系统(其一)相关的知识,希望对你有一定的参考价值。
pygame库越来越有趣了。
一直在思考如何构建一个目标追踪和定位的功能,今天终于落笔开始写成博客。下面是我的一些思考:
归根到最简单的功能,就是首先有一个初始的点,然后有一个目标点,然后通过时间片,结合算法计算出新的位置,不断更新初始的点,最后到达目标点的一个过程。
当然,真实的环境比这个复杂多了,譬如:
1、不能简单的把初始点和目标点,可能是2D的图形,或者3D的图形。 2、别的环境因素的影响等等。
作为技术上的考虑,我觉得开始不要想得太复杂,先实现了功能先。整体目录如下:
文章目录
一、需要的数学知识
这里借用一下博主@GZR专家
的文章一个简单的导弹自动追踪以及实时图片旋转算法,Python-pygame代码实现(https://blog.csdn.net/guozirui12/article/details/86997123?utm_source=app)里面的数学知识和图,在此表示感谢!
(一)数学思路
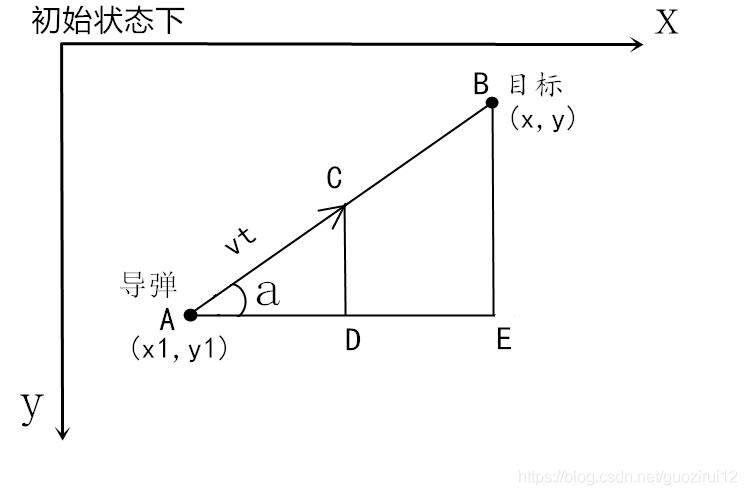
根据上图,把时间t分割成足够小的片段(比如1/1000,这个时间片越小越精确),每一个片段分别构造如上三角形,计算出导弹下一个时间片走的方向(即∠a)和走的路程(即vt=|AC|),这时候目标再在第二个时间片移动了位置,这时刚才计算的C点又变成了第二个时间片的初始点,这时再在第二个时间片上在C点和新的目标点构造三角形计算新的vt,然后进入第三个时间片,如此反复即可。
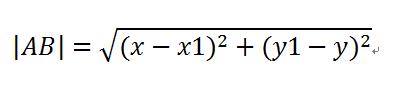
(二)计算距离
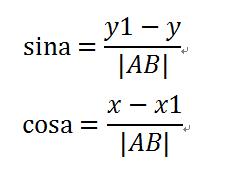
假定导弹和目标的初始状态下坐标分别是(x1,y1),(x,y),构造出直角三角形ABE,这个三角形用来求∠a的正弦和余弦值,因为vt是自己设置的,我们需要计算A到C点x和y坐标分别移动了多少,移动的值就是AD和CD的长度,这两个分别用vt乘cosa和sina即可。
(三)计算X\\Y的值
AC的长度就是导弹的速度乘以时间即 |AC|=vt,然后即可计算出AD和CD的长度,于是这一个时间片过去后,导弹应该出现在新的位置C点,他的坐标就是老的点A的x增加AD和y减去CD。
于是,新的C点坐标就是:

二、一个点到点的案例
(一)对应的参数设置
x1,y1=100,600           #导弹的初始发射位置
x,y =500,200            #目标位置
velocity=0.3            #导弹速度
(二)循环更新追踪点位置
clock=pygame.time.Clock()
while True:
    for event in pygame.event.get():
        if event.type==pygame.QUIT:
            pygame.quit()
            sys.exit()
    clock.tick(300)
    distance=sqrt(pow(x1-x,2)+pow(y1-y,2))      #两点距离公式
    section=velocity               #每个时间片需要移动的距离
    sina=(y1-y)/distance
    cosa=(x-x1)/distance
    angle=atan2(y-y1,x-x1)              #两点线段的弧度值
    x1,y1=(x1+section*cosa,y1-section*sina)
(三)绘制追踪点和目标点
pygame.draw.circle(screen, (255, 0, 0), (int(x1), int(y1)), 10)
pygame.draw.circle(screen, (0, 0, 255), (x,y), 10)
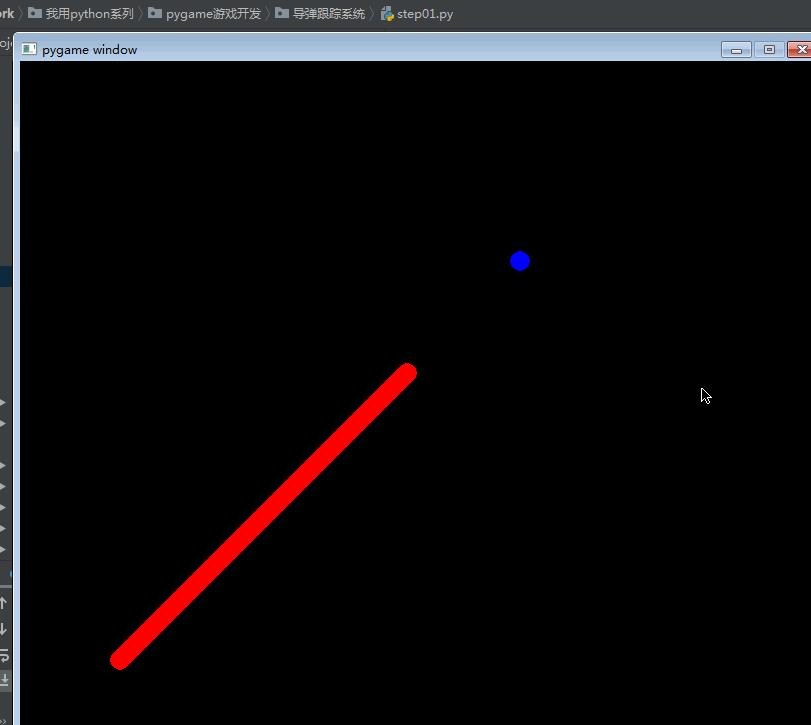
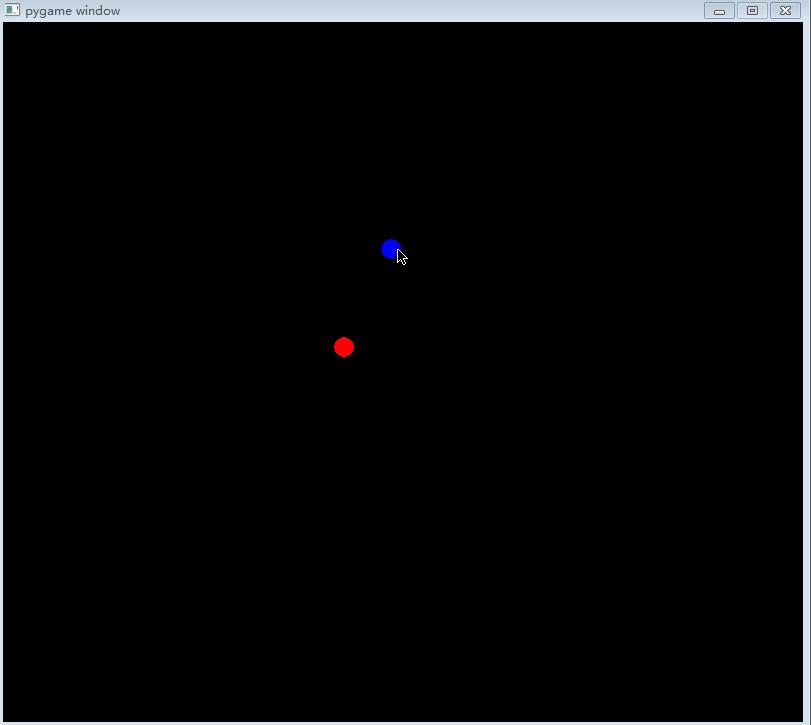
(四)完整的效果演示
代码如下:
import pygame,sys
from math import *
pygame.init()
screen=pygame.display.set_mode((800,700))
x1,y1=100,600           #导弹的初始发射位置
x,y =500,200            #目标位置
velocity=0.3            #导弹速度
clock=pygame.time.Clock()
while True:
    for event in pygame.event.get():
        if event.type==pygame.QUIT:
            pygame.quit()
            sys.exit()
    clock.tick(300)
    distance=sqrt(pow(x1-x,2)+pow(y1-y,2))      #两点距离公式
    section=velocity               #每个时间片需要移动的距离
    sina=(y1-y)/distance
    cosa=(x-x1)/distance
    angle=atan2(y-y1,x-x1)              #两点线段的弧度值
    x1,y1=(x1+section*cosa,y1-section*sina)
    pygame.draw.circle(screen, (255, 0, 0), (int(x1), int(y1)), 10)
    pygame.draw.circle(screen, (0, 0, 255), (x,y), 10)
    pygame.display.update()
(五)让目标点随着鼠标运动起来
增加对鼠标位置的记录,核心代码如下:
x, y = pygame.mouse.get_pos() # 获取鼠标位置,鼠标就是需要打击的目标
完整的代码如下:
import pygame,sys
from math import *
pygame.init()
screen=pygame.display.set_mode((800,700))
x1,y1=100,600           #导弹的初始发射位置
x,y =500,200            #目标位置
velocity=0.8            #导弹速度
clock=pygame.time.Clock()
while True:
    x, y = pygame.mouse.get_pos()  # 获取鼠标位置,鼠标就是需要打击的目标
    for event in pygame.event.get():
        if event.type==pygame.QUIT:
            pygame.quit()
            sys.exit()
    clock.tick(300)
    distance=sqrt(pow(x1-x,2)+pow(y1-y,2))      #两点距离公式
    section=velocity               #每个时间片需要移动的距离
    sina=(y1-y)/distance
    cosa=(x-x1)/distance
    angle=atan2(y-y1,x-x1)              #两点线段的弧度值
    x1,y1=(x1+section*cosa,y1-section*sina)
    screen.fill((0,0,0))
    pygame.draw.circle(screen, (255, 0, 0), (int(x1), int(y1)), 10)
    pygame.draw.circle(screen, (0, 0, 255), (x,y), 10)
    pygame.display.update()
运行效果如下:
(六)让追踪点拖着尾巴跑起来
通过增加list对象记录历史出现的所有的点的位置,然后绘制,核心代码如下:
steps = []
steps.append((int(x1), int(y1)))
for step in steps:
    pygame.draw.circle(screen, (255, 0, 0), step, 10)
pygame.draw.circle(screen, (0, 0, 255), (x,y), 10)
完整代码如下:
import pygame,sys
from math import *
pygame.init()
screen=pygame.display.set_mode((800,700))
x1,y1=100,600           #导弹的初始发射位置
x,y =500,200            #目标位置
velocity=0.8            #导弹速度
clock=pygame.time.Clock()
steps = []
while True:
    x, y = pygame.mouse.get_pos()  # 获取鼠标位置,鼠标就是需要打击的目标
    for event in pygame.event.get():
        if event.type==pygame.QUIT:
            pygame.quit()
            sys.exit()
    clock.tick(300)
    distance=sqrt(pow(x1-x,2)+pow(y1-y,2))      #两点距离公式
    section=velocity               #每个时间片需要移动的距离
    sina=(y1-y)/distance
    cosa=(x-x1)/distance
    angle=atan2(y-y1,x-x1)              #两点线段的弧度值
    x1,y1=(x1+section*cosa,y1-section*sina)
    screen.fill((0, 0, 0))
    steps.append((int(x1), int(y1)))
    for step in steps:
        pygame.draw.circle(screen, (255, 0, 0), step, 10)
    pygame.draw.circle(screen, (0, 0, 255), (x,y), 10)
    pygame.display.update()
运行效果如下:
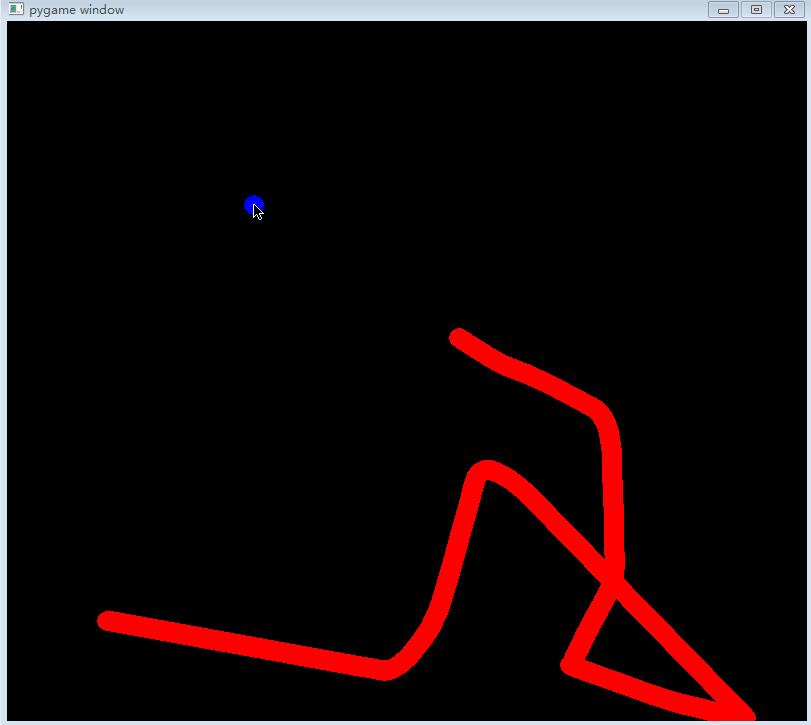
一个超级简单的点到点的目标追踪功能就开发好了。你是更喜欢拖着尾巴的追踪,还是喜欢不拖尾巴的追踪呢?
三、更复杂点的点到点案例
我们让目标点动起来,类似运动的小球一样,而且让小球更随机,即小球的运动速度、初始位置(x,y),小球的颜色、小球的半径等都是随机的。
(一)新建Ball类
通过Ball类实现运动的小球,具体的类代码如下:
from random import randint
import pygame

class Ball:

    def __init__(self, width,height,screen):
        self.scrnwidth = width
        self.scrnheight = height
        self.screen = screen
        self.reset()
        self.color = (randint(0,255),randint(0,255),randint(0,255))

    def draw_ball(self):
        pygame.draw.circle(self.screen, self.color, (self.xpos, self.ypos), self.radius)

    def reset(self):
        self.radius = randint(2, 10)
        self.xpos = randint(self.radius, int(self.scrnwidth)-self.radius)
        self.ypos = randint(self.radius, int(self.scrnheight)-self.radius)
        self.xvelocity = randint(1, 2)
        self.yvelocity = randint(1, 2)
        self.color = (randint(0,255),randint(0,255),randint(0,255))

    def move(self):
        # 进行相应的移动,如果坐标超过屏幕边缘则向相反方向移动
        # 让球的x坐标和y坐标,按照向量的大小进行增加,表示球的运行,向下和向右

        self.xpos += self.xvelocity
        self.ypos += self.yvelocity

        # 如果球的y坐标大于等于屏幕高度和球的半径的差,则调整球的运行y轴方向朝上
        if self.ypos >= self.scrnheight - self.radius:
            self.yvelocity = -self.yvelocity

        # 如果球的y坐标小于等于屏幕高度和球的半径的差,则调整球的y轴运行方向朝下
        if self.ypos <= self.radius:
            self.yvelocity = abs(self.yvelocity)

        # 如果球的x坐标大于等于屏幕宽度和球的半径差,则调整球的运行x轴方向朝左
        if self.xpos >= self.scrnwidth - self.radius:
            self.xvelocity = -self.xvelocity

        # 如果球的x坐标小于等于屏幕宽度和球半径的差,则调整球的运行x轴方向朝右
        if self.xpos <= self.radius:
            self.xvelocity = abs(self.xvelocity)
(二)初始化Ball对象并运动绘制
在主文件里面引入Ball文件,并初始化Ball对象。
from Ball import Ball
myball = Ball(800,700,screen)
在循环过程中更新Ball的位置,并画出Ball的surface信息。
myball.move()
myball.draw_ball()
(三)完整的代码
import pygame,sys
from math import *
from Ball import Ball

pygame.init()
screen=pygame.display.set_mode((800,700))
x1,y1=100,600           #导弹的初始发射位置
x,y =500,200            #目标位置
velocity=1.1            #导弹速度
clock=pygame.time.Clock()
steps = []
myball = Ball(800,700,screen)
while True:
    myball.move()
    x, y = myball.xpos,myball.ypos # 获取运动小球的位置
    for event in pygame.event.get():
        if event.type==pygame.QUIT:
            pygame.quit()
            sys.exit()
    clock.tick(300)
    distance=sqrt(pow(x1-x,2)+pow(y1-y,2))      #两点距离公式
    section=velocity               #每个时间片需要移动的距离
    sina=(y1-y)/distance
    cosa=(x-x1)/distance
    angle=atan2(y-y1,x-x1)              #两点线段的弧度值
    x1,y1=(x1+section*cosa,y1-section*sina)
    screen.fill((0, 0, 0))
    steps.append((int(x1), int(y1)))
    for step in steps:
        pygame.draw.circle(screen, (255, 0, 0), step, 10)
    myball.draw_ball()
    # pygame.draw.circle(screen, (0, 0, 255), (x,y), 10)
    pygame.display.update()
(四)运行效果如下:
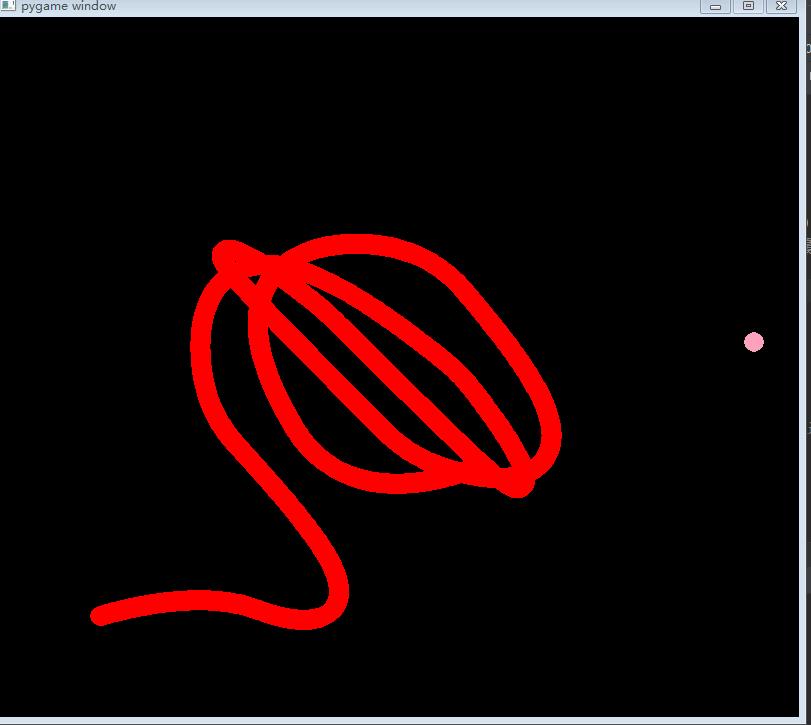
这个是点到点的智能追踪系统的最简单的版本,后面将增加图片的运行效果,并增加其他更有趣的功能,欢迎持续关注啊。
感谢各位的支持,比心。
参考文档:
https://blog.csdn.net/guozirui12/article/details/86997123?utm_source=app
以上是关于pygame教你从0到1一步步实现点到点的智能追踪系统(其一)的主要内容,如果未能解决你的问题,请参考以下文章