不论是CentOS还是Windows,面对这些bug, 从来没怂过......
Posted IT翰麟院
tags:
篇首语:本文由小常识网(cha138.com)小编为大家整理,主要介绍了不论是CentOS还是Windows,面对这些bug, 从来没怂过......相关的知识,希望对你有一定的参考价值。
真知如同珍宝,不是轻易获得的,必须学习、钻研、思考,最重要的是必须有强烈的求知欲。——托马斯·阿诺德
Real knowledge, like everything else of value, is not to be obtained easily,it must be worked for, studied for, thought for, and more than all, must be prayed for.——Thomas Arnold

今天,给大家分享的是CentOS下的一些科研实验中出现的bug及其解决方法。
一、Lib库“CXXABI_1.3.9”问题
程序运行时出现
ImportError: /lib64/libstdc++.so.6: version `CXXABI_1.3.9' not found (required by /home/lab214/anaconda3/lib/python3.8/site-packages/matplotlib/ft2font.cpython-38-x86_64-linux-gnu.so)

原因剖析:
解决办法:
查看对应符号版本
strings /usr/lib64/libstdc++.so.6 | grep 'CXXABI'
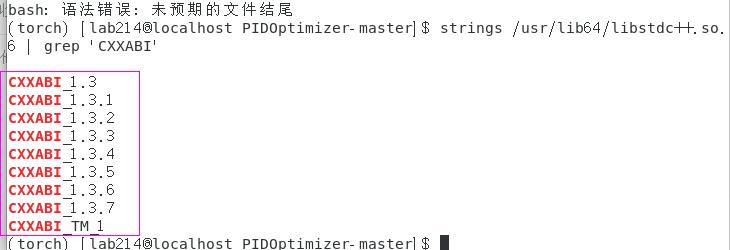
发现此时,可观测到的最高版本只有“CXXABI_1.3.7” 果然没有程序运行所需要的“CXXABI_1.3.9”版本。
针对这个问题,我们可以通过删除系统自带的libstdc++.so.6,将Anaconda3中的libstdc++.so.6拷贝复制到系统对应的地方。
查看系统下libstdc++.so.6版本
ll /usr/lib64/libstdc++*

查看Anaconda3下libstdc.so.6版本
ll ~/anaconda3/lib/libstdc*

进入系统对应的文件夹位置
cd /usr/lib64/
将anaconda3中的libstdc++so.6拷贝到系统相应地方。注意版本号,注意命令行最后有个空格和点“.”(点,表示当前目录)。
sudo cp ~/anaconda3/lib/libstdc++.so.6.0.26 .
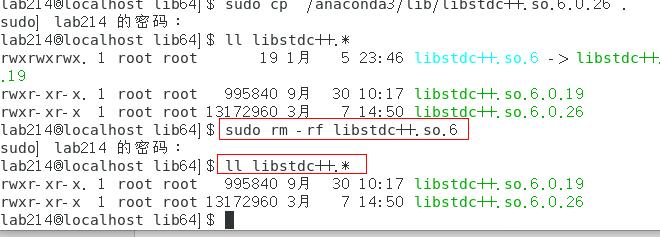
查看此时系统文件夹下的内容,可以看到,相比之前多了6.0.26

删除系统下libstdc++.so.6旧版本,并查看
sudo rm -rf libstdc++.so.6
ll libstdc++.*
建立软连接
sudo ln -sf libstdc++.so.6.0.26 libstdc++.so.6

sudo ldconfig

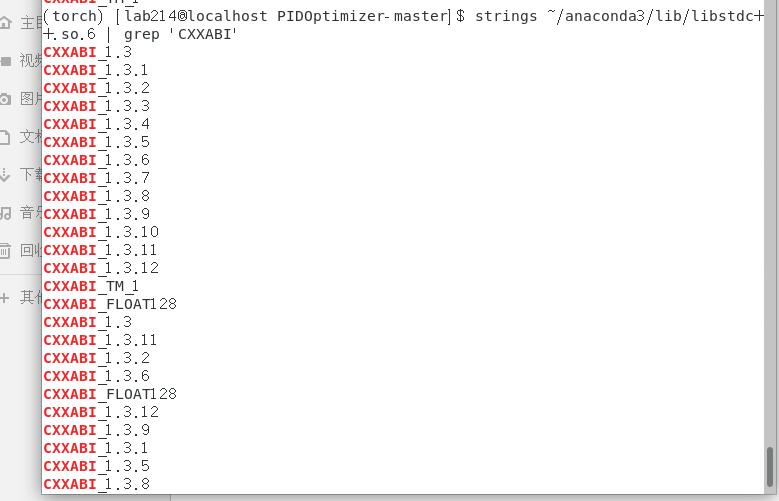
至此,配置完成,再次查看CXXABI动态库版本
strings ~/anaconda3/lib/libstdc++.so.6 | grep 'CXXABI'
二、对特定torch环境的记录
torch==1.4.0对应torchvision ==0.5.0
三、对/etc/sudoers修改所造成的错误
对/etc/sudoers修改后出现的bug错误记录如下:
1/etc/sudoers: 语法错误 near line 124 <<<
2sudo: /etc/sudoers 中第 124 行附近有解析错误
3sudo: 没有找到有效的 sudoers 资源,退出
4sudo: 无法初始化策略插件切换到root用户,执行 vi /etc/sudoers 编辑文件内容,将第124行的错误改正(注释掉)之后保存退出。
su root

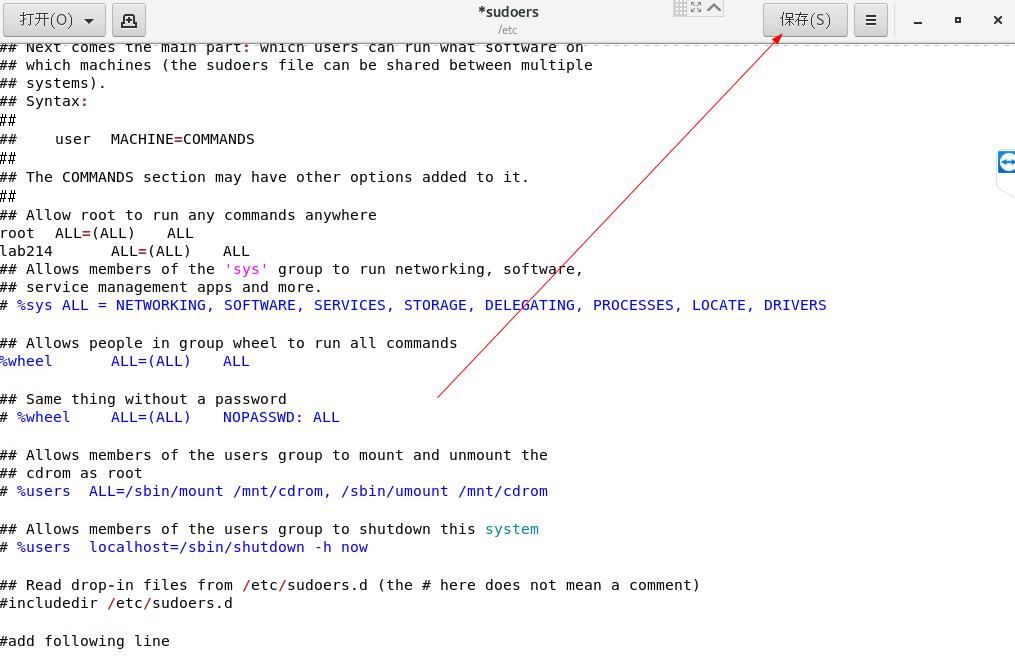
gedit /etc/sudoers打开后,我们定位到124行附近

将这一行删除,之后点击右上角的“保存”
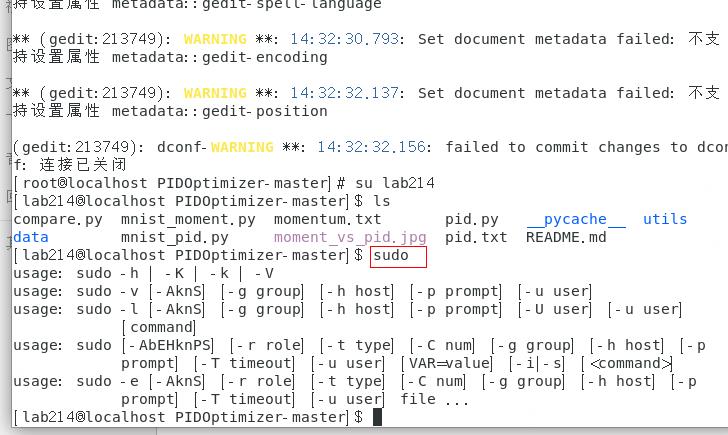
再切回普通用户
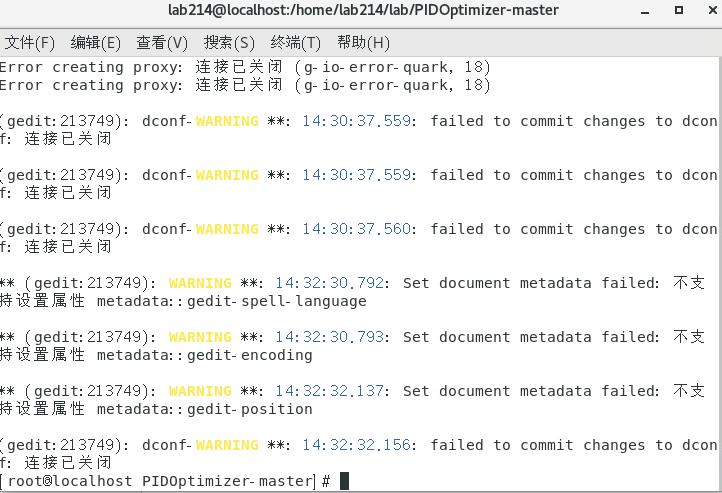
输入命令sudo 此时发现 sudo已经可以正常工作
四、Pytorch运行报错问题
运行pytorch时,出现以下错误
AssertionError:
The NVIDIA driver on your system is too old (found version 8000).
Please update your GPU driver by downloading and installing a new
version from the URL: Download Drivers
Alternatively, go to: PyTorch to install
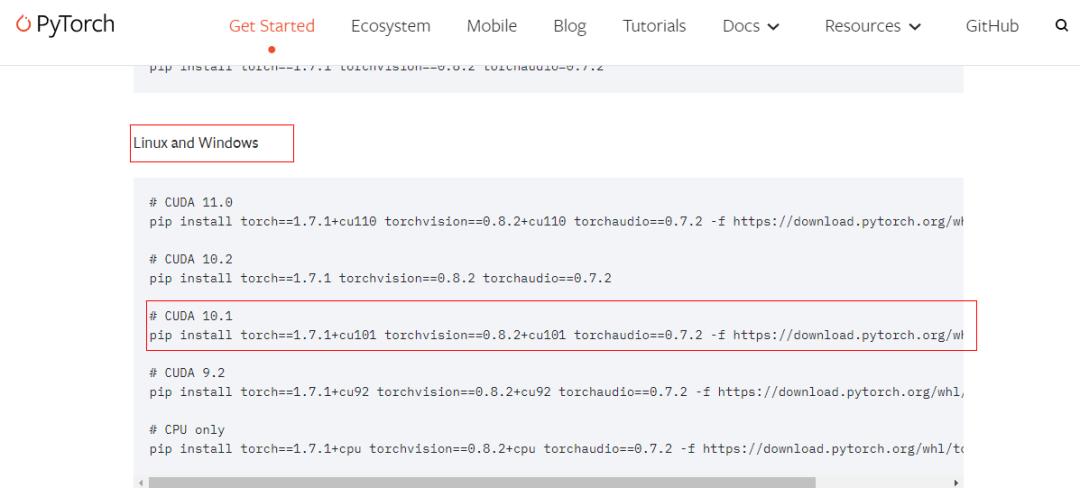
a PyTorch version that has been compiled with your version这个错误提示具有误导性,其实不是Nvidia驱动显卡驱动的问题,出现此问题应该先检查Pytorch 的版本和 CUDA 是否匹配。
先确认下自己的 CUDA 版本:
cat /usr/local/cuda/version.txt
https://pytorch.org/get-started/previous-versions/
再在官网找到对应的Linux版本命令,进行安装,即可解决问题。
五、多卡GPU训练时出现的问题
RuntimeError: view size is not compatible with input tensor's size and
stride (at least one dimension spans across two contiguous subspaces).
 Use .reshape(...) instead.
解决方法:对tensor进行操作时先调用contiguous()。
tensor.contiguous().view()
于是打开文档,ctrl+f ,查找view,在前面加上contiguous()

IndexError: invalid index of a 0-dim tensor. Use `tensor.item()` in Python or `tensor.item<T>()` in C++ to convert a 0-dim tensor to a number

六、Pytorch中train_loss语句的问题
train_loss += loss.data[0] 是pytorch0.3.1版本代码,在0.4-0.5版本的pytorch会出现警告,不会报错,但是0.5版本以上的pytorch就会报错,总的来说是版本更新问题。
解决方法:
#将原语句:
train_loss+=loss.data[0]
#修改为:
train_loss+=loss.item()

七、出现段错误(吐核)

(1)faulthandler调试、(2)settrace调试、(3)gdb调试。
在代码中加入
import faulthandler
faulthandler.enable()
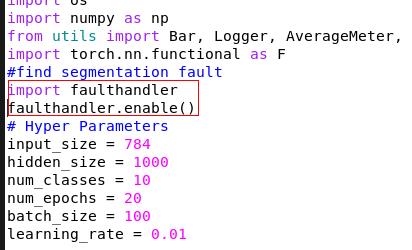
命令行运行时使用:
python3 -Xfaulthandler  modelAttack.py

或者使用

PYTHONFAULTHANDLER=1 python3 test.py
结论:经过一系列的其余的调试发现好像也没什么用!最简单的解决方法就是:重新运行、重新打开终端、重启电脑。
八、RuntimeError问题
在执行程序时,如果不注意矩阵维度对应问题,常常会出现以下问题:
RuntimeError: view size is not compatible with input tensor's size
and stride (at least one dimension spans across two contiguous subspaces).
Use .reshape(...) instead.

解决办法,使用reshape方法

九、缺少xlrd依赖
Missing optional dependency 'xlrd'. Install xlrd >= 1.0.0 for
Excel support Use pip or conda to install xlrd.
通过安装xlrd来解决
pip install -i https://pypi.douban.com/simple --trusted-host pypi.douban.com xlrd

十、xlrd版本大于2.0所引出的问题
ValueError: Your version of xlrd is 2.0.1. In xlrd >= 2.0,
only the xls format is supported. Install openpyxl instead.

原因剖析:
xlrd2.0之后的版本不支持xlsx文件的读入了,需要另外修改文件或者使用其它库。
两种解决方法:
①直接用excel把xlsx文件另存为xls文件
②安装openpyxl库
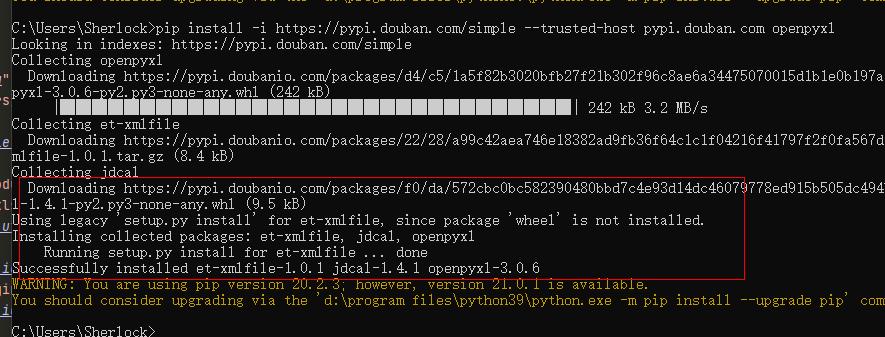
pip install -i https://pypi.douban.com/simple --trusted-host pypi.douban.com openpyxl
十一、多进程问题
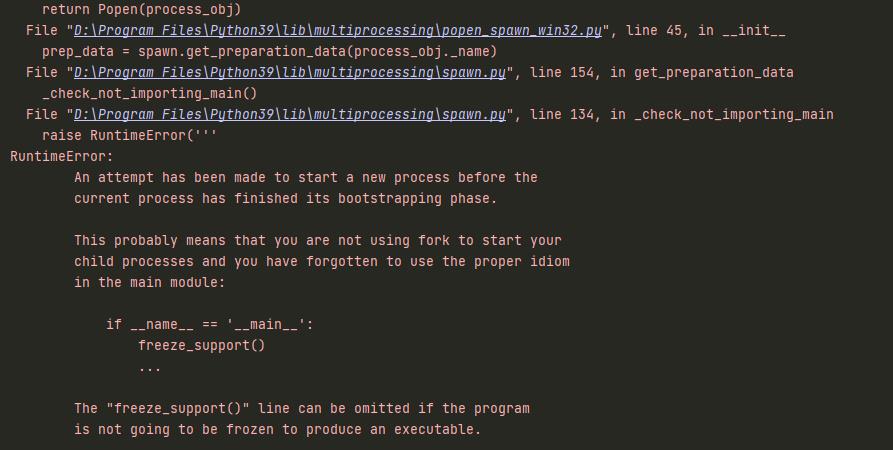
当运行多进程代码时,如果没注意在main函数中运行,常常会出现以下错误
RuntimeError:
        An attempt has been made to start a new process before the
        current process has finished its bootstrapping phase.


        This probably means that you are not using fork to start your
        child processes and you have forgotten to use the proper idiom
        in the main module:


            if __name__ == '__main__':
                freeze_support()
                ...


        The "freeze_support()" line can be omitted if the program
        is not going to be frozen to produce an executable.
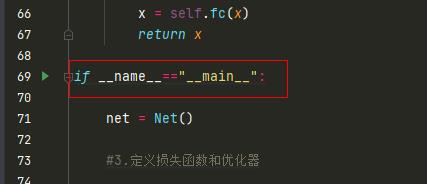
原因:多进程需要在main函数中运行
解决方法:
①加main函数的解决方法
加main函数,在main中调用
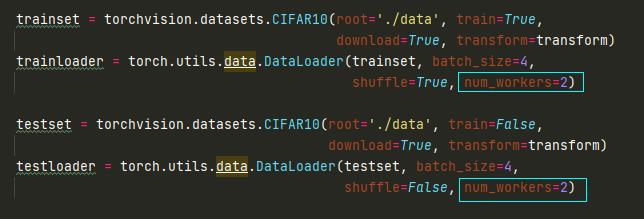
②修改num_workers的方法
num_workers改为0,单进程加载
十二、关于imsave使用中出现的问题
Python调用imsave报错
ImportError: cannot import name imsave

imsave函数,该函数属于scipy包,单独导入该包可能会运行失败,这是因为还需要Python的图像处理库Pillow的支持。

使用pip命令安装Pillow
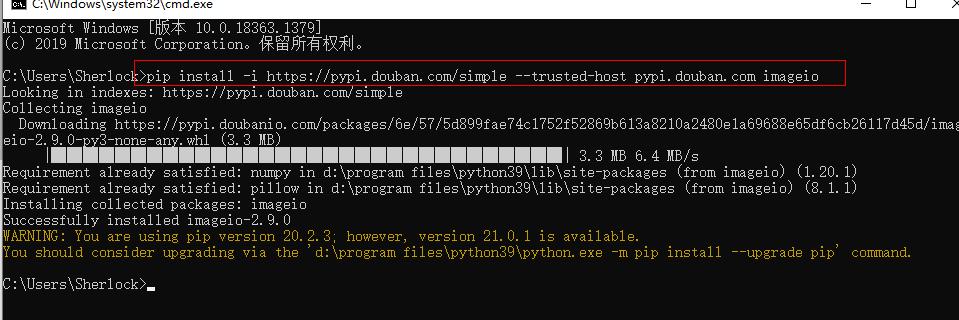
pip install -i https://pypi.douban.com/simple --trusted-host pypi.douban.com pillow

安装imageio库
pip install -i https://pypi.douban.com/simple --trusted-host pypi.douban.com imageio
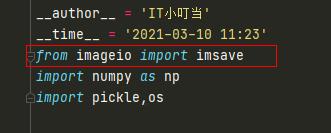
在调用时更改为从imageio调用
from imageio import imsave
十三、为程序生成requirements.txt文件
程序写完后,打开控制台,在命令行模式下输入以下代码
pip freeze>requirements.txt

十四、神经网络训练出现Loss nan 现象
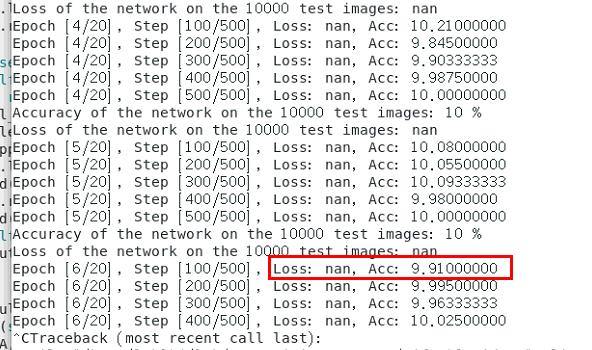
问题:在pytorch训练时出现loss nan的现象,并且训练的准确度ACC越来越小。
解决方法:
出现此种问题,是因为学习率太大,将学习率调小,即可解决。
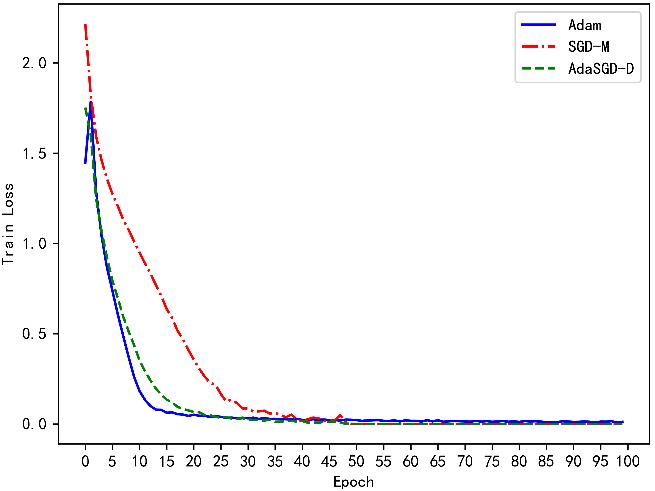
十五、画图时出现多图混搅的问题
使用pyhton画图保存图像时,出现多个图存在一起混搅的问题
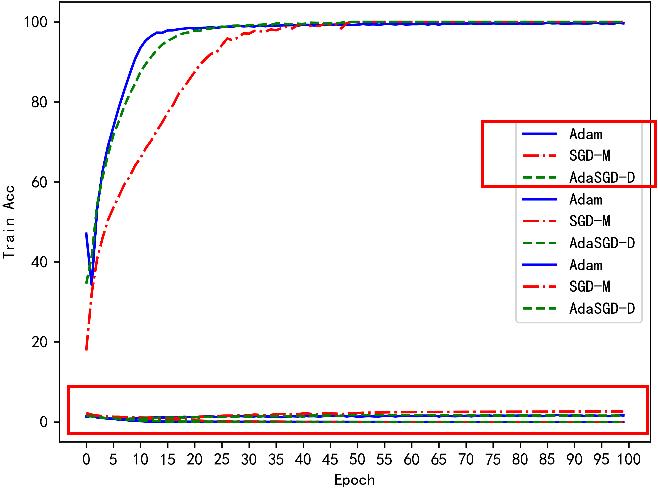 解决办法:使用clf()函数 清空绘画板
使用clf()函数后再次运行,可见此时图像已经不会再混搅在一起
十六、Python生成的eps图片显示不全
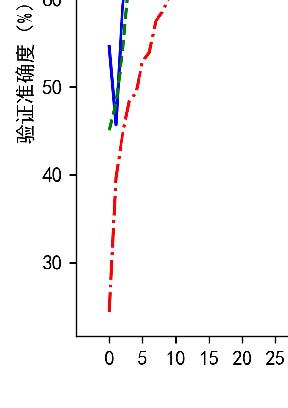
问题描述:
利用python将图片转成eps后,在撰写科研论文时,使用Latex加载,出现显示不全的问题。
解决方法:
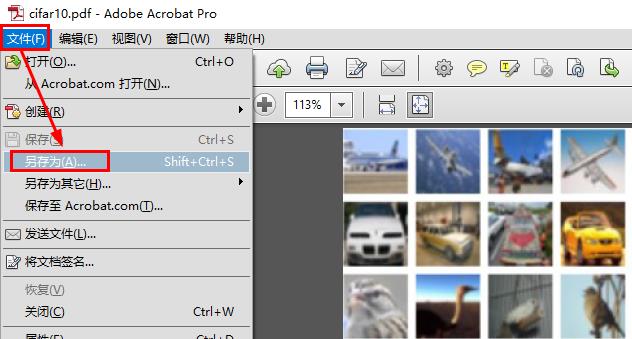
①不是用python直接转成eps,而是使用python将图像先转成pdf。
②之后再使用pdf编辑器()---另存为---eps格式,即可完美使用。
以上是关于不论是CentOS还是Windows,面对这些bug, 从来没怂过......的主要内容,如果未能解决你的问题,请参考以下文章