k8s集群07:核心概念 Pod
Posted 传智教育官方博客
tags:
篇首语:本文由小常识网(cha138.com)小编为大家整理,主要介绍了k8s集群07:核心概念 Pod相关的知识,希望对你有一定的参考价值。
提示:文章写完后,目录可以自动生成,如何生成可参考右边的帮助文档
文章目录
一、前言
通过前面课程学习,大家已经掌握了k8s集群中NameSpace操作,那么如果我们想在k8s集群中运行应用程序,应该使用什么资源对象呢?我们知道k8s集群中是不能直接运行容器的,k8s集群中最小调度单元为Pod,因此我们要使用Pod来运行应用程序。
二、学习目标
√ 了解Pod概念
√ 了解查看Pod方法
√ 了解创建Pod方法
√ 了解Pod访问方法
√ 了解删除Pod方法
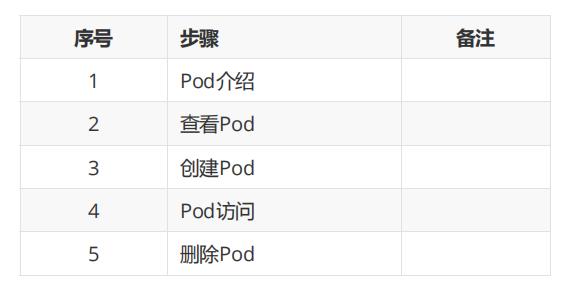
三、学习步骤

四、课程内容
4.1 Pod介绍

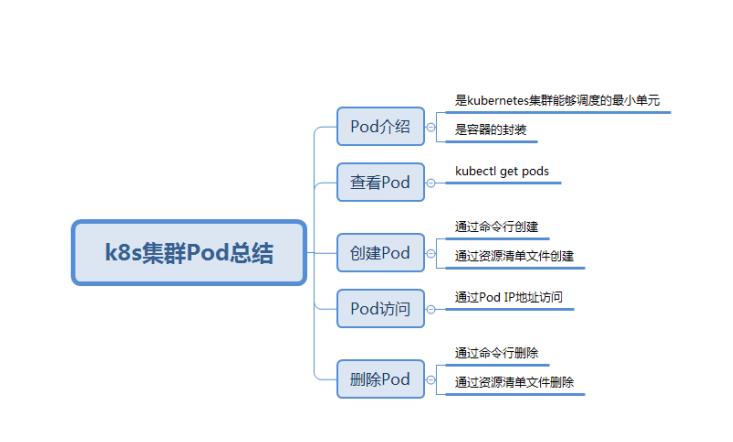
Pod是kubernetes集群能够调度的最小单元
Pod是容器的封装
4.2 查看Pod
命令及输出
查看default命名空间中的Pod
[root@master1 ~]# kubectl get pod No resources found.
或
[root@master1 ~]# kubectl get pods No resources found.
或
[root@master1 ~]# kubectl get pods -- namespace default No resources found.
或
[root@master1 ~]# kubectl get pod -- namespace default No resources found.
命令
查看kube-system命名空间中的Pod
[root@master1 ~]# kubectl get namespace
输出
NAME STATUS AGE
default Active 17h
kube-node-lease Active 17h
kube-public Active 17h
kube-system Active 17h 确认有此命名空间
命令
[root@master1 ~]# kubectl get pod -n kube- system
输出
NAME READY
STATUS RESTARTS AGE
calico-node-896hj 1/2
Running 0 17h
calico-node-q4w7q 2/2
Running 0 17h calico-node-qzws6 1/2
Running 0 17h
calico-typha-7d87d68466-5mdw4 1/1
Running 0 17h
coredns-5c98db65d4-9l4tp 1/1
Running 0 17h
coredns-5c98db65d4-sqxj7 1/1
Running 0 17h
etcd-master1 1/1
Running 0 17h
kube-apiserver-master1 1/1
Running 0 17h
kube-controller-manager-master1 1/1
Running 0 17h
kube-proxy-4sgmb 1/1
Running 0 17h
kube-proxy-crmq2 1/1
Running 0 17h
kube-proxy-sqhp4 1/1
Running 0 17h
kube-scheduler-master1 1/1
Running 1 17h
4.3 创建Pod
由于网络原因,建议提前准备好容器镜像,本次使用nginx:latest容器镜像。
4.3.1 编写用于创建Pod资源清单文件
[root@master1 yamldir]# cat 02-create- pod.yaml
apiVersion: v1
kind: Pod
metadata:
  name: pod1
  spec: containers:
  - name: ngninx-pod
    image: nginx:latest
    ports:
    - name: nginxport
    - containerPort: 80
4.3.2 应用用于创建Pod资源清单文件
命令
[root@master1 yamldir]# kubectl apply -f 02- create-pod.yaml
输出
pod/pod1 created
4.3.3 验证Pod是否被创建
命令
查看已创建pod
[root@master1 yamldir]# kubectl get pods
输出
NAME READY STATUS RESTARTS AGE
pod1 1/1 Running 0 88s
命令
通过指定默认命名空间查看已创建pod
[root@master1 yamldir]# kubectl get pods -n default
输出
NAME READY STATUS RESTARTS AGE
pod1 1/1 Running 0 2m43s
命令
查看pod更加详细信息
[root@master1 yamldir]# kubectl get pods -o wide
输出
NAME READY STATUS RESTARTS AGE IP NODE NOMINATED NODE READINESS GAT
pod1 1/1 Running 0 9m5s 172.16.1.2 node2 <none> <none>
4.4 Pod访问
命令
[root@master1 ~]# curl http://172.16.1.2
输出
<!DOCTYPE html>
<html>
<head>
<title>Welcome to nginx!</title>
<style>
    body {
        width: 35em;
        margin: 0 auto;
        font-family: Tahoma, Verdana, Arial, sans-serif;
        }
</style>
</head> <body>
<h1>Welcome to nginx!</h1>
<p>If you see this page, the nginx web server is successfully installed and
working. Further configuration is required. </p>

<p>For online documentation and support please refer to
<a href="http://nginx.org/">nginx.org</a>.
<br/>
Commercial support is available at
<a href="http://nginx.com/">nginx.com</a>. </p>

<p><em>Thank you for using nginx.</em></p>
</body>
</html>
4.5 删除Pod
可通过命令行删除,也可通过资源清单(YAML)文件删除。
4.5.1 kubectl 命令行删除
命令
[root@master1 ~]# kubectl delete pods pod1
输出
pod "pod1" deleted
4.5.2 通过kubectl通过Pod资源清单文件删除
命令
[root@master1 yamldir]# kubectl delete -f 02-create-pod.yaml
输出
pod "pod1" deleted
五、学习总结

以上是关于k8s集群07:核心概念 Pod的主要内容,如果未能解决你的问题,请参考以下文章