屏保的一些知识点
Posted 福尔摩聪
tags:
篇首语:本文由小常识网(cha138.com)小编为大家整理,主要介绍了屏保的一些知识点相关的知识,希望对你有一定的参考价值。
一.屏保的一些配置
1.默认屏保启动时间
frameworks/base/packages/SettingsProvider/res/values/defaults.xml
600000
(正常是配置在这个文件里面的,但是许多项目会在device下面重新写一个defaults.xml文件,类似于overlay,替换掉默认的一些配置,eg:device/msm/common/overlay_screenoff/frameworks/base/packages/SettingsProvider/res/values/defaults.xml)
2.默认屏保类型
frameworks/base/core/res/res/values/config.xml
com.dangbei.screensaver.dynamic/com.dangbei.screensaver.dynamic.DynamicDream
(和默认的启动时间类似,大部分项目也都会在overlay下重新创建一个config.xml,重写一部分配置。 eg:device/msm/common/tv/overlay/frameworks/base/core/res/res/values/config.xml)
二.设置是如何设置屏保相关的
1.获取当前设备内所有类型的屏保
final List<DreamBackend.DreamInfo> infos = mBackend.getDreamInfos();
    public List<DreamInfo> getDreamInfos() {
        logd("getDreamInfos()");
        ComponentName activeDream = getActiveDream();
        PackageManager pm = mContext.getPackageManager();
        Intent dreamIntent = new Intent(DreamService.SERVICE_INTERFACE);
        List<ResolveInfo> resolveInfos = pm.queryIntentServices(dreamIntent,
                PackageManager.GET_META_DATA);
        List<DreamInfo> dreamInfos = new ArrayList<>(resolveInfos.size());
        for (ResolveInfo resolveInfo : resolveInfos) {
            if (resolveInfo.serviceInfo == null)
                continue;
            DreamInfo dreamInfo = new DreamInfo();
            dreamInfo.caption = resolveInfo.loadLabel(pm);
            dreamInfo.icon = resolveInfo.loadIcon(pm);
            dreamInfo.componentName = getDreamComponentName(resolveInfo);
            dreamInfo.isActive = dreamInfo.componentName.equals(activeDream);
            dreamInfo.settingsComponentName = getSettingsComponentName(pm, resolveInfo);
            dreamInfos.add(dreamInfo);
        }
        Collections.sort(dreamInfos, mComparator);
        return dreamInfos;
    }
从源码里面可以看出,通过PMS的queryIntentServices方法,获取所有满足action为 "android.service.dreams.DreamService"的resolveInfos 。之后再解析成对应的DreamInfo 。
2.打开对应屏保的预览界面(也可以说是设置界面)
    private void setActiveDream(String componentNameString) {
        Log.i(TAG, "setActiveDream: componentNameString");
        final DreamBackend.DreamInfo dreamInfo = mDreamInfos.get(componentNameString);
        if (dreamInfo != null) {
            if (dreamInfo.settingsComponentName != null) {
                startActivity(new Intent().setComponent(dreamInfo.settingsComponentName));
            }
            if (!mBackend.isEnabled()) {
                mBackend.setEnabled(true);
            }
            // if (!Objects.equals(mBackend.getActiveDream(), dreamInfo.componentName)) {
            //     mBackend.setActiveDream(dreamInfo.componentName);
            // }
        } else {
            if (mBackend.isEnabled()) {
                mBackend.setActiveDream(null);
                mBackend.setEnabled(false);
            }
        }
    }
这里的关键是dreamInfo.settingsComponentName。(后面会有讲)
3.设置屏保启动时间
String SCREEN_OFF_TIMEOUT = “system screen_off_timeout”
private void setDreamTime(int ms) {
Settings.System.putInt(getActivity().getContentResolver(), 	SCREEN_OFF_TIMEOUT, ms);
}
//设置成永不启动,按道理说应该是将屏保关闭掉:
Settings.Secure.putInt(mContext.getContentResolver(), 0);
但是原生设置里面并不是这么做的,而是将屏保启动时间设置成最大:2147483647
这么做的原因暂时未知。
三.屏保应用该如何做
1.AndroidManifest文件配置
<service android:name=".DynamicDream"
            android:exported="true"
            android:permission="android.permission.BIND_DREAM_SERVICE"
            android:label="@string/app_name">
            <meta-data
                android:name="android.service.dream"
                android:resource="@xml/dynamic_dream"/>
            <intent-filter>
                <action android:name="android.service.dreams.DreamService" />
                <category android:name="android.intent.category.DEFAULT" />
            </intent-filter>
        </service>
①android:permission=“android.permission.BIND_DREAM_SERVICE”
这个是必须的,在DreamManagerService里面 会有一个如下判断:
    private boolean validateDream(ComponentName component) {
        if (component == null) return false;
        final ServiceInfo serviceInfo = getServiceInfo(component);
        if (serviceInfo == null) {
            Slog.w(TAG, "Dream " + component + " does not exist");
            return false;
        } else if (serviceInfo.applicationInfo.targetSdkVersion >= Build.VERSION_CODES.LOLLIPOP
                && !BIND_DREAM_SERVICE.equals(serviceInfo.permission)) {
            Slog.w(TAG, "Dream " + component
                    + " is not available because its manifest is missing the " + BIND_DREAM_SERVICE
                    + " permission on the dream service declaration.");
            return false;
        }
        return true;
    }
在获取本设备上所有的屏保应用时,会加上如上判断。如果该类型的屏保没有这个权限,则会被判定成无效屏保,不会被添加到屏保列表里面。
②
这个是必须的,只有加上这个action,才会被搜索到。
public static final String SERVICE_INTERFACE =
"android.service.dreams.DreamService";

public List<DreamInfo> getDreamInfos() {
        logd("getDreamInfos()");
        ComponentName activeDream = getActiveDream();
        PackageManager pm = mContext.getPackageManager();
        Intent dreamIntent = new Intent(DreamService.SERVICE_INTERFACE);
        List<ResolveInfo> resolveInfos = pm.queryIntentServices(dreamIntent,
                PackageManager.GET_META_DATA);
        List<DreamInfo> dreamInfos = new ArrayList<>(resolveInfos.size());
        for (ResolveInfo resolveInfo : resolveInfos) {
            if (resolveInfo.serviceInfo == null)
                continue;
            DreamInfo dreamInfo = new DreamInfo();
            dreamInfo.caption = resolveInfo.loadLabel(pm);
            dreamInfo.icon = resolveInfo.loadIcon(pm);
            dreamInfo.componentName = getDreamComponentName(resolveInfo);
            dreamInfo.isActive = dreamInfo.componentName.equals(activeDream);
            dreamInfo.settingsComponentName = getSettingsComponentName(pm, resolveInfo);
            dreamInfos.add(dreamInfo);
        }
        Collections.sort(dreamInfos, mComparator);
        return dreamInfos;
    }
③ < meta-data >的设置
这个是预览界面相关的。
dynamic_dream.xml:
<?xml version="1.0" encoding="utf-8"?>
<dream xmlns:android="http://schemas.android.com/apk/res/android"
android:settingsActivity="com.dangbei.screensaver.dynamic/.DynamicDreamSettings" />
google建议通过上述方法绑定屏保和屏保预览界面:
这种配置在后续跳转到预览界面时会起作用:
设置是如何跳转到预览界面呢?
private void setActiveDream(String componentNameString) {
        Log.i(TAG, "setActiveDream: componentNameString");
        final DreamBackend.DreamInfo dreamInfo = mDreamInfos.get(componentNameString);
        if (dreamInfo != null) {
            if (dreamInfo.settingsComponentName != null) {
                startActivity(new Intent().setComponent(dreamInfo.settingsComponentName));
            }
            if (!mBackend.isEnabled()) {
                mBackend.setEnabled(true);
            }
            // if (!Objects.equals(mBackend.getActiveDream(), dreamInfo.componentName)) {
            //     mBackend.setActiveDream(dreamInfo.componentName);
            // }
        } else {
            if (mBackend.isEnabled()) {
                mBackend.setActiveDream(null);
                mBackend.setEnabled(false);
            }
        }
    }
那么这个settingsComponentName是怎么来的呢?
可以从获取所有屏保的函数里面看到这个:
dreamInfo.settingsComponentName = getSettingsComponentName(pm, resolveInfo);
 private static ComponentName getSettingsComponentName(PackageManager pm, ResolveInfo resolveInfo) {
        if (resolveInfo == null
                || resolveInfo.serviceInfo == null
                || resolveInfo.serviceInfo.metaData == null)
            return null;
        String cn = null;
        XmlResourceParser parser = null;
        Exception caughtException = null;
        try {
            parser = resolveInfo.serviceInfo.loadXmlMetaData(pm, DreamService.DREAM_META_DATA);
            if (parser == null) {
                Log.w(TAG, "No " + DreamService.DREAM_META_DATA + " meta-data");
                return null;
            }
            Resources res = pm.getResourcesForApplication(resolveInfo.serviceInfo.applicationInfo);
            AttributeSet attrs = Xml.asAttributeSet(parser);
            int type;
            while ((type=parser.next()) != XmlPullParser.END_DOCUMENT
                    && type != XmlPullParser.START_TAG) {
            }
            String nodeName = parser.getName();
            if (!"dream".equals(nodeName)) {
                Log.w(TAG, "Meta-data does not start with dream tag");
                return null;
            }
            TypedArray sa = res.obtainAttributes(attrs, com.android.internal.R.styleable.Dream);
            cn = sa.getString(com.android.internal.R.styleable.Dream_settingsActivity);
            sa.recycle();
        } catch (PackageManager.NameNotFoundException|IOException|XmlPullParserException e) {
            caughtException = e;
        } finally {
            if (parser != null) parser.close();
        }
        if (caughtException != null) {
            Log.w(TAG, "Error parsing : " + resolveInfo.serviceInfo.packageName, caughtException);
            return null;
        }
        if (cn != null && cn.indexOf('/') < 0) {
            cn = resolveInfo.serviceInfo.packageName + "/" + cn;
        }
        return cn == null ? null : ComponentName.unflattenFromString(cn);
    }
从上述函数可以看到,获取屏保的预览界面的ComponentName时,就是通过解析AndroidManifest文件里面的service的属性。其中DREAM_META_DATA = “android.service.dream”;
所以按照google建议的流程做,就是每个屏保service都绑定一个预览界面。这样做的好处就是屏保应用和设置不需要再相互传递消息。
2.继承DreamService

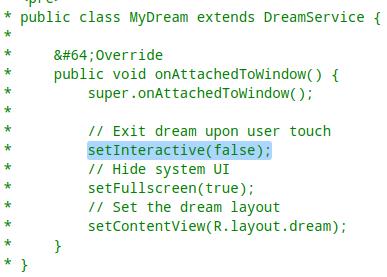
重写onAttachedToWindow(),将屏保界面展示出来。其中有一点需要注意,setInteractive(false)。这个函数里面的参数是需要注意的。
false:按下任何按键都会退出屏保
true:按下返回键退出屏保。
设置成true的好处就是,可以自定义其他按键事件。比如说设置成true之后,我可以按左右键的时候切换屏保资源,按其他键再退出。
原理如下:
@Override
    public boolean dispatchKeyEvent(KeyEvent event) {
        // TODO: create more flexible version of mInteractive that allows use of KEYCODE_BACK
        if (!mInteractive) {
            if (mDebug) Slog.v(TAG, "Waking up on keyEvent");
            wakeUp();
            return true;
        } else if (event.getKeyCode() == KeyEvent.KEYCODE_BACK) {
            if (mDebug) Slog.v(TAG, "Waking up on back key");
            wakeUp();
            return true;
        }
        return mWindow.superDispatchKeyEvent(event);
    }
3.将本屏保设置成当前屏保
这个建议在屏保应用本身做,这个是咱们的需求决定的。之前原生的几种屏保,都是只要进入预览界面,就会将屏保设置成系统当前屏保,所以这是可以在设置里面做的。但是咱们这边的需求不太一样,咱们是要先进入到预览界面,点击设成屏保之后才能设置成当前屏保。如果点击返回,那么屏保类型不变。所以建议在屏保应用本身做.
	private final IDreamManager mDreamManager;
	mDreamManager = IDreamManager.Stub.asInterface(
	ServiceManager.getService(DreamService.DREAM_SERVICE));
    public void setActiveDream(ComponentName dream) {
        logd("setActiveDream(%s)", dream);
        if (mDreamManager == null)
            return;
        try {
            ComponentName[] dreams = { dream };
            mDreamManager.setDreamComponents(dream == null ? null : dreams);
        } catch (RemoteException e) {
            Log.w(TAG, "Failed to set active dream to " + dream, e);
        }
    }
以上是关于屏保的一些知识点的主要内容,如果未能解决你的问题,请参考以下文章