全网最新Redis结合Kaptcha实现验证码功能篇一(前后端分离)
Posted DT辰白
tags:
篇首语:本文由小常识网(cha138.com)小编为大家整理,主要介绍了全网最新Redis结合Kaptcha实现验证码功能篇一(前后端分离)相关的知识,希望对你有一定的参考价值。
前言
Google 的 kaptcha 框架是一个高度可配置的实用验证码生成工具,下面我们来使用一下,很多公司都在用,特别实在。
kaptcha 是一个扩展自 simplecaptcha 的验证码库,在 Java 编程中 是一个非常实用的验证码生成工具。我们可以利用这个工具生成各种样式的验证码,因为它是可配置的,我们可以根据需求定制
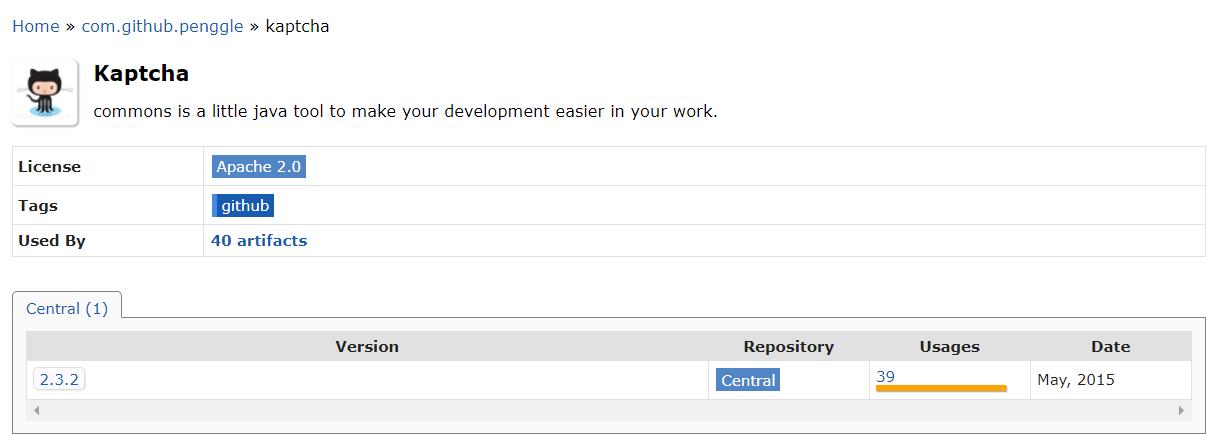
一、导入Kaptcha依赖包
 <!-- https://mvnrepository.com/artifact/com.github.penggle/kaptcha -->
 <dependency>
     <groupId>com.github.penggle</groupId>
     <artifactId>kaptcha</artifactId>
     <version>2.3.2</version>
 </dependency>

二、使用步骤
1.验证码配置类
/**
 * @description: kaptcha验证码配置类
 * @author: DT
 * @date: 2021/5/19 22:19
 * @version: v1.0
 */
@Configuration
public class KaptchaConfig {

    @Bean
    public DefaultKaptcha defaultKaptcha() {
        DefaultKaptcha defaultKaptcha = new DefaultKaptcha();
        Properties properties = new Properties();
        // 字体
        properties.setProperty(Constants.KAPTCHA_TEXTPRODUCER_FONT_NAMES, "宋体,楷体,微软雅黑");
        properties.setProperty(Constants.KAPTCHA_BORDER, "no");

        Config config = new Config(properties);
        defaultKaptcha.setConfig(config);
        return defaultKaptcha;
    }
}
2.获取验证码接口
/**
 * @description: 登录控制器
 * @author: DT
 * @date: 2021/5/19 22:23
 * @version: v1.0
 */
@RestController
@RequestMapping("/api")
@CrossOrigin  //解决跨域
public class LoginController {

    @Autowired
    private DefaultKaptcha defaultKaptcha;

    @GetMapping("/verification")
    public void createImageCode(HttpServletResponse response) throws IOException {
        response.setHeader("Cache-Control", "no-store, no-cache");
        response.setContentType("image/jpeg");
        // 生成文字验证码
        String text = defaultKaptcha.createText();
        // 生成图片验证码
        BufferedImage image = defaultKaptcha.createImage(text);
        ServletOutputStream out = response.getOutputStream();
        ImageIO.write(image, "jpg", out);
        out.flush();
        out.close();
    }
}
3、Vue页面
<el-form ref="loginForm" class="dt_form" label-position="left" label-width="0px">
     <el-form-item prop="username">
         <el-input v-model="userForm.password" placeholder="请输入账号" auto-complete="off" prefix-icon="el-icon-user">
         </el-input>
     </el-form-item>
     <el-form-item prop="password">
         <el-input type="password" v-model="userForm.password" placeholder="请输入密码" auto-complete="off" prefix-icon="el-icon-lock">
         </el-input>
     </el-form-item>
     <el-form-item prop="code">
         <el-col :span="12">
             <el-input v-model="userForm.code" placeholder="验证码" auto-complete="off" prefix-icon="el-icon-refresh"></el-input>
         </el-col>
         <el-col :span="12">
             <!--加载验证码-->
             <img width="160px" onclick="this.src='http://localhost:8081/api/verification?d='+new Date()*1" src="http://localhost:8081/api/verification" alt="验证码"/>
         </el-col>
     </el-form-item>
     <el-form-item>
         <el-button type="button" class="dt_button">登录系统</el-button>
     </el-form-item>
 </el-form>

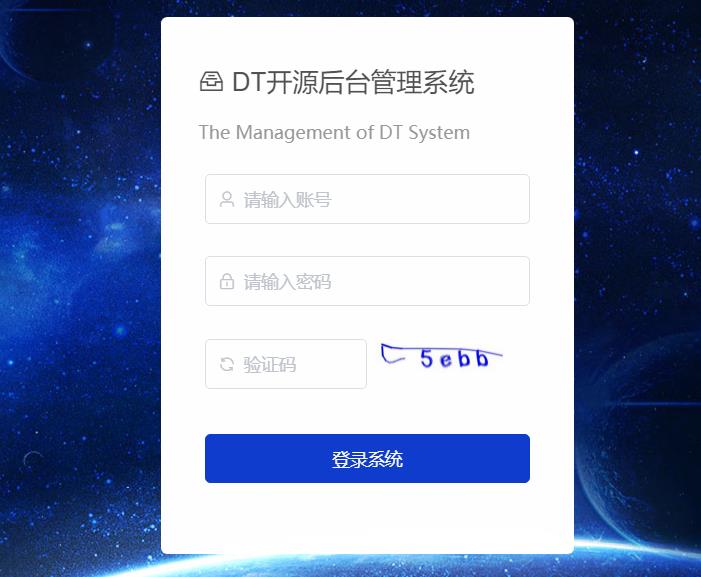
4、去除背景
可以看到这是默认的背景,很丑,我们现在去除掉背景:
@Configuration
public class KaptchaConfig {

    @Bean
    public DefaultKaptcha defaultKaptcha() {
        DefaultKaptcha defaultKaptcha = new DefaultKaptcha();
        Properties properties = new Properties();
        // 验证码是否带边框 No
        properties.setProperty("kaptcha.border", "no");
        // 验证码字体颜色
        properties.setProperty("kaptcha.textproducer.font.color", "blue");
        // 验证码整体宽度
        properties.setProperty("kaptcha.image.width", "300");
        // 验证码整体高度
        properties.setProperty("kaptcha.image.height", "75");
        // 文字个数
        properties.setProperty("kaptcha.textproducer.char.length", "4");
        // 文字大小
        properties.setProperty("kaptcha.textproducer.font.size","50");
        // 文字随机字体
        properties.setProperty("kaptcha.textproducer.font.names", "宋体,楷体,微软雅黑");
        // 文字距离
        properties.setProperty("kaptcha.textproducer.char.space","16");
        // 干扰线颜色
        properties.setProperty("kaptcha.noise.color","blue");
        // 自定义验证码背景
        properties.setProperty("kaptcha.background.impl","com.dt.springbootdemo.config.kaptcha.NoKaptchaBackhround");
        Config config=new Config(properties);
        defaultKaptcha.setConfig(config);
        return defaultKaptcha;
    }
}
去除样式背景类:
/**
 * @description: 去除验证码背景颜色
 * @author: DT
 * @date: 2021/5/19 22:54
 * @version: v1.0
 */
public class NoKaptchaBackhround extends Configurable implements BackgroundProducer {

    public NoKaptchaBackhround(){
    }

    @Override
    public BufferedImage addBackground(BufferedImage bufferedImage) {
        int width = 400;
        int height = 125;
        BufferedImage imageWithBackground = new BufferedImage(width, height, 1);
        Graphics2D graph = (Graphics2D)imageWithBackground.getGraphics();
        graph.fill(new Rectangle2D.Double(0.0D, 0.0D, (double)width, (double)height));
        graph.drawImage(bufferedImage, 0, 0, null);
        return imageWithBackground;
    }
}

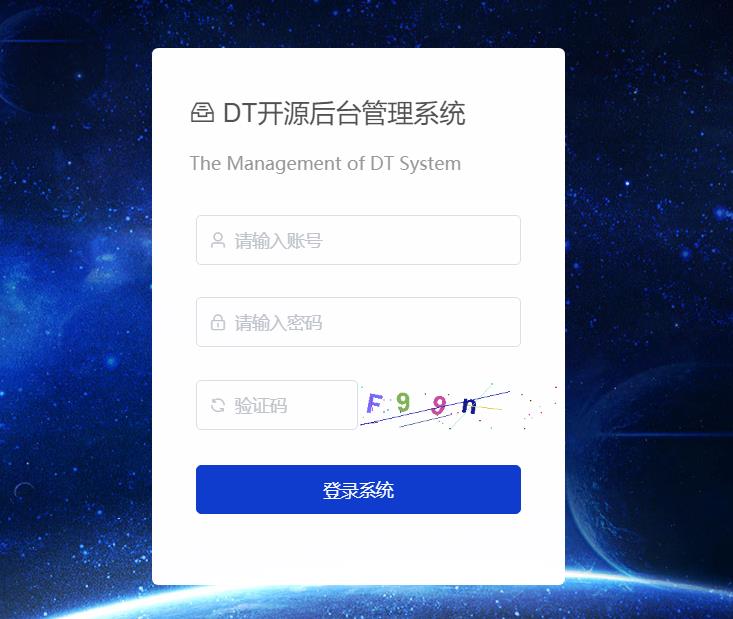
5、自定义背景以及验证码随机规则
@Bean
public DefaultKaptcha defaultKaptcha() {
    DefaultKaptcha defaultKaptcha = new DefaultKaptcha();
    Properties properties = new Properties();
    // 图片边框
    properties.setProperty("kaptcha.border", "yes");
    // 边框颜色
    properties.setProperty("kaptcha.border.color", "105,179,90");
    // 字体颜色
    properties.setProperty("kaptcha.textproducer.font.color", "red");
    // 验证码整体宽度
    properties.setProperty("kaptcha.image.width", "300");
    // 验证码整体高度
    properties.setProperty("kaptcha.image.height", "75");
    // 文字个数
    properties.setProperty("kaptcha.textproducer.char.length", "4");
    // 文字大小
    properties.setProperty("kaptcha.textproducer.font.size","50");
    // 文字随机字体
    properties.setProperty("kaptcha.textproducer.font.names", "宋体,楷体,微软雅黑");
    // 文字距离
    properties.setProperty("kaptcha.textproducer.char.space","16");
    // 干扰线颜色
    properties.setProperty("kaptcha.noise.color","blue");
    // 自定义验证码背景
    //properties.setProperty("kaptcha.background.impl","com.dt.springbootdemo.config.kaptcha.NoKaptchaBackhround");
    Config config=new Config(properties);
    defaultKaptcha.setConfig(config);
    return defaultKaptcha;
}
验证码规则工具类:
/**
 * @description: 验证码Util类
 * @author: DT
 * @date: 2021/5/19 23:14
 * @version: v1.0
 */
public class VerifyCodeUtils {

    /**
     * 宽高可作为参数传入
     */
    private static final int WIDTH = 300;
    private static final int HEIGHT = 75;

    /**
     * 传入BufferedImage对象,并将生成好的验证码保存到BufferedImage中
     * @param bufferedImage
     * @return
     */
    public static String drawRandomText(BufferedImage bufferedImage) {
        Graphics2D graphics = (Graphics2D) bufferedImage.getGraphics();
        // 设置画笔颜色-验证码背景色
        graphics.setColor(Color.WHITE);
        // 填充背景
        graphics.fillRect(0, 0, WIDTH, HEIGHT);
        graphics.setFont(new Font("宋体,楷体,微软雅黑", Font.BOLD, 40));

        // 数字和字母的组合
        String baseNumLetter = "123456789abcdefghijklmnopqrstuvwxyzABCDEFGHJKLMNPQRSTUVWXYZ";

        StringBuilder builder = new StringBuilder();
        // 旋转原点的 x 坐标
        int x = 10;
        String ch;
        Random random = new Random();

        for (int i = 0; i < 4; i++) {
            graphics.setColor(getRandomColor());

            //设置字体旋转角度,角度小于30度
            int degree = random.nextInt() % 30;
            int dot = random.nextInt(baseNumLetter.length());

            ch = baseNumLetter.charAt(dot) + "";
            builder.append(ch);

            //正向旋转
            graphics.rotate(degree * Math.PI / 180, x, 45);
            graphics.drawString(ch, x, 45);

            //反向旋转
            graphics.rotate(-degree * Math.PI / 180, x, 45);
            x += 48;
        }

        //画干扰线
        for (int i = 0; i < 6; i++) {
            // 设置随机颜色
            graphics.setColor(getRandomColor());

            // 随机画线
            graphics.drawLine(random.nextInt(WIDTH), random.nextInt(HEIGHT),
                    random.nextInt(WIDTH), random.nextInt(HEIGHT));

        }

        //添加噪点
        for (int i = 0; i < 30; i++) {
            int x1 = random.nextInt(WIDTH);
            int y1 = random.nextInt(HEIGHT);

            graphics.setColor(getRandomColor());
            graphics.fillRect(x1, y1, 2, 2);
        }
        return builder.toString();
    }

    /**
     * 随机取色
     */
    private static Color getRandomColor() {
        Random ran = new Random();
        return new Color(ran.nextInt(256),
                ran.nextInt(256), ran.nextInt(256));

    }
}
接口实现:
@GetMapping("/verification")
public void createImageCode(HttpServletResponse response) throws IOException {
    //禁止缓存
    response.setDateHeader("Expires", 0);
    response.setHeader("Cache-Control", "no-store, no-cache, must-revalidate");
    response.addHeader("Cache-Control", "post-check=0, pre-check=0");
    response.setHeader("Pragma", "no-cache");
    //设置响应格式为png图片
    response.setContentType("image/png");
    // 生成图片验证码
    BufferedImage image = new BufferedImage(300, 75, BufferedImage.TYPE_INT_RGB);
    String randomText = VerifyCodeUtils.drawRandomText(image);
    System.out.println("验证码->>>"+randomText);
    ServletOutputStream out = response.getOutputStream();
    ImageIO.write(image, "png", out);
    out.flush();
    out.close();
}
}
测试:


此时拿到验证码,我们即可保存至redis中,下一篇我们来实现如何存入Redis中,以及如何校验。
总结
本篇博文参考了一些大佬文章,进行了一些改动,只是对这个验证码感兴趣,并且如何校验以及加入Redis缓存设置过期时间才是重点,下一篇我们将会讲到我们的实现方案。
以上是关于全网最新Redis结合Kaptcha实现验证码功能篇一(前后端分离)的主要内容,如果未能解决你的问题,请参考以下文章