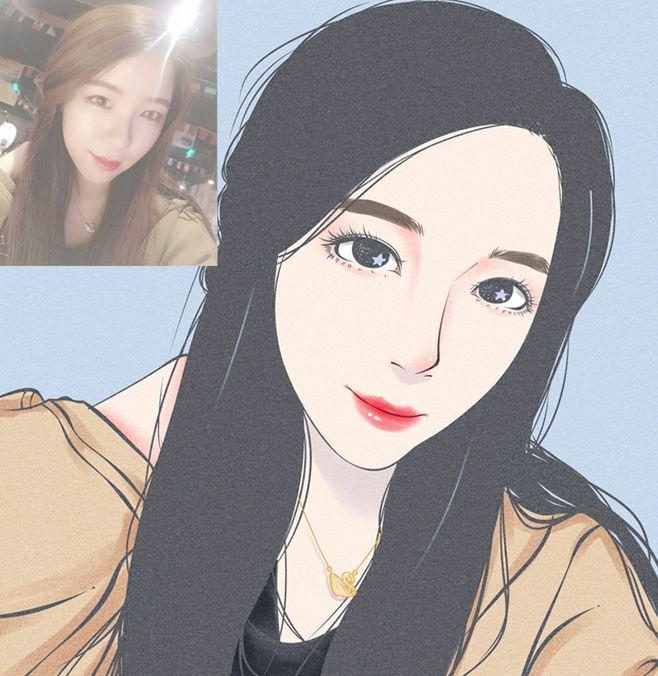
程序员独特的浪漫:拿女朋友的照片做成动漫人物当头像
Posted yunyun云芸
tags:
篇首语:本文由小常识网(cha138.com)小编为大家整理,主要介绍了程序员独特的浪漫:拿女朋友的照片做成动漫人物当头像相关的知识,希望对你有一定的参考价值。
作为女生最喜欢的就是男朋友能拿自己最漂亮的照片做头像,今天主要就是介绍了用python实现人像动漫化的示例代码,文中通过示例代码介绍的非常详细,而且上手简单,小白操作起来也不难,二十多行代码,快去动手@你喜欢的人吧~
1.利用百度api实现人像动漫化
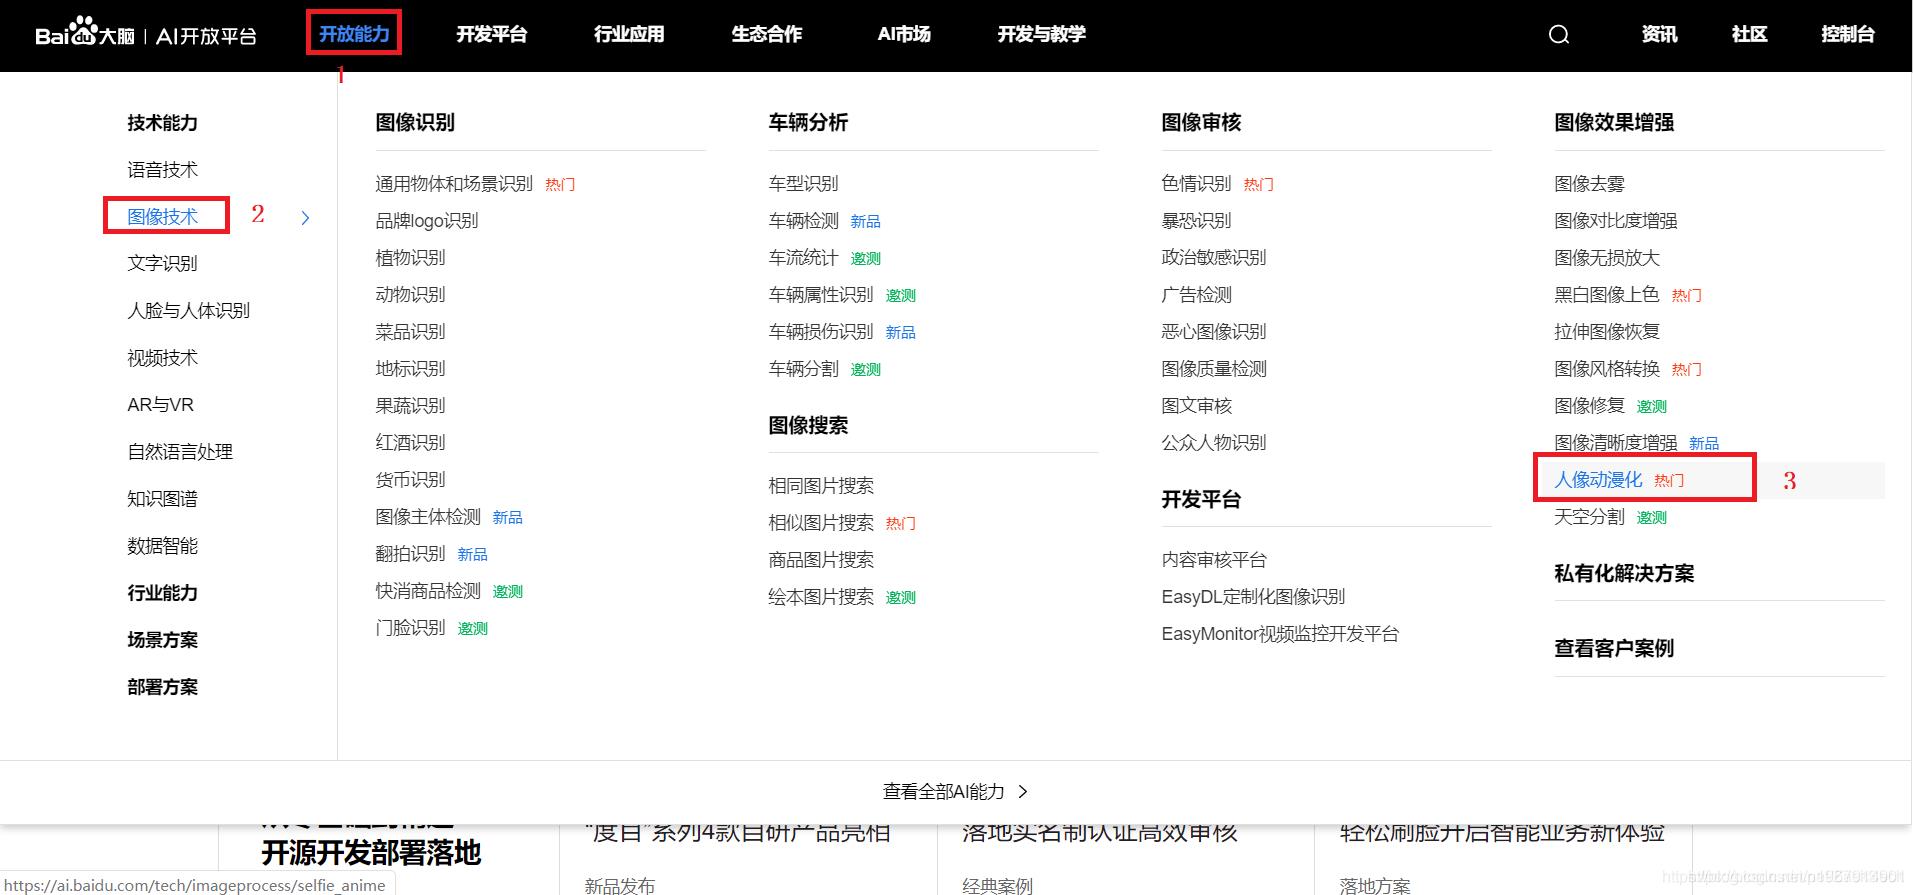
百度API地址:https://ai.baidu.com/tech/imageprocess/selfie_anime
技术文档:https://ai.baidu.com/ai-doc/IMAGEPROCESS/Mk4i6olx5
注册百度账号,开通实现人像动漫化,创建应用。
# encoding:utf-8

import requests
import base64

# client_id 为官网获取的AK, client_secret 为官网获取的SK
host = 'https://aip.baidubce.com/oauth/2.0/token?grant_type=client_credentials&client_id=【官网获取的AK】&client_secret=【官网获取的SK】'
response = requests.get(host)
if response:
  access_token= response.json()["access_token"]
2.将上面的【官网获取的AK】【官网获取的SK】, 替换成自己的API Key 和 Secret Key
'''
人像动漫化
'''
request_url = "https://aip.baidubce.com/rest/2.0/image-process/v1/selfie_anime"
# 二进制方式打开需要处理图片文件
f = open('001.jpg', 'rb') # 打开需要处理的图片
img = base64.b64encode(f.read())

params = {"image":img}
request_url = request_url + "?access_token=" + access_token
headers = {'content-type': 'application/x-www-form-urlencoded'}
response = requests.post(request_url, data=params, headers=headers)
print(response)
if response:
  # 保存文件
  f = open('t.jpg', 'wb')
  img = (response.json()['image'])
  f.write(base64.b64decode(img))
  f.close()

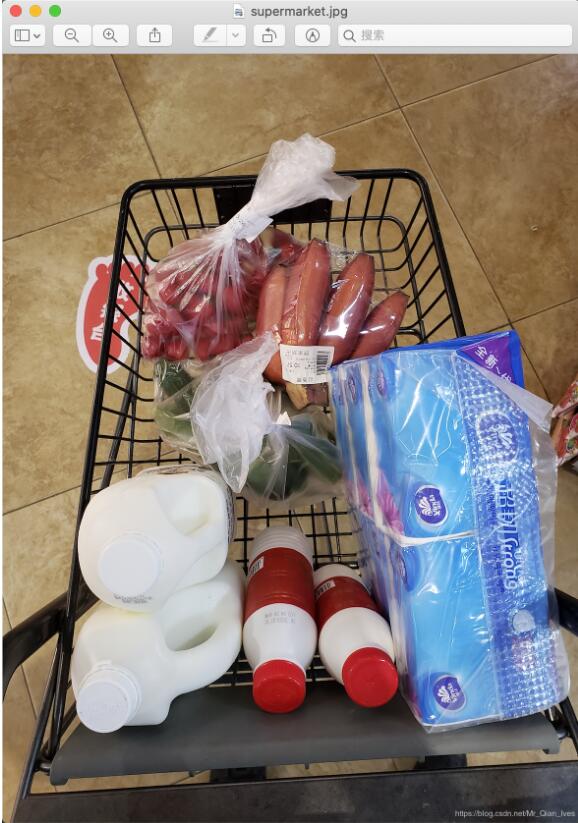
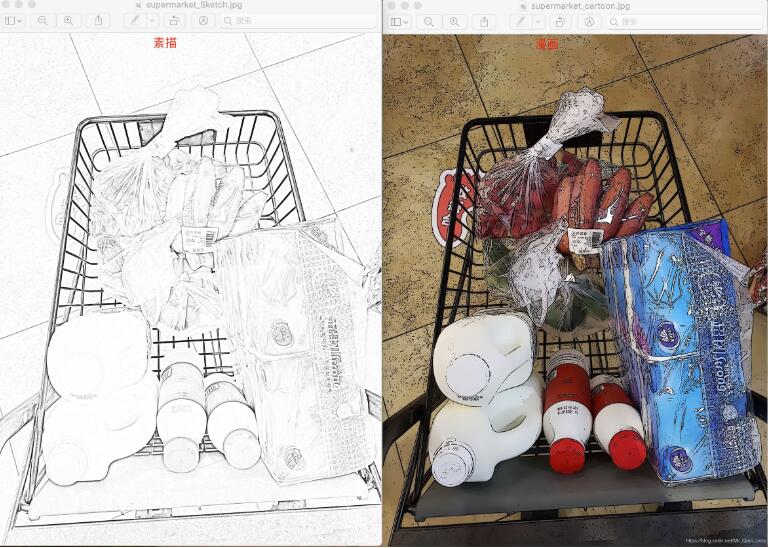
突发奇想,也可以把照片改成素描画或动漫,随便找了一张生活图,如下图:
原图
完整代码:
# -*- coding: utf-8 -*-

import cv2

from PIL import Image, ImageOps, ImageFilter


# 转换成漫画风格
def toCarttonStyle(picturePath):
 # 设置输入输出路径和文件名称
 imgInput_FileName = picturePath
 imgOutput_FileName = picturePath.split(".")[0] + '_cartoon.' + picturePath.split(".")[1]

 # 属性设置
 num_down = 2 # 缩减像素采样的数目
 num_bilateral = 7 # 定义双边滤波的数目

 # 读取图片
 img_rgb = cv2.imread(imgInput_FileName)

 # 用高斯金字塔降低取样
 img_color = img_rgb
 for _ in range(num_down):
 img_color = cv2.pyrDown(img_color)

 # 重复使用小的双边滤波代替一个大的滤波
 for _ in range(num_bilateral):
 img_color = cv2.bilateralFilter(img_color, d=9, sigmaColor=9, sigmaSpace=7)

 # 升采样图片到原始大小
 for _ in range(num_down):
 img_color = cv2.pyrUp(img_color)

 # 转换为灰度并且使其产生中等的模糊
 img_gray = cv2.cvtColor(img_rgb, cv2.COLOR_RGB2GRAY)
 img_blur = cv2.medianBlur(img_gray, 7)

 # 检测到边缘并且增强其效果
 img_edge = cv2.adaptiveThreshold(img_blur, 255,
     cv2.ADAPTIVE_THRESH_MEAN_C,
     cv2.THRESH_BINARY,
     blockSize=9,
     C=2)

 # 算法处理后,照片的尺寸可能会不统一
 # 把照片的尺寸统一化
 height=img_rgb.shape[0]
 width = img_rgb.shape[1]
 img_color=cv2.resize(img_color,(width,height))

 # 转换回彩色图像
 img_edge = cv2.cvtColor(img_edge, cv2.COLOR_GRAY2RGB)
 img_cartoon = cv2.bitwise_and(img_color, img_edge)

 # 保存转换后的图片
 cv2.imwrite(imgOutput_FileName, img_cartoon)
 print('文件转换成漫画成功,保存在' + imgOutput_FileName)


# 透明度转换 素描转换的一部分
def dodge(a, b, alpha):
 # alpha为图片透明度
 return min(int(a * 255 / (256 - b * alpha)), 255)


# 图片转换为素描
def toSketchStyle(picturePath, blur=25, alpha=1.0):
 # 设置输入输出路径和文件名称
 imgInput_FileName = picturePath
 imgOutput_FileName = picturePath.split(".")[0] + '_Sketch.' + picturePath.split(".")[1]

 # 转化成ima对象
 img = Image.open(picturePath)
 # 将文件转成灰色
 img1 = img.convert('L')

 img2 = img1.copy()

 img2 = ImageOps.invert(img2)

 # 模糊度
 for i in range(blur):
 img2 = img2.filter(ImageFilter.BLUR)
 width, height = img1.size
 for x in range(width):
 for y in range(height):
  a = img1.getpixel((x, y))
  b = img2.getpixel((x, y))
  img1.putpixel((x, y), dodge(a, b, alpha))

 # 保存转换后文件
 img1.save(imgOutput_FileName)
 print('文件转换成漫画成功,保存在' + imgOutput_FileName)


if __name__ == '__main__':
 imgInput_FileName = input('输入文件路径:')
 while True:
 print('1、漫画风格')
 print('2、素描风格')
 userChoose = input('请选择风格(输入序号即可):')
 if userChoose.__eq__('1'):
  toCarttonStyle(imgInput_FileName)
  break
 elif userChoose.__eq__('2'):
  toSketchStyle(imgInput_FileName)
  break
 else:
  print('违法输入(请输入序号)')
  break
转换后的图
Python基础学习资源共享,免费视频课堂,电子书籍,关注云芸学派不后悔
还是很有趣的,一尝试就停不下来,到此这篇关于python实现人像动漫化的示例代码的文章就介绍到这了,更多有关Python精彩内容可以看小编主页吖。
以上是关于程序员独特的浪漫:拿女朋友的照片做成动漫人物当头像的主要内容,如果未能解决你的问题,请参考以下文章
