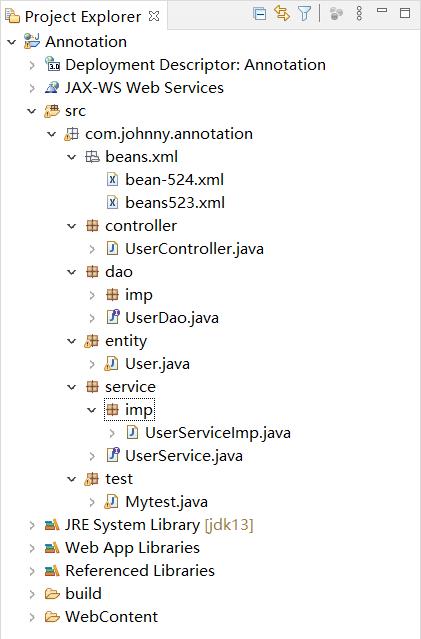
spring框架学习:Bean的装配方式 ——基于注解的装配自动装配
Posted Johnny*
tags:
篇首语:本文由小常识网(cha138.com)小编为大家整理,主要介绍了spring框架学习:Bean的装配方式 ——基于注解的装配自动装配相关的知识,希望对你有一定的参考价值。
【序言】
在前面的例子中我们就可以看到了使用基于XML方式的缺点了:如果应用中有较多的Bean对象,则会导致xml文件过于臃肿,给后续的维护和升级工作造成困难。为此Spring提供了基于注解的方式。这也是我们最常使用的方式
基于注解装配
常用注解:
- @Component:可以使用次数接描述Spring中的Bean,但它是一个泛化的概念,仅仅表示一个组件(Bean),并且可以作用于任何层次。使用时只需将该注解标注在相应的类上即可。
- @Controller、@Service、@Repository,这三个注解是@Component注解的细化,分别用于标注在Controller(控制层)、Service层(业务层)、Dao层(数据访问层),作用与@Component相同。
- @AutoWired:用于对Bean的属性变量、属性的setter方法及构造方法进行标注,配合对应的注解处理器完成Ben啊的自动装配工作,默认Bean类型进行装配。
- @Resource:@AutoWired的加强版。默认按Bean实例名称装配。有name和type两个属性,可以通过type属性指定按Bean类型进行装配,此时就等同与@AutoWired。如果都没有指定,则先按实力名称装配,不能匹配在按照Bean类型装配,都无法匹配时,抛出NoSuchBeanDefinitionException异常
- @Qualifier :与@AutoWired注解配合使用,会将@AutoWired默认的按Bean类型(byType)装配修改为按Bean实例名(byName)装配,Bean的实例名称由@Qualifier注解参数指定。

UserDao 接口
package com.johnny.annotation.dao;

public interface UserDao {
	public void save();
}
package com.johnny.annotation.dao.imp;

import org.springframework.stereotype.Repository;

import com.johnny.annotation.dao.UserDao;

/**
 *
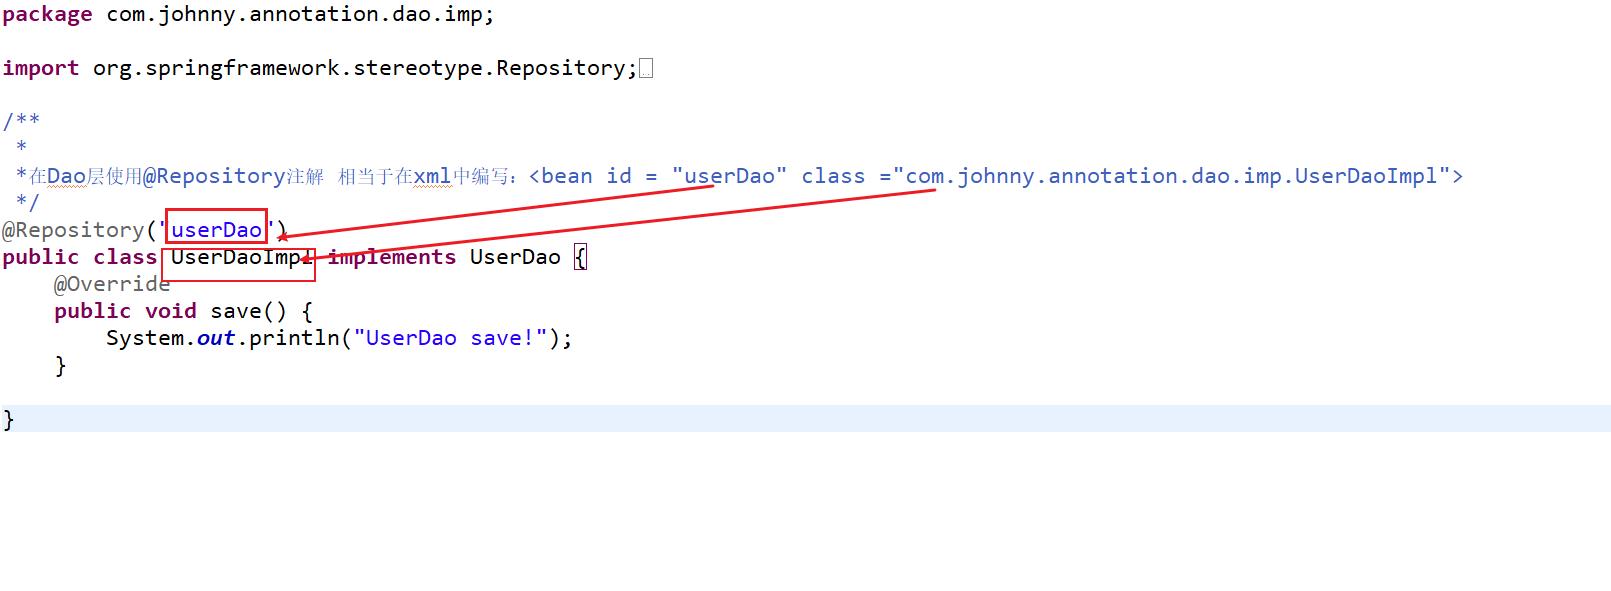
 *在Dao层使用@Repository注解 相当于在xml中编写:<bean id = "userDao" class ="com.johnny.annotation.dao.imp.UserDaoImpl">
 */
@Repository("userDao")
public class UserDaoImpl implements UserDao {
	@Override
	public void save() {
		System.out.println("UserDao save!");
	}

}

UserService.java
package com.johnny.annotation.service;

public interface UserService {
	public void save();

}
UserServiceImpl
package com.johnny.annotation.service.imp;


import javax.annotation.Resource;

import org.springframework.stereotype.Service;

import com.johnny.annotation.dao.UserDao;
import com.johnny.annotation.service.UserService;

@Service("userService")
public class UserServiceImp implements UserService {

	/**
	 * 使用@Resource 注解 且指定name = userDao
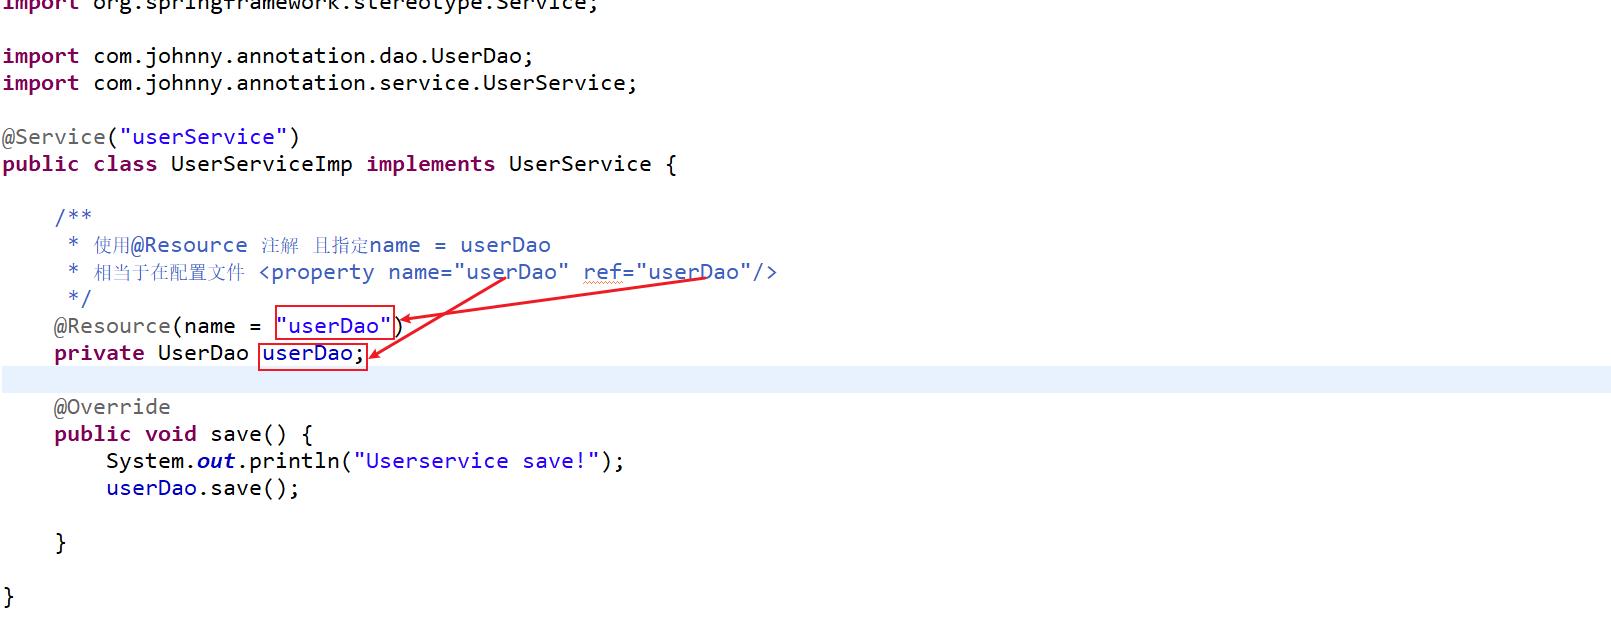
	 * 相当于在配置文件 <property name="userDao" ref="userDao"/>
	 */
	@Resource(name = "userDao")
	private UserDao userDao;

	@Override
	public void save() {
		System.out.println("Userservice save!");
		userDao.save();

	}

}

UserController.java
package com.johnny.annotation.controller;


import javax.annotation.Resource;

import org.springframework.stereotype.Controller;

import com.johnny.annotation.service.UserService;

@Controller("userController")
public class UserController {

	@Resource(name="userService")
	private UserService userService;

	public void save() {
		System.out.println("UserControler save!");
		userService.save();
	}

}
bean-524.xml
<?xml version="1.0" encoding="UTF-8" ?>
<beans xmlns="http://www.springframework.org/schema/beans"
	xmlns:xsi="http://www.w3.org/2001/XMLSchema-instance"
	xmlns:context="http://www.springframework.org/schema/context"
	xsi:schemaLocation="http://www.springframework.org/schema/beans
        https://www.springframework.org/schema/beans/spring-beans.xsd
        http://www.springframework.org/schema/context
        https://www.springframework.org/schema/context/spring-context.xsd" >
	<!-- 开启注解 -->
	<context:annotation-config />
	<!-- 声明3个Bean对应的3个实例  与XML装配不同的是 使用注解装配 不用使用ref   -->
	<bean id="userDao" class="com.johnny.annotation.dao.imp.UserDaoImpl" />
	<bean id="userService" class="com.johnny.annotation.service.imp.UserServiceImp" />
	<bean id="userController" class="com.johnny.annotation.controller.UserController" />

</beans>
在元素中增加了第4行,引入context命名空间,第7、8行增加对context的约束信息;然后通过配置
context:annotation-config/来开启注解 处理器。最后分别定义3个Bean对应编写的实例。与XML装配不同的是,这里 不需要配置子元素。
<!-- 使用context命名空间 开启注解扫描器: 这样则无需在Spring配置文件中一一配置相应的Bean -->
<context:component-scan base-package = "com.johnny.annotation"/>
可用上述代码将bean524.xml文件中的9-14行代码换掉。
测试类MyTest.java
package com.johnny.annotation.test;

import org.springframework.context.ApplicationContext;
import org.springframework.context.support.ClassPathXmlApplicationContext;

import com.johnny.annotation.controller.UserController;
import com.johnny.annotation.dao.UserDao;
import com.johnny.annotation.entity.User;


public class Mytest {

	public static void main(String[] args) {
		ApplicationContext applicationContext=new ClassPathXmlApplicationContext("com/johnny/annotation/beans/xml/bean-524.xml");
	    UserController userController= (UserController) applicationContext.getBean("userController");
		userController.save();
	}

}
通过Spring容器加载文件并获取UserController实例,最后嗲用save()方法,输出结果
UserControler save!
Userservice save!
UserDao save!
总结
使用注解定义bean,通过注解的形式将bean以及相应的属性值放入IOC容器中。
<context:component-scan base-package = “com.johnny.annotation”/> Spring在启动的时候,会根据base-package在 该包中扫描所有类,查找这些类是否有注解@Component等注解。如果有,则将该类 加入Spring IOC容器。
步骤:
- 在指定类增加注解
- 配置文件中添加注解扫描器,指定要扫描的包
自动装配
所谓自动装配,就是将一个Bean自动地注入到其他Bean的Property中。我们可以通过设置元素的autowire的属性值来实现自动装配Bean。
autowire属性有5个值,如下:

- 修改UserServiceImpl.java和UserController.java,分别增加类属性的setter方法。
package com.johnny.annotation.service.imp;


import javax.annotation.Resource;

import org.springframework.stereotype.Service;

import com.johnny.annotation.dao.UserDao;
import com.johnny.annotation.service.UserService;

@Service("userService")
public class UserServiceImp implements UserService {

	/**
	 * 使用@Resource 注解 且指定name = userDao
	 * 相当于在配置文件 <property name="userDao" ref="userDao"/>
	 */
	//基于单个注解方式:@Resource(name = "userDao")
	private UserDao userDao2;  //属性名userDao2


	public void setUserDao2(UserDao userDao2) {
		this.userDao2 = userDao2;
	}


	@Override
	public void save() {
		System.out.println("Userservice save!");
		userDao2.save();

	}

}
UserController.java
package com.johnny.annotation.controller;


import javax.annotation.Resource;

import org.springframework.stereotype.Controller;

import com.johnny.annotation.dao.UserDao;
import com.johnny.annotation.service.UserService;

@Controller("userController")
public class UserController {

	//基于单个注解方式:@Resource(name="userService")
	private UserService userService22;


	public void setUserService22(UserService userService) {
		this.userService22 = userService;
	}
	public void save() {
		System.out.println("UserControler save!");
		userService22.save();
	}

}
- 修改配置文件为自动装配
<?xml version="1.0" encoding="UTF-8" ?>
<beans xmlns="http://www.springframework.org/schema/beans"
	xmlns:xsi="http://www.w3.org/2001/XMLSchema-instance"
	xmlns:context="http://www.springframework.org/schema/context"
	xsi:schemaLocation="http://www.springframework.org/schema/beans
        https://www.springframework.org/schema/beans/spring-beans.xsd
        http://www.springframework.org/schema/context
        https://www.springframework.org/schema/context/spring-context.xsd" >

	<!-- 使用自动装配  -->
	<bean id="userDao2" class="com.johnny.annotation.dao.imp.UserDaoImpl"  />
	<bean id="userService22" class="com.johnny.annotation.service.imp.UserServiceImp"  autowire ="byName"/>
	<bean id="userController" class="com.johnny.annotation.controller.UserController" autowire ="byName"/>

</beans>
在默认情况下,配置文件需要通过ref来装配Bean,但设置了autowire="buName"之后,Spring会自动寻找userService Bean中的属性,并将其属性名称(UserService类属性名 UserDao userDao2)== 配置文件中Bean id(id =userDao2的Bean)进行匹配。由于UserServiceImpl 中定义了userDao2属性及其setter方法,所以SP日国内会自动地将id为userDao2的Bean装配到id为UserService22的Bean中。
同理UserController的配置也是如此。
byType:会自动寻找其他配置文件中是否有其他Bean的类型(class)与该 Bean 的ref属性的类型一致。注意:此种方式的必须满足当前IOC容器中,只有一个Bean满足条件。
constructor:会自动寻找其他配置文件中是否有其他Bean的类型(class)与该 Bean 的构造方法参数的类型一致,本质是通过byType。
可以在头文件中,一次性将该IOC容器的所有bean同一设置成自动装配:
<beans xmlns=“http://www.springframework.org/schema/beans” ……default-autowire=“byName”>
自动装配的原理基于: 约定优于配置
以上是关于spring框架学习:Bean的装配方式 ——基于注解的装配自动装配的主要内容,如果未能解决你的问题,请参考以下文章
在学习spring-IoC容器装配Bean_基于注解配置方式的时候,碰见的两个异常
在学习spring-IoC容器装配Bean_基于注解配置方式的时候,碰见的两个异常
Spring框架学习:Spring @Autowired实现自动装配
JAVAWEB开发之Spring详解之——Spring的入门以及IOC容器装配Bean(xml和注解的方式)Spring整合web开发整合Junit4测试