iOS圆角的离屏渲染,你真的弄明白了吗
Posted iOS开发
tags:
篇首语:本文由小常识网(cha138.com)小编为大家整理,主要介绍了iOS圆角的离屏渲染,你真的弄明白了吗相关的知识,希望对你有一定的参考价值。
Python实战社群
Java实战社群
长按识别下方二维码,按需求添加
扫码关注添加客服
进Python社群▲

扫码关注添加客服
进Java社群▲
作者丨收納箱
来源丨掘金
链接:
https://juejin.im/post/5f0339505188252e817c6c02
测试环境 Xcode 11.4 iPhone 11 Pro ios 13.5
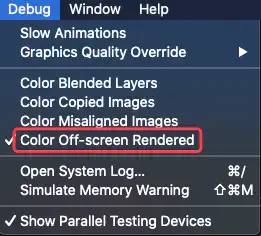
1. 如何设置圆角才会触发离屏渲染
cornerRadius
的描述:
Setting the radius to a value greater than 0.0causes the layer to begin drawing rounded corners on its background. By default, the corner radius does not apply to the image in the layer’scontentsproperty; it applies only to the background color and border of the layer. However, setting themasksToBoundsproperty totruecauses the content to be clipped to the rounded corners.
cornerRadius
大于0时,只为layer的
backgroundColor
和
border
设置圆角;而不会对layer的
contents
设置圆角,除非同时设置了
layer.masksToBounds
为
true
(对应UIView的
clipsToBounds
属性)。
layer
.
masksToBounds
或者
clipsToBounds
设置为
true
就会触发离屏渲染,这是不完全正确的。
不设置
layer.masksToBounds或者clipsToBounds,其默认值为NO
   - (void)viewDidLoad {


    [super viewDidLoad];


    UIView *view1 = [[UIView alloc] initWithFrame:CGRectMake(0, 0, 200.0, 200.0)];


    // 设置背景色


    view1.backgroundColor = UIColor.redColor;


    // 设置边框宽度和颜色


    view1.layer.borderWidth = 2.0;


    view1.layer.borderColor = UIColor.blackColor.CGColor;


    // 设置圆角


    view1.layer.cornerRadius = 100.0;


    view1.center = self.view.center;


    [self.view addSubview:view1];


   }
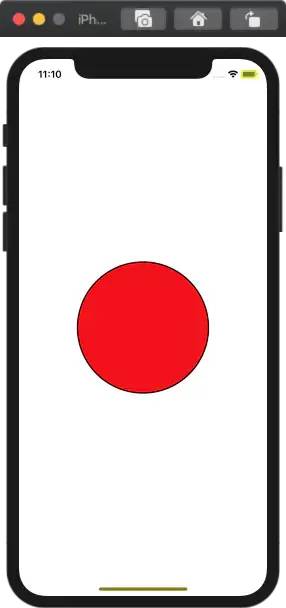
设置
layer.masksToBounds或者clipsToBounds为YES
   - (void)viewDidLoad {


    [super viewDidLoad];


    UIView *view1 = [[UIView alloc] initWithFrame:CGRectMake(0, 0, 200.0, 200.0)];


    // 设置背景色


    view1.backgroundColor = UIColor.redColor;


    // 设置边框宽度和颜色


    view1.layer.borderWidth = 2.0;


    view1.layer.borderColor = UIColor.blackColor.CGColor;


    // 设置圆角


    view1.layer.cornerRadius = 100.0;


    // 设置裁剪


    view1.clipsToBounds = YES;


    view1.center = self.view.center;


    [self.view addSubview:view1];


   }
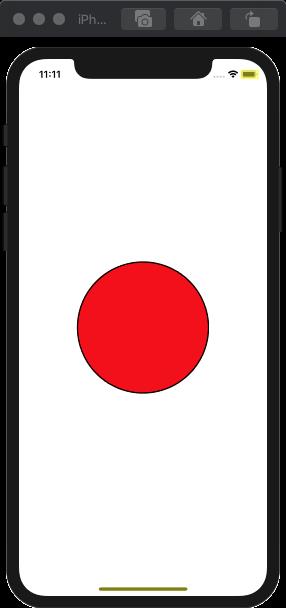
layer.masksToBounds
或者
clipsToBounds
时,同样的没有触发离屏渲染。这是因为我们还没有设置图片。
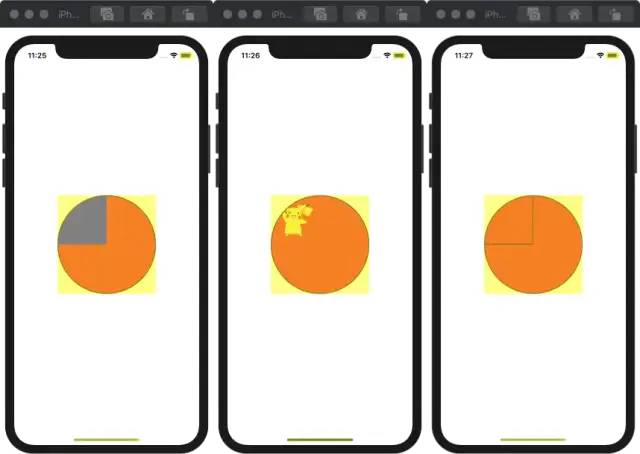
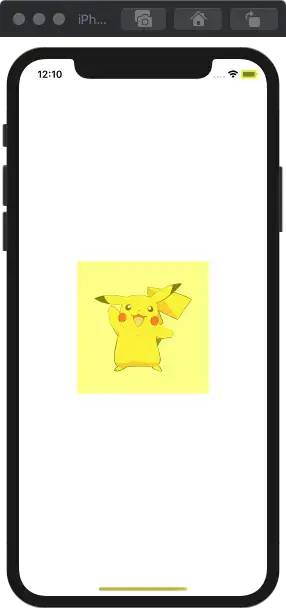
设置
layer.masksToBounds或者clipsToBounds为YES,同时设置图片
   - (void)viewDidLoad {


    [super viewDidLoad];


    UIView *view1 = [[UIView alloc] initWithFrame:CGRectMake(0, 0, 200.0, 200.0)];


    // 设置背景色


    view1.backgroundColor = UIColor.redColor;


    // 设置边框宽度和颜色


    view1.layer.borderWidth = 2.0;


    view1.layer.borderColor = UIColor.blackColor.CGColor;


    //设置图片


    view1.layer.contents = (__bridge id)[UIImage imageNamed:@"pkq"].CGImage;


    // 设置圆角


    view1.layer.cornerRadius = 100.0;


    // 设置裁剪


    view1.clipsToBounds = YES;


    view1.center = self.view.center;


    [self.view addSubview:view1];


   }
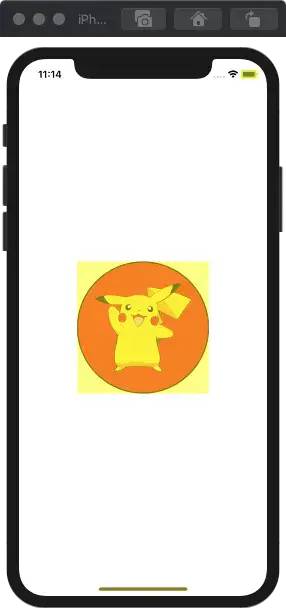
layer.masksToBounds
或者
clipsToBounds
时,同时设置图片时,就会触发离屏渲染。
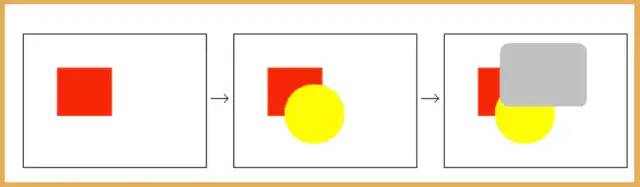
其实不光是图片,我们为视图添加一个有颜色、内容或边框等有图像信息的子视图也会触发离屏渲染。
有图像信息还包括在视图或者layer的draw方法中进行绘制等。
   - (void)viewDidLoad {


    [super viewDidLoad];


    UIView *view1 = [[UIView alloc] initWithFrame:CGRectMake(0, 0, 200.0, 200.0)];


    // 设置背景色


    view1.backgroundColor = UIColor.redColor;


    // 设置边框宽度和颜色


    view1.layer.borderWidth = 2.0;


    view1.layer.borderColor = UIColor.blackColor.CGColor;


    // 设置圆角


    view1.layer.cornerRadius = 100.0;


    // 设置裁剪


    view1.clipsToBounds = YES;


    // 子视图


    UIView *view2 = [[UIView alloc] initWithFrame:CGRectMake(0, 0, 100.0, 100.0)];


    // 下面3个任何一个属性


    // 设置背景色


    view2.backgroundColor = UIColor.blueColor;


    // 设置内容


    view2.layer.contents = (__bridge id)([UIImage imageNamed:@"pkq"].CGImage);


    // 设置边框


    view2.layer.borderWidth = 2.0;


    view2.layer.borderColor = UIColor.blackColor.CGColor;


    [view1 addSubview:view2];


    view1.center = self.view.center;


    [self.view addSubview:view1];


   }
2. 圆角触发离屏渲染的真正原因
cornerRadius
以及
masksToBounds
进行圆角+裁剪时,
masksToBounds
裁剪属性会应用到所有的图层上。
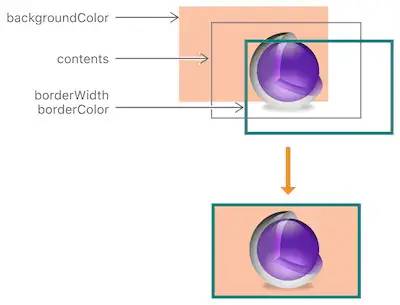
背景色、边框、背景色+边框,再加上圆角+裁剪,根据文档说明,因为 contents = nil 没有需要裁剪处理的内容,所以
masksToBounds设置为YES或者NO都没有影响。一旦我们 为contents设置了内容 ,无论是图片、绘制内容、有图像信息的子视图等,再加上圆角+裁剪,就会触发离屏渲染。
不一定是直接为contents赋值!
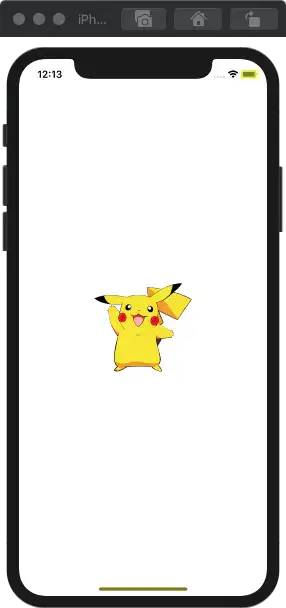
3. iOS9及以后的优化
layer.contents
/
imageView.image
我们只设置
contents
或者
UIImageView
的
image
,并加上圆角+裁剪,是不会产生离屏渲染的。但如果加上了背景色、边框或其他有图像内容的图层,还是会产生离屏渲染。
   - (void)viewDidLoad {


    [super viewDidLoad];


    UIView *view1 = [[UIView alloc] initWithFrame:CGRectMake(0, 0, 200.0, 200.0)];


    //设置图片


    view1.layer.contents = (__bridge id)[UIImage imageNamed:@"qiyu"].CGImage;


    // 设置圆角


    view1.layer.cornerRadius = 100.0;


    // 设置裁剪


    view1.clipsToBounds = YES;


    view1.center = self.view.center;


    [self.view addSubview:view1];


   }

UIButton
的视图的时候需要注意:
UIButton
   - (void)viewDidLoad {


    [super viewDidLoad];


    self.view.backgroundColor = [UIColor whiteColor];


    // 创建一个button视图


    UIButton *button = [[UIButton alloc] initWithFrame:CGRectMake(0, 0, 200.0, 200.0)];


    //设置图片


    [button setImage:[UIImage imageNamed:@"pkq"] forState:UIControlStateNormal];


    button.center = self.view.center;


    [self.view addSubview:button];


   }
我们为
UIButton
设置一个图片,其实会添加一个
UIImageView
。
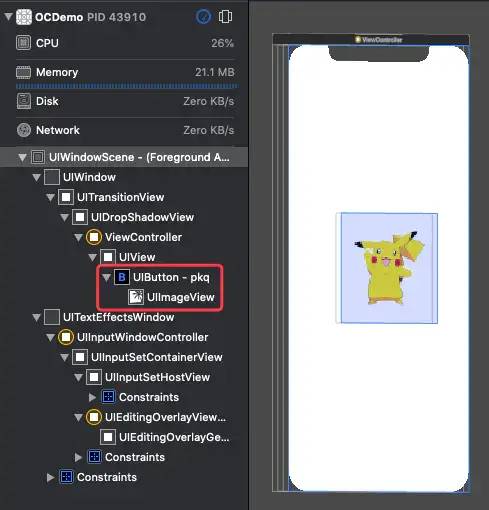
UIButton
添加圆角和裁剪,则会触发离屏渲染。
   我// 设置圆角


   button.layer.cornerRadius = 100.0;


   // 设置裁剪


   button.clipsToBounds = YES;
如果改为
UIButton中的UIImageView添加圆角和裁剪,则 不会触发离屏渲染。-
// 设置圆角button.imageView.layer.cornerRadius = 100.0;// 设置裁剪button.imageView.clipsToBounds = YES;复制代码
扩展阅读
      程序员专栏


       扫码关注填加客服


      长按识别下方二维码进群


近期精彩内容推荐:

![]()

在看点这里好文分享给更多人↓↓
以上是关于iOS圆角的离屏渲染,你真的弄明白了吗的主要内容,如果未能解决你的问题,请参考以下文章