Springboot- Spring Security
Posted guardwhy
tags:
篇首语:本文由小常识网(cha138.com)小编为大家整理,主要介绍了Springboot- Spring Security相关的知识,希望对你有一定的参考价值。
学习视频: https://www.bilibili.com/video/BV1PE411i7CV?p=34
1.1 基本概念
官网地址: https://spring.io/projects/spring-security#learn
Spring Security is a powerful and highly customizable authentication and access-control framework. It is the de-facto standard for securing Spring-based applications。
Spring Security is a framework that focuses on providing both authentication and authorization to Java applications. Like all Spring projects, the real power of Spring Security is found in how easily it can be extended to meet custom requirements。
Spring Security是一个功能强大且高度可定制的身份验证和访问控制框架。它是用于保护基于Spring的应用程序的实际标准。
Spring Security是一个框架,致力于为Java应用程序提供身份验证和授权。像所有Spring项目一样,Spring Security的真正强大之处在于它可以轻松扩展以满足定制需求的能力。
基本特点
Spring Security 是基于 Spring 框架。一般来说,Web 应用的安全性包括用户认证(Authentication)和用户授权(Authorization)两个部分。用户认证指的是验证某个用户是否为系统中的合法主体,也就是说用户能否访问该系统。用户认证一般要求用户提供用户名和密码。系统通过校验用户名和密码来完成认证过程。用户授权指的是验证某个用户是否有权限执行某个操作。在一个系统中,不同用户所具有的权限是不同的。比如对一个文件来说,有的用户只能进行读取,而有的用户可以进行修改。一般来说,系统会为不同的用户分配不同的角色,而每个角色则对应一系列的权限。
1.2 SpringSecurity邂逅
Spring Security 是针对Spring项目的安全框架,也是Spring Boot底层安全模块默认的技术选型,它可以实现强大的Web安全控制。
1、导入所需相关依赖
<!--thymeleaf版本-->
<dependency>
    <groupId>org.thymeleaf</groupId>
    <artifactId>thymeleaf-spring5</artifactId>
</dependency>
<dependency>
    <groupId>org.thymeleaf.extras</groupId>
    <artifactId>thymeleaf-extras-java8time</artifactId>
</dependency>
2、导入相关静态资源。
链接:https://pan.baidu.com/s/1N4yy7rtSQrCt1vyjZgPu5w 提取码:yyfk
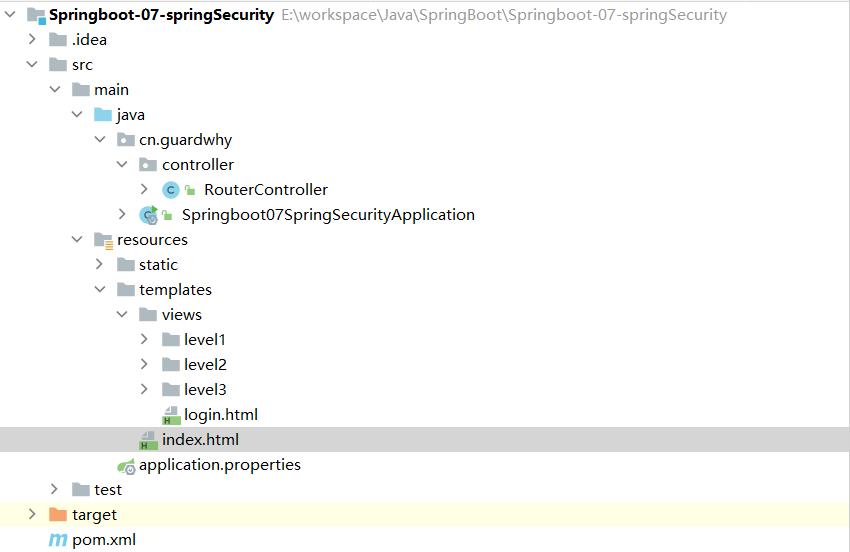
3、编写RouterController进行测试
package cn.guardwhy.controller;

import org.springframework.stereotype.Controller;
import org.springframework.web.bind.annotation.PathVariable;
import org.springframework.web.bind.annotation.RequestMapping;

@Controller
public class RouterController {
    @RequestMapping({"/","/index"})
    public String index(){
        return "index";
    }

    @RequestMapping("/toLogin")
    public String toLogin(){
        return "views/login";
    }

    @RequestMapping("/level1/{id}")
    public String level1(@PathVariable("id") int id){
        return "views/level1/" + id;
    }

    @RequestMapping("/level2/{id}")
    public String level2(@PathVariable("id") int id){
        return "views/level2/" + id;
    }

    @RequestMapping("/level3/{id}")
    public String level3(@PathVariable("id") int id){
        return "views/level3/" + id;
    }
}
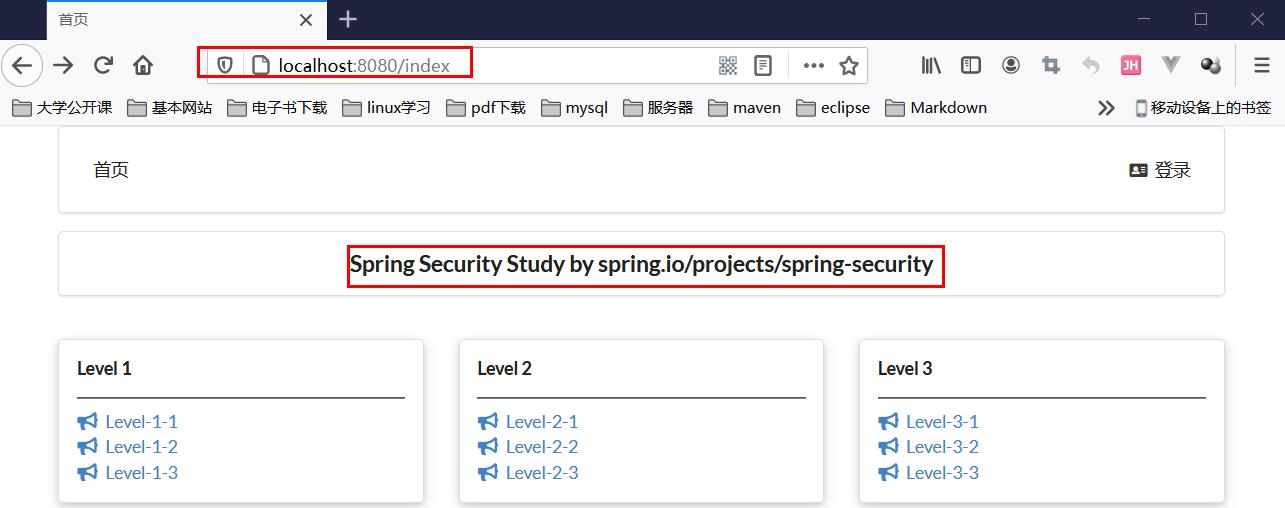
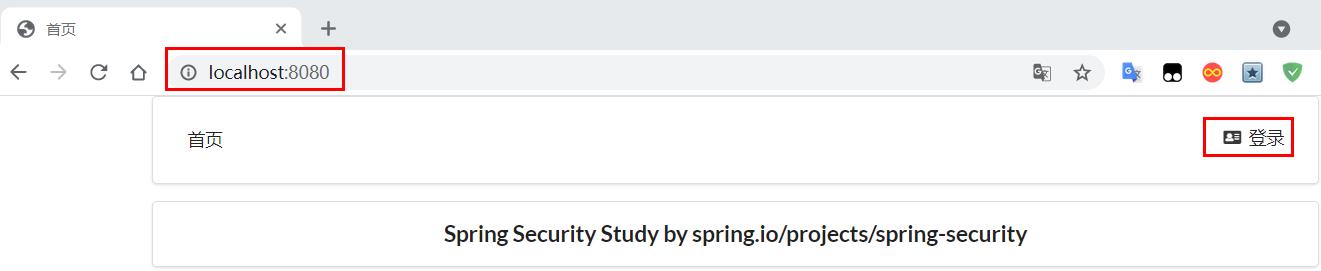
测试成功,执行结果!!
1.3 认证和授权
1、Spring Security主要目标是 认证和 授权
对于安全控制,通过引入spring-boot-starter-security 模块,进行少量的配置,就可以实现安全管理。
认证(Authentication)
身份验证是关于验证用户的凭据,如用户名/用户ID和密码,以验证用户的身份。
身份验证通常通过用户名和密码完成,有时与身份验证因素结合使用。
授权 (Authorization)
授权发生在系统成功验证用户的身份后,最终会授予用户访问资源的完全权限。
重点类作用
- WebSecurityConfigurerAdapter: 自定义Security策略。
- AuthenticationManagerBuilder:自定义认证策略。
- @EnableWebSecurity:开启WebSecurity模式(@EnableXXX 开启某个功能!!!)。
2、引入Spring Security依赖
<!--SpringSecurity版本-->
<dependency>
    <groupId>org.springframework.boot</groupId>
    <artifactId>spring-boot-starter-security</artifactId>
</dependency>
查看项目中的版本,找到对应的文档:https://docs.spring.io/spring-security/site/docs/5.4.6/reference/html5/#jc-custom-dsls
The custom DSL can then be used like this:
@EnableWebSecurity
public class Config extends WebSecurityConfigurerAdapter {
    @Override
    protected void configure(HttpSecurity http) throws Exception {
        http
            .apply(customDsl())
                .flag(true)
                .and()
            ...;
    }
}
1.3.1 请求授权
1、编写基础配置类
package cn.guardwhy.config;

import org.springframework.security.config.annotation.web.builders.HttpSecurity;
import org.springframework.security.config.annotation.web.configuration.EnableWebSecurity;
import org.springframework.security.config.annotation.web.configuration.WebSecurityConfigurerAdapter;

@EnableWebSecurity // 开启开启WebSecurity模式
public class SecurityConfig extends WebSecurityConfigurerAdapter {
    @Override
    protected void configure(HttpSecurity http) throws Exception {
        super.configure(http);
    }
}
2、定制请求的授权规则
package cn.guardwhy.config;

import org.springframework.security.config.annotation.web.builders.HttpSecurity;
import org.springframework.security.config.annotation.web.configuration.EnableWebSecurity;
import org.springframework.security.config.annotation.web.configuration.WebSecurityConfigurerAdapter;

@EnableWebSecurity // 开启开启WebSecurity模式
public class SecurityConfig extends WebSecurityConfigurerAdapter {
    @Override // 授权
    protected void configure(HttpSecurity http) throws Exception {
       // 首页所有人可以访问,功能页只有对应有权限的人才能访问
       // 请求授权的规则
       http.authorizeRequests()
               .antMatchers("/").permitAll()
               .antMatchers("/level1/**").hasRole("vip1")
               .antMatchers("/level2/**").hasRole("vip2")
               .antMatchers("/level3/**").hasRole("vip3");

       // 2.没有权限默认会到登录页面,需要开启登录的页面
        http.formLogin();
    }
}
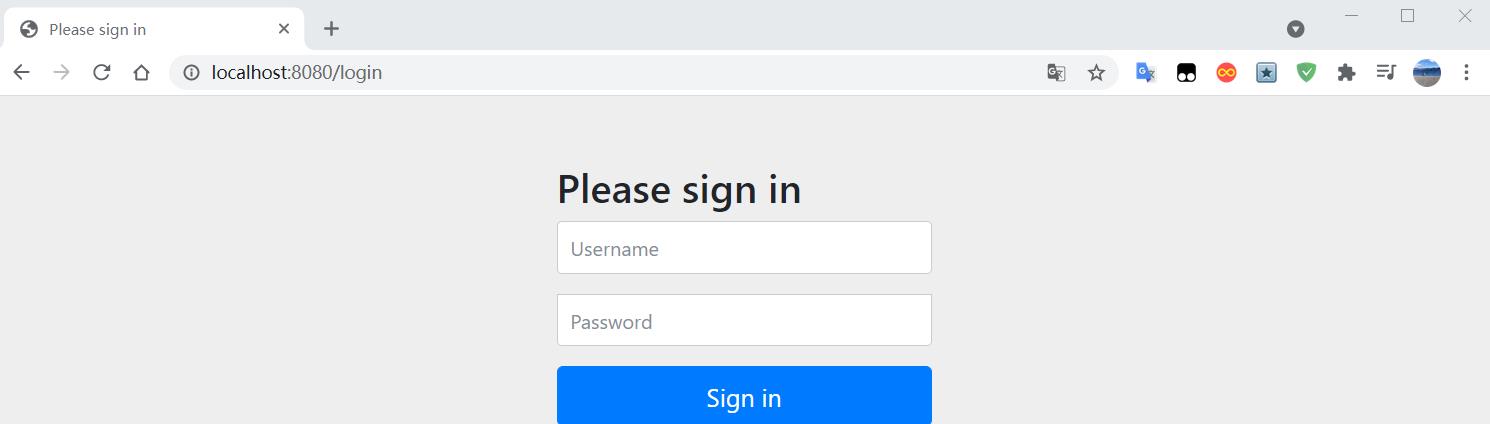
执行结果
测试一下,没有权限的时候,会跳转到登录的页面!!!
1.3.2 定义认证规则
1、定义认证规则,重写configure(AuthenticationManagerBuilder auth)方法!!!
@Override //认证规则
protected void configure(AuthenticationManagerBuilder auth) throws Exception {
    //在内存中定义,也可以在jdbc中去拿....
    auth.inMemoryAuthentication()
        .withUser("guardwhy").password("123456").roles("vip2", "vip3")
        .and()
        .withUser("linux").password("123456").roles("vip1", "vip2", "vip3")
        .and()
        .withUser("James").password("123456").roles("vip1", "vip2");
}
2、执行结果,发现报错!!!
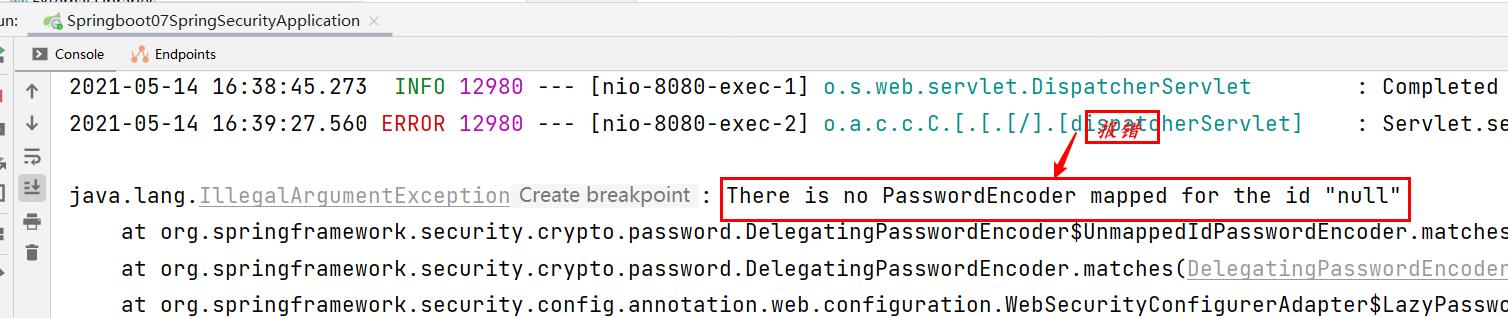
3、Spring Security 5.0 + 新增了很多的加密方法,要想项目还能够正常登陆,需要修改一下configure中的代码。要将前端传过来的密码进行加密处理。
@Override //认证规则
protected void configure(AuthenticationManagerBuilder auth) throws Exception {
    //在内存中定义
    auth.inMemoryAuthentication().passwordEncoder(new BCryptPasswordEncoder())
        .withUser("guardwhy").password(new BCryptPasswordEncoder().encode("123456")).roles("vip2", "vip3")
        .and()
        .withUser("linux").password(new BCryptPasswordEncoder().encode("123456")).roles("vip1", "vip2", "vip3")
        .and()
        .withUser("James").password(new BCryptPasswordEncoder().encode("123456")).roles("vip1", "vip2");
}
4、执行结果,登录成功,并且每个角色只能访问自己认证下的规则!!

1.4 权限控制和注销
1.4.1 注销实现
1、开启自动配置的注销的功能,注销完毕后跳转到首页
@Override // 授权
protected void configure(HttpSecurity http) throws Exception {
    // 开启了注销的功能,跳转到首页
    http.logout().logoutSuccessUrl("/");
}
2、在index.html增加一个注销的按钮。
<a class="item" th:href="@{/logout}">
    <i class="sign-out icon"></i>注销
</a>
执行结果
测试项目,注销完毕后,发现跳转到登录页!!!
1.4.2 权限控制
需求实现
1、用户没有登录的时候,导航栏上只显示登录按钮,用户登录之后,导航栏可以显示登录的用户信息及注销按钮。比如James这个用户,它只有 vip1,vip2功能,登录则只显示这两个功能,而vip3的功能则不能显示!!!
2、导入相关依赖模块
<dependency>
    <groupId>org.thymeleaf.extras</groupId>
    <artifactId>thymeleaf-extras-springsecurity5</artifactId>
    <version>3.0.4.RELEASE</version>
</dependency>
3、修改index.html页面
- 导入命名空间
<html lang="en" xmlns:th="http://www.thymeleaf.org"
      xmlns:sec="http://www.thymeleaf.org/thymeleaf-extras-springsecurity5">
</html>
- 修改导航栏,增加认证判断(
sec:authorize="isAuthenticated()":是否认证登录,来显示不同的页面)
<div class="ui secondary menu">
    <a class="item"  th:href="@{/index}">首页</a>
    <!--登录注销-->
    <div class="right menu">
        <!--如果未登录-->
        <div sec:authorize="!isAuthenticated()">
            <a class="item" th:href="@{/toLogin}">
                <i class="address card icon"></i> 登录
            </a>
        </div>
        <!--如果登录: 用户名,注销-->
        <div sec:authorize="isAuthenticated()">
            <a class="item">
                用户名: <span sec:authentication="principal.username"></span>
                角色: <span sec:authentication="principal.authorities"></span>
            </a>
        </div>
        <div sec:authorize="isAuthenticated()">
            <a class="item" th:href="@{/logout}">
                <i class="sign-out icon"></i>注销
            </a>
        </div>
    </div>
</div>
4、点击注销按钮,发现出现网页无法找到(404),因为它默认防止csrf跨站请求伪造,会产生安全问题,可以在spring security中关闭csrf功能。
@Override // 授权
protected void configure(HttpSecurity http) throws Exception {
	// 关闭csrf功能
	http.csrf().disable();
}
5、将角色功能块认证完成,修改index.html页面。
<!--菜单根据用户角色动态实现-->
<div class="column" sec:authorize="hasRole('vip1')">
    <div class="ui raised segment">
        <div class="ui">
            <div class="content">
                <h5 class="content">Level 1</h5>
                <hr>
                <div><a th:href="@{/level1/1}"><i class="bullhorn icon"></i> Level-1-1</a></div>
                <div><a th:href="@{/level1/2}"><i class="bullhorn icon"></i> Level-1-2</a></div>
                <div><a th:href="@{/level1/3}"><i class="bullhorn icon"></i> Level-1-3</a></div>
            </div>
        </div>
    </div>
</div>

<div class="column" sec:authorize="hasRole('vip2')">
    <div class="ui raised segment">
        <div class="ui">
            <div class="content">
                <h5 class="content">Level 2</h5>
                <hr>
                <div><a th:href="@{/level2/1}"><i class="bullhorn icon"></i> Level-2-1</a></div>
                <div><a th:href="@{/level2/2}"><i class="bullhorn icon"></i> Level-2-2</a></div>
                <div><a th:href="@{/level2/3}"><i class="bullhorn icon"></i> Level-2-3</a></div>
            </div>
        </div>
    </div>
</div>

<div class="column" sec:authorize="hasRole('vip3')">
    <div class="ui raised segment">
        <div class="ui">
            <div class="content">
                <h5 以上是关于Springboot- Spring Security的主要内容,如果未能解决你的问题,请参考以下文章