Springboot-Swagger整合
Posted guardwhy
tags:
篇首语:本文由小常识网(cha138.com)小编为大家整理,主要介绍了Springboot-Swagger整合相关的知识,希望对你有一定的参考价值。
学习视频: https://www.bilibili.com/video/BV1PE411i7CV?p=47
1.1 Swagger基本概念
Swagger官网:https://swagger.io/
前后端分离
- 后端:后端控制层,服务层,数据访问层。
- 前端: 前端控制层、视图层。
- 前后端通过API进行交互,前后端相对独立且松耦合。
- 前后端可以部署在不同的服务器上…
产生的问题
前后端集成联调,前端人员和后端人员无法做到"即使协商,尽早解决",最终导致问题集中爆发。
解决方案:
- 指定schema【计划的提纲】,实时更新最新的API,降低集成的风险。
Swagger
- 号称世界上最流行的API框架。
- Restful Api 文档在线自动生成器,API 文档 与API 定义同步更新。
- 直接运行,在线测试API,支持多种语言 (如:Java,php等)。
1.2 集成Swagger
1、新建一个Springboot项目。
2、添加相关的maven依赖
2.x.x 版本
<!-- https://mvnrepository.com/artifact/io.springfox/springfox-swagger2 -->
<dependency>
    <groupId>io.springfox</groupId>
    <artifactId>springfox-swagger2</artifactId>
    <version>2.9.2</version>
</dependency>
<!-- https://mvnrepository.com/artifact/io.springfox/springfox-swagger-ui -->
<dependency>
    <groupId>io.springfox</groupId>
    <artifactId>springfox-swagger-ui</artifactId>
    <version>2.9.2</version>
</dependency>
3.x.x版本
<dependency>
    <groupId>io.springfox</groupId>
    <artifactId>springfox-boot-starter</artifactId>
    <version>3.0.0</version>
</dependency>
3、编写对应的controller
package cn.guardwhy.controller;

import org.springframework.web.bind.annotation.RequestMapping;
import org.springframework.web.bind.annotation.RestController;

@RestController
public class HelloController {
    @RequestMapping(value = "/hello")
    public String hello(){
        return "hello Swagger!!!";
    }
}
4、编写一个配置类-SwaggerConfig来配置 Swagger
package cn.guardwhy.config;

import org.springframework.context.annotation.Configuration;
import springfox.documentation.swagger2.annotations.EnableSwagger2;

@Configuration // 配置类
@EnableSwagger2 // 开启Swagger2的自动配置
public class SwaggerConfig {

}
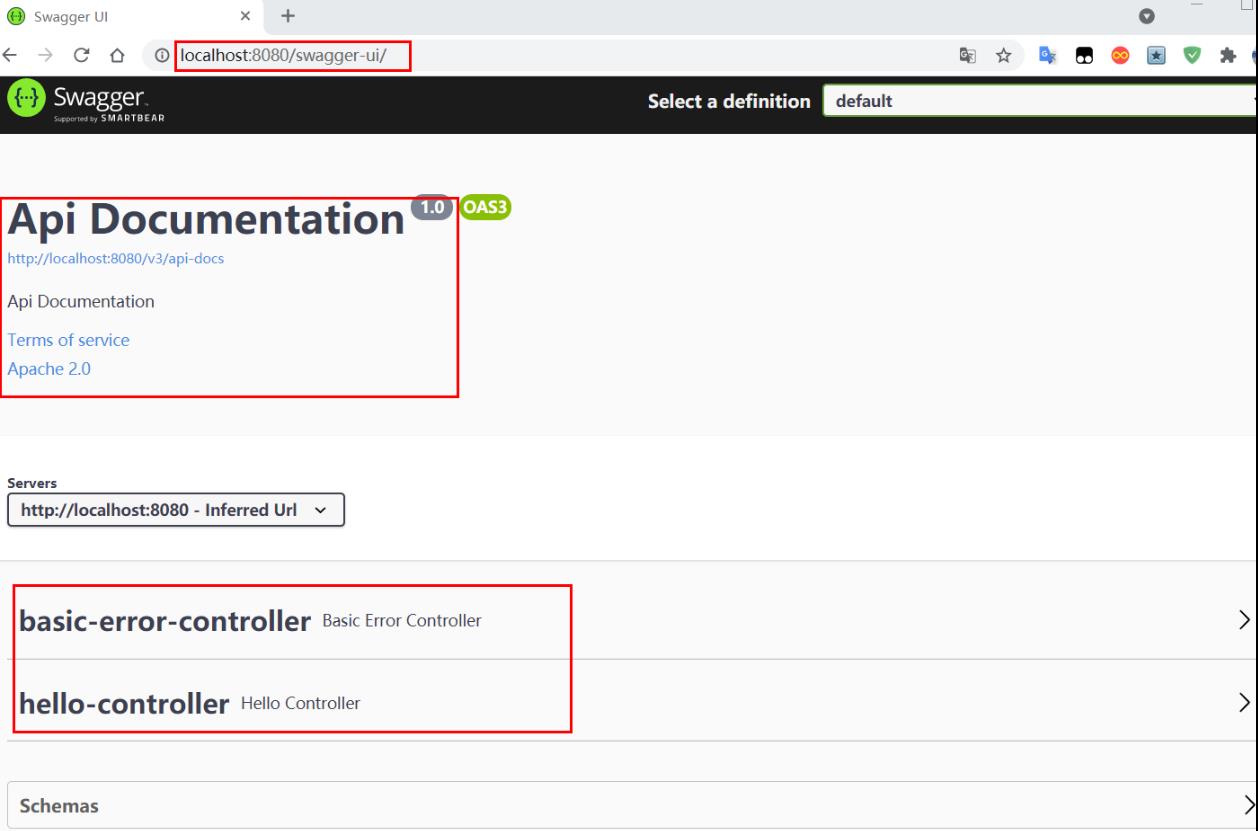
5、启动项目,访问测试。就可以看到swagger界面!!
2.x.x版本: http://localhost:8080/swagger-ui.html

3.x.x版本: http://localhost:8080/swagger-ui/
1.3 配置Swagger
1、Swagger实例Bean是Docket,通过配置Docket实例来配置Swaggger。
package cn.guardwhy.config;

import org.springframework.context.annotation.Bean;
import org.springframework.context.annotation.Configuration;
import springfox.documentation.spi.DocumentationType;
import springfox.documentation.spring.web.plugins.Docket;
import springfox.documentation.swagger2.annotations.EnableSwagger2;

@Configuration // 配置类
@EnableSwagger2 // 开启Swagger2的自动配置
public class SwaggerConfig {
    // 1.配置了Swagger的Docket的bean实例
    @Bean
    public Docket docket(){
        return new Docket(DocumentationType.SWAGGER_2);
    }
}
源码分析

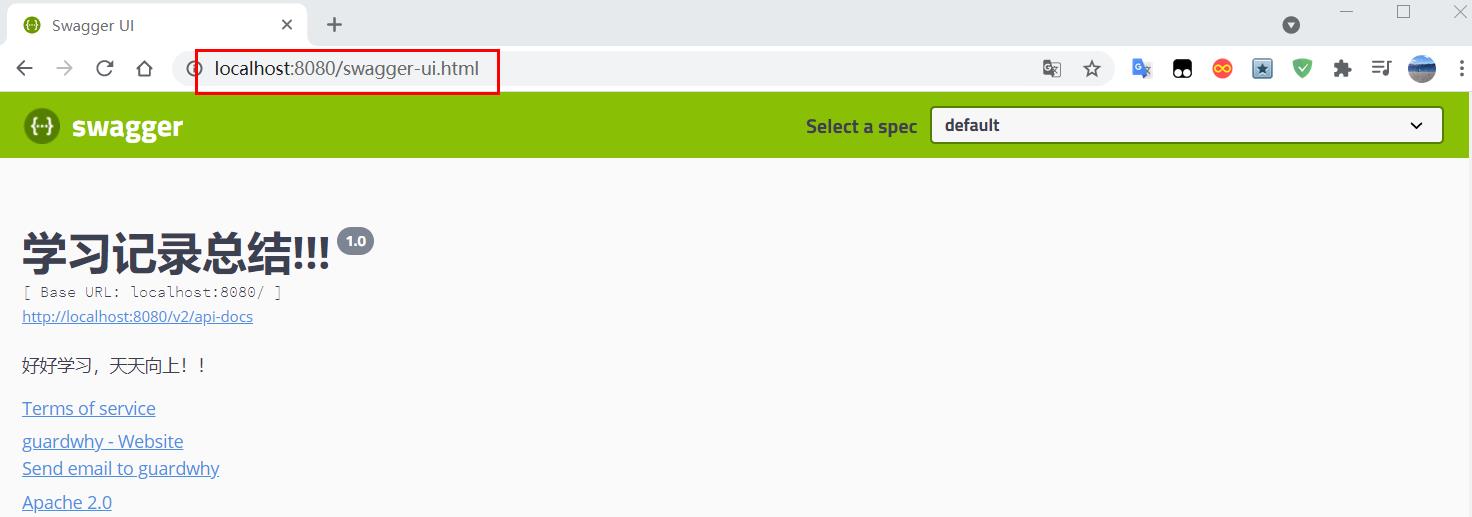
2、可以通过apiInfo()属性配置文档信息
// 2.配置Swagger信息=apiInfo
private ApiInfo apiInfo() {
    // 2.1 作者信息
    Contact contact = new Contact("guardwhy", "https://home.cnblogs.com/u/Guard9/","hxy1625309592@aliyun.com");
    return new ApiInfo(
        "学习记录总结!!!",
        "好好学习,天天向上!!",
        "1.0",
        "urn:tos",
        contact,
        "Apache 2.0",
        "http://www.apache.org/licenses/LICENSE-2.0",
        new ArrayList()
    );
}
3、Docket 实例关联上 apiInfo()
package cn.guardwhy.config;

import org.springframework.context.annotation.Bean;
import org.springframework.context.annotation.Configuration;
import springfox.documentation.service.ApiInfo;
import springfox.documentation.service.Contact;
import springfox.documentation.spi.DocumentationType;
import springfox.documentation.spring.web.plugins.Docket;
import springfox.documentation.swagger2.annotations.EnableSwagger2;

import java.util.ArrayList;

@Configuration // 配置类
@EnableSwagger2 // 开启Swagger2的自动配置
public class SwaggerConfig {
    // 1.配置了Swagger的Docket的bean实例
    @Bean
    public Docket docket(){
        // 1.1 Docket实例关联上 apiInfo()
        return new Docket(DocumentationType.SWAGGER_2).apiInfo(apiInfo());
    }

    // 2.配置Swagger信息=apiInfo
    private ApiInfo apiInfo() {
        // 2.1 作者信息
        Contact contact = new Contact("guardwhy", "https://home.cnblogs.com/u/Guard9/","hxy1625309592@aliyun.com");
        return new ApiInfo(
                "学习记录总结!!!",
                "好好学习,天天向上!!",
                "1.0",
                "urn:tos",
                 contact,
                "Apache 2.0",
                "http://www.apache.org/licenses/LICENSE-2.0",
                new ArrayList()
        );
    }
}
4、重启项目,访问测试!!
1.4 配置扫描接口
1、通过select()方法配置扫描接口
@Bean
public Docket docket(){
    // 1.1 Docket实例关联上 apiInfo()
    return new Docket(DocumentationType.SWAGGER_2)
        .apiInfo(apiInfo())
        .select()
        // RequestHandlerSelectors,配置要扫描接口的方式
        // basePackage:指定要扫描的包
        // any():扫描全部
        // none():不扫描
        // withClassAnnotation:扫描类上的注解,参数是一个注解的反射对象
        // withMethodAnnotation:扫描方法上的注解
        .apis(RequestHandlerSelectors.basePackage("cn.guardwhy.controller"))
        .build();
}
2、配置接口扫描过滤
@Bean
public Docket docket(){
    // 1.1 Docket实例关联上 apiInfo()
    return new Docket(DocumentationType.SWAGGER_2)
        .apiInfo(apiInfo())
        .select()
        .apis(RequestHandlerSelectors.basePackage("cn.guardwhy.controller"))
        // 配置如何通过path过滤,即这里只扫描请求以/guardwhy开头的接口
        .paths(PathSelectors.ant("/guardwhy/**"))
        .build();
}
1.5 配置开关Swagger
1、通过enable()方法配置是否启用swagger,如果是false,swagger将不能在浏览器中访问了。
@Bean
public Docket docket(){
    // 1.1 Docket实例关联上 apiInfo()
    return new Docket(DocumentationType.SWAGGER_2)
        .apiInfo(apiInfo())
        .enable(false) // enable是否启动Swagger,如果为False,则Swagger不能再浏览器中的访问!!
        .select()
        .apis(RequestHandlerSelectors.basePackage("cn.guardwhy.controller"))
        // 配置如何通过path过滤,即这里只扫描请求以/guardwhy开头的接口
        .paths(PathSelectors.ant("/guardwhy/**"))
        .build();
}
执行结果

2、希望Swagger在生产环境中使用,在发布的时候不使用?
application.properties
spring.profiles.active=dev
application-dev.properties
server.port=8081
application-pro.properties
server.port=8082
SwaggerConfig
@Bean
public Docket docket(Environment environment){
    // 1.设置要显示Swagger的环境
    Profiles profiles = Profiles.of("dev","test");
    // 2.通过environment.acceptsProfiles 判断是否处在自己设定的环境当中
    boolean flag = environment.acceptsProfiles(profiles);
    System.out.println(flag);

    return new Docket(DocumentationType.SWAGGER_2)
        .apiInfo(apiInfo())
        .enable(flag) // enable是否启动Swagger,如果为False,则Swagger不能再浏览器中的访问!!
        .select()
        .apis(RequestHandlerSelectors.basePackage("cn.guardwhy.controller"))
        // 配置如何通过path过滤,即这里只扫描请求以/guardwhy开头的接口
        .paths(PathSelectors.ant("/guardwhy/**"))
        .build();
}
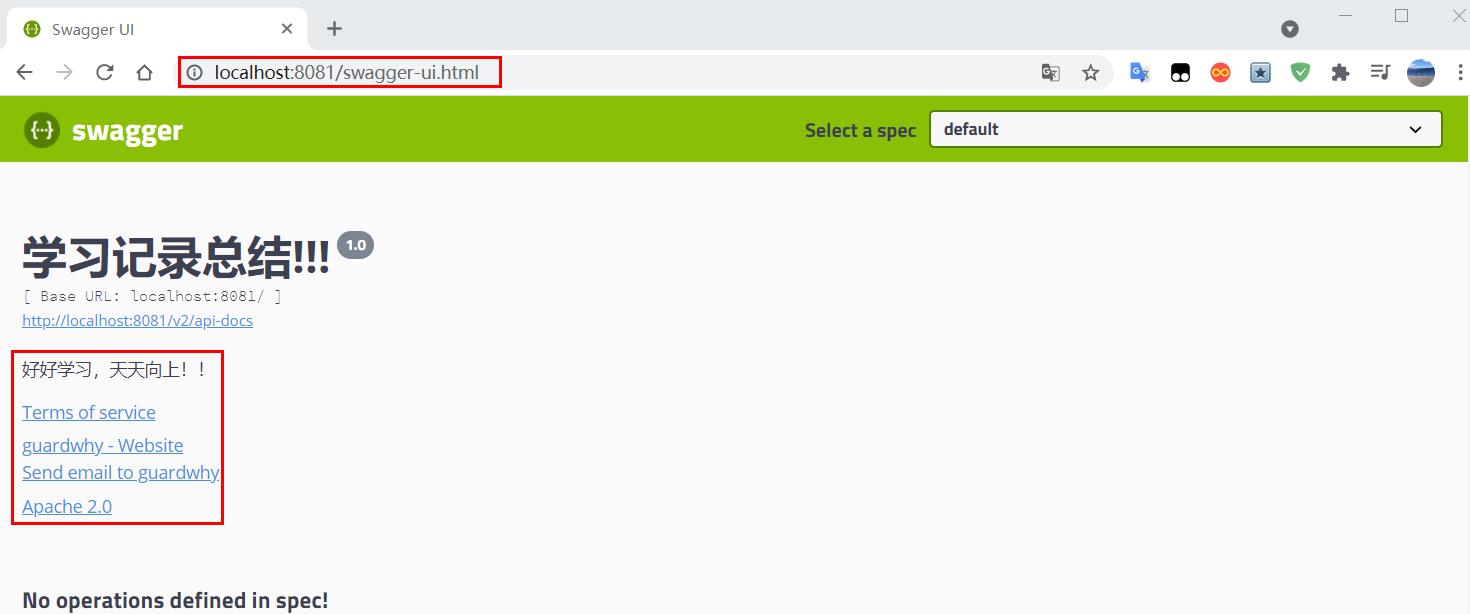
3、启动项目,访问测试 http://localhost:8081/swagger-ui.html
1.6 分组和实体类配置
1.6.1 配置分组
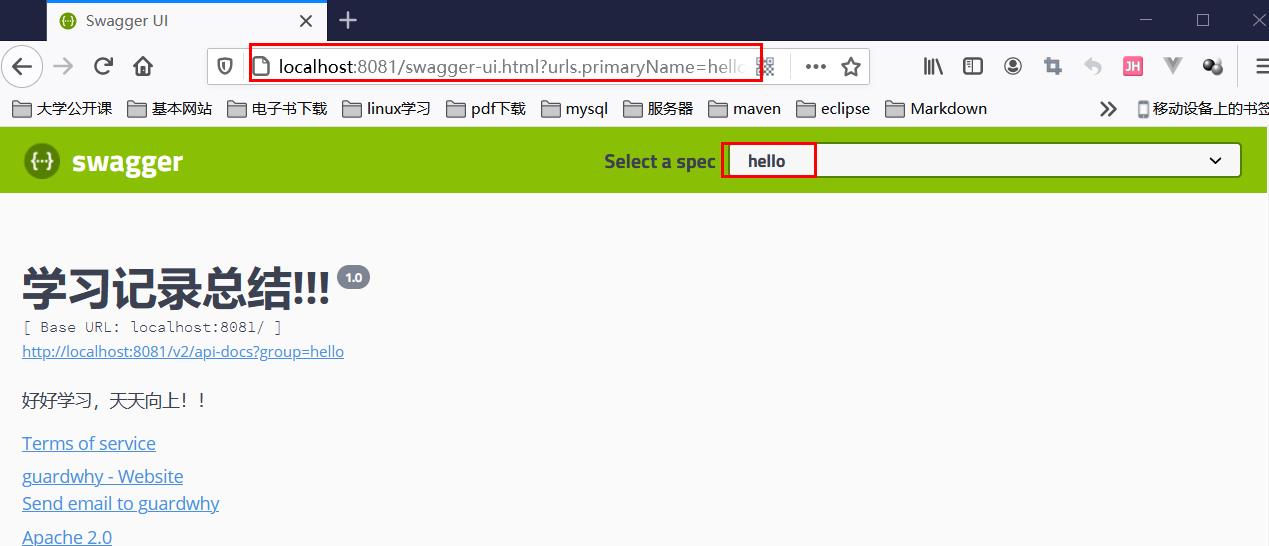
1、如果没有配置分组,默认是default。通过groupName()方法即可配置分组
@Bean
public Docket docket(Environment environment){
    return new Docket(DocumentationType.SWAGGER_2)
        .apiInfo(apiInfo())
        .groupName("hello")
        .enable(flag) // enable是否启动Swagger,如果为False,则Swagger不能再浏览器中的访问!!
        .select()
        .apis(RequestHandlerSelectors.basePackage("cn.guardwhy.controller"))
        // 配置如何通过path过滤,即这里只扫描请求以/guardwhy开头的接口
        .paths(PathSelectors.ant("/guardwhy/**"))
        .build();
}
2、启动项目,查看结果!!!
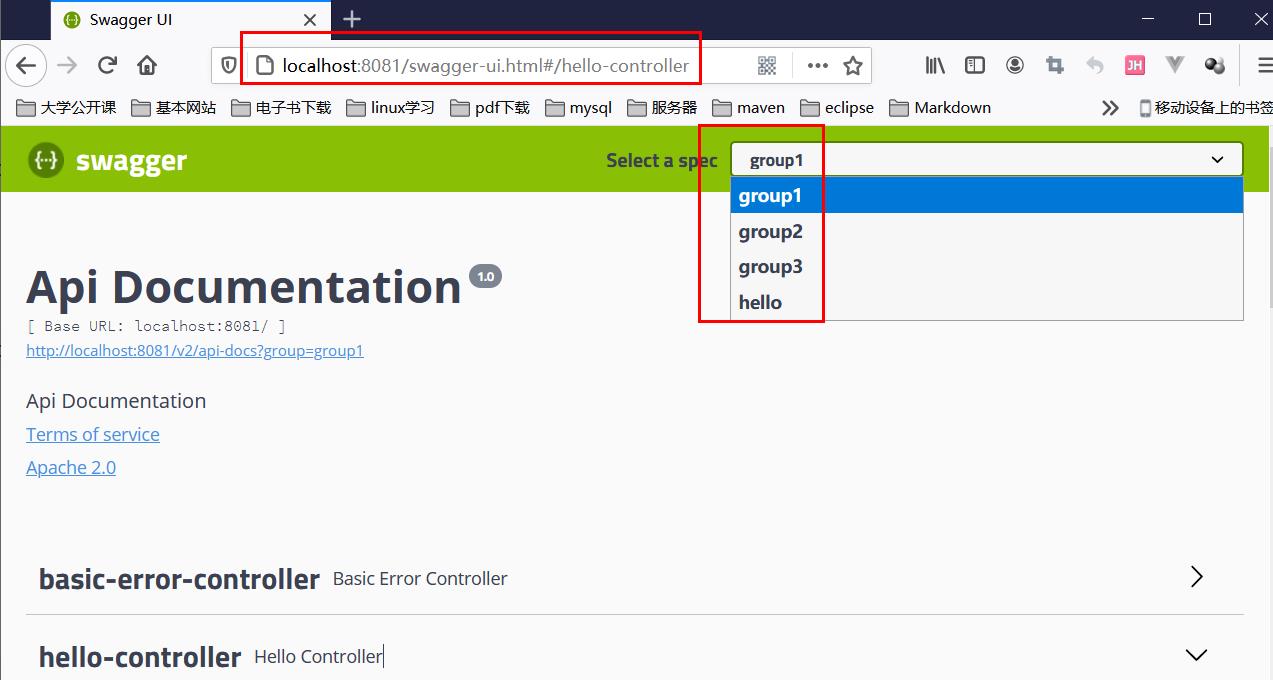
3、配置多个分组只需要配置多个docket。
// 3.配置多个分组
@Bean
public Docket docket1(){
    return new Docket(DocumentationType.SWAGGER_2).groupName("group1");
}

@Bean
public Docket docket2(){
    return new Docket(DocumentationType.SWAGGER_2).groupName("group2");
}

@Bean
public Docket docket3(){
    return new Docket(DocumentationType.SWAGGER_2).groupName("group3");
}
4、重启项目,测试:http://localhost:8080/swagger-ui.html
1.6.2 实体配置
1、新建一个实体类User类
@ApiModel为类添加注释
@ApiModelProperty为类属性添加注释
package cn.guardwhy.pojo;

import io.swagger.annotations.ApiModel;
import io.swagger.annotations.ApiModelProperty;

@ApiModel("用户实体类")
public class User {
    @ApiModelProperty("用户名")
    public String username;
    @ApiModelProperty("密码")
    public String password;
}
2、只要这个实体在请求接口的返回值上,都能映射到实体项中
// 只要接口中,返回值存在实体类,它就会扫描到Swagger中
@PostMapping(value = "/user")
public User user(){
    return new User();
}
3、重启项目,执行结果!!!

1.6.3 小结
Swagger是个优秀的工具,较于传统的Postman或Curl方式测试接口,使用swagger简直就是傻瓜式操作,不需要额外说明文档。
以上是关于Springboot-Swagger整合的主要内容,如果未能解决你的问题,请参考以下文章