每天学一个jquery插件-一像素画布1
Posted 阿飞超努力
tags:
篇首语:本文由小常识网(cha138.com)小编为大家整理,主要介绍了每天学一个jquery插件-一像素画布1相关的知识,希望对你有一定的参考价值。
每天一个jquery插件-一像素画布1
一像素画布1
我记忆中记得有一个社区搞过一个百万像素,全社区同屏操作画布的活动,不过不记得是啥时候在哪搞得了,所以我来搞一个同屏画布试试,先搞单机的,在搞成同屏的
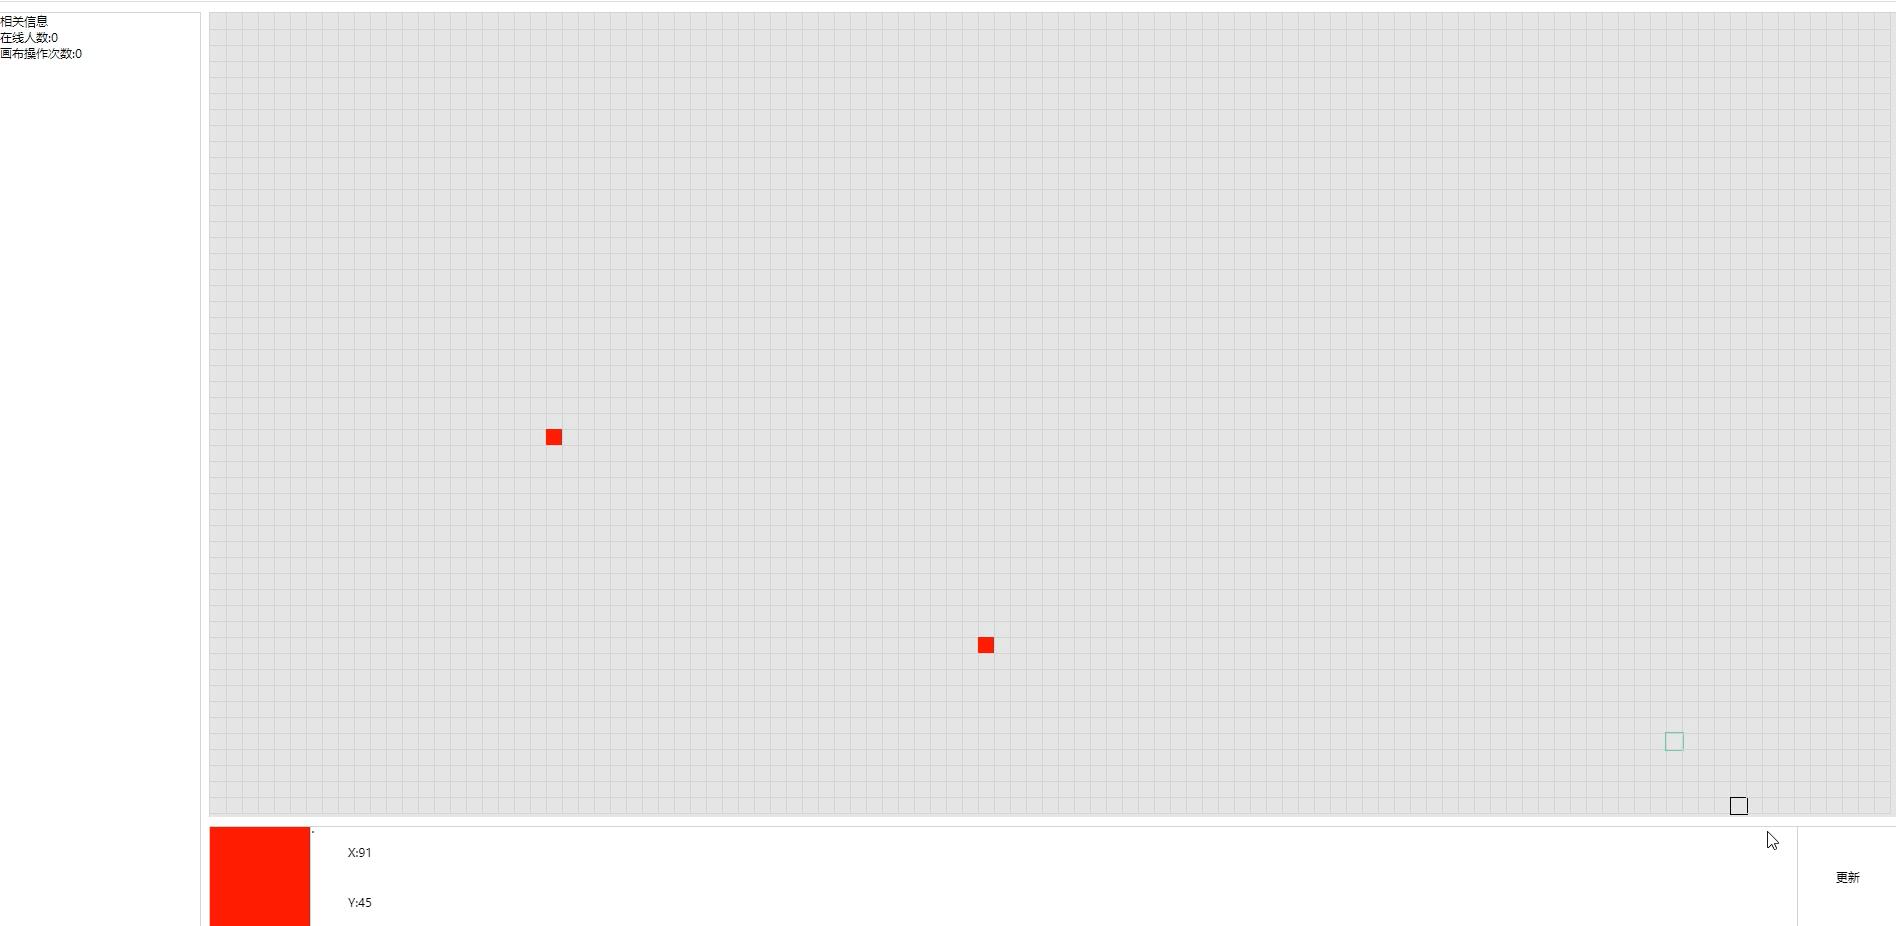
效果如下

代码部分
*{
	margin: 0;
	padding: 0;
	user-select: none;
	font-size: 12px;
}
#main{
	position: fixed;
	top: 10px;
	bottom: 120px;
	right: 10px;
	left: 220px;
	/* border: 1px solid lightgray; */
	overflow: auto;
}
#box{
	width: 1688px;
	height: 804px;
	background-color: rgba(211,211,211,0.6);
	position: relative;
	border-top: 1px solid lightgray;
	border-left: 1px solid lightgray;
}
#msg{
	position: fixed;
	top:10px;
	left: 10px;
	bottom: 10px;
	width: 200px;
	border: 1px solid lightgray;
}
.item{
	position: absolute;
	width: 16px;
	height: 16px;
	border: 1px solid lightgray;
	border-top: none;
	border-left: none;
}
.item.check{
	outline: 1px solid #2ecc71;
	animation:check 0.5s linear infinite;
}
@keyframes check{
	from{
		opacity: 1;
	}
	to{
		opacity: 0.2;
	}
}
.item:hover{
	border: 1px solid black;
}
#btn{
	position: fixed;
	bottom: 10px;
	left: 220px;
	right: 10px;
	height: 100px;
	bottom: 10px;
	border: 1px solid lightgray;
}
#tx{
	position: absolute;
	top: 0;
	left: 100px;
	height: 50px;
	width: 100px;
	display: flex;
	justify-content: center;
	align-items: center;
}
#ty{
	position: absolute;
	top: 50px;
	left: 100px;
	bottom: 0px;
	width: 100px;
	display: flex;
	justify-content: center;
	align-items: center;
}
.click:hover{
	opacity: 0.8;
}
.click:active{
	opacity: 0.6;
}
#fcolor{
	position: absolute;
	top: 0px;
	left: 100px;
	outline: none;
	border: none;
	width: 0;
	height: 0;
}
#color{
	position: absolute;
	top: 0;
	left: 0;
	bottom: 0;
	width: 100px;
	border-right: 1px solid lightgray;
	cursor: pointer;
}
#send{
	position: absolute;
	right: 0;
	top: 0;
	bottom: 0;
	width: 100px;
	border-left: 1px solid lightgray;
	display: flex;
	justify-content: center;
	align-items: center;
	font-size: 12px;
	cursor: pointer;
}
.stopclick{
	opacity: 0.4;
	pointer-events: none;
}
<!DOCTYPE html>
<html>
	<head>
		<meta charset="utf-8">
		<title>yqxsh</title>
		<script src="js/jquery-3.4.1.min.js"></script>
		<script src="js/yqxsh.js"></script>
		<link href="css/yqxsh.css" rel="stylesheet" type="text/css" />
	</head>
	<body>
		<div id="main">
			<div id="box">

			</div>
		</div>
		<div id="msg">
			<p>相关信息</p>
			<p>在线人数:<span id="num1">0</span></p>
			<p>画布操作次数:<span id="num2">0</span></p>
		</div>
		<div id="btn">
			<label id="color" class="click" for="fcolor"></label>
			<input type="color" id="fcolor" />
			<div id="tx">X:0</div>
			<div id="ty">Y:0</div>
			<div id="send" class="click">更新</div>
		</div>
	</body>
</html>
<script>

</script>
$(function(){
	//绘制339288(1688*804)个小方块
	var $box = $("#box");
	for(var a = 0;a<105;a++){
		for(var b = 0;b<50;b++){
			var $item = $("<div class='item' data-x='"+a+"' data-y='"+b+"'></div>");
			$item.appendTo($box);
			var p  = {x:a,y:b};
			$item.css(itemcss(p));
		}
	}
	//参数
	var x = 0;
	var y = 0;
	var color = 'white';
	var time = 3000//多久允许更新一次参数
	drawclick();
	//事件
	$(".item").click(function(){
		x = parseInt($(this).attr("data-x"));
		y = parseInt($(this).attr("data-y"));
		$("#tx").text("X:"+x);
		$("#ty").text("Y:"+y);
		drawclick();
	})
	$("#fcolor").bind('input propertychange', function () {
	        color = $(this).val();
	        $("#color").css({ "background-color": color });
	})
	$("#send").click(function(){
		$(this).addClass('stopclick');
		var $that = $(this);
		$that.text("3秒后可更新");
		var p = {x:x,y:y,c:color};
		upp(p)
		setTimeout(function(){
			$that.removeClass("stopclick");
			$that.text("更新");
		},time)
	})
	function upp(p){
		$items(p).css("background-color",p.c);
	}
	function drawclick(){
		$(".item").removeClass("check");
		var p  = {x:x,y:y};
		$items(p).addClass("check");
	}


})
function $items(p){
		return $(".item[data-x='"+p.x+"'].item[data-y='"+p.y+"']");
	}
function itemcss(p){
	return{
		left:(p.x*16)+'px',
		top:(p.y*16)+'px'
	}
}
$.prototype.arr = function () {
    var that = this;
    var arr = [];
    for (var i = 0; i < that.length; i++) {
        arr.push($(that[i]));
    }
    return arr;
}
思路解释
- 反正到时候要存到服务器上的肯定是坐标集,所以我们在绘制画布的时候就给弄一个坐标系出来,同屏的操作分发的内容就是这些参数
- 未完,休息
以上是关于每天学一个jquery插件-一像素画布1的主要内容,如果未能解决你的问题,请参考以下文章