03. 第一个spring源码调试demo
Posted java技术探秘
tags:
篇首语:本文由小常识网(cha138.com)小编为大家整理,主要介绍了03. 第一个spring源码调试demo相关的知识,希望对你有一定的参考价值。
本文代码的gitee仓库链接:https://gitee.com/funcy/spring-framework.
在上一篇中,我们编译好了源码,接下来就是源码调试与分析了。
1. 创建调试代码模块
在进行源码调试前,我们先要创建调试代码,简单来说就是main()方法入口或@Test方法。虽然在spring-test模块下有大量的单元测试类,在每个模块的src/test/java下也有不少测试用例,但更多的时候,我们还是希望自己写代码来调试,因此需要一个专门的模块来放置自己的测试代码。
1.1 新建模块 spring-learn
在idea中,点击spring-framework项目,右键,选择new-module:
spring项目是使用gradle构建的,构建工具选择gradle:

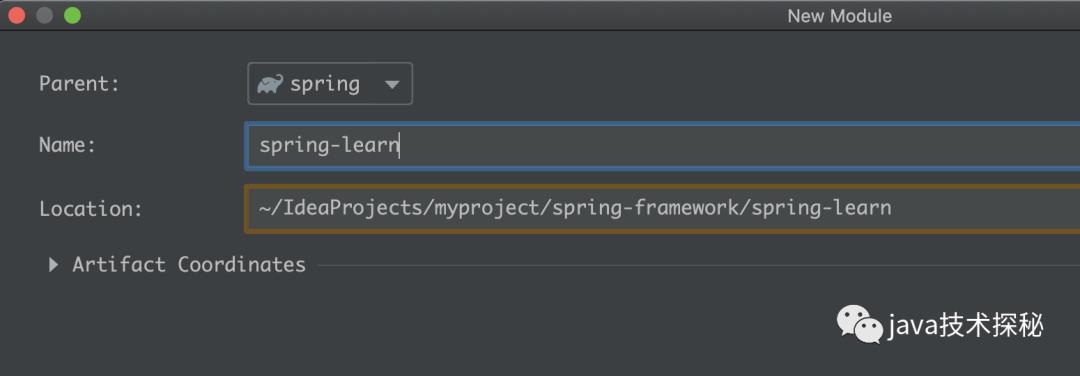
模块名称填写spring-learn:
1.2 配置spring-learn模块
调度spring源码,当然需求引入spring的其他模块,spring-learn.gradle配置如下:
description = "Spring Learn"

apply plugin: "kotlin"

dependencies {
    compile(project(":spring-core"))
    compile(project(":spring-aop"))
    compile(project(":spring-beans"))
    compile(project(":spring-context"))
    optional("org.aspectj:aspectjweaver")
    testCompile group: 'junit', name: 'junit', version: '4.12'
}
接着,我们还需要在spring-learn模块下创建org.springframework.learn包,之后我们所有的调度代码就都放在这里了:
1.3 将spring-learn排除check-style
spring作为一个庞大的项目,在多人开发下,为了保证代码风格统一,使用了checkstyle插件,如果违反了代码风格,编译时就会报错:
为了避免出现这种情况,需要将spring-learn模块下的代码排除于check-style之外,需要在spring-framework/src/checkstyle/下的checkstyle-suppressions.xml文件添加这样一句:
<?xml version="1.0"?>
<!DOCTYPE suppressions PUBLIC "-//Checkstyle//DTD SuppressionFilter Configuration 1.2//EN"
    "https://checkstyle.org/dtds/suppressions_1_2.dtd">
<suppressions>
    ...

    <!-- spring-learn -->
    <suppress files="[\/]src[\/]main[\/]java[\/]org[\/]springframework[\/]learn[\/]" checks=".*" />
</suppressions>
如此一来,就不会再出现因代码风格而编译出错的尴尬场面了。
2. 第一个spring调试demo
在src/main/java下创建包org.springframework.learn.demo01,然后创建两个bean,内容如下:
package org.springframework.learn.demo01;

import org.springframework.stereotype.Service;

@Service
public class BeanObj1 {

    public BeanObj1() {
        System.out.println("调用beanObj1的构造方法");
    }

    @Override
    public String toString() {
        return "BeanObj1{}";
    }
}
package org.springframework.learn.demo01;

import org.springframework.stereotype.Component;

@Component
public class BeanObj2 {

    public BeanObj2() {
        System.out.println("调用beanObj2的构造方法");
    }

    @Override
    public String toString() {
        return "BeanObj2{}";
    }
}
再写个main方法:
package org.springframework.learn.demo01;

import org.springframework.context.ApplicationContext;
import org.springframework.context.annotation.AnnotationConfigApplicationContext;

public class Demo01Main {

    public static void main(String[] args) {
        // 指定扫描的包
        ApplicationContext context = new AnnotationConfigApplicationContext(
            "org.springframework.learn.demo01");
        Object obj1 = context.getBean("beanObj1");
        Object obj2 = context.getBean("beanObj2");
        System.out.println("obj1:" +  obj1);
        System.out.println("obj2:" + obj2);
    }
}
运行,结果如下:
> Task :spring-learn:Demo01Main.main()
调用beanObj1的构造方法
调用beanObj2的构造方法
obj1:BeanObj1{}
obj2:BeanObj2{}

BUILD SUCCESSFUL in 7s
35 actionable tasks: 3 executed, 32 up-to-date
1:12:14 下午: Task execution finished 'Demo01Main.main()'.
在以上的代码中,我们创建了两个类:BeanObj1与BeanObj2,并在这两个类上分别添加了@Service与@Component注解,在main()方法中,使用的ApplicationContext为AnnotationConfigApplicationContext且指定包名为org.springframework.learn.demo01。可以看到,最终从spring容器中成功获取了这两个bean了。
3. 对demo01的说明
我们已经成功创建了第一个可以运行的demo了,并且得到了运行结果,接下来我们对demo01的代码作出相关分析。
-
我们创建了两个类: BeanObj1与BeanObj2,并在这两个类上添加了@Component注解,这样spring在扫描包时,就能扫到这两个类了; -
在 main()方法中,使用的ApplicationContext为AnnotationConfigApplicationContext; -
在 AnnotationConfigApplicationContext中,我们指定了扫描的包为org.springframework.learn.demo01; -
使用 context.getBean("xxx")从spring中获取bean,成功得到了BeanObj1与BeanObj2的对象。
从以上的分析来看,不难猜测spring大概做了这么几件事:
-
根据包名扫描包,这里指定的包名是 org.springframework.learn.demo01 -
扫描包时,如果发现类上有 @Service与@Component注解,则实例化并放入spring容器 -
context.getBean("xxx")即为从spring容器中获取bean
那么spring内部是如何扫描包的?如何实例化bean的?又是如何存储bean的?关于这些,我们接下来就从源码来分析spring是如何处理的。
本文原文链接:https://my.oschina.net/funcy/blog/4533250 ,限于作者个人水平,文中难免有错误之处,欢迎指正!原创不易,商业转载请联系作者获得授权,非商业转载请注明出处。
本系列的其他文章
【spring源码分析】spring源码分析系列目录
以上是关于03. 第一个spring源码调试demo的主要内容,如果未能解决你的问题,请参考以下文章