网络编程--03NIO
Posted Anrys
tags:
篇首语:本文由小常识网(cha138.com)小编为大家整理,主要介绍了网络编程--03NIO相关的知识,希望对你有一定的参考价值。
网络编程--03 NIO
4.NIO
4.1概述
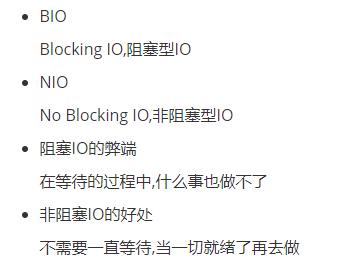
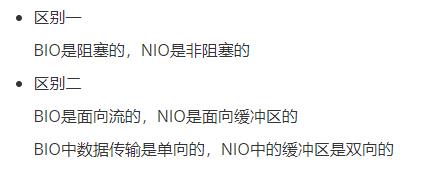
4.2NIO与BIO的区别
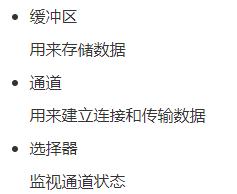
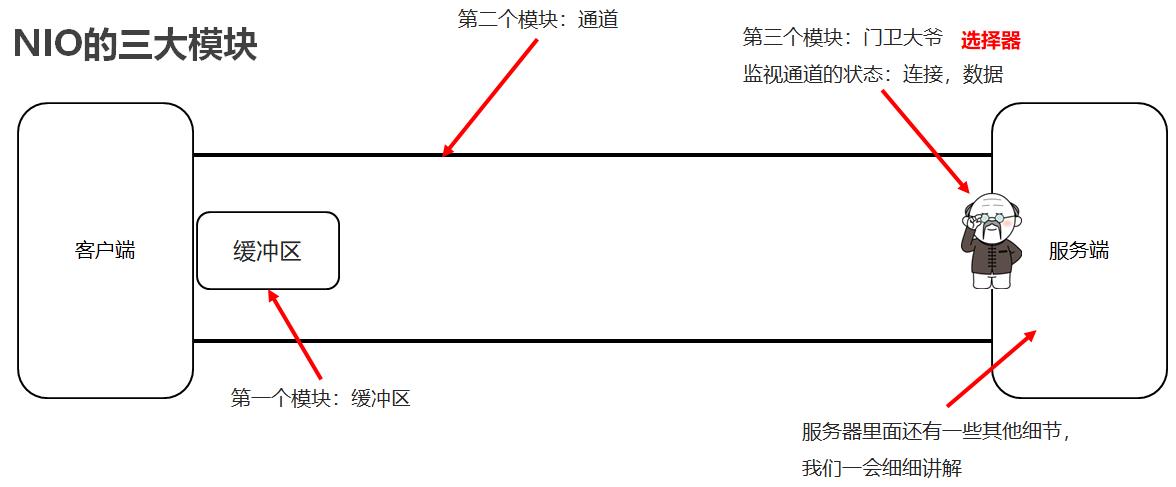
4.3NIO三大模块
4.4 NIO创建缓冲区对象
方法介绍:

代码:
public class CreateByteBufferDemo1 {
    public static void main(String[] args) {
        //method1();

        //method2();

        ByteBuffer wrap = ByteBuffer.wrap("aaa".getBytes());
        for (int i = 0; i < 3; i++) {
            System.out.println(wrap.get());
        }
    }

    private static void method2() {
        byte [] bytes = {97,98,99};
        ByteBuffer byteBuffer2 = ByteBuffer.wrap(bytes);
        //缓冲区的长度3
        //缓冲区里面的内容就是字节数组的内容.
        for (int i = 0; i < 3; i++) {
            System.out.println(byteBuffer2.get());
        }
        System.out.println(byteBuffer2.get());
    }

    private static void method1() {
        ByteBuffer byteBuffer1 = ByteBuffer.allocate(5);
        //get
        for (int i = 0; i < 5; i++) {
            System.out.println(byteBuffer1.get());
        }
        System.out.println(byteBuffer1.get());
    }
}
4…5NIO缓冲区添加数据应用
方法介绍:
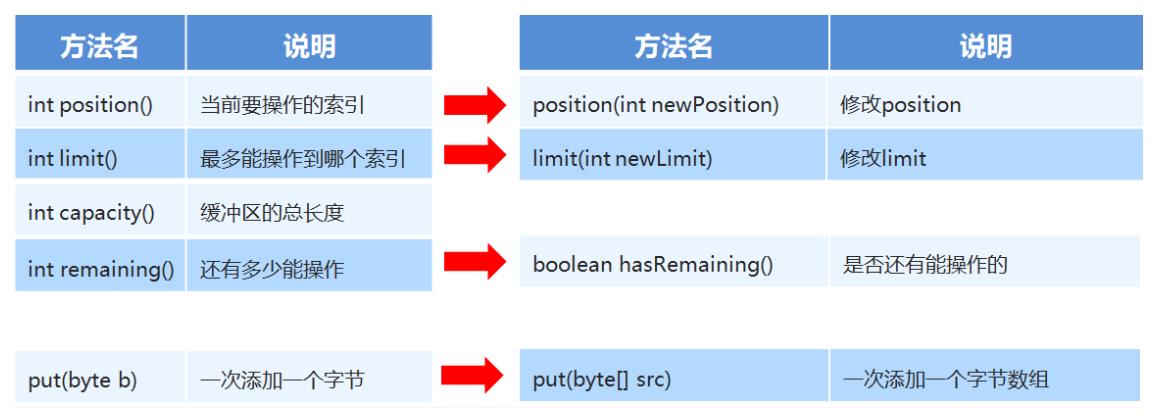
代码:
public class ByteBufferDemo2 {
    public static void main(String[] args) {
//        int position()		  当前要操作的索引
//        int limit() 		  最多能操作到哪个索引
//        int capacity()		  缓冲区的总长度
        ByteBuffer byteBuffer = ByteBuffer.allocate(10);
        System.out.println(byteBuffer.position());//0
        System.out.println(byteBuffer.limit());//10
        System.out.println(byteBuffer.capacity());//10

//        put(byte b)		  一次添加一个字节
//        byteBuffer.put((byte) 97);
//        System.out.println(byteBuffer.position());
//        System.out.println(byteBuffer.limit());
//        System.out.println(byteBuffer.capacity());

//        put(byte[] src)		 一次添加一个字节数组
//        byteBuffer.put("aaa".getBytes());
//        System.out.println(byteBuffer.position());//3
//        System.out.println(byteBuffer.limit());//10
//        System.out.println(byteBuffer.capacity());//10

//        position(int newPosition) 修改position
//        byteBuffer.position(1);

//        limit(int newLimit)	  修改limit
//        byteBuffer.limit(5);
//        System.out.println(byteBuffer.position());
//        System.out.println(byteBuffer.limit());
//        System.out.println(byteBuffer.capacity());

//        int remaining()		  还有多少能操作
//        boolean hasRemaining()	  是否还有能操作的

        byteBuffer.put("0123456789".getBytes());
        System.out.println(byteBuffer.remaining());
        System.out.println(byteBuffer.hasRemaining());
    }
}
4.6缓冲区获取数据
方法介绍:
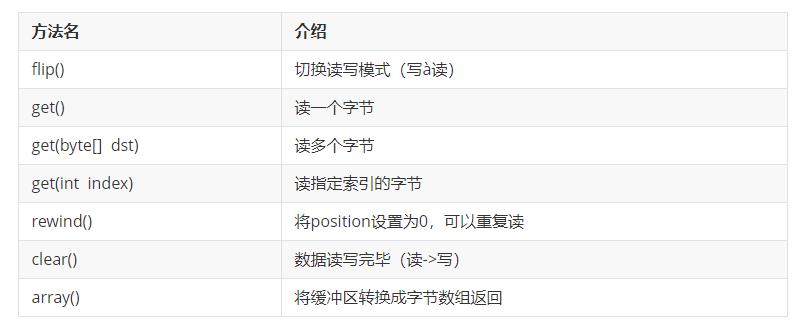
代码示例:
public class ByteBufferDemo3 {
public static void main(String[] args) {
ByteBuffer byteBuffer = ByteBuffer.allocate(10);
byteBuffer.put("abc".getBytes());
// flip() 切换读写模式(写读)
byteBuffer.flip();
// get() 读一个字节
// while(byteBuffer.limit() != byteBuffer.position()){
// System.out.println((char) byteBuffer.get());
// }
for (int i = 0; i < byteBuffer.limit(); i++) {
System.out.println((char) byteBuffer.get());
}
// get(byte[] dst) 读多个字节
// byte [] bytes = new byte[byteBuffer.limit()];
// byteBuffer.get(bytes);
// System.out.println(new String(bytes));
// get(int index) 读指定索引的字节
// System.out.println((char) byteBuffer.get(0));
// rewind() 将position设置为0,可以重复读
// byteBuffer.rewind();
// for (int i = 0; i < byteBuffer.limit(); i++) {
// System.out.println((char) byteBuffer.get());
// }
// clear() 数据读写完毕(读->写)
byteBuffer.clear();
byteBuffer.put("qqq".getBytes());
// array() 将缓冲区转换成字节数组返回
byte[] bytes = byteBuffer.array();
System.out.println(new String(bytes));
}
}
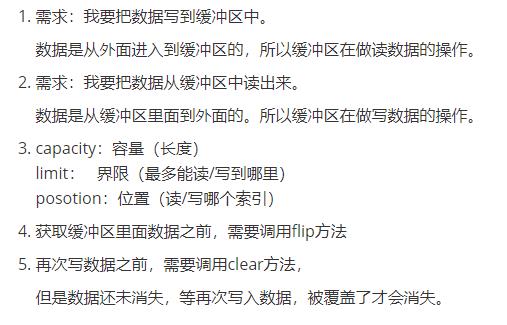
4.7 小结
4.8NIO通道客户端实现
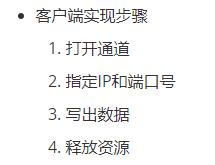
代码:
public class NIOClient {
    public static void main(String[] args) throws IOException {
        //1.打开通道
        SocketChannel socketChannel = SocketChannel.open();

        //2.指定IP和端口号
        socketChannel.connect(new InetSocketAddress("127.0.0.1",10000));

        //3.写出数据
        ByteBuffer byteBuffer = ByteBuffer.wrap("一点寒毛先制".getBytes());
        socketChannel.write(byteBuffer);

        //4.释放资源
        socketChannel.close();
    }
}
4.9 NIO通道服务端
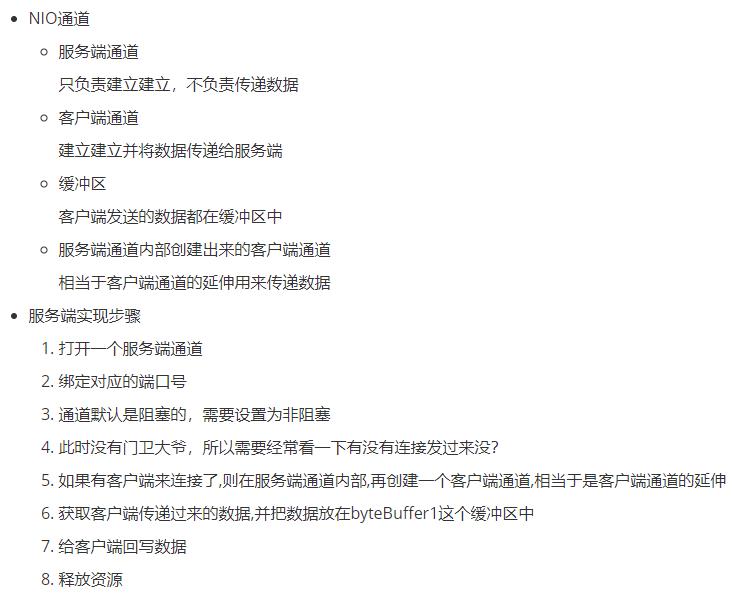
代码:
public class Nioserver {
    public static void main(String[] args) throws IOException {
//        1.打开一个服务端通道
        ServerSocketChannel serverSocketChannel = ServerSocketChannel.open();
//        2.绑定对应的端口号
        serverSocketChannel.bind(new InetSocketAddress(10000));
//        3.通道默认是阻塞的,需要设置为非阻塞
            //如果传递true 表示通道设置为阻塞通道...默认值
            //如果传递false 表示通道设置为非阻塞通道
        serverSocketChannel.configureBlocking(false);
//        4.此时没有门卫大爷,所以需要经常看一下有没有连接发过来没?
        while (true) {
//        5.如果有客户端来连接了,则在服务端通道内部,再创建一个客户端通道,相当于是客户端通道的延伸
            //此时已经设置了通道为非阻塞
            //所以在调用方法的时候,如果有客户端来连接,那么会创建一个SocketChannel对象.
            //如果在调用方法的时候,没有客户端来连接,那么他会返回一个null
            SocketChannel socketChannel = serverSocketChannel.accept();
            //System.out.println(socketChannel);
            if(socketChannel != null){
//        6.客户端将缓冲区通过通道传递给服务端,就到了这个延伸通道socketChannel里面
//        7.服务端创建一个空的缓冲区装数据并输出
                ByteBuffer byteBuffer = ByteBuffer.allocate(1024);
                //获取传递过来的数据,并把他们放到byteBuffer缓冲区中.
                //返回值:
                    //正数: 表示本次读到的有效字节个数.
                    //0   : 表示本次没有读到有效字节.
                    //-1  : 表示读到了末尾
                int len = socketChannel.read(byteBuffer);
                System.out.println(new String(byteBuffer.array(),0,len));
              //8.释放资源
                socketChannel.close();
            }
        }
    }
}
4.10 NIO通道练习
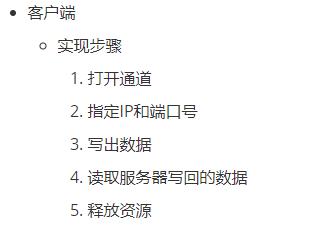
示例代码:
public class Clinet {
    public static void main(String[] args) throws IOException {
        // 1.打开通道
        SocketChannel socketChannel = SocketChannel.open();
        // 2.指定IP和端口号
        socketChannel.connect(new InetSocketAddress("127.0.0.1",10000));
        // 3.写出数据
        ByteBuffer byteBuffer1 = ByteBuffer.wrap("吃俺老孙一棒棒".getBytes());
        socketChannel.write(byteBuffer1);
  		// 手动写入结束标记
        socketChannel.shutdownOutput();

        System.out.println("数据已经写给服务器");
        // 4.读取服务器写回的数据
        ByteBuffer byteBuffer2 = ByteBuffer.allocate(1024);
        int len;
        while((len = socketChannel.read(byteBuffer2)) != -1){
            byteBuffer2.flip();
            System.out.println(new String(byteBuffer2.array(),0,len));
            byteBuffer2.clear();
        }
        // 5.释放资源
        socketChannel.close();
    }
}
服务端:
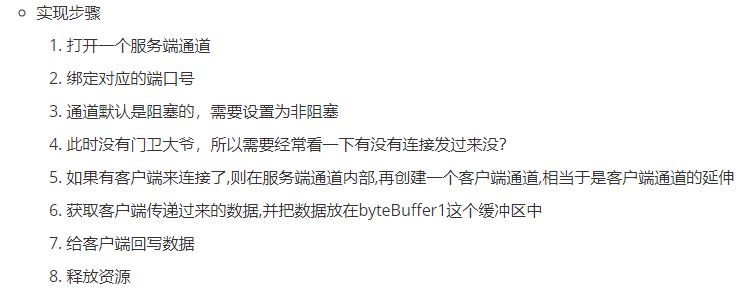
代码:
public class Sever {
    public static void main(String[] args) throws IOException {
        // 1,打开一个服务端通道
        ServerSocketChannel serverSocketChannel = ServerSocketChannel.open();
        // 2,绑定对应的端口号
        serverSocketChannel.bind(new InetSocketAddress(10000));
        // 3,通道默认是阻塞的,需要设置为非阻塞
        serverSocketChannel.configureBlocking(false);
        // 4,此时没有门卫大爷,所以需要经常看一下有没有连接发过来没?
        while(true){
            //  5,如果有客户端来连接了,则在服务端通道内部,再创建一个客户端通道,相当于是客户端通道的延伸
            SocketChannel socketChannel = serverSocketChannel.accept();
            if(socketChannel != null){
                System.out.println("此时有客户端来连接了");
                // 6,获取客户端传递过来的数据,并把数据放在byteBuffer1这个缓冲区中
                ByteBuffer byteBuffer1 = ByteBuffer.allocate(1024);
                //socketChannel.read(byteBuffer1);
                int len;
                //针对于缓冲区来讲
                    //如果 从添加数据 ----> 获取数据 flip
                    //如果 从获取数据 ----> 添加数据 clear
                while((len = socketChannel.read(byteBuffer1)) != -1){
                    byteBuffer1.flip();
                    System.out.println(new String(byteBuffer1.array(),0,len));
                    byteBuffer1.clear();
                }

                System.out.println("接收数据完毕,准备开始往客户端回写数据");
                // 7,给客户端回写数据
                ByteBuffer byteBuffer2 = ByteBuffer.wrap("哎哟,真疼啊!!!".getBytes());
                socketChannel.write(byteBuffer2);
                // 8,释放资源
                socketChannel.close();
            }
        }
    }
}
4.11NIO通道练习优化

代码:
// 客户端
public class Clinet {
    public static void main(String[] args) throws IOException {
        SocketChannel socketChannel = SocketChannel.open();

        socketChannel.connect(new InetSocketAddress("127.0.0.1",10000));

        ByteBuffer byteBuffer1 = ByteBuffer.wrap("吃俺老孙一棒棒".getBytes());
        socketChannel.write(byteBuffer1);

        System.out.println("数据已经写给服务器");

        ByteBuffer byteBuffer2 = ByteBuffer.allocate(1024);
        int len;
        while((len = socketChannel.read(byteBuffer2)) != -1){
            System.out.println("客户端接收回写数据");
            byteBuffer2.flip();
            System.out.println(new String(byteBuffer2.array(),0,len));
            byteBuffer2.clear();
        }
        socketChannel.close();
    }
}
// 服务端
public class Sever {
    public static void main(String[] args) throws IOException {
        ServerSocketChannel serverSocketChannel = ServerSocketChannel.open();

        serverSocketChannel.bind(new InetSocketAddress(10000));

        serverSocketChannel.configureBlocking(false);

        while(true){
            SocketChannel socketChannel = serverSocketChannel.accept();
            if(socketChannel != null){
                System.out.println("此时有客户端来连接了");
              	// 将服务端内部获取的客户端通道设置为非阻塞的
                socketChannel.configureBlocking(false);
                //获取客户端传递过来的数据,并把数据放在byteBuffer1这个缓冲区中
                ByteBuffer byteBuffer1 = ByteBuffer.allocate(1024);
                //socketChannel.read(byteBuffer1);
                int len;
                //针对于缓冲区来讲
                    //如果 从添加数据 ----> 获取数据 flip
                    //如果 从获取数据 ----> 添加数据 clear
                while((len = socketChannel.read(byteBuffer1)) > 0){
                    System.out.println("服务端接收发送数据");
                    byteBuffer1.flip();
                    System.out.println(new String(byteBuffer1.array(),0,len));
                    byteBuffer1.clear();
                }

                System.out.println("接收数据完毕,准备开始往客户端回写数据");

                ByteBuffer byteBuffer2 = ByteBuffer.wrap("哎哟,真疼啊!!!".getBytes());
                socketChannel.write(byteBuffer2);

                socketChannel.close();
            }
        }
    }
}
4.12 NIO选择器
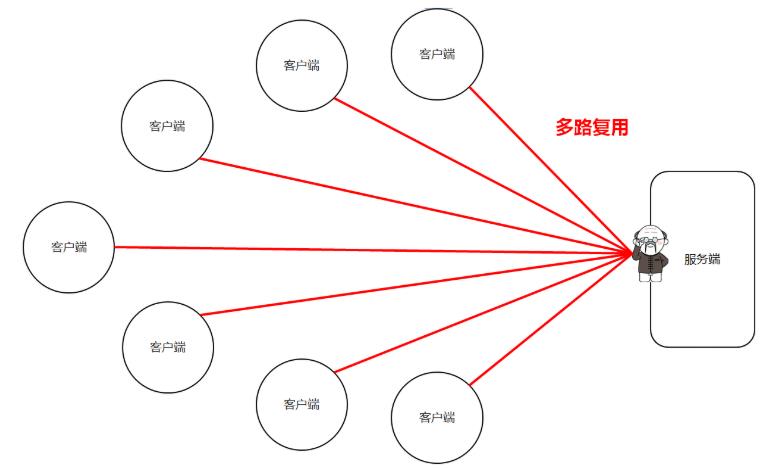
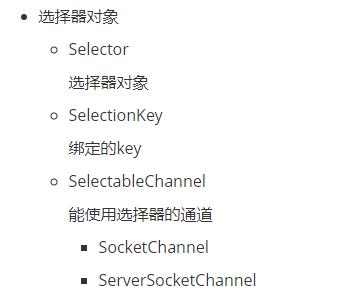
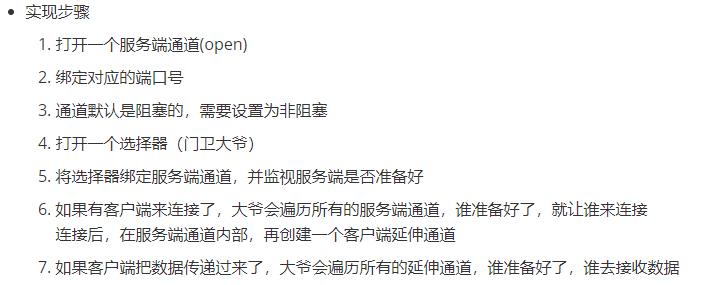
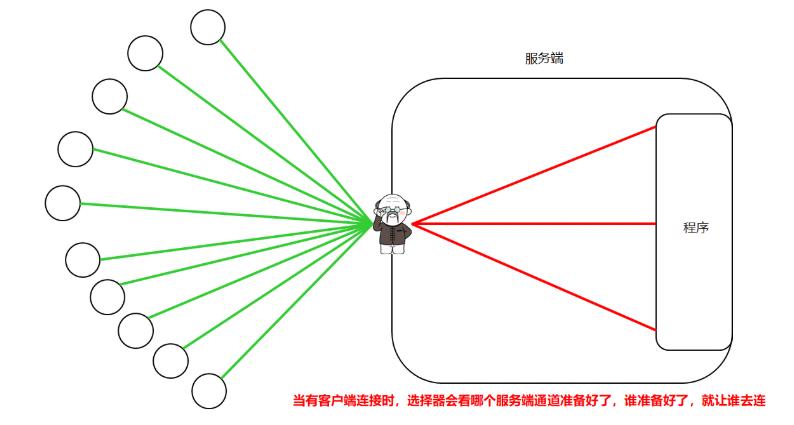
选择器可以监视通道的状态,多路复用
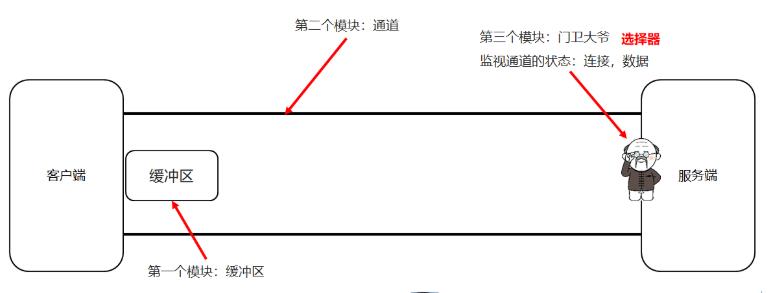
4.13 NIO选择器改写服务端
// 客户端
public class Clinet {
    public static void main(String[] args) throws IOException {
        SocketChannel socketChannel = SocketChannel.open();

        socketChannel.connect(new InetSocketAddress("127.0.0.1",10000));

        ByteBuffer byteBuffer1 = ByteBuffer.wrap("吃俺老孙一棒棒".getBytes());
        socketChannel.write(byteBuffer1);

        System.out.println("数据已经写给服务器");

        ByteBuffer byteBuffer2 = ByteBuffer.allocate(1024);
        int len;
        while((len = socketChannel.read(byteBuffer2)) != -1){
            System.out.println("客户端接收回写数据");
            byteBuffer2.flip();
            System.out.println(new String(byteBuffer2.array(),0以上是关于网络编程--03NIO的主要内容,如果未能解决你的问题,请参考以下文章