SpringBoot 2.x + Layui + UEditor 实现富文本编辑器
Posted Calvin Chan
tags:
篇首语:本文由小常识网(cha138.com)小编为大家整理,主要介绍了SpringBoot 2.x + Layui + UEditor 实现富文本编辑器相关的知识,希望对你有一定的参考价值。
SpringBoot 2.x + Layui + UEditor 实现富文本编辑器,实现图片/文件/视频上传回显
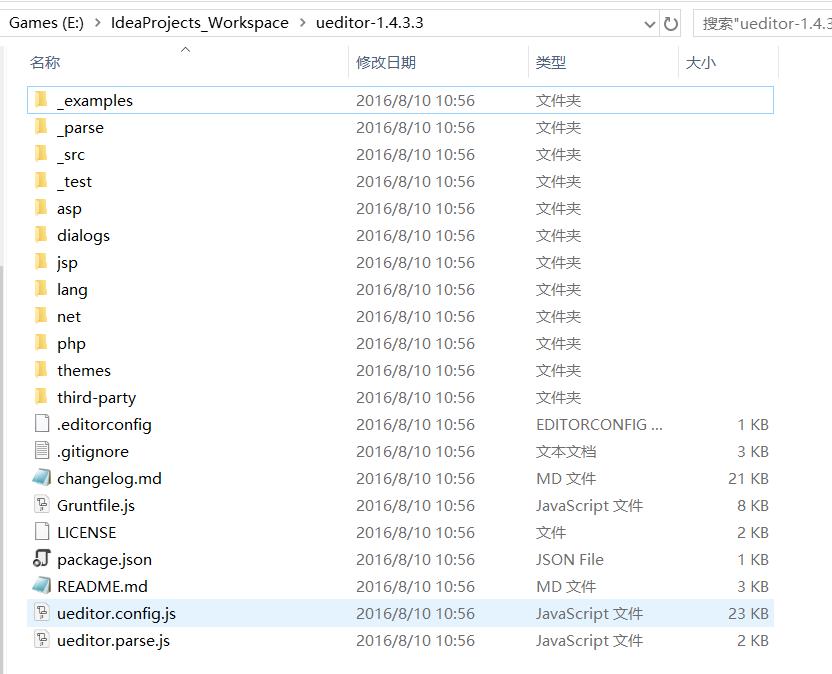
一、下载 UEditor 源码
UEditor 官网: UEditor 官网
UEditor GitHub 地址:UEditor GitHub 地址
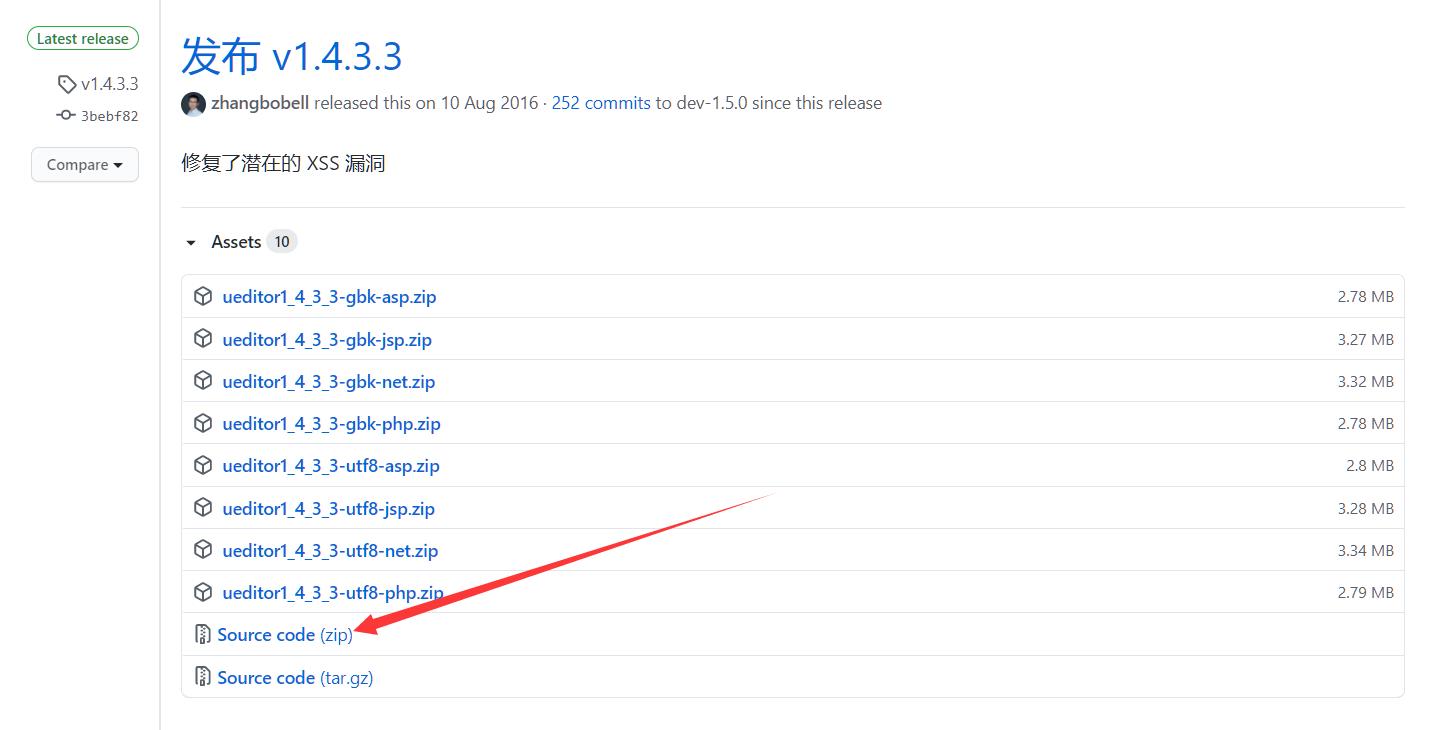
下载最新版的源码:
二、使用 grunt 打包源代码
node.js 和 grunt 的安装和使用请自行百度
打包详细教程见 UEditor 官网:使用grunt打包源代码
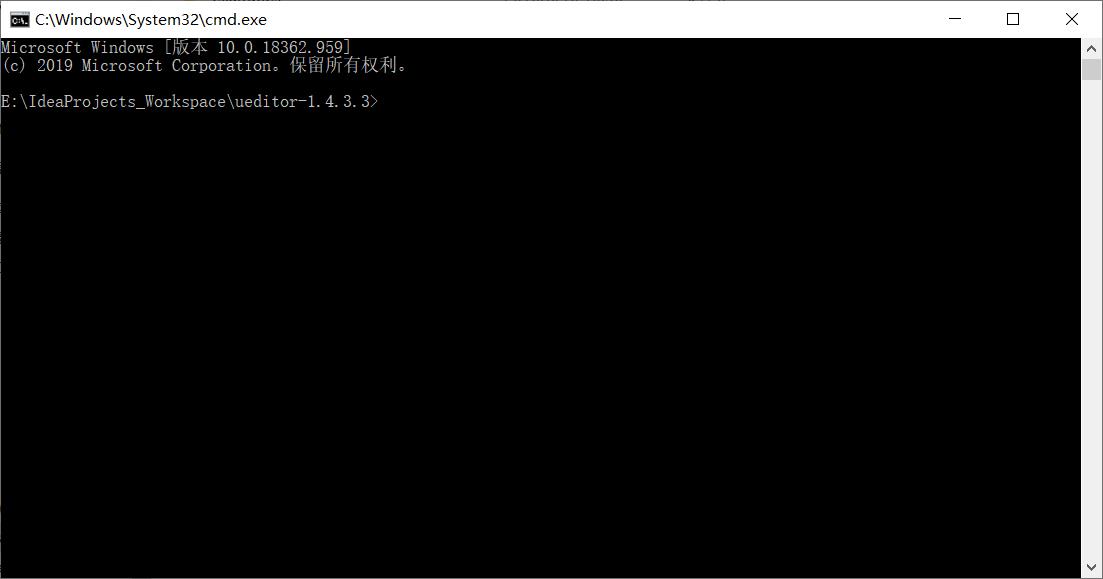
1、在 UEditor 源码根目录打开命令提示符窗口
2、安装打包需要的grunt插件
在命令提示符输入命令:npm install
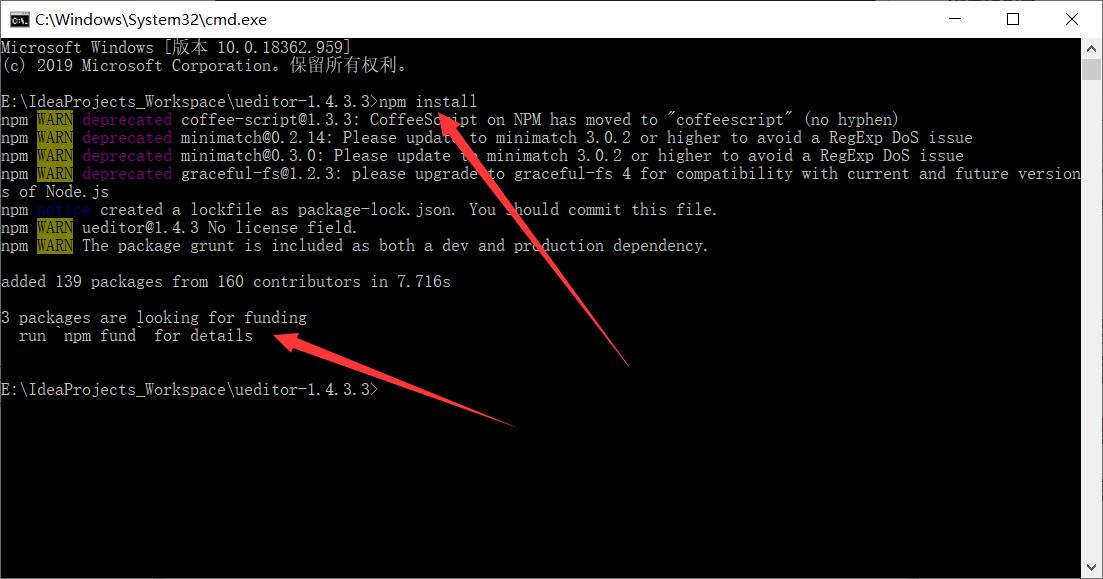
这个命令会根据 package.json 文件,安装打包需要的 grunt 和 grunt 插件,安装结束后,会在 ueditor 目录下出现一个 node_modules 文件夹。
3、执行打包命令
在命令提示符输入命令:grunt --encode=utf8 --server=jsp
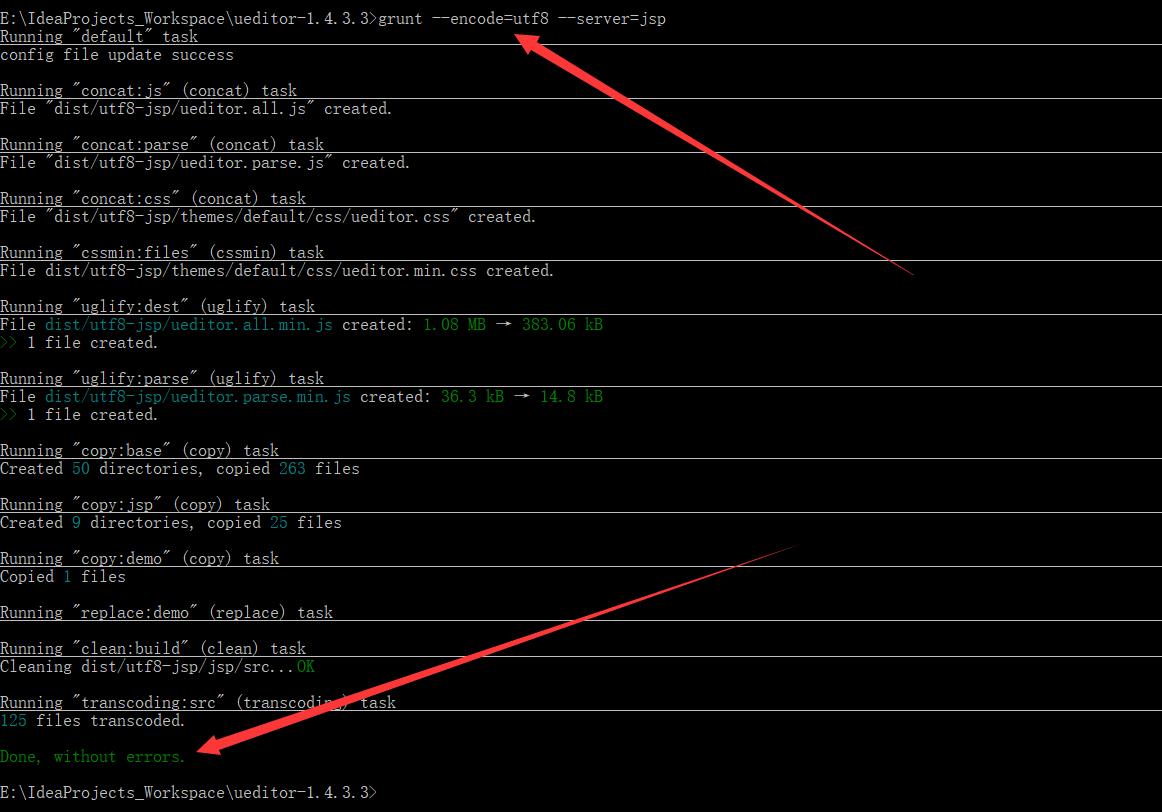
出现 Done, without errors. 时,打包完成。

这个命令会根据 Gruntfile.js 执行打包的任务,运行过程需要 java 环境 支持。
命令完成后,ueditor 目录下会出现 dist/ 目录,里面有你要的打包好的 ueditor 文件夹,默认是 utf8-jsp 文件夹。

执行打包grunt命令时,可以传入编码和后台语言的参数:
1、支持两种编码指定:–encode参数
- utf8 (默认编码)
- gbk
2、提供四种后台语言支持:–server参数
- php (默认语言)
- jsp
- net (代表.net后台)
- asp
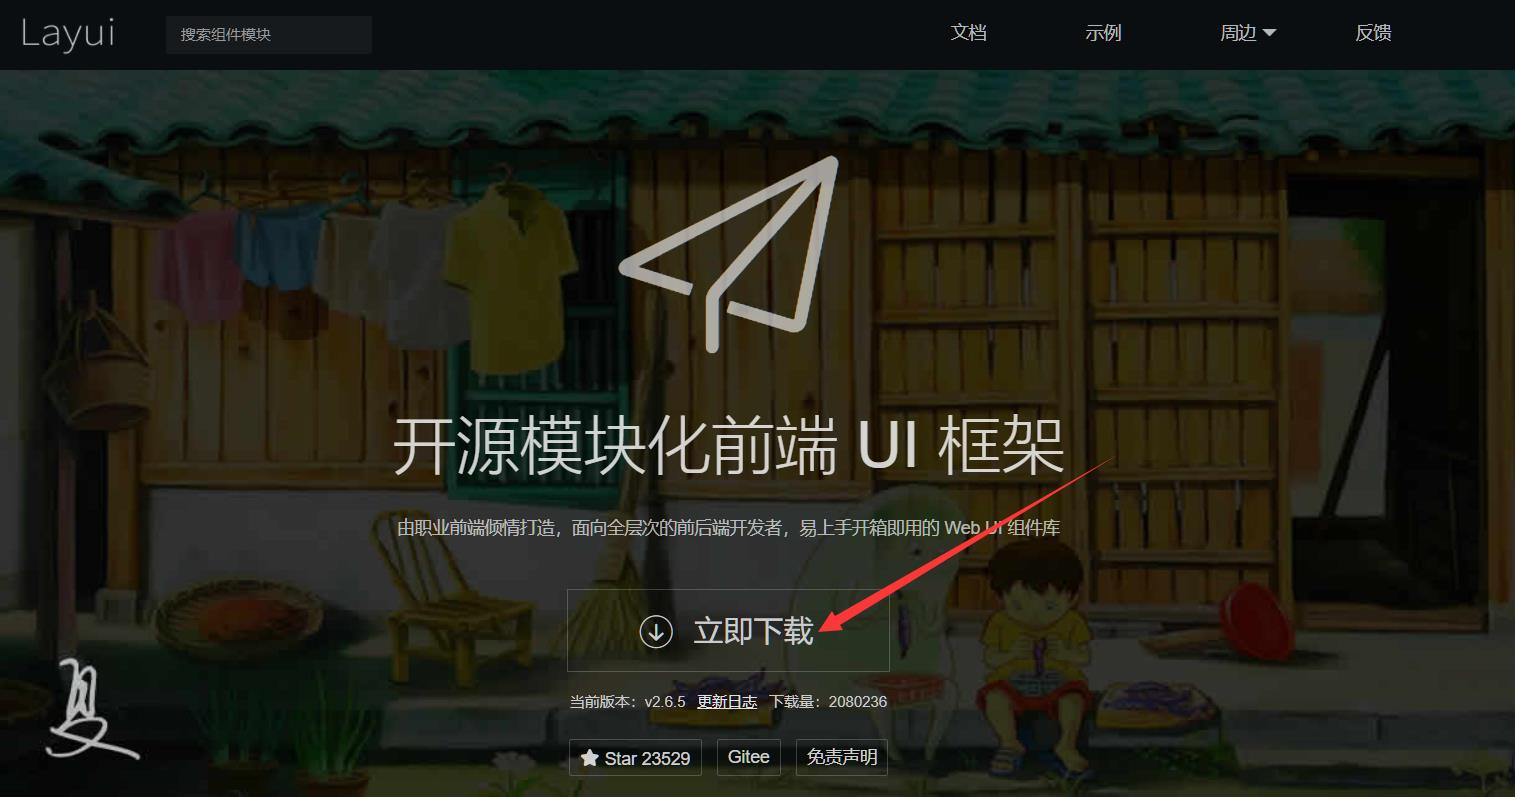
三、下载 Layui
Layui 官网: Layui 官网
四、配置 SpringBoot 项目
1、依赖
	<dependencies>
        <!-- ueditor 依赖 -->
        <dependency>
            <groupId>commons-fileupload</groupId>
            <artifactId>commons-fileupload</artifactId>
            <version>1.3.1</version>
        </dependency>
        <dependency>
            <groupId>commons-io</groupId>
            <artifactId>commons-io</artifactId>
            <version>2.4</version>
        </dependency>
        <dependency>
            <groupId>commons-codec</groupId>
            <artifactId>commons-codec</artifactId>
            <version>1.9</version>
        </dependency>

        <!--阿里 FastJson依赖-->
        <dependency>
            <groupId>com.alibaba</groupId>
            <artifactId>fastjson</artifactId>
            <version>1.2.39</version>
        </dependency>

        <dependency>
            <groupId>org.springframework.boot</groupId>
            <artifactId>spring-boot-starter-thymeleaf</artifactId>
        </dependency>
        <dependency>
            <groupId>org.springframework.boot</groupId>
            <artifactId>spring-boot-starter-web</artifactId>
        </dependency>
        <dependency>
            <groupId>org.mybatis.spring.boot</groupId>
            <artifactId>mybatis-spring-boot-starter</artifactId>
            <version>2.1.4</version>
        </dependency>

        <dependency>
            <groupId>org.springframework.boot</groupId>
            <artifactId>spring-boot-devtools</artifactId>
            <scope>runtime</scope>
            <optional>true</optional>
        </dependency>
        <dependency>
            <groupId>mysql</groupId>
            <artifactId>mysql-connector-java</artifactId>
            <scope>runtime</scope>
        </dependency>
        <dependency>
            <groupId>org.projectlombok</groupId>
            <artifactId>lombok</artifactId>
            <optional>true</optional>
        </dependency>
        <dependency>
            <groupId>org.springframework.boot</groupId>
            <artifactId>spring-boot-starter-test</artifactId>
            <scope>test</scope>
        </dependency>
    </dependencies>
2、目录结构
1、把 UEditor 打包生成的 dist/utf8-jsp 文件夹复制到 static 文件夹下,并把 utf8-jsp 文件夹重命名为 ueditor
2、把 layui 文件夹复制到 static 文件夹下
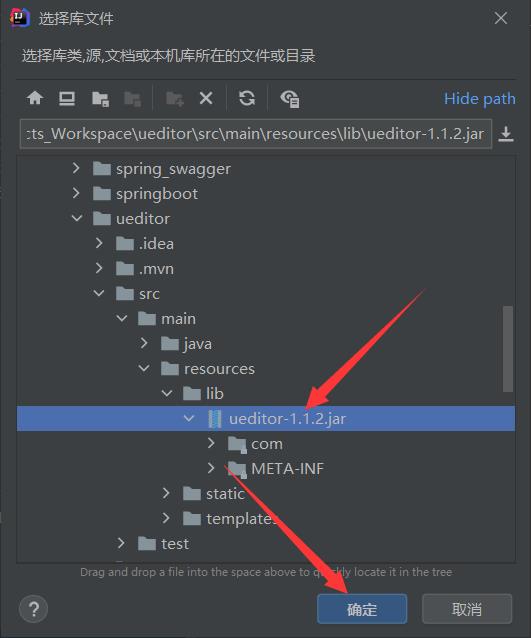
3、在 resources 文件夹下新建文件夹 lib,把 ueditor\\jsp\\lib 下的 ueditor-1.1.2.jar 文件复制到 static/lib 文件夹下(其他四个 jar 已在 Maven 添加依赖)
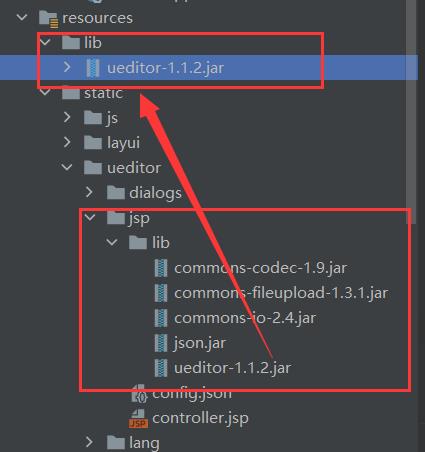
4、在项目中添加 jar 包
在 project structure 中引入该 lib
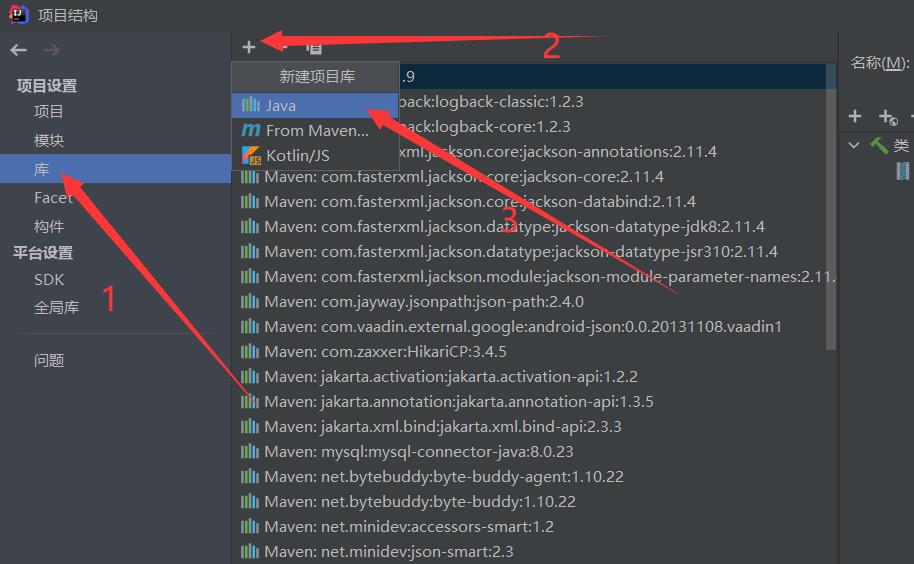
引入 jar 包

3、使用 UEditor
①、创建 ueditor.html 文件
<!DOCTYPE html>
<html lang="en">
<head>
    <meta charset="UTF-8">
    <link rel="stylesheet" href="/layui/css/layui.css">
    <script src="/layui/layui.js"></script>
    <script src="/js/jquery-3.3.1.min.js"></script>

    <script src="/ueditor/third-party/jquery-1.10.2.js"></script>
    <!-- 配置文件 -->
    <script src="/ueditor/ueditor.config.js"></script>
    <!-- 编辑器源码文件 -->
    <script src="/ueditor/ueditor.all.js"></script>
    <script src="/ueditor/lang/zh-cn/zh-cn.js"></script>
    <script src="/ueditor/ueditor.parse.js"></script>

</head>
<body>

<div align="center">
    <br><br><br><br>
    <textarea id="faq_edit" type="text" style="height: 500px; width: 1000px;"></textarea>
</div>


    <script type="application/javascript">

        layui.define(function () {
            let ue = UE.getEditor('faq_edit');

        });
    </script>

</body>
</html>
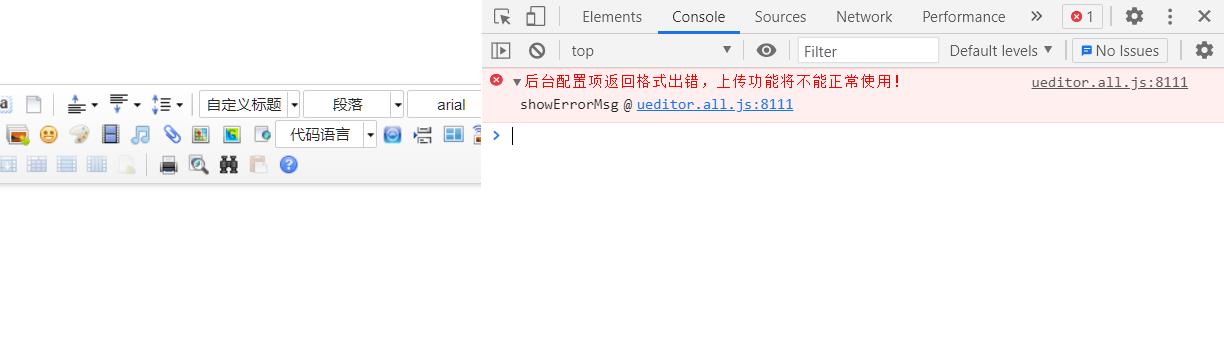
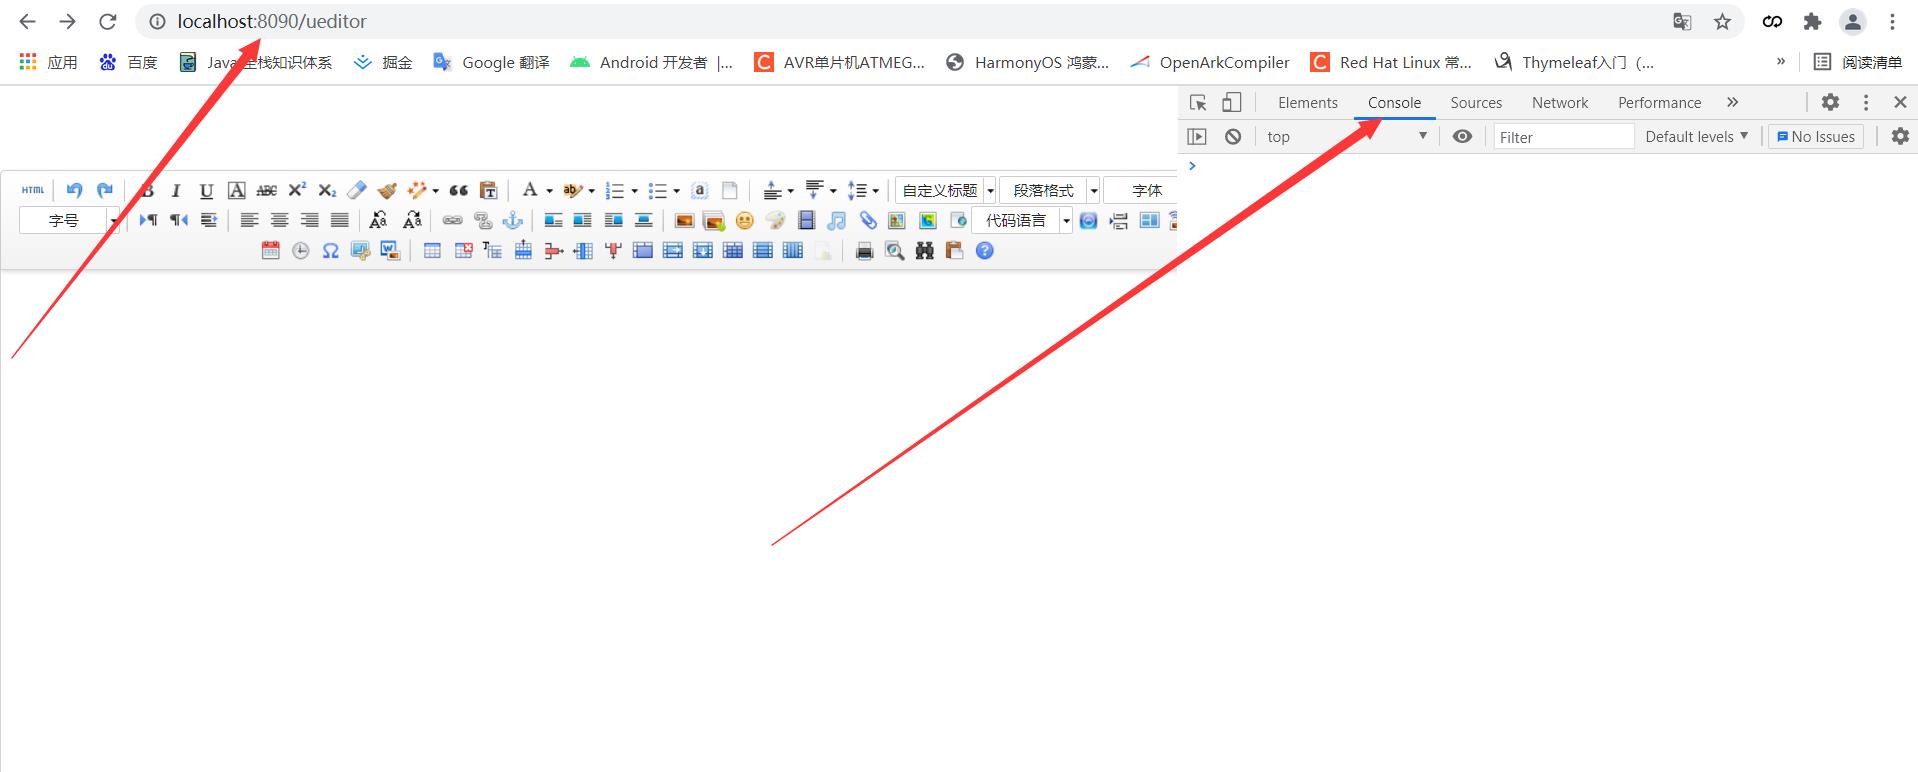
②、在浏览器打开 ueditor.html
如果看到了下面这样的编辑器,恭喜你,初次部署成功(这里用了 Controller )!
浏览器地址: http://localhost:8090/ueditor

初次使用会提示 后台配置项返回格式出错,上传功能将不能正常使用!
五、配置后端
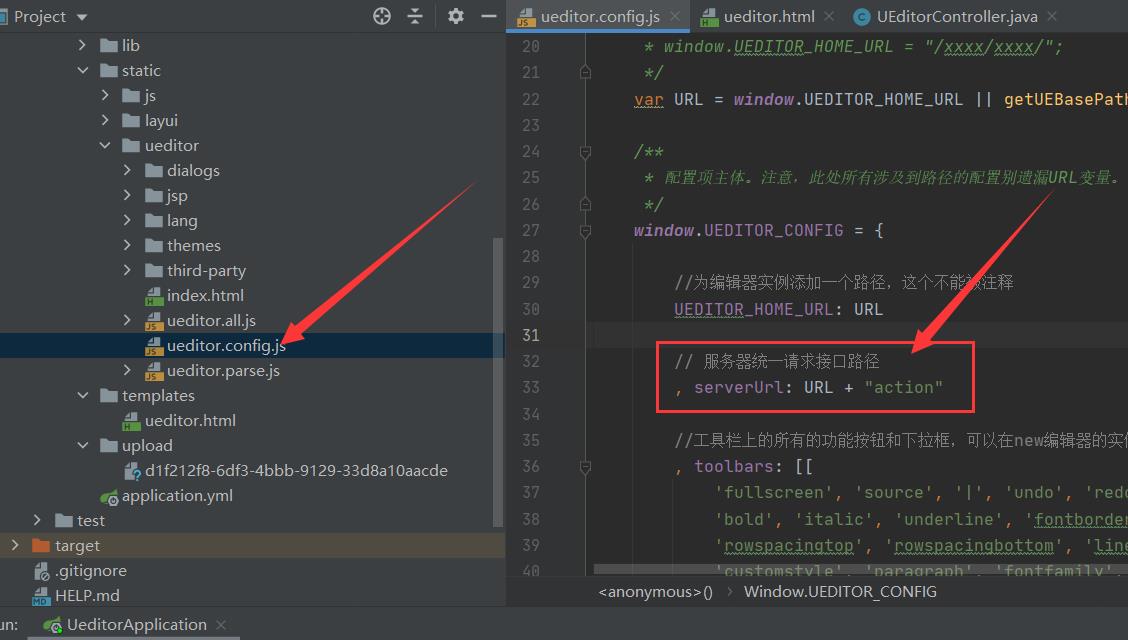
1、服务器统一请求接口路径
配置 ueditor.config.js,设置服务器统一请求接口路径
不要改动 URL,这里只改动 serverURL
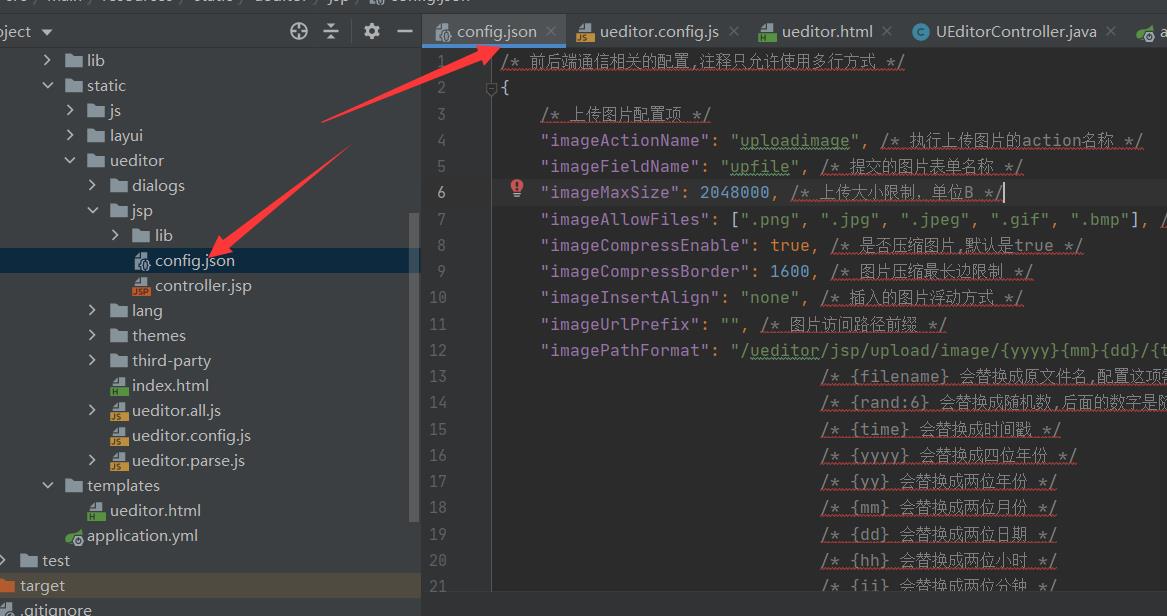
2、配置返回 JSON 包
打开 ueditor/jsp/config.json 文件,去掉注释,转化为 JSON
3、配置 UEditorController
/**
 * @author wxhntmy
 */
@RestController
public class UEditorController {

    private String config_json = "{\\n" +
            "\\t\\"imageActionName\\": \\"uploadimage\\",\\n" +
            "\\t\\"imageFieldName\\": \\"upfile\\",\\n" +
            "\\t\\"imageMaxSize\\": 2048000,\\n" +
            "\\t\\"imageAllowFiles\\": [\\".png\\", \\".jpg\\", \\".jpeg\\", \\".gif\\", \\".bmp\\"],\\n" +
            "\\t\\"imageCompressEnable\\": true,\\n" +
            "\\t\\"imageCompressBorder\\": 1600,\\n" +
            "\\t\\"imageInsertAlign\\": \\"none\\",\\n" +
            "\\t\\"imageUrlPrefix\\": \\"\\",\\n" +
            "\\t\\"imagePathFormat\\": \\"/ueditor/jsp/upload/image/{yyyy}{mm}{dd}/{time}{rand:6}\\",\\n" +
            "\\n" +
            "\\t\\"scrawlActionName\\": \\"uploadscrawl\\",\\n" +
            "\\t\\"scrawlFieldName\\": \\"upfile\\",\\n" +
            "\\t\\"scrawlPathFormat\\": \\"/ueditor/jsp/upload/image/{yyyy}{mm}{dd}/{time}{rand:6}\\",\\n" +
            "\\t\\"scrawlMaxSize\\": 2048000,\\n" +
            "\\t\\"scrawlUrlPrefix\\": \\"\\",\\n" +
            "\\t\\"scrawlInsertAlign\\": \\"none\\",\\n" +
            "\\n" +
            "\\t\\"snapscreenActionName\\": \\"uploadimage\\",\\n" +
            "\\t\\"snapscreenPathFormat\\": \\"/ueditor/jsp/upload/image/{yyyy}{mm}{dd}/{time}{rand:6}\\",\\n" +
            "\\t\\"snapscreenUrlPrefix\\": \\"\\",\\n" +
            "\\t\\"snapscreenInsertAlign\\": \\"none\\",\\n" +
            "\\n" +
            "\\t\\"catcherLocalDomain\\": [\\"127.0.0.1\\", \\"localhost\\", \\"img.baidu.com\\"],\\n" +
            "\\t\\"catcherActionName\\": \\"catchimage\\",\\n" +
            "\\t\\"catcherFieldName\\": \\"source\\",\\n" +
            "\\t\\"catcherPathFormat\\": \\"/ueditor/jsp/upload/image/{yyyy}{mm}{dd}/{time}{rand:6}\\",\\n" +
            "\\t\\"catcherUrlPrefix\\": \\"\\",\\n" +
            "\\t\\"catcherMaxSize\\": 2048000,\\n" +
            "\\t\\"catcherAllowFiles\\": [\\".png\\", \\".jpg\\", \\".jpeg\\", \\".gif\\", \\".bmp\\"],\\n" +
            "\\n" +
            "\\t\\"videoActionName\\": \\"uploadvideo\\",\\n" +
            "\\t\\"videoFieldName\\": \\"upfile\\",\\n" +
            "\\t\\"videoPathFormat\\": \\"/ueditor/jsp/upload/video/{yyyy}{mm}{dd}/{time}{rand:6}\\",\\n" +
            "\\t\\"videoUrlPrefix\\": \\"\\",\\n" +
            "\\t\\"videoMaxSize\\": 102400000,\\n" +
            "\\t\\"videoAllowFiles\\": [\\n" +
            "\\t\\t\\".flv\\", \\".swf\\", \\".mkv\\", \\".avi\\", \\".rm\\", \\".rmvb\\", \\".mpeg\\", \\".mpg\\",\\n" +
            "\\t\\t\\".ogg\\", \\".ogv\\", \\".mov\\", \\".wmv\\", \\".mp4\\", \\".webm\\", \\".mp3\\", \\".wav\\", \\".mid\\"\\n" +
            "\\t],\\n" +
            "\\n" +
            "\\t\\"fileActionName\\": \\"uploadfile\\",\\n" +
            "\\t\\"fileFieldName\\": \\"upfile\\",\\n" +
            "\\t\\"filePathFormat\\": \\"/ueditor/jsp/upload/file/{yyyy}{mm}{dd}/{time}{rand:6}\\",\\n" +
            "\\t\\"fileUrlPrefix\\": \\"\\",\\n" +
            "\\t\\"fileMaxSize\\": 51200000,\\n" +
            "\\t\\"fileAllowFiles\\": [\\n" +
            "\\t\\t\\".png\\", \\".jpg\\", \\".jpeg\\", \\".gif\\", \\".bmp\\",\\n" +
            "\\t\\t\\".flv\\", \\".swf\\", \\".mkv\\", \\".avi\\", \\".rm\\", \\".rmvb\\", \\".mpeg\\", \\".mpg\\",\\n" +
            "\\t\\t\\".ogg\\", \\".ogv\\", \\".mov\\", \\".wmv\\", \\".mp4\\", \\".webm\\", \\".mp3\\", \\".wav\\", \\".mid\\",\\n" +
            "\\t\\t\\".rar\\", \\".zip\\", \\".tar\\", \\".gz\\", \\".7z\\", \\".bz2\\", \\".cab\\", \\".iso\\",\\n" +
            "\\t\\t\\".doc\\", \\".docx\\", \\".xls\\", \\".xlsx\\", \\".ppt\\", \\".pptx\\", \\".pdf\\", \\".txt\\", \\".md\\", \\".xml\\"\\n" +
            "\\t],\\n" +
            "\\n" +
            "\\t\\"imageManagerActionName\\": \\"listimage\\",\\n" +
            "\\t\\"imageManagerListPath\\": \\"/ueditor/jsp/upload/image/\\",\\n" +
            "\\t\\"imageManagerListSize\\": 20,\\n" +
            "\\t\\"imageManagerUrlPrefix\\": \\"\\",\\n" +
            "\\t\\"imageManagerInsertAlign\\": \\"none\\",\\n" +
            "\\t\\"imageManagerAllowFiles\\": [\\".png\\", \\".jpg\\", \\".jpeg\\", \\".gif\\", \\".bmp\\"],\\n" +
            "\\n" +
            "\\t\\"fileManagerActionName\\": \\"listfile\\",\\n" +
            "\\t\\"fileManagerListPath\\": \\"/ueditor/jsp/upload/file/\\",\\n" +
            "\\t\\"fileManagerUrlPrefix\\": \\"\\",\\n" +
            "\\t\\"fileManagerListSize\\": 20,\\n" +
            "\\t\\"fileManagerAllowFiles\\": [\\n" +
            "\\t\\t\\".png\\", \\".jpg\\", \\".jpeg\\", \\".gif\\", \\".bmp\\",\\n" +
            "\\t\\t\\".flv\\", \\".swf\\", \\".mkv\\", \\".avi\\", \\".rm\\", \\".rmvb\\", \\".mpeg\\", \\".mpg\\",\\n" +
            "\\t\\t\\".ogg\\", \\".ogv\\", \\".mov\\", \\".wmv\\", \\".mp4\\", \\".webm\\", \\".mp3\\", \\".wav\\", \\".mid\\",\\n" +
            "\\t\\t\\".rar\\", \\".zip\\", \\".tar\\", \\".gz\\", \\".7z\\", \\".bz2\\", \\".cab\\", \\".iso\\",\\n" +
            "\\t\\t\\".doc\\", \\".docx\\", \\".xls\\", \\".xlsx\\", \\".ppt\\", \\".pptx\\", \\".pdf\\", \\".txt\\", \\".md\\", \\".xml\\"\\n" +
            "\\t]\\n" +
            "\\n" +
            "}";

    @RequestMapping(value = "/ueditor/jsp/action", method = {RequestMethod.GET, RequestMethod.POST} )
    public JSONObject action(@RequestParam String action){

        System.out.println("action: " + action);
        JSONObject jsonObject = JSONObject.parseObject(config_json);

        System.out.println("jsonObject: " + jsonObject.toJSONString());

        return jsonObject;
    }
}
至此,再次打开浏览器,打开 ueditor.html(http://localhost:8090/ueditor) 文件,提示 后台配置项返回格式出错,上传功能将不能正常使用! 的错误已经没有了。
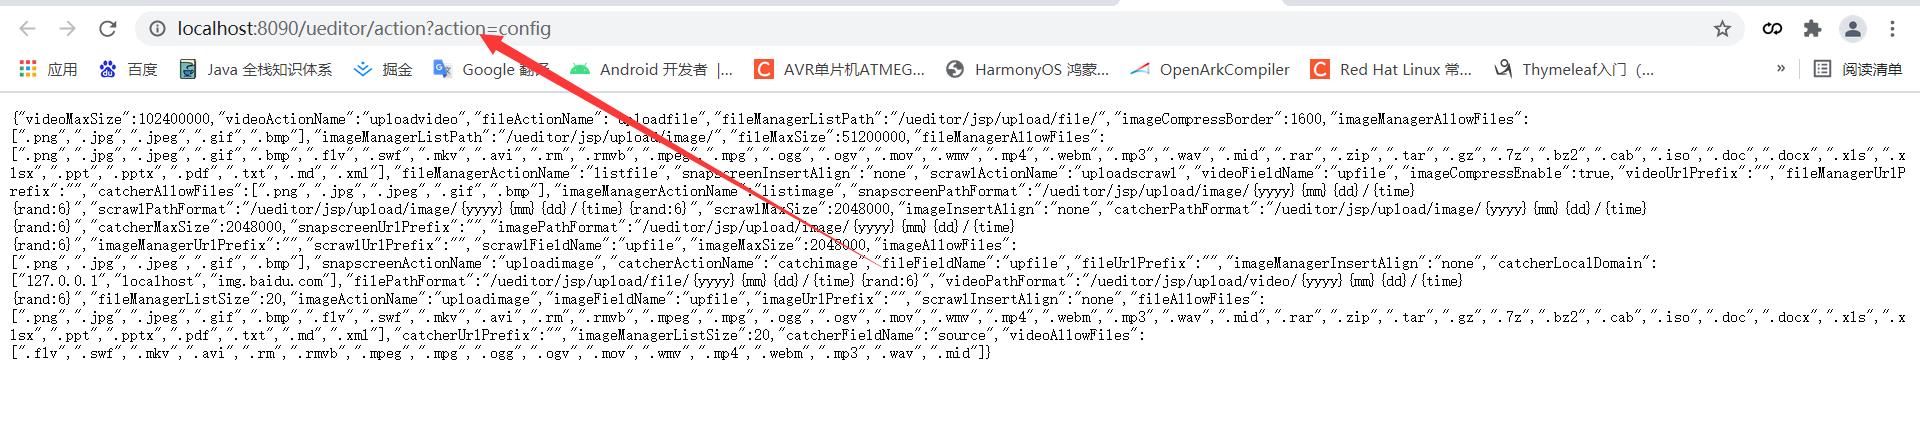
浏览器输入地址: http://localhost:8090/ueditor/action?action=config 会返回 config.json
六、配置上传路径和回调
详细教程见 UEditor 官网:后端请求规范
1、上传
重新编辑 UEditorController 的 action 方法,请求类型改为 GET
	@RequestMapping(value = "/ueditor/action", method = RequestMethod.GET )
    public Object action(@RequestParam String action){

        System.out.println("action: " + action);

        switch (action){
            //执行上传图片或截图的action名称
            case "uploadimage":
                break;
            //执行上传涂鸦的action名称
            case "uploadscrawl":
                break;
            //执行上传视频的action名称
            case "uploadvideo":
                break;
            //controller里,执行上传视频的action名称
            case "uploadfile":
                break;
            //执行抓取远程图片的action名称
            case "catchimage":
                break;
            //执行列出图片的action名称
            case "listimage":
                break;
            //执行列出文件的action名称
            case "listfile":
                break;
            default:
                break;
        }

        JSONObject jsonObject = JSONObject.parseObject(config_json);

        //System.out.println("jsonObject: " + jsonObject.toJSONString());

        return jsonObject;
    }
再写一个同样 url 的 POST 方法,用于文件上传
	/**
     * 执行单个文件上传操作
     * @param upfile 文件数据
     * @return 响应json
     */
    @RequestMapping(value = "/ueditor/action", method = RequestMethod.POST )
    public Object action_upload(@RequestParam MultipartFile upfile){

        System.out.println("upfile: " + upfile.getOriginalFilename());

        String filename = upfile.getOriginalFilename();
        String uuid = UUID.randomUUID().toString();
        boolean boole = fileOperationService.saveFile(upfile, uuid);

        Map<String, String> map = new HashMap<>();
        if (boole) {
            map.put("state", "SUCCESS");
            map.put("url","/ueditor/download?uuid="+uuid);
            map.put("title", filename);
            map.put("original", filename);
        } else {
            map.put("state", "FAIL");
            map.put("url","");
            map.put("title", filename);
            map.put("original", filename);
        }
        return map;
    }
2、文件操作 Service
/**
     * 保存文件
     *
     * @param file 文件
     * @param uuid uuid
     * @return 保存成功返回true
     */
    @Override
    public boolean saveFile(MultipartFile file, String uuid) {
        try {
            File path = path(file.getContentType());
            String filename = file.getOriginalFilename();
            ImgFile fileEntity = new ImgFile();
            fileEntity.setFileName(filename);
            fileEntity.setUuid(uuid);
            String storeaddress = path.getAbsolutePath();
            fileEntity.setStoreaddress(storeaddress);
            File saveFile = new File以上是关于SpringBoot 2.x + Layui + UEditor 实现富文本编辑器的主要内容,如果未能解决你的问题,请参考以下文章