给ElasticSearch和Kibana设置Https
Posted 仿真地球
tags:
篇首语:本文由小常识网(cha138.com)小编为大家整理,主要介绍了给ElasticSearch和Kibana设置Https相关的知识,希望对你有一定的参考价值。
本文一共有两部分,第一部分是给ElasticSearch和Kibana设置Https,第二部分是javascript代码中如何使用Rest接口调用
一、给ElasticSearch和Kibana设置Https
重置默认密码,保持ES启动状态,重新打开一个CMD窗口
C:\elasticsearch-7.6.1\bin>elasticsearch-setup-passwords interactiveInitiating the setup of passwords for reserved users elastic,apm_system,kibana,logstash_system,beats_system,remote_monitoring_user.You will be prompted to enter passwords as the process progresses.Please confirm that you would like to continue [y/N]yEnter password for [elastic]:Reenter password for [elastic]:Enter password for [apm_system]:Reenter password for [apm_system]:Enter password for [kibana]:Reenter password for [kibana]:Enter password for [logstash_system]:Reenter password for [logstash_system]:Enter password for [beats_system]:Reenter password for [beats_system]:Enter password for [remote_monitoring_user]:Reenter password for [remote_monitoring_user]:Changed password for user [apm_system]Changed password for user [kibana]Changed password for user [logstash_system]Changed password for user [beats_system]Changed password for user [remote_monitoring_user]Changed password for user [elastic]
生成证书:
C:\elasticsearch\elasticsearch-7.6.1\bin>elasticsearch-certutil ca --days 3650 --keysize 4096 \ --out elastic-stack-ca0425.zip --pemThis tool assists you in the generation of X.509 certificates and certificatesigning requests for use with SSL/TLS in the Elastic stack.The 'ca' mode generates a new 'certificate authority'This will create a new X.509 certificate and private key that can be usedto sign certificate when running in 'cert' mode.Use the 'ca-dn' option if you wish to configure the 'distinguished name'of the certificate authorityBy default the 'ca' mode produces a single PKCS#12 output file which holds:* The CA certificate* The CA's private keyIf you elect to generate PEM format certificates (the -pem option), then the output willbe a zip file containing individual files for the CA certificate and private key
解压elastic-stack-ca0425.zip,得到ca.crt和ca.key,放到config/ca文件夹下。然后运行:
C:\elasticsearch\elasticsearch-7.6.1\bin>elasticsearch-certutil cert --ca-key C:\elasticsearch\elasticsearch-7.6.1\elastic-stack-ca0425\ca\ca.key --ca-cert C:\elasticsearch\elasticsearch-7.6.1\elastic-stack-ca0425\ca\ca.crt \ --days 3650 --keysize 4096 \ --out C:\elasticsearch\elasticsearch-7.6.1\elastic-stack-ca0425\ca\kibana-cert.zip -pemThis tool assists you in the generation of X.509 certificates and certificatesigning requests for use with SSL/TLS in the Elastic stack.The 'cert' mode generates X.509 certificate and private keys.* By default, this generates a single certificate and key for useon a single instance.* The '-multiple' option will prompt you to enter details for multipleinstances and will generate a certificate and key for each one* The '-in' option allows for the certificate generation to be automated bydescribingthe details of each instance in a YAML file* An instance is any piece of the Elastic Stack that requires an SSL certificate.Depending on your configuration, Elasticsearch, Logstash, Kibana, and Beatsmay all require a certificate and private key.* The minimum required value for each instance is a name. This can simply bethehostname, which will be used as the Common Name of the certificate. A fulldistinguished name may also be used.* A filename value may be required for each instance. This is necessary whenthename would result in an invalid file or directory name. The name providedhereis used as the directory name (within the zip) and the prefix for the keyandcertificate files. The filename is required if you are prompted and the nameis not displayed in the prompt.* IP addresses and DNS names are optional. Multiple values can be specifiedas acomma separated string. If no IP addresses or DNS names are provided, youmaydisable hostname verification in your SSL configuration.* All certificates generated by this tool will be signed by a certificate authority (CA).* The tool can automatically generate a new CA for you, or you can provide your own with the-ca or -ca-cert command line options.By default the 'cert' mode produces a single PKCS#12 output file which holds:* The instance certificate* The private key for the instance certificate* The CA certificateIf you specify any of the following options:* -pem (PEM formatted output)* -keep-ca-key (retain generated CA key)* -multiple (generate multiple certificates)* -in (generate certificates from an input file)then the output will be be a zip file containing individual certificate/key filesCertificates written to C:\elasticsearch\elasticsearch-7.6.1\elastic-stack-ca0425\ca\kibana-cert.zipThis file should be properly secured as it contains the private key foryour instance.After unzipping the file, there will be a directory for each instance.Each instance has a certificate and private key.For each Elastic product that you wish to configure, you should copythe certificate, key, and CA certificate to the relevant configuration directoryand then follow the SSL configuration instructions in the product guide.For client applications, you may only need to copy the CA certificate andconfigure the client to trust this certificate.
解压kibana-cert.zip,得到instance.crt和instance.key,放到config/ca文件夹下。
ES配置文件:
# ---------------------------------- Network -----------------------------------## Set the bind address to a specific IP (IPv4 or IPv6):#network.host: 192.168.0.11## Set a custom port for HTTP:#http.port: 9200## For more information, consult the network module documentation.## --------------------------------- Discovery ----------------------------------## Pass an initial list of hosts to perform discovery when this node is started:# The default list of hosts is ["127.0.0.1", "[::1]"]##discovery.seed_hosts: ["117.73.10.180", "127.0.0.1"]## Bootstrap the cluster using an initial set of master-eligible nodes:#cluster.initial_master_nodes: ["node-1"]## For more information, consult the discovery and cluster formation module documentation.## ---------------------------------- Gateway -----------------------------------## Block initial recovery after a full cluster restart until N nodes are started:##gateway.recover_after_nodes: 3## For more information, consult the gateway module documentation.## ---------------------------------- Various -----------------------------------## Require explicit names when deleting indices:##action.destructive_requires_name: truehttp.cors.enabled: truehttp.cors.allow-origin: "*"xpack.security.enabled: truexpack.security.http.ssl.enabled: truexpack.security.transport.ssl.enabled: truexpack.security.transport.ssl.verification_mode: certificate#xpack.security.http.ssl.keystore.path: elastic-certificates.p12#xpack.security.http.ssl.truststore.path: elastic-certificates.p12xpack.security.http.ssl.key: ca/ca.keyxpack.security.http.ssl.certificate: ca/ca.crtxpack.security.http.ssl.certificate_authorities: ca/instance.crt#xpack.security.transport.ssl.keystore.path: elastic-certificates.p12#xpack.security.transport.ssl.truststore.path: elastic-certificates.p12xpack.security.transport.ssl.key: ca/ca.keyxpack.security.transport.ssl.certificate: ca/ca.crtxpack.security.transport.ssl.certificate_authorities: ca/instance.crt
kibana配置文件:
# Specifies the address to which the Kibana server will bind. IP addresses and host names are both valid values.# The default is 'localhost', which usually means remote machines will not be able to connect.# To allow connections from remote users, set this parameter to a non-loopback address.server.host: "0.0.0.0"# Enables you to specify a path to mount Kibana at if you are running behind a proxy.# Use the `server.rewriteBasePath` setting to tell Kibana if it should remove the basePath# from requests it receives, and to prevent a deprecation warning at startup.# This setting cannot end in a slash.#server.basePath: ""# Specifies whether Kibana should rewrite requests that are prefixed with# `server.basePath` or require that they are rewritten by your reverse proxy.# This setting was effectively always `false` before Kibana 6.3 and will# default to `true` starting in Kibana 7.0.#server.rewriteBasePath: false# The maximum payload size in bytes for incoming server requests.#server.maxPayloadBytes: 1048576# The Kibana server's name. This is used for display purposes.#server.name: "your-hostname"# The URLs of the Elasticsearch instances to use for all your queries.elasticsearch.hosts: ["https://192.168.0.11:9200"]# When this setting's value is true Kibana uses the hostname specified in the server.host# setting. When the value of this setting is false, Kibana uses the hostname of the host# that connects to this Kibana instance.#elasticsearch.preserveHost: true# Kibana uses an index in Elasticsearch to store saved searches, visualizations and# dashboards. Kibana creates a new index if the index doesn't already exist.#kibana.index: ".kibana"# The default application to load.#kibana.defaultAppId: "home"# If your Elasticsearch is protected with basic authentication, these settings provide# the username and password that the Kibana server uses to perform maintenance on the Kibana# index at startup. Your Kibana users still need to authenticate with Elasticsearch, which# is proxied through the Kibana server.elasticsearch.username: "kibana"elasticsearch.password: "123456a?"# Enables SSL and paths to the PEM-format SSL certificate and SSL key files, respectively.# These settings enable SSL for outgoing requests from the Kibana server to the browser.server.ssl.enabled: trueserver.ssl.certificate: C:/elasticsearch/elasticsearch-7.6.1/config/ca/instance.crtserver.ssl.key: C:/elasticsearch/elasticsearch-7.6.1/config/ca/instance.key# Optional settings that provide the paths to the PEM-format SSL certificate and key files.# These files are used to verify the identity of Kibana to Elasticsearch and are required when# xpack.security.http.ssl.client_authentication in Elasticsearch is set to required.#elasticsearch.ssl.certificate: /path/to/your/client.crt#elasticsearch.ssl.key: /path/to/your/client.key# Optional setting that enables you to specify a path to the PEM file for the certificate# authority for your Elasticsearch instance.elasticsearch.ssl.certificateAuthorities: [ "C:/elasticsearch/elasticsearch-7.6.1/config/ca/ca.crt" ]# To disregard the validity of SSL certificates, change this setting's value to 'none'.elasticsearch.ssl.verificationMode: certificate
这么配置用户名密码:
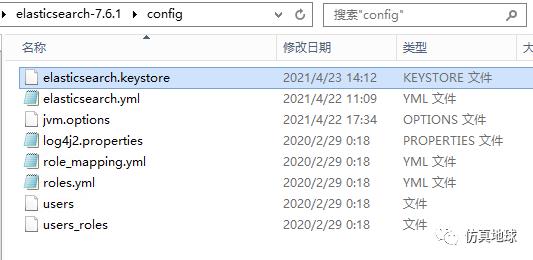
C:\elasticsearch-7.6.1\bin>elasticsearch-keystore add xpack.security.transport.ssl.keystore.secure_passwordEnter value for xpack.security.transport.ssl.keystore.secure_password:
C:\elasticsearch-7.6.1\bin>elasticsearch-keystore add xpack.security.transport.ssl.truststore.secure_passwordEnter value for xpack.security.transport.ssl.truststore.secure_password:
C:\kibana-7.6.1-windows-x86_64\bin>kibana-keystore.bat createCreated Kibana keystore in C:\kibana-7.6.1-windows-x86_64\data\kibana.keystoreC:\kibana-7.6.1-windows-x86_64\bin>kibana-keystore.bat add elasticsearch.usernameEnter value for elasticsearch.username: kibanaC:\kibana-7.6.1-windows-x86_64\bin>kibana-keystore.bat add elasticsearch.passwordEnter value for elasticsearch.password: ********
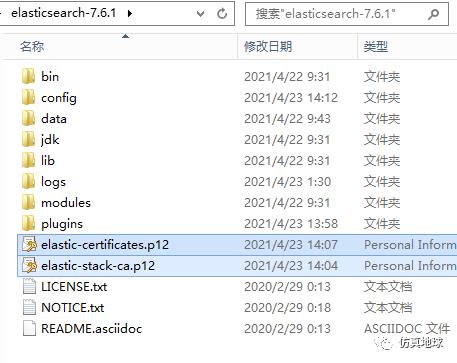
p12文件只能配置es的https,此部分可以忽略
C:\elasticsearch-7.6.1\bin>elasticsearch-certutil.bat caThis tool assists you in the generation of X.509 certificates and certificatesigning requests for use with SSL/TLS in the Elastic stack.The 'ca' mode generates a new 'certificate authority'This will create a new X.509 certificate and private key that can be usedto sign certificate when running in 'cert' mode.Use the 'ca-dn' option if you wish to configure the 'distinguished name'of the certificate authorityBy default the 'ca' mode produces a single PKCS#12 output file which holds:* The CA certificate* The CA's private keyIf you elect to generate PEM format certificates (the -pem option), then the output willbe a zip file containing individual files for the CA certificate and private keyPlease enter the desired output file [elastic-stack-ca.p12]:Enter password for elastic-stack-ca.p12 :
C:\elasticsearch-7.6.1\bin>elasticsearch-certutil cert --ca elastic-stack-ca.p12This tool assists you in the generation of X.509 certificates and certificatesigning requests for use with SSL/TLS in the Elastic stack.The 'cert' mode generates X.509 certificate and private keys.* By default, this generates a single certificate and key for useon a single instance.* The '-multiple' option will prompt you to enter details for multipleinstances and will generate a certificate and key for each one* The '-in' option allows for the certificate generation to be automated bydescribingthe details of each instance in a YAML file* An instance is any piece of the Elastic Stack that requires an SSL certificate.Depending on your configuration, Elasticsearch, Logstash, Kibana, and Beatsmay all require a certificate and private key.* The minimum required value for each instance is a name. This can simply bethehostname, which will be used as the Common Name of the certificate. A fulldistinguished name may also be used.* A filename value may be required for each instance. This is necessary whenthename would result in an invalid file or directory name. The name providedhereis used as the directory name (within the zip) and the prefix for the keyandcertificate files. The filename is required if you are prompted and the nameis not displayed in the prompt.* IP addresses and DNS names are optional. Multiple values can be specifiedas acomma separated string. If no IP addresses or DNS names are provided, youmaydisable hostname verification in your SSL configuration.* All certificates generated by this tool will be signed by a certificate authority (CA).* The tool can automatically generate a new CA for you, or you can provide your own with the-ca or -ca-cert command line options.By default the 'cert' mode produces a single PKCS#12 output file which holds:* The instance certificate* The private key for the instance certificate* The CA certificateIf you specify any of the following options:* -pem (PEM formatted output)* -keep-ca-key (retain generated CA key)* -multiple (generate multiple certificates)* -in (generate certificates from an input file)then the output will be be a zip file containing individual certificate/key filesEnter password for CA (elastic-stack-ca.p12) :Please enter the desired output file [elastic-certificates.p12]:Enter password for elastic-certificates.p12 :Certificates written to C:\elasticsearch-7.6.1\elastic-certificates.p12This file should be properly secured as it contains the private key foryour instance.This file is a self contained file and can be copied and used 'as is'For each Elastic product that you wish to configure, you should copythis '.p12' file to the relevant configuration directoryand then follow the SSL configuration instructions in the product guide.For client applications, you may only need to copy the CA certificate andconfigure the client to trust this certificate.


xpack.security.enabled: truexpack.security.transport.ssl.enabled: truexpack.security.transport.ssl.verification_mode: certificatexpack.security.transport.ssl.keystore.path: elastic-certificates.p12xpack.security.transport.ssl.truststore.path: elastic-certificates.p12
浏览器输入http://117.73.10.180:9200/
键入用户名elastic和设置的密码,出现一下内容说明成功
{"name": "GIS","cluster_name": "elasticsearch","cluster_uuid": "tQOZlhf-Qh2gvoBg3neeqw","version": {"number": "7.6.1","build_flavor": "default","build_type": "zip","build_hash": "aa751e09be0a5072e8570670309b1f12348f023b","build_date": "2020-02-29T00:15:25.529771Z","build_snapshot": false,"lucene_version": "8.4.0","minimum_wire_compatibility_version": "6.8.0","minimum_index_compatibility_version": "6.0.0-beta1"},"tagline": "You Know, for Search"}
二、javascript代码中如何使用Rest接口调用
1、创建key
在Kibana的DEV工具输入命令
GET /_security/api_key{"name":"apikey"}
或者用CURL工具
curl -H "Content-Type: application/json" --user elastic:密码 -X POST --data '{"name":"apikey"}' "https://117.73.10.180:9200/_security/api_key" -k得到
{"id": "HN06CHkBwLLyPHyDxZsF","name": "myname","expiration": 1934700739815,"api_key": "Hza_VNdzTBKiBevdOx6_Pg"}
2、生成ApiKey
用Linux系统运行以下语句得到ApiKey( id和api_key用英文冒号隔开)
echo -n "HN06CHkBwLLyPHyDxZsF:Hza_VNdzTBKiBevdOx6_Pg"| base64
得到ApiKey如下
SE4wNkNIa0J3TEx5UEh5RHhac0Y6SHphX1ZOZHpUQktpQmV2ZE94Nl9QZw==3、Javascript代码配置ApiKey
在headers中添加Authorization,“ApiKey”+空格+生成的ApiKey
let params = {query: {bool: {must: [{multi_match: {query: keywords,type: "cross_fields",fields: ["*"]}}]}},highlight: {pre_tags: ['<em class=\'searchhighlight\'>'],post_tags: ['</em>'],fields: {name: {}}}}this.$axios.post( baseUrl_es + '/_search', params, {headers: {'Content-Type': 'application/json','Authorization': 'ApiKey SE4wNkNIa0J3TEx5UEh5RHhac0Y6SHphX1ZOZHpUQktpQmV2ZE94Nl9QZw=='}}).then(res => {if (res.data.hits.total > 0 || res.data.hits.total.value > 0) {}}).catch(err => {console.log(err)})
参考:
https://www.elastic.co/guide/en/elasticsearch/reference/current/security-api-create-api-key.html
https://www.elastic.co/guide/cn/kibana/current/production.html#enabling-ssl
以上是关于给ElasticSearch和Kibana设置Https的主要内容,如果未能解决你的问题,请参考以下文章