Thanos Receive 实现 Prometheus (几乎)无状态化
Posted k8s技术圈
tags:
篇首语:本文由小常识网(cha138.com)小编为大家整理,主要介绍了Thanos Receive 实现 Prometheus (几乎)无状态化相关的知识,希望对你有一定的参考价值。
前面我们介绍主要组件的时候提到了一个 Receiver 组件,那为什么上面在使用 Thanos 的时候并没有用到呢?其实这是因为 Receiver 和 Sidecar 是 Thanos 的两种不同架构模式,之前 Receiver 只是一种实验特性,现在已经是 GA 状态了,所以非常有必要来了解下。那么 Receiver 到底有什么作用呢?和 Sidecar 的区别是什么?
关于 Thano Sidecar 模式如何使用的可以查看前面文章:《》
我们知道 Sidecar 模式是在每一个 Prometheus 的实例旁边添加一个 Sidecar 组件来上传数据,但是数据上传并不是实时的,而是每2h上传一个数据块,而且当通过 Querier 组件查询的时候,如果 Sidecar 非常多,那么势必会造成很多的资源消耗,这也是现在使用的 Sidecar 模式的弊端。
Thanos Receiver 组件可以接收来自任何 Prometheus 实例的 remote write 远程写入请求,并将数据存储在其本地 TSDB 中,同样我们也可以选择将这些 TSDB 块定期上传到对象存储中。此外 Receiver 同样也暴露了 StoreAPI 接口,这样 Thanos Querier 组件也是可以实时查询接收到的指标了,完全不需要去所有的 Sidecar 上查询最新的数据。
另外 Thanos Receiver 组件也支持多租户,通过传入请求的 HTTP Header 头 THANOS-TENANT 的值来确定租户 Prometheus 的 ID,为了防止数据库级别的数据泄露,每个租户都有一个单独的 TSDB 实例,Thanos Receiver 还通过暴露类似于 Prometheus 的 external_label 来支持多租户。
                 +
Tenant's Premise | Provider Premise
                 |
                 |            +------------------------+
                 |            |                        |
                 |  +-------->+     Object Storage     |
                 |  |         |                        |
                 |  |         +-----------+------------+
                 |  |                     ^
                 |  | S3 API              | S3 API
                 |  |                     |
                 |  |         +-----------+------------+
                 |  |         |                        |       Store API
                 |  |         |  Thanos Store Gateway  +<-----------------------+
                 |  |         |                        |                        |
                 |  |         +------------------------+                        |
                 |  |                                                           |
                 |  +---------------------+                                     |
                 |                        |                                     |
+--------------+ |            +-----------+------------+              +---------+--------+
|              | | Remote     |                        |  Store API   |                  |
|  Prometheus  +------------->+     Thanos Receiver    +<-------------+  Thanos Querier  |
|              | | Write      |                        |              |                  |
+--------------+ |            +------------------------+              +---------+--------+
                 |                                                              ^
                 |                                                              |
+--------------+ |                                                              |
|              | |                PromQL                                        |
|    User      +----------------------------------------------------------------+
|              | |
+--------------+ |
                 +
如果我们需要负载均衡和数据多副本等功能,则可以将 Thanos Receiver 的多个实例作为单个 hash 的一部分来运行,每个 Receiver 在 hashring 中的位置决定了哪些时间序列被哪个 Receiver 接收和存储。下面是一个 hashring 的配置文件示例:
[
   {
       "hashring": "tenant-a",
       "endpoints": ["tenant-a-1.metrics.local:19291/api/v1/receive", "tenant-a-2.metrics.local:19291/api/v1/receive"],
       "tenants": ["tenant-a"]
   },
   {
       "hashring": "tenants-b-c",
       "endpoints": ["tenant-b-c-1.metrics.local:19291/api/v1/receive", "tenant-b-c-2.metrics.local:19291/api/v1/receive"],
       "tenants": ["tenant-b", "tenant-c"]
   },
   {
       "hashring": "soft-tenants",
       "endpoints": ["http://soft-tenants-1.metrics.local:19291/api/v1/receive"]
   }
]
这里多租户涉及到两个概念:
-
soft-tenants(软租户):如果 hashring 未指定任何明确的租户,则任何租户都被视为有效的匹配,这允许集群提供软租用。租户 ID 和其他任何 hashring 都不明确匹配的请求将自动进入此软租户 hashring。所有未在 HTTP 请求中设置租户 header 的传入远程写请求都属于软租约,并且默认租户 ID(可以通过标志 --receive.default-tenant-id进行配置)都会附加到 metrics 指标上。 -
hard-tenants(硬租户):硬租户必须在每个 HTTP 请求中设置租户 header 信息,Thanos Receiver 中的硬租户在 hashring 配置文件中进行配置,比如使用配置管理工具来协调对该配置的更改,当 Thanos Receiver 接收到远程写请求的时候,它将遍历已配置的硬租户列表,硬租户还具有属于它的关联接收方端点的数量。
PS:远程写请求最初可以由任何 Receiver 实例接收,但是,将仅分发到与该硬租户相对应的 Receiver 端点。
                                  Soft tenant hashring
                                 +-----------------------+
                                 |                       |
+-----------------+              |  +-----------------+  |
|                 |              |  |                 |  |
|  Load Balancer  +-------+      |  | Thanos receiver |  |
|                 |       |      |  |                 |  |
+-----------------+       |      |  +-----------------+  |
                          |      |                       |
                          |      |                       |
                          |      |  +-----------------+  |
                          |      |  |                 |  |
                          +-------->+ Thanos receiver +-----------+
                                 |  |                 |  |        |
                                 |  +-----------------+  |        |
                                 |                       |        |
                                 +-----------------------+        |
                                                                  |
                                   Hard Tenant A hashring         |
                                 +-----------------------+        |
                                 |                       |        |
                                 |  +-----------------+  |        |
                                 |  |                 |  |        |
                                 |  | Thanos receiver +<----------+
                                 |  |                 |  |        |
                                 |  +-----------------+  |        |
                                 |                       |        |
                                 |                       |        |
                                 |  +-----------------+  |        |
                                 |  |                 |  |        |
                                 |  | Thanos receiver +<----------+
                                 |  |                 |  |
                                 |  +-----------------+  |
                                 |                       |
                                 +-----------------------+
接下来我们来安装配置 Thanos Receiver 组件,现在我们的 Prometheus 数据是通过 Remote Write API 实时上传到 Receiver 组件上面去的,所以我们需要对 Receiver 组件进行数据持久化,然后指定 objstore 后可以将数据上传到对象存储中去,对应的资源清单文件如下所示:
# receiver.yaml
apiVersion: apps/v1
kind: StatefulSet
metadata:
  labels:
    app: thanos-receiver
  name: thanos-receiver
  namespace: kube-mon
spec:
  selector:
    matchLabels:
      app: thanos-receiver
  serviceName: thanos-receiver
  replicas: 1
  template:
    metadata:
      labels:
        app: thanos-receiver
        thanos-store-api: "true"
    spec:
      containers:
      - image: thanosio/thanos:v0.18.0
        args:
        - receive
        - --grpc-address=0.0.0.0:10901
        - --http-address=0.0.0.0:10902
        - --remote-write.address=0.0.0.0:19291
        - --receive.replication-factor=1
        - --objstore.config-file=/etc/secret/thanos.yaml
        - --tsdb.path=/var/thanos/receiver
        - --tsdb.retention=1d
        - --label=receive_replica="$(NAME)"
        - --receive.local-endpoint=$(NAME).thanos-receiver.$(NAMESPACE).svc.cluster.local:10901
        env:
        - name: NAME
          valueFrom:
            fieldRef:
              fieldPath: metadata.name
        - name: NAMESPACE
          valueFrom:
            fieldRef:
              fieldPath: metadata.namespace
        livenessProbe:
          failureThreshold: 8
          httpGet:
            path: /-/healthy
            port: 10902
            scheme: HTTP
          periodSeconds: 30
        name: thanos-receive
        ports:
        - containerPort: 10901
          name: grpc
        - containerPort: 10902
          name: http
        - containerPort: 19291
          name: remote-write
        readinessProbe:
          failureThreshold: 20
          httpGet:
            path: /-/ready
            port: 10902
            scheme: HTTP
          periodSeconds: 5
        volumeMounts:
        - mountPath: /var/thanos/receiver
          name: data
          readOnly: false
        - name: object-storage-config
          mountPath: /etc/secret
          readOnly: false
      volumes:
      - name: object-storage-config
        secret:
          secretName: thanos-objectstorage
  volumeClaimTemplates:
  - metadata:
      name: data
      labels:
        app: thanos-receiver
    spec:
      storageClassName: openebs-jiva-default
      accessModes:
      - ReadWriteOnce
      resources:
        requests:
          storage: 20Gi
---
apiVersion: v1
kind: Service
metadata:
  name: thanos-receiver
  namespace: kube-mon
spec:
  clusterIP: None
  ports:
  - name: grpc
    port: 10901
    targetPort: 10901
  - name: http
    port: 10902
    targetPort: 10902
  - name: remote-write
    port: 19291
    targetPort: 19291
  selector:
    app: thanos-receiver
此外还有一个需要注意的点是现在 Receiver 也变成了 Querier 组件的一个数据源了,所以这里我们给上面的 Pod 增加一个 thanos-store-api: "true" 的标签,这样可以让 Querier 自动发现这个 Pod。直接创建上面的资源清单即可:
$ kubectl apply -f receiver.yaml
# configmap.yaml
apiVersion: v1
kind: ConfigMap
metadata:
  name: prometheus-config
  namespace: kube-mon
data:
  prometheus.yaml.tmpl: |
    global:
      scrape_interval: 15s
      scrape_timeout: 15s
      external_labels:
        cluster: ydzs-test
        replica: $(POD_NAME)  # 每个 Prometheus 有一个唯一的标签

    rule_files:  # 报警规则文件配置
    - /etc/prometheus/rules/*rules.yaml

    # 指定 remote write 地址
    remote_write:
    - url: http://thanos-receiver:19291/api/v1/receive

    ......
正常是不需要 Sidecar 容器了,这里我们为了用一个 StatefulSet 来运行两个 Prometheus 副本,借助 Sidecar 来帮我们渲染 prometheus.yaml.tmpl 模板文件(因为 Prometheus 本身是不支持环境变量替换的),这里的 Sidecar 仅作渲染用,后续可以换成其他方式:
# sidecar.yaml
apiVersion: apps/v1
kind: StatefulSet
metadata:
  name: prometheus
  namespace: kube-mon
  labels:
    app: prometheus
spec:
  serviceName: "prometheus"
  replicas: 2
  selector:
    matchLabels:
      app: prometheus
  template:
    metadata:
      labels:
        app: prometheus
    spec:
      serviceAccountName: prometheus
      volumes:
      - name: prometheus-config
        configMap:
          name: prometheus-config
      - name: prometheus-rules
        configMap:
          name: prometheus-rules
      - name: prometheus-config-shared
        emptyDir: {}
      containers:
      - name: prometheus
        image: prom/prometheus:v2.14.0
        imagePullPolicy: IfNotPresent
        args:
        - "--config.file=/etc/prometheus-shared/prometheus.yaml"
        - "--storage.tsdb.path=/prometheus"
        - "--storage.tsdb.retention.time=6h"
        - "--storage.tsdb.no-lockfile"
        - "--storage.tsdb.min-block-duration=2h"  # Thanos处理数据压缩
        - "--storage.tsdb.max-block-duration=2h"
        - "--web.enable-admin-api"  # 通过一些命令去管理数据
        - "--web.enable-lifecycle"  # 支持热更新  localhost:9090/-/reload 加载
        ports:
        - name: http
          containerPort: 9090
        resources:
          requests:
            memory: "2Gi"
            cpu: "1"
          limits:
            memory: "2Gi"
            cpu: "1"
        volumeMounts:
        - name: prometheus-config-shared
          mountPath: /etc/prometheus-shared/
        - name: prometheus-rules
          mountPath: /etc/prometheus/rules
        - name: prometheus-config
          mountPath: /etc/prometheus
      - name: thanos
        image: thanosio/thanos:v0.18.0
        imagePullPolicy: IfNotPresent
        args:
        - sidecar
        - --log.level=debug
        - --reloader.config-file=/etc/prometheus/prometheus.yaml.tmpl
        - --reloader.config-envsubst-file=/etc/prometheus-shared/prometheus.yaml
        - --reloader.rule-dir=/etc/prometheus/rules/
        ports:
        - name: http-sidecar
          containerPort: 10902
        - name: grpc
          containerPort: 10901
        env:
        - name: POD_NAME
          valueFrom:
            fieldRef:
              fieldPath: metadata.name
        volumeMounts:
        - name: prometheus-config-shared
          mountPath: /etc/prometheus-shared/
        - name: prometheus-config
          mountPath: /etc/prometheus
        - name: prometheus-rules
          mountPath: /etc/prometheus/rules
重新创建 Prometheus:
$ kubectl delete -f configmap.yaml
$ kubectl delete -f sidecar.yaml
$ kubectl apply -f configmap.yaml
$ kubectl apply -f sidecar.yaml
$ kubectl get pods -n kube-mon
NAME                              READY   STATUS    RESTARTS   AGE
alertmanager-86c756695f-b92zh     1/1     Running   0          38h
dingtalk-hook-66c75955d-mjpdc     1/1     Running   0          38h
grafana-67c7856c69-kjcvp          1/1     Running   0          23h
node-exporter-gvbmd               1/1     Running   0          23h
node-exporter-tx4p2               1/1     Running   0          166m
node-exporter-wfp4j               1/1     Running   0          36h
node-exporter-x8gjs               1/1     Running   0          27d
prometheus-0                      2/2     Running   0          5m8s
prometheus-1                      2/2     Running   0          5m1s
thanos-compactor-0                1/1     Running   0          3h44m
thanos-querier-77b47f7948-4sjhc   1/1     Running   0          3h9m
thanos-receiver-0                 1/1     Running   0          40m
thanos-store-gateway-0            1/1     Running   0          3h10m
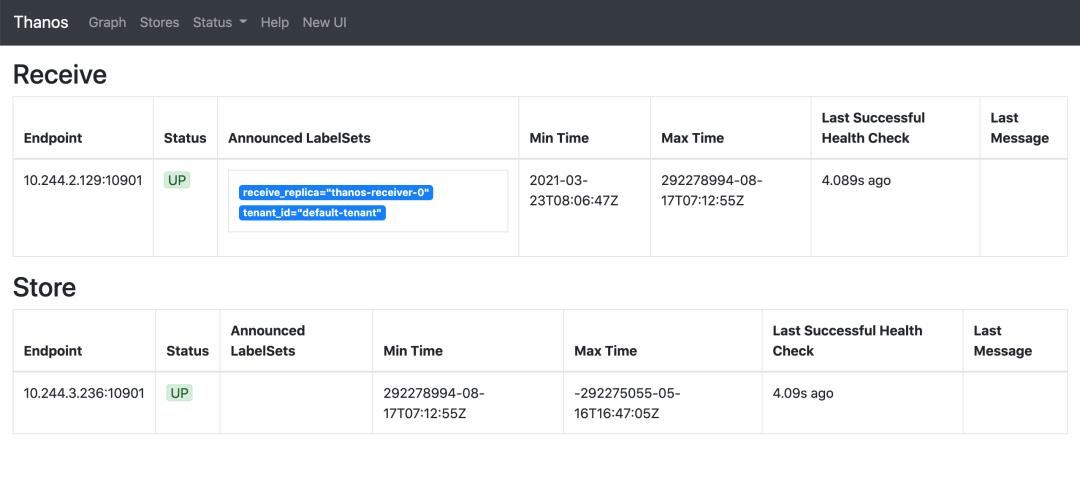
部署完成后正常这个时候 Prometheus 就已经开始实时远程写入数据到 Receiver 去了,我们可以通过 Querier 的界面可以查看到现在发现的 Stores:
然后切换到 Graph 页面查询 node_load1,先去掉 deduplication:
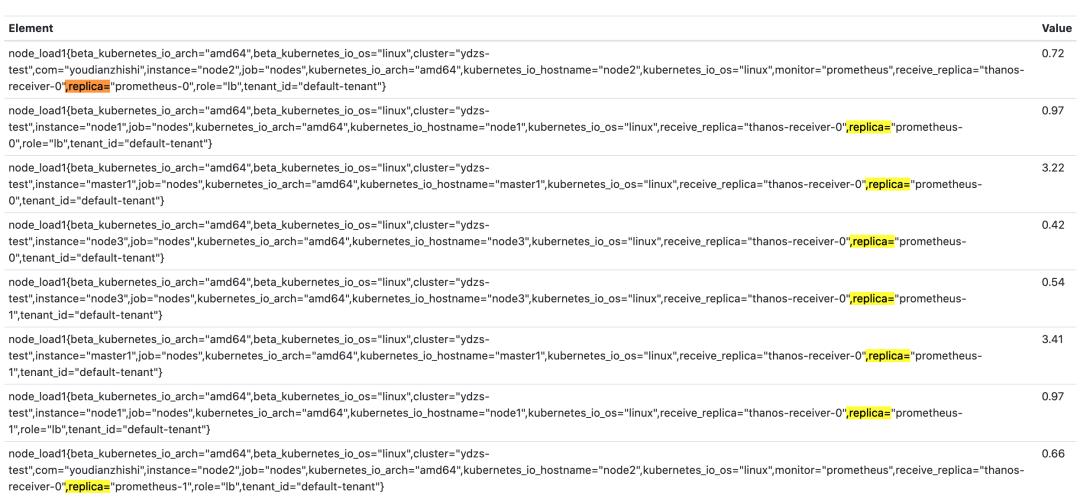
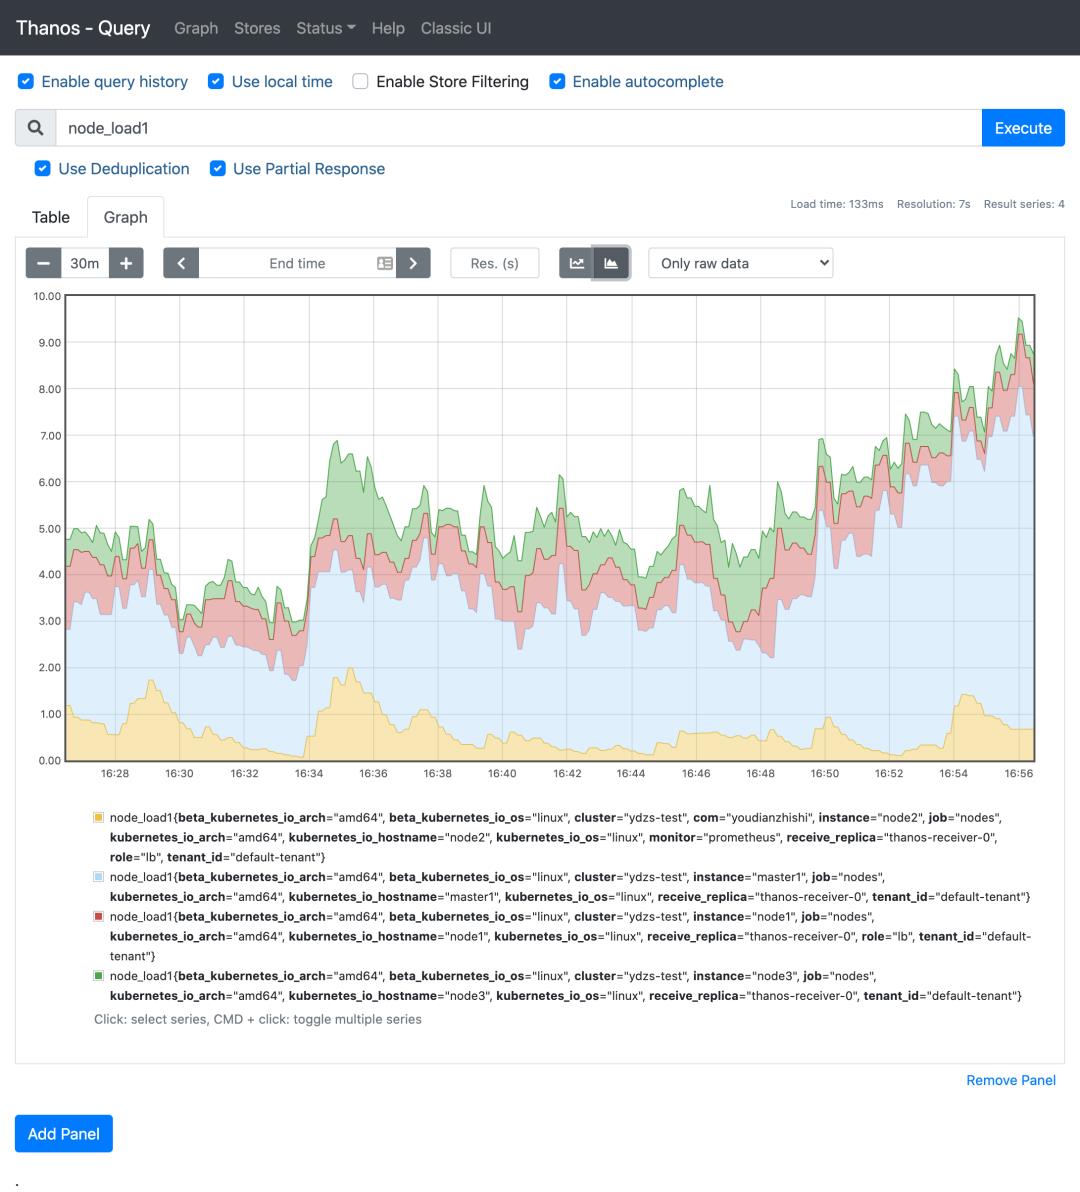
可以看到已经查询到了两个 Prometheus 实例的数据,这证明我们数据已经成功上传到 Receiver 了,这里的数据其实是通过 Receiver 获取到的,然后勾选上 deduplication 后可以根据 replica 标签进行去重:
此外我们还为 Receiver 配置了 StoreObject,正常一段时间(默认还是2h)后 Receiver 组件也会把数据上传到对象存储中去。
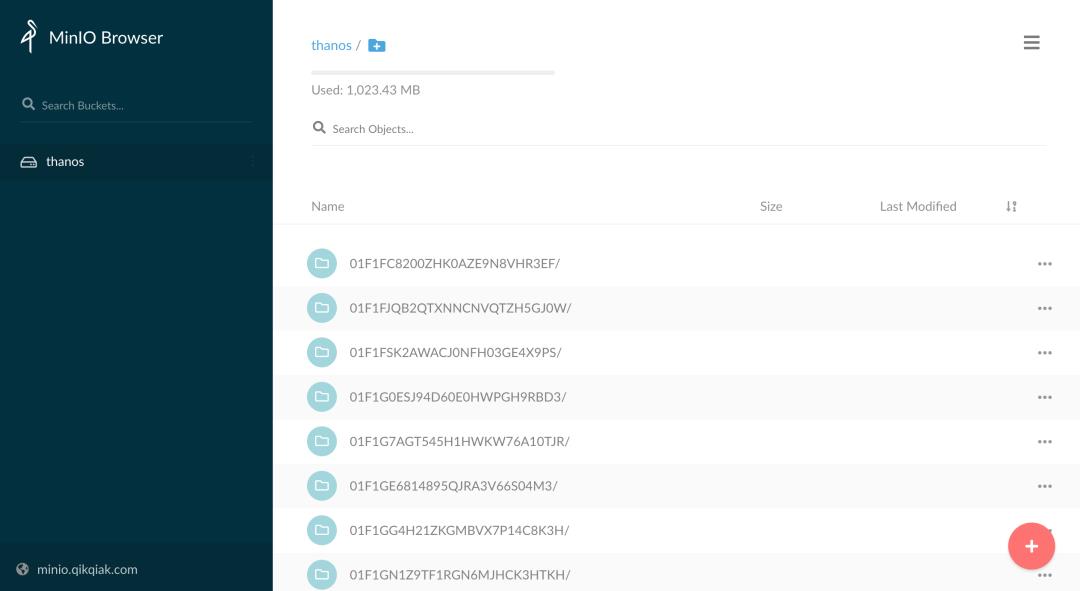
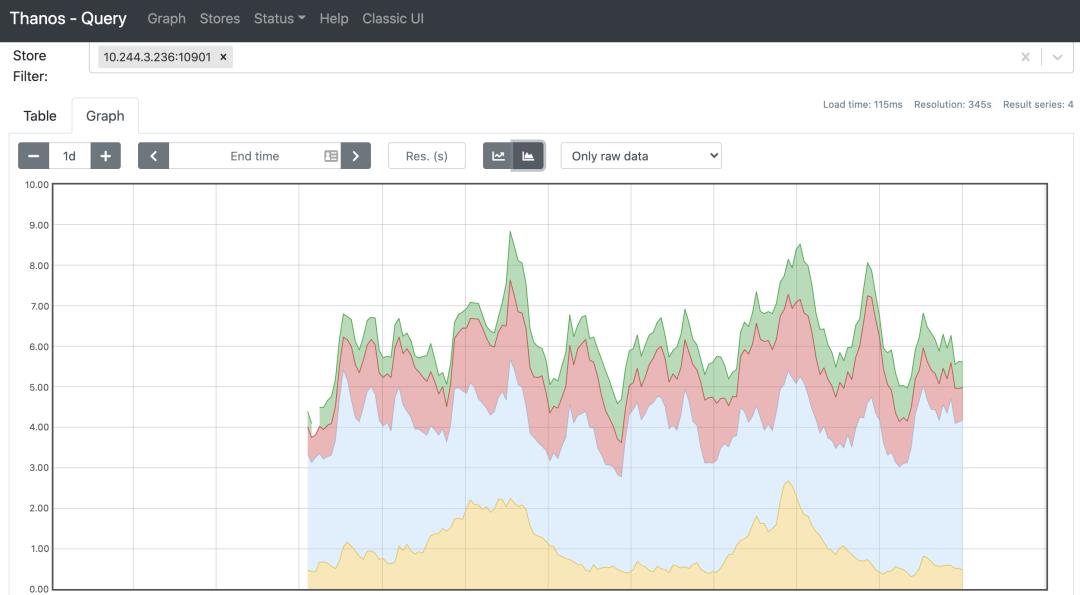
而且在 NewUI 中还可以根据 Store 来过滤要查询的数据,比如我们可以直接查询远程对象存储中的数据:
关于如何使用 Thanos Receiver 来进行多租户监控后文再结合 Prometheus Operator 进行说明。
K8S 进阶训练营
以上是关于Thanos Receive 实现 Prometheus (几乎)无状态化的主要内容,如果未能解决你的问题,请参考以下文章
打造云原生大型分布式监控系统: Kvass+Thanos 监控超大规模容器集群