Python3 开发接口测试工具
Posted 金大师科技部落
tags:
篇首语:本文由小常识网(cha138.com)小编为大家整理,主要介绍了Python3 开发接口测试工具相关的知识,希望对你有一定的参考价值。
言归正传,公司app使用的接口大多为http和https协议的请求。请求的方法只用到了get和post。所以我们开发的工具相当简洁基础部分界面为这样:
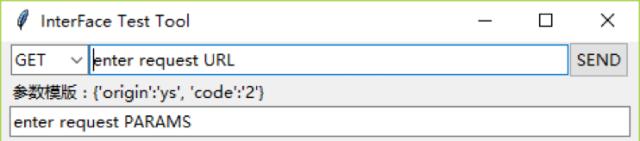
这里我用到的图形开发界面库为Tkinter,其实还有很多其他的选择,为什么选择使用Tkinter,因为最先接触到的就是这个,原因就是这样。
使用前先导入

下拉框内只有get和post 2个选项
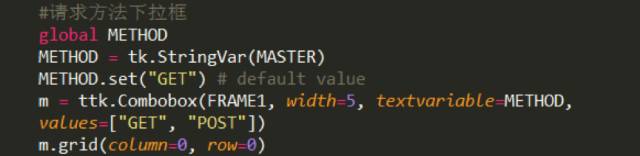
用的全局变量,便于发送接口函数知道走get还是post。默认值设为get。
以后可以扩展其他的请求方式,目前是只支持get和post,后面的请求接口函数会提到

send按钮去调用send_url()函数这里我调用的函数并没有送参数,所以也能写成这样:
s = ttk.Button(FRAME1, width=5, text=”SEND”, command=send_url)

参数输入栏,用post方法调用接口,需要按给出的模板格式填写。填写的内容会写入全局变量PARARM中,供send_url()函数使用。
这里有个问题!!!我们公司产品的接口通过ukey字段来判断是游客访问还是登录用户访问
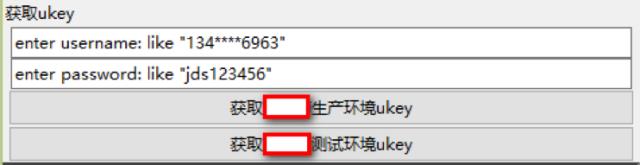
听说不能出现公司产品名称,所以。。。
这样获取ukey就很方便了,恩!
这里代码可以参照下文中提到的post方式。
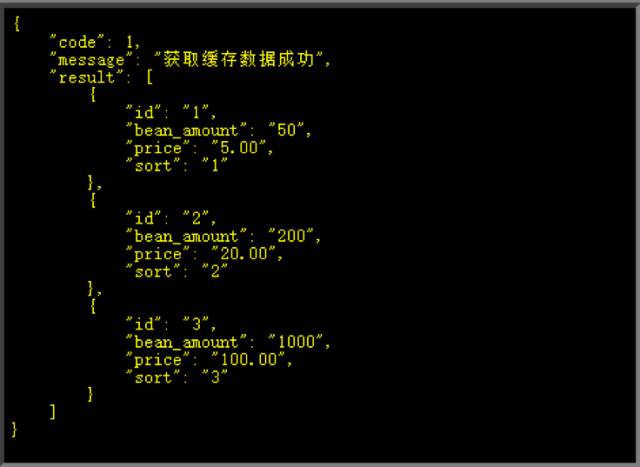
这里说下,login接口会返回个code,通过code的值我们会知道是登录成功,还是登录失败。又因为我们的接口返回是json格式的。所以这里

使用json.loads()去解析返回数据
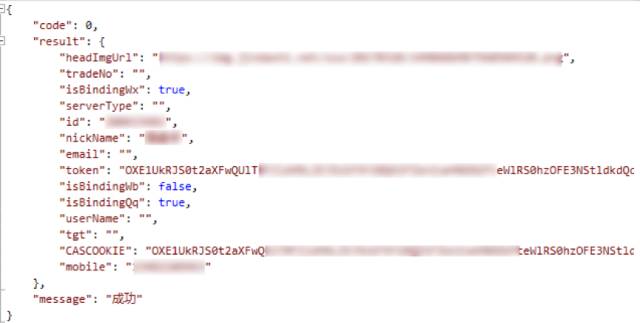
就能很简单的去获取返回信息中各字段的值,比如图中的:
Json_login_response[‘code’]
Json_login_response[‘result’][‘token’]
根据返回的结构就很好理解了,请看下图:
界面上看到的登录失败是这样的

会告诉你你访问的环境,错误原因,以及上送的请求参数
登录成功是这样的:

会告知访问的环境和获取到的token
后期还可以考虑将需要测试的用户登录信息写到配置项里,调用接口时勾选游客还是登录用户,登录用户的话自动获取ukey,加到post的参数中。
send_url()函数会先判断用户选择的请求方法

为get方式,打开输入的url,输入框的textvariable的值需要使用.get()去获取

为post方式,用get()获取的参数输入框textvariable的值为str类型
urlencode函数处理不了str类型,所以使用eval()将dparam转换成dist类型

非get和post方式,提示不支持
既然是个带有图形界面的工具,自然发送接口请求会将接口返回数据展示出来
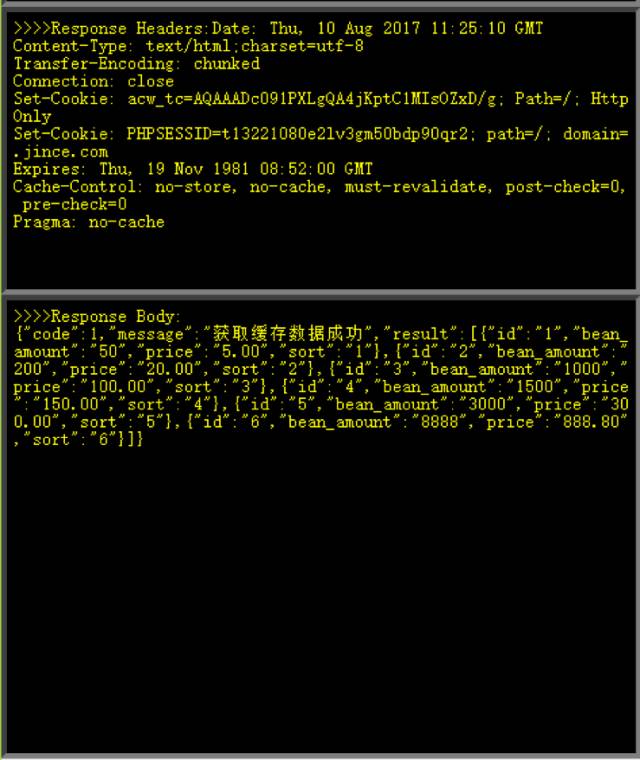
2块区域:一块展示响应头信息,一块展示响应体信息。

定义的2块区域 黑地黄字显示,对字体有要求的朋友可以加上font='微软雅黑'
该版本目前只是个初稿,所以ui方面有很大的上升空间
处理界面返回数据展示的代码如下:

先清空响应头展示区域和响应体展示区域,然后去插入展示信息,post的部分代码类似
接口测试通常都是检查响应体信息,一旦发现问题会将接口的返回复制-黏贴给开发人员看
所以,我在接收接口返回的时候加了一段代码:

会将响应体信息复制到系统剪贴板,所以用我的接口测试工具跑完,可以直接ctrl+v黏贴到你需要黏贴的地方。这里需要注意一下,你的python需要安装pywin
https://sourceforge.net/projects/pywin32/files/pywin32/
并import

增加了打印:
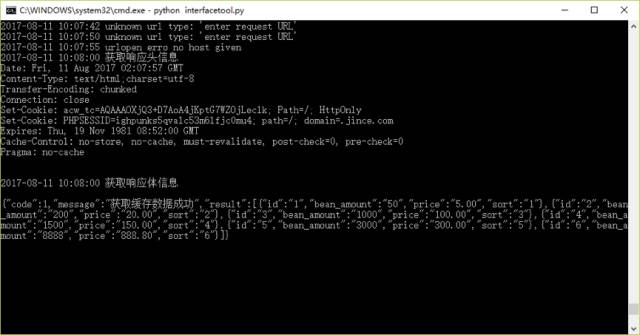
代码如下:
print(get_now_time() + ' 获取响应头信息')
print(response.info()) #response.info() class 'http.client.HTTPMessage'
print(get_now_time() + ' 获取响应体信息')
print(get)
这里的get_now_time()函数用来获取当前系统时间

将获取到的时间信息以我需要的格式进行展示
这里注意需要import

并且增加了日志文件记录每一次请求的信息:

部分代码如下:
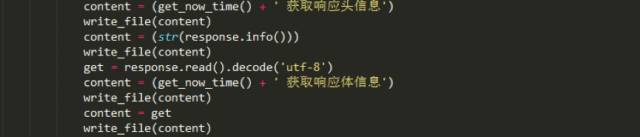
将需要写入文件的信息放入变量content中,去调用write_file(content)函数

文件名用的当前日期,写了个get_now_date()函数去获取
a为追加模式,每次打开日志文件从底部追加内容
每次写入内容后换行 + ‘\n’

格式为年-月-日
文件夹路径为 file_path,先定义为全局变量,你想在哪个路径下生产日志文件,就可以自己先修改该路径:

当然调用写入文件write_file(content)函数时,如果发现文件夹不存在是会报错的。
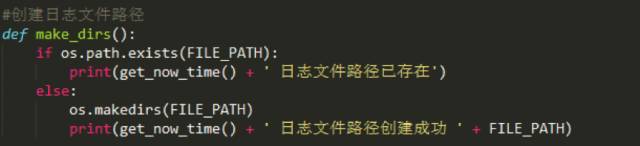
所以写了个make_dirs()函数,先去判断文件路径是否存在,不存在则自动创建该文件夹
需要先import

后期展望:
1、可以将返回数据展示的更有层次,如下图:
2、还可以增加导入文件功能来做接口自动化测试
导入的文件可能需要以下字段:用例号、测试点、url、请求方式、请求参数、预期结果、实际结果、用例结果。
导入后点击发送请求,去批量跑文档里的接口,把得到的返回写入文件的实际结果中,与预期结果做比较,一致则在用例结果字段填写通过。不一致则填写不通过。
3、可以使用requests库代替urllib库 requests库用起来更舒服,真的!

requests.get()这个代表了用get方法访问
response.headers 获取的响应头信息
response.text 获取的响应体信息
post的方法访问:
response = requests.post(URL.get(), data=dparam)
这里注意dparam需要为字典类型
苹果阻止不了你对原创文章的支持
以上是关于Python3 开发接口测试工具的主要内容,如果未能解决你的问题,请参考以下文章