Solr-1
Posted 健哥说编程
tags:
篇首语:本文由小常识网(cha138.com)小编为大家整理,主要介绍了Solr-1相关的知识,希望对你有一定的参考价值。
Linux上Solr的快速安装与使用
Solr简介:
略。
步1、下载Solr
Windows版本:http://mirrors.hust.edu.cn/apache/lucene/solr/7.4.0/solr-7.4.0.zip
Linux版本:http://mirrors.hust.edu.cn/apache/lucene/solr/7.4.0/solr-7.4.0.tgz
以下是在CentOS7上安装Solr7.4(2018-9-16最新版本)
步2、在linux上安装solr
要求必须在linux上已经安装好了Jdk并配置了环境变量JAVA_HOME。
1、解压
$ tar -zxvf ~/solr-7.4.0.tgz -C .
查看目录:
$ ls
bin contrib docs licenses LUCENE_CHANGES.txt README.txt
CHANGES.txt dist example LICENSE.txt NOTICE.txt server
其中server是solr的服务目录。
可选的配置环境变量:
export SOLR_HOME=/app/solr-7.4.0/server/solr
export PATH=$PATH:/app/solr-7.4.0/bin
注意上面的PATH并没有引用SOLR_HOME这个环境变量。
可以查看server下的配置文件,solr从5.0开始使用内置的jetty服务器,默认端口为8983。
2、启动Solr
使用solr start可以启动solr服务器如下:
$ solr start
*** [WARN] *** Your open file limit is currently 1024.
It should be set to 65000 to avoid operational disruption.
If you no longer wish to see this warning, set SOLR_ULIMIT_CHECKS to false in your profile or solr.in.sh
*** [WARN] *** Your Max Processes Limit is currently 4096.
It should be set to 65000 to avoid operational disruption.
If you no longer wish to see this warning, set SOLR_ULIMIT_CHECKS to false in your profile or solr.in.sh
NOTE: Please install lsof as this script needs it to determine if Solr is listening on port 8983.
Started Solr server on port 8983 (pid=2833). Happy searching!
3、访问8983端口
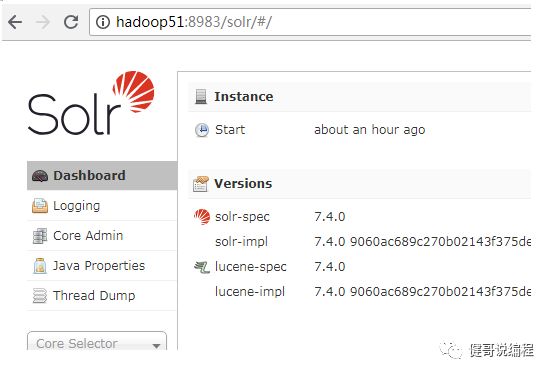
4、现在停止Solr服务器
$ solr stop
步3、创建一个新的core
什么是core?
solr在lucene外边做了一层厚厚的封装,主要是为了简化二次开发,提供了一些成熟的解决方案。
solr可以对多个core进行综合管理,并接受请求选择特定的一个或者多个core执行相关任务。
下面来回答什么是solr的core。
core从文件结构的角度来看的话,主要包括
一份索引(也可能还包括拼写检查的索引)、一堆配置文件。
最主要的配置文件是:solrconfig.xml和schema.xml。
1) solrconfig.xml从整体上对core进行了配置,(其实这个文件不需要太大的变更)
例如索引的存放路径、字段的最大长度(maxFiedlLength)、写锁的超时时间(writeLockTimeout)、锁类型(lockType)、是否压缩索引(useCompoundFile)、内存索引缓冲区大小(ramBufferSizeMB)、合并因子(mergeFactor)、删除策略、自动提交策略、缓存设置等,
它好比是一份组装机器人的说明书,里面详细描述了各个部件(handler)的参数。
2) schema.xml主要是对索引的配置,在solr7.4中没有了扩展名。
例如分词器、字段名称+索引方法+存储方式+分词方式、唯一标识字段等,
它好比是机器人学习的学习方法,机器人主动或被动接受特定数据,按照配置转化成索引,然后通过其部件(handler)展示出来,
例如:search、moreLikeThis、spellCheck、factedSearcher等。
1、创建目录
在$SOLR_HOME/server/solr目录下,创建一个目录:
[wangjian@hadoop51 solr]$ mkdir first_core
拷贝conf目录到first_core目录下去
[wangjian@hadoop51 solr]$ cp -r configsets/sample_techproducts_configs/conf/ first_core/
查看目录结构:
[wangjian@hadoop51 solr]$ ll first_core/
总用量 4
drwxr-xr-x. 6 wangjian wangjian 4096 9月 16 23:28 conf
2、启动solr
$ solr start
3、创建core
在http://server:8983的页面上,点Core Admin,然后点添加:

点添加:

在弹出的页面上,输入所需的信息,注意instanceDir是刚才创建的目录名称:first_core。然后点Add Core按扭即可:
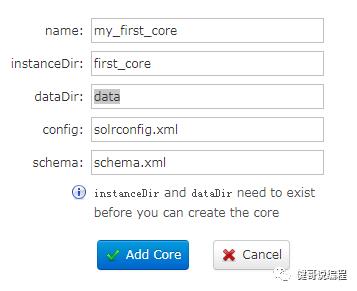
创建成功以后:
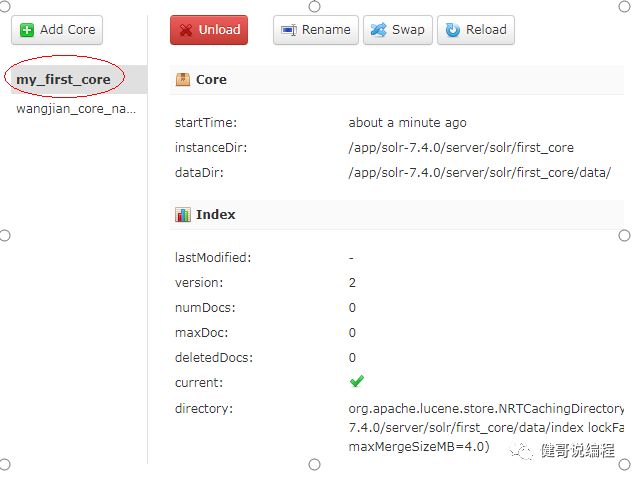
4、查看已经拥有的分词
选择已经创建的core可以查看它目前所拥有的分词和查询:
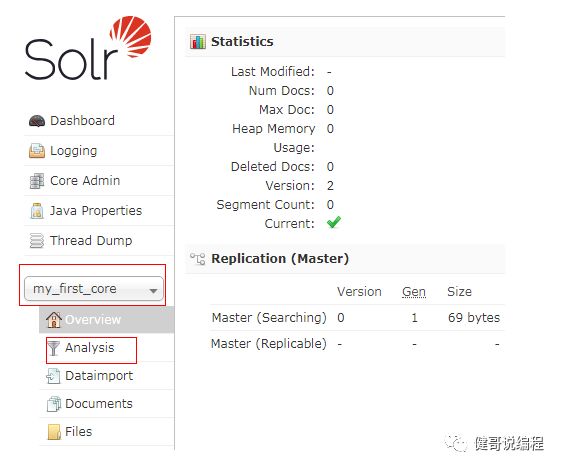
步4、添加IK中文分词
1、停止服务器
$ solr stop
2、上传IK包
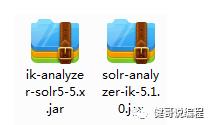
将上面的两个包,放到$SOLR_HOME/server/solr-webapp/webapp/WEB-INF/lib目录下。
查看:
[wangjian@hadoop51 lib]$ pwd
/app/solr-7.4.0/server/solr-webapp/webapp/WEB-INF/lib
[wangjian@hadoop51 lib]$ ll | grep ik
-rw-r--r--. 1 wangjian wangjian 1167537 6月 5 2016 ik-analyzer-solr5-5.x.jar
-rw-r--r--. 1 wangjian wangjian 912 3月 31 2017 solr-analyzer-ik-5.1.0.jar
将以下三个文件,放到$SOLR_HOME/server/solr-webapp/webapp/WEB-INF/classes目录下:

3、添加分词
修改:/app/solr-7.4.0/server/solr/first_core/conf/managed-schema这个xml文件,添加以下内容:
<fieldType name="text_ik" class="solr.TextField">
<analyzer type="index" useSmart="false"
class="org.wltea.analyzer.lucene.IKAnalyzer"/>
<analyzer type="query" useSmart="true"
class="org.wltea.analyzer.lucene.IKAnalyzer"/>
</fieldType>
如果还想添加smart_cn分词,请同样的也要上传smart_cn的jar包放到lib目录下:
<fieldType name="text_smartcn" class="solr.TextField">
<analyzer type="index" useDefaultStopWords="true"
class="org.apache.lucene.analysis.cn.smart.SmartChineseAnalyzer"/>
<analyzer type="query" useDefaultStopWords="true"
class="org.apache.lucene.analysis.cn.smart.SmartChineseAnalyzer"/>
</fieldType>
4、启动solr
$ solr start
5、测试IK分词器
如果出现以下效果,说明配置已经成功。
【部分结束】
以上是关于Solr-1的主要内容,如果未能解决你的问题,请参考以下文章