Kafka在SpringBoot 2.0中的整合
Posted weafteam
tags:
篇首语:本文由小常识网(cha138.com)小编为大家整理,主要介绍了Kafka在SpringBoot 2.0中的整合相关的知识,希望对你有一定的参考价值。
一、Windows平台Kafka的环境搭建
注意:确保JAVA环境变量的正确
1.ZooKeeper的安装
  dataDir=D:\data\logs\zookeeper


  dataLogDir=D:\data\logs\zookeeper
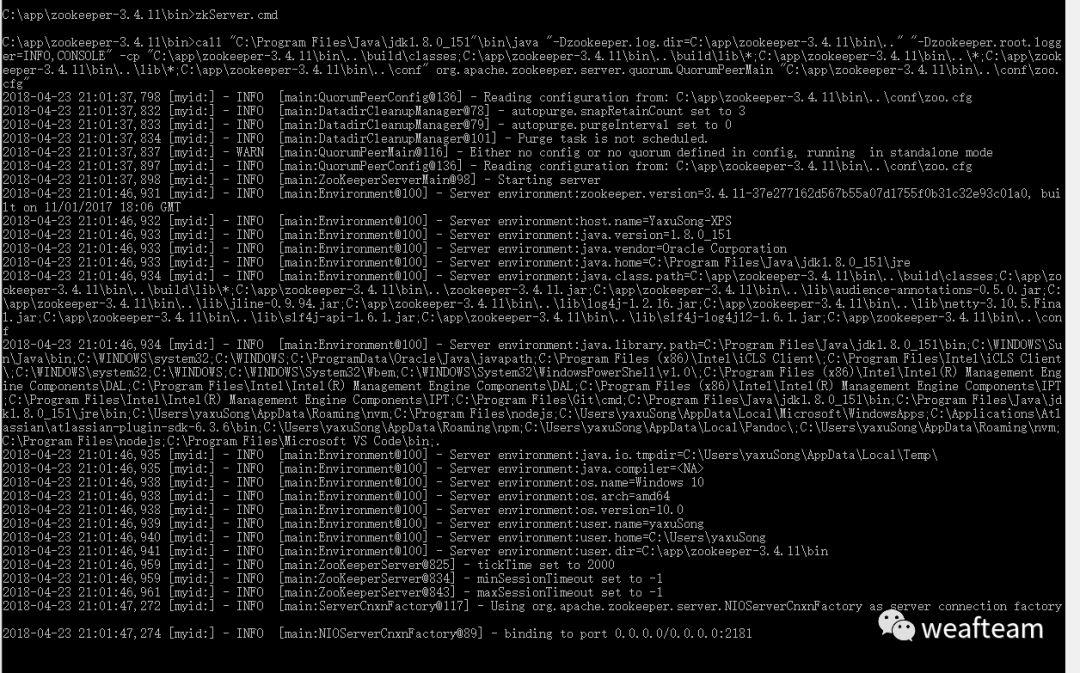
然后进入bin目录双击zkServer.cmd运行。如下图:
2.Kafka的安装
log.dirs=D:\data\logs\kafka
我们可以看到bin目录下的是linux的启动脚本,然后有个单独的文件夹装着windows的脚本。 我们在根目录下打开命令行,运行以下命令启动Kafka。 我们在运行前需要注意以下几点
确认JAVA环境变量没有问题
路径不能有空格,不然可能会出现无法加载主类的错误。
出现无法加载主类错误,可修改bin\windows目录中的kafka-run-class.bat中 set COMMAND=%JAVA% %KAFKAHEAPOPTS% %KAFKAJVMPERFORMANCEOPTS% %KAFKAJMXOPTS% %KAFKALOG4JOPTS% -cp %CLASSPATH% %KAFKAOPTS% %* 中"%CLASSPATH%"加上双引号

.\bin\windows\kafka-server-start.bat .\config\server.properties
二、SpringBoot2.0相关配置
pom文件加入以下依赖
pom.xml
  <!-- kafka -->


  <dependency>


      <groupId>org.springframework.kafka</groupId>


      <artifactId>spring-kafka</artifactId>


      <version>2.1.5.RELEASE</version>


  </dependency>
我这里SpringBoot的配置文件使用的是YAML。 在相应环境中配置Kafka
application-local.yml
  server:


      port: 7777


  spring:


      datasource:


          name: test


          driverClassName: com.mysql.jdbc.Driver


          url: jdbc:mysql://.....


          username: ...


          password: ....


      redis:


        database: 0


        host: localhost


        port: 6379


        jedis:


          pool:


            min-idle: 0


            max-idle: 8


            max-active: 8


            max-wait: -1ms


        password: 123456


      kafka:


          consumer:


            group-id: foo


            auto-offset-reset: earliest


            key-deserializer: org.apache.kafka.common.serialization.StringDeserializer


            value-deserializer: org.apache.kafka.common.serialization.StringDeserializer


          producer:


            key-serializer: org.apache.kafka.common.serialization.StringSerializer


            value-serializer: org.apache.kafka.common.serialization.StringSerializer


          bootstrap-servers: localhost:9092


  app:


        topic:


          foo: foo.t
可以仅关注spring.kafka和app.topic节点 更多spring.kafka配置信息请查看官网文档
三、代码
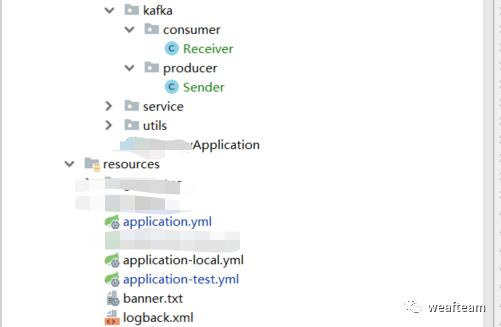
主要代码结构 消费者代码
消费者代码
  package com.xxx.kafka.consumer;


  import lombok.extern.slf4j.Slf4j;


  import org.springframework.kafka.annotation.KafkaListener;


  import org.springframework.messaging.handler.annotation.Payload;


  import org.springframework.stereotype.Service;


  /**


   * @Author :yaxuSong


   * @Description:


   * @Date: 17:56 2018/4/23


   * @Modified by:


   */


  @Slf4j


  @Service


  public class Receiver {


      @KafkaListener(topics = "${app.topic.foo}")


      public void listen(@Payload String message) {


          log.info("received message='{}'", message);


      }


  }
生产者代码
  package com.xxx.kafka.producer;


  import lombok.extern.slf4j.Slf4j;


  import org.springframework.beans.factory.annotation.Autowired;


  import org.springframework.beans.factory.annotation.Value;


  import org.springframework.kafka.core.KafkaTemplate;


  import org.springframework.stereotype.Service;


  /**


   * @Author :yaxuSong


   * @Description:


   * @Date: 17:57 2018/4/23


   * @Modified by:


   */


  @Service


  @Slf4j


  public class Sender {


      @Autowired


      private KafkaTemplate<String, String> kafkaTemplate;


      @Value("${app.topic.foo}")


      private String topic;


      public void send(String message){


          log.info("sending message='{}' to topic='{}'", message, topic);


          kafkaTemplate.send(topic, message);


      }


  }
测试代码
  package com.xxx.controller;


  import com.xxx.controller.entry.ResMsg;


  import com.xxx.Sender;


  import lombok.extern.slf4j.Slf4j;


  import org.springframework.beans.factory.annotation.Autowired;


  import org.springframework.web.bind.annotation.RequestMapping;


  import org.springframework.web.bind.annotation.RestController;


  /**


   * @Author :yaxuSong


   * @Description:


   * @Date: 11:21 2018/4/21


   * @Modified by:


   */


  @Slf4j


  @RequestMapping("test")


  @RestController


  public class TestController {


      @Autowired


      private Sender sender;


      @RequestMapping("send")


      public ResMsg send(String content){


          sender.send("Spring Kafka and Spring Boot Send Message:"+content);


          return ResMsg.success();


      }


  }
四、简单的测试
运行项目 测试发送查看接收结果:
五、SpringBoot-Demo
以上是关于Kafka在SpringBoot 2.0中的整合的主要内容,如果未能解决你的问题,请参考以下文章