(原创)牛逼!通过Python做文字识别到破解图片验证码
Posted 简说Python
tags:
篇首语:本文由小常识网(cha138.com)小编为大家整理,主要介绍了(原创)牛逼!通过Python做文字识别到破解图片验证码相关的知识,希望对你有一定的参考价值。
0、前言
1、文章目录
2、前期准备
(1)安装包,直接在终端上输入pip指令即可:
  1# 发送浏览器请求


  2pip3 install requests


  3# 文字识别


  4pip3 install pytesseract


  5# 图片处理


  6pip3 install Pillow
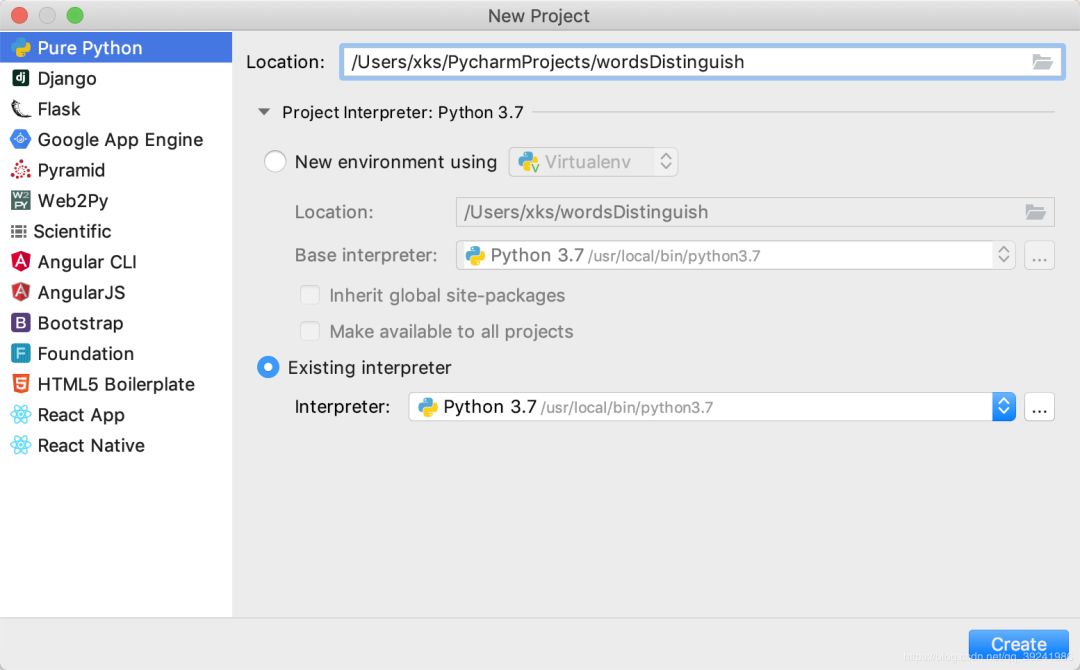
(2)新建项目
wordsDistinguish
,在项目包下新建三个
.py
文件——test_pytesseract 和 test_pillow、case_verification。
test_pytesseract:模块 pytesseract 的基本使用测试test_pillow:模块 Pillow 的基本使用测试case_verification:实战案例,破解网站图片验证码验证
3、知识知识
(1)Pillow 中的 Image
   1# -*- coding: utf-8 -*-


   2"""
 3@author = 老表
 4@date = 2019-08-16
 5@个人公众号 : 简说Python
 6"""


   7


   8# 注意:print_function的导入必须在Image之前,否则会报错


   9from __future__ import print_function


  10from PIL import Image


  11"""
12pillow 模块 中 Image 的基本使用
13"""


  14


  15


  16# 1.打开图片


  17im = Image.open("../wordsDistinguish/test1.jpg")


  18print(im)


  19


  20# 2.查看图片文件内容


  21print("图片文件格式:"+im.format)


  22print("图片大小:"+str(im.size))


  23print("图片模式:"+im.mode)


  24


  25# 3.显示当前图片对象


  26im.show()


  27


  28# 4.修改图片大小,格式,保存


  29size = (50, 50)


  30im.thumbnail(size)


  31im.save("1.jpg", "PNG")


  32


  33# 5.图片模式转化并保存,L 表示灰度 RGB 表示彩色


  34im = im.convert("L")


  35im.save("test1.jpg")
(2)基于 Tesseract-OCR 的 pytesseract
Python-tesseract是Google的Tesseract-OCR引擎的包装器。它作为独立的调用脚本也很有用,因为它可以读取Pillow和Leptonica成像库支持的所有图像类型,包括jpeg,png,gif,bmp,tiff等。此外,如果用作脚本,Python-tesseract将打印已识别的文本,而不是将其写入文件。
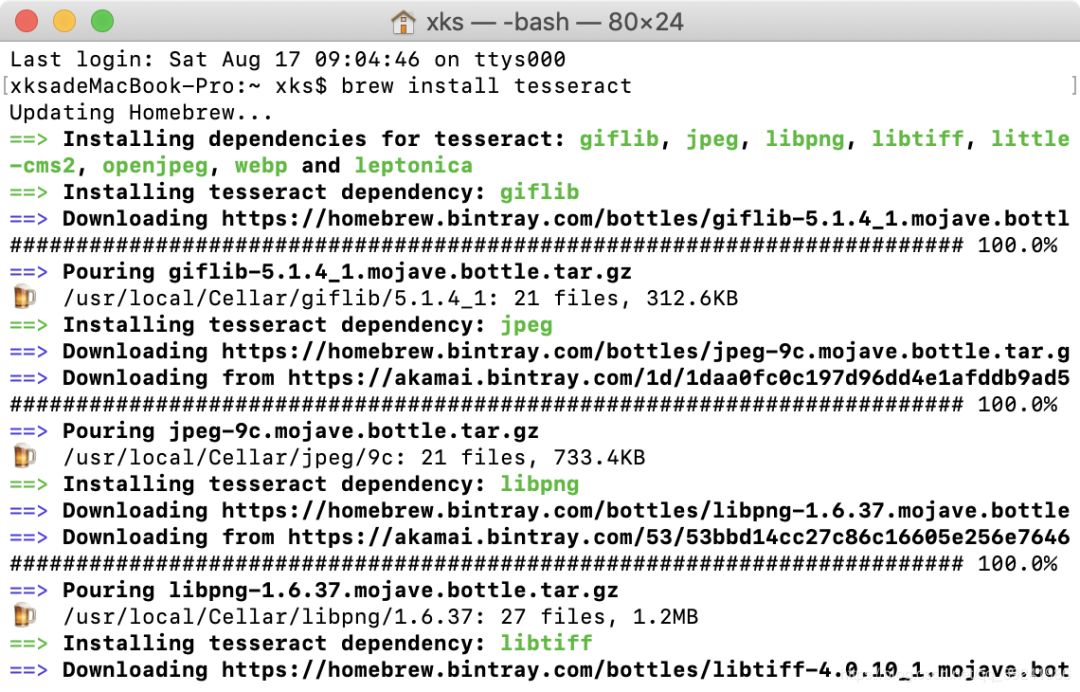
要在你的电脑上使用
pytesseract
模块,你还需要安装 Tesseract-OCR ,Mac上安装该工具我比较建议使用
Homebrew
,安装好后,直接在终端输入下面指令即可:
1brew install tesseract
傻白甜
,可以百度一下。
1# -*- coding: utf-8 -*-
2"""
3@author = 老表
4@date = 2019-08-16
5@个人公众号 : 简说Python
6"""
7
8# 从 Pillow 中导入图片处理模块 Image
9from PIL import Image
10# 导入基于 Tesseract 的文字识别模块 pytesseract
11import pytesseract
12"""
13@pytesseract:https://github.com/madmaze/pytesseract
14"""
15
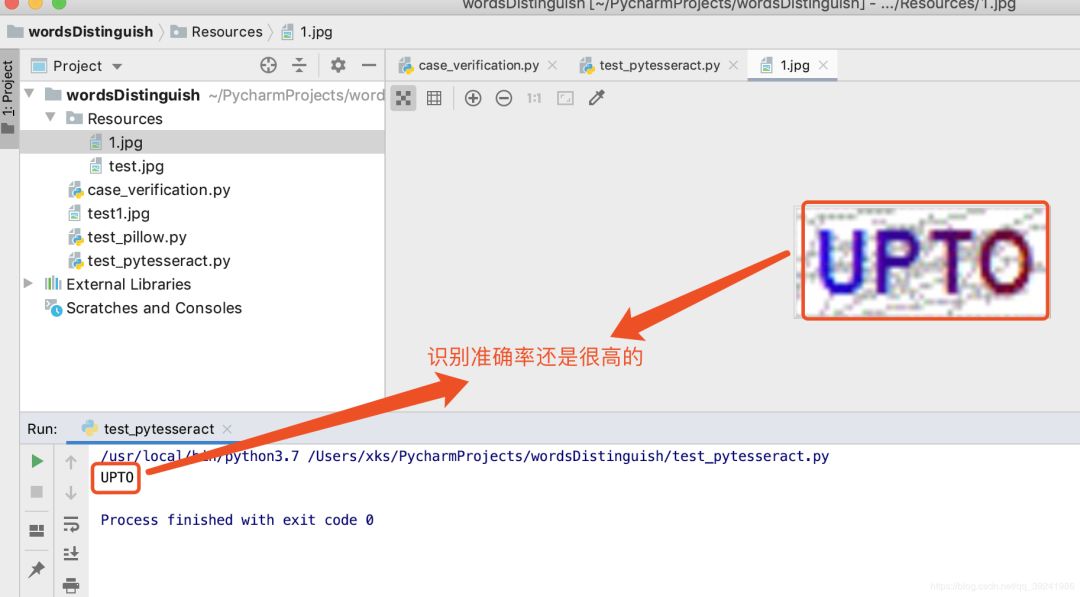
16# 打开图片
17im = Image.open("../wordsDistinguish/Resources/1.jpg")
18# 识别图片内容
19text = pytesseract.image_to_string(im)
20print(text)
4、小项目:破解图片验证码登陆
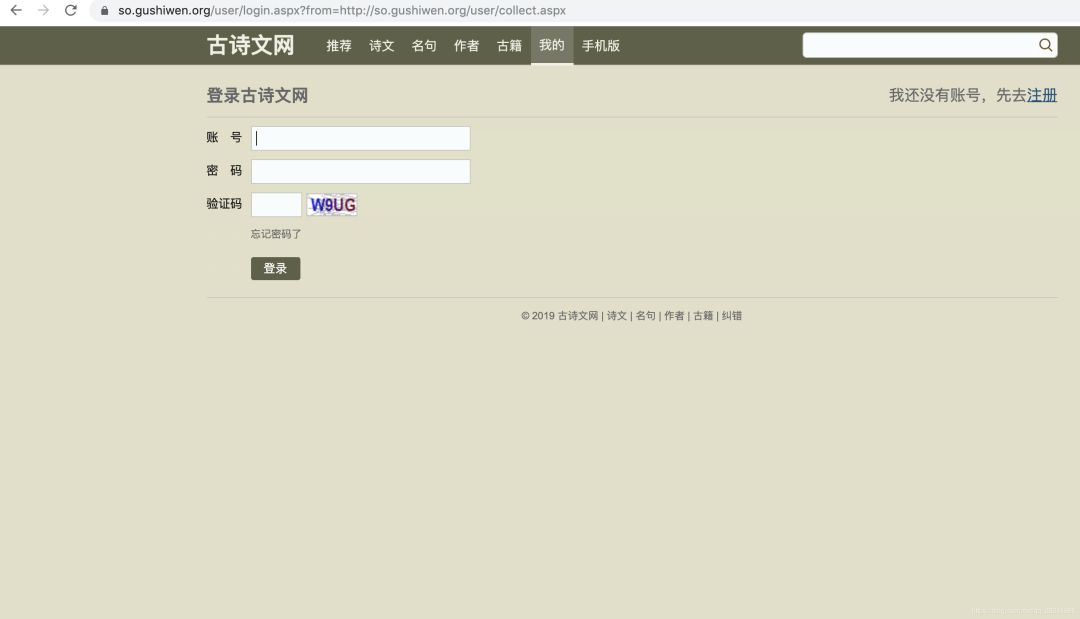
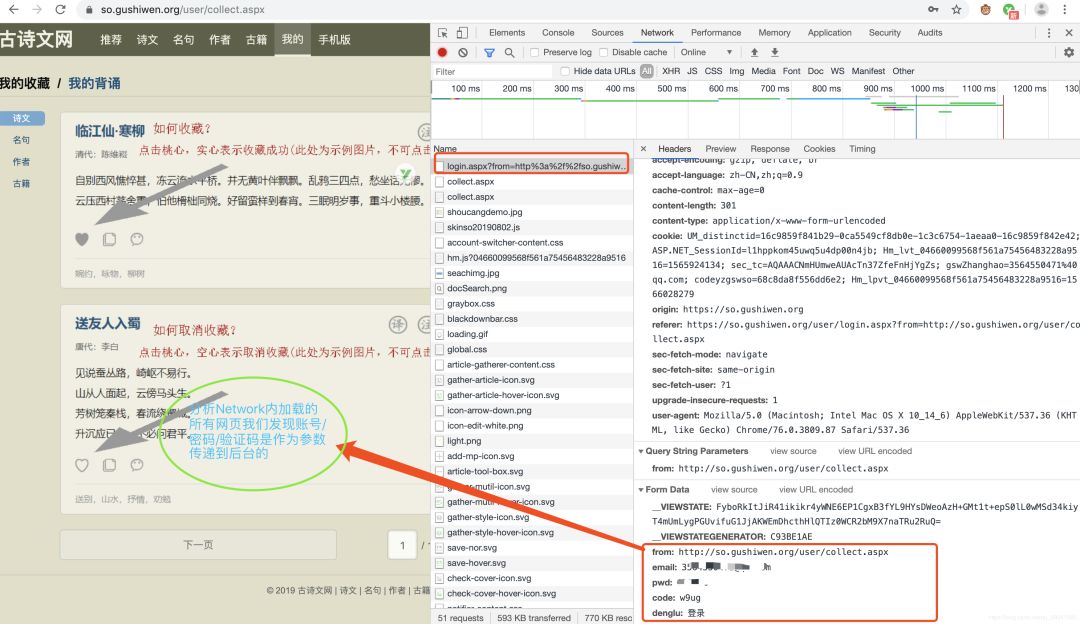
(1)准备过程
输入账号密码,和验证码,点击登录,注意Network内的变化。
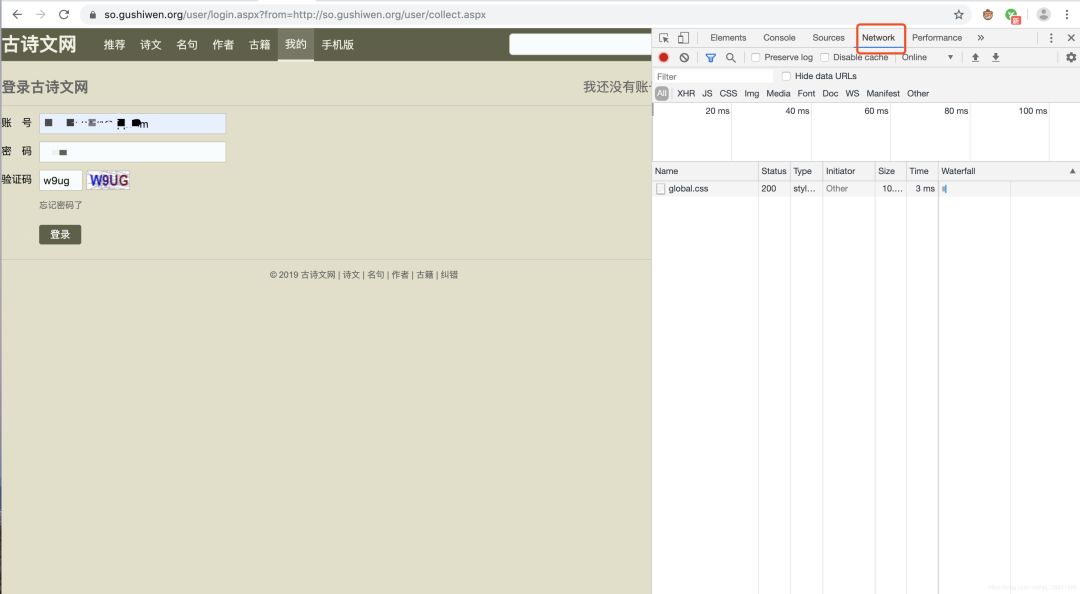
login.aspx
里,传递了我们的登录信息,这是关键,意味着我们只要把数据通过这个地址传递给服务器就可以实现登录了。
(2)代码敲起来
a.验证码识别我们根据前面的
知识知识
里的,直接采用
pytesseract
模块。
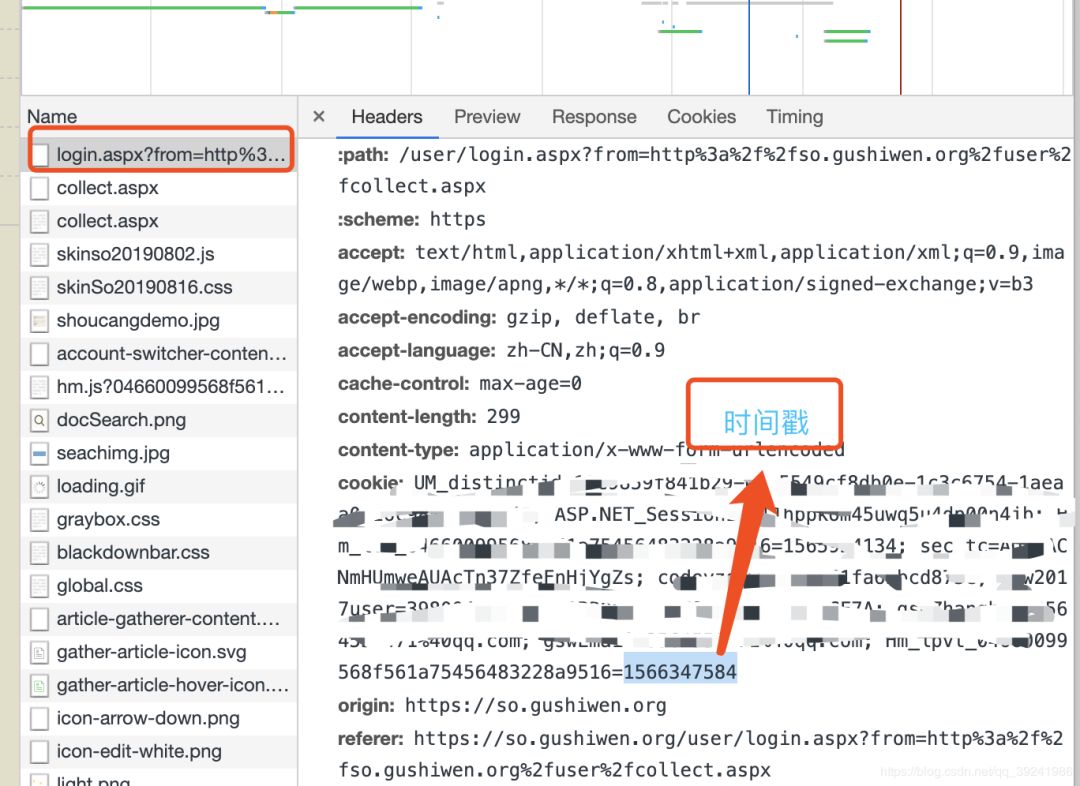
b.登录参数传递,利用
requests
库发送
post
请求即可,问题是如何把验证码和登录联系起来,通过前面分析我们知道验证码是在“https://so.gushiwen.org/RandCode.ashx”里生成的,而登录页面是“https://so.gushiwen.org/user/login.aspx”,分析发现,正常浏览器登录这两个网址的cookie是一致的,并且都带有时间戳,所以,只要在代码请求时保证两者的cookie一致即可,这里我们利用requests库的
session
方法可以实现。
1# -*- coding: utf-8 -*-
2"""
3@author = 老表
4@date = 2019-08-16
5@个人公众号 : 简说Python
6"""
7
8# 从 Pillow 中导入图片处理模块 Image
9from PIL import Image
10# 导入基于 Tesseract 的文字识别模块 pytesseract
11import pytesseract
12# 导入发送网络请求的库 requests
13import requests
14# 导入正则库 re
15import re
16"""
17模拟登录,破解字母数字图片验证码
18目标网站:https://so.gushiwen.org
19"""
20# 请求头
21headers = {
22 "user-agent": "Mozilla/5.0 (Macintosh; Intel Mac OS X 10_14_6) AppleWebKit/537.36 (Khtml, like Gecko) Chrome/76.0.3809.87 Safari/537.36"
23 }
24# 通过requests 创建一个 session 会话,保持两次访问 cookie 值相同
25session = requests.session()
26
27
28# 下载识别验证码图片函数
29def get_verification():
30 # 生成验证码图片url
31 url = "https://so.gushiwen.org/RandCode.ashx"
32 # 通过session发送get请求,获取验证码
33 resp = session.get(url, headers=headers)
34 # 将验证码保证到本地
35 with open(r"../wordsDistinguish/Resources/test.jpg", 'wb') as f:
36 f.write(resp.content)
37 # 打开验证码图片文件
38 im = Image.open(r"../wordsDistinguish/Resources/test.jpg")
39 # 基本处理,灰度处理,提升识别准确率
40 im = im.convert("L")
41 # 保存处理后的图片
42 im.save("test.jpg")
43 # 利用pytesseract进行图片内容识别
44 text = pytesseract.image_to_string(im)
45 # 去除识别结果中的非数字/字母内容
46 text = re.sub("\W", "", text)
47 # 返回验证码内容
48 return text
49
50
51def do_login():
52 i = 0 # 识别错误次数
53 # 获取验证码
54 captcha = get_verification()
55 # 基本检验,验证码位数必须为四位
56 while len(captcha) != 4:
57 captcha = get_verification()
58 i = i + 1 # i+=1
59 print("第%d次识别错误" % i)
60
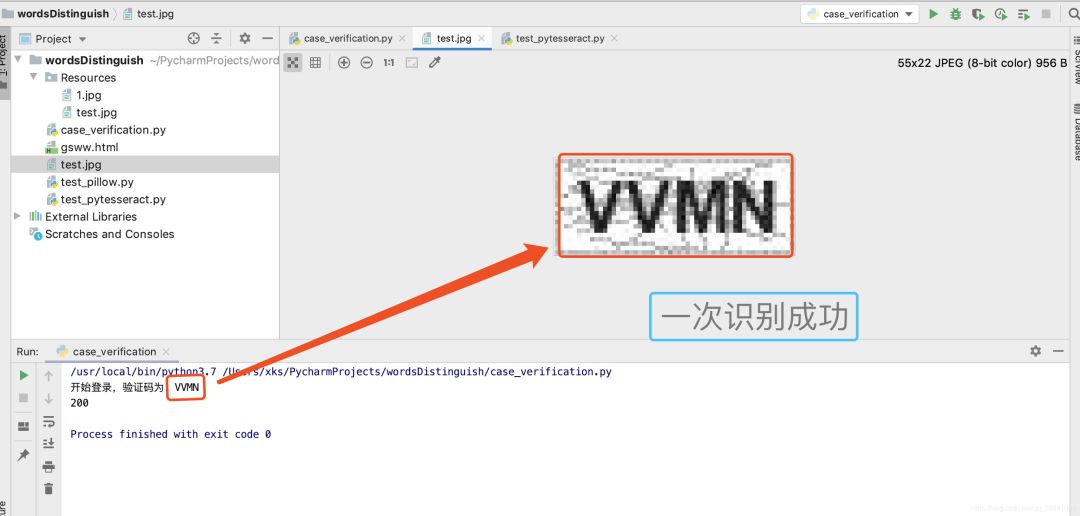
61 print("开始登录,验证码为:"+captcha)
62 # 传递的登录参数
63 data = {
64 "from": "http://so.gushiwen.org/user/collect.aspx",
65 "email": "你的注册邮箱",
66 "pwd": "你的登录密码",
67 "code": captcha,
68 "denglu": "登录"
69 }
70 # 登录地址
71 url = "https://so.gushiwen.org/user/login.aspx"
72 # 利用 session 发送post请求
73 response = session.post(url, headers=headers, data=data)
74 # 打印登录后的状态码
75 print(response.status_code)
76 # 保存登录后的页面内容,进一步确认是否登录成功
77 with open("gsww.html", encoding="utf-8", mode="w") as f:
78 f.write(response.content.decode())
79
80
81# 开始程序
82if __name__ == "__main__":
83 do_login()
(3)运行结果
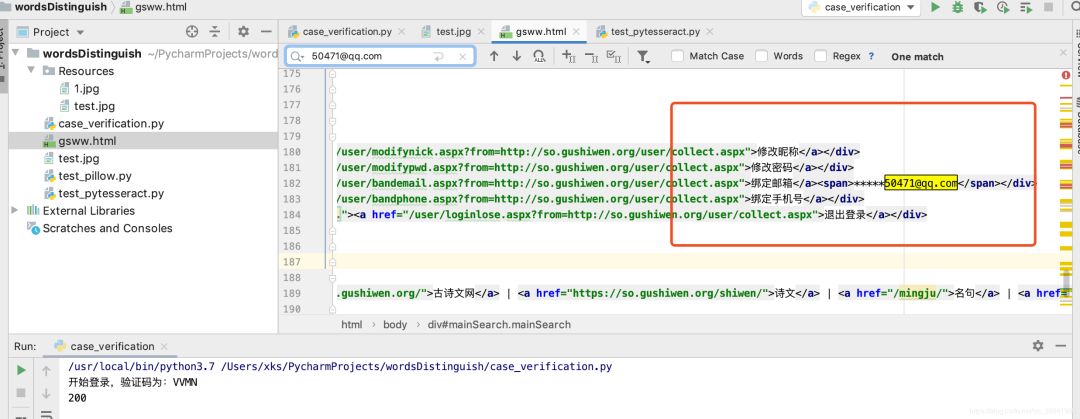
我们在浏览器观察登录后的页面发现,只有登录后的页面才有账号管理模块,其中有用户的唯一标识:绑定邮箱的后几位,我的是
50471@qq.com
。
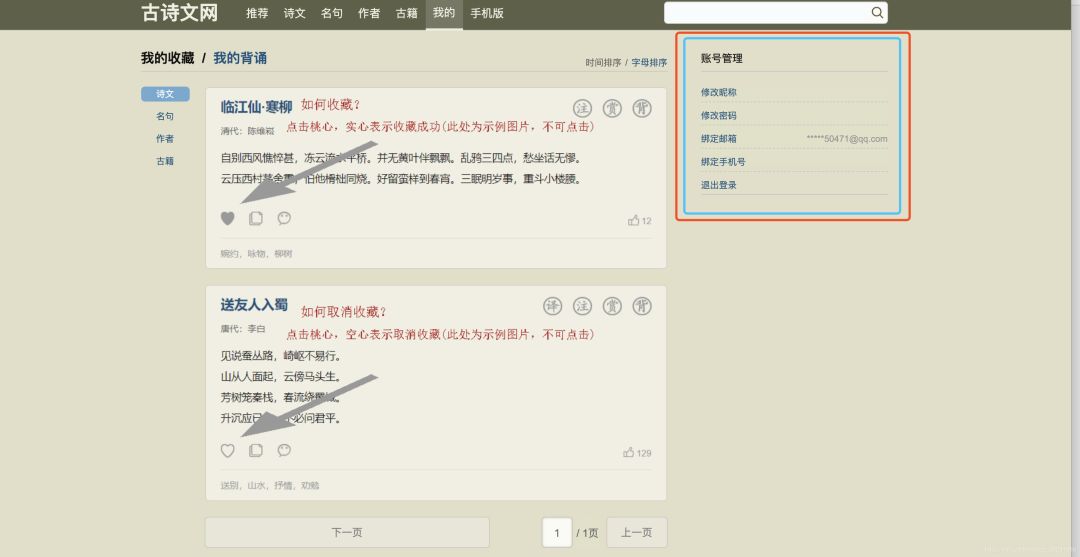
50471@qq.com
即可查明是否登录成功,我们发现可以查询到,即模拟登录成功了。
5、多说点话
pytesseract
,希望大家多多查看官方文档,仔细了解该模块,大有用处,后面有涉及项目我也会再次写文介绍。
完整Python基础知识要点
给个[在看],是对老表最大的支持!
以上是关于(原创)牛逼!通过Python做文字识别到破解图片验证码的主要内容,如果未能解决你的问题,请参考以下文章