C++ Win32程序编写入门
Posted 火柴盒zhang
tags:
篇首语:本文由小常识网(cha138.com)小编为大家整理,主要介绍了C++ Win32程序编写入门相关的知识,希望对你有一定的参考价值。
翻译:原文地址
一、关于Win32++
本文档描述了Win32++9.1版的功能。若要下载Win32++的程序清单,可以点击这里。
Win32++是一个用于构建windows应用程序的C++库。Win32++是MFC的免费替代品。它还有一个额外的优势,即能够在各种免费编译器上运行,包括Visual Studio Community、Clang以及CodeBlocks和Dev-C++提供的MinGW编译器。
Win32++在Windows API上提供了一个简单的封装,与MFC类似。然而,MFC有几个不同之处。Win32++使用很少的宏,并且不将宏用于消息映射。Win32++的所有代码都在一组头文件中提供。Win32++有视图窗口,但没有将Doc/view结构暴露给用户。当然,用户也可以自由使用Doc/View架构。
Win32++支持所有Windows操作系统,从Windows 95到Windows 11和Windows Server 2022。
二、前言
Win32++由用于创建窗口应用程序的C++库组成。它是MFC的免费替代品,可用于更广泛的编译器,包括Borland、Microsoft和MinGW的编译器。该库可用于创建各种程序,包括简单的窗口、对话框、属性表以及框架和MDI框架应用程序。教程部分提供了有关如何使用这些类构建自己的Win32应用程序的信息。
基于框架的应用程序通常有一个通用框架窗口,该窗口可能有例如菜单、工具栏和状态栏,并且在客户端区域上有一个单独的窗口(有时称为视图窗口)。您熟悉的许多windows应用程序都可能是基于框架的应用程序。您可以使用此库不仅生成简单的窗口和对话框,还可以生成外观专业的基于框架的应用程序,包括菜单、工具栏、状态栏和工具提示。
三、Win32++程序特点
Win32++提供了一个直接使用Windows API开发应用程序的库。它支持所有运行32位和64位Windows的MS操作系统,从Windows 95到Windows 10和Server 2019。Win32++旨在生成与使用MFC创建的程序外观相似的程序。该库可以开发基于简单窗口、对话框、框架和MDI框架的应用程序。Win32++架构有如下特点:
- Rebar control
- MenuBar 菜单栏(a menu housed inside the rebar control).
- ToolBar 工具栏
- Status bar 状态栏
- Tool tips 工具提示
- Docking
Win32++还为直接使用Windows API进行编程提供了一种面向对象的方法。创建的每个窗口都是一个C++类对象,能够有自己的窗口程序来处理路由消息。
所有Win32++的功能特点可参考原文。
四、开发环境准备
4.1 Win32++必备技能
为了使用Win32++,您需要以下各项:
- C++编译器 A C++ compiler.
- C++的知识Some knowledge of C++, including how to use classes
- Windows API文档 Documentation for the Windows API.
4.2 代码和工具
框架库和例子代码可以在这里下载。示例包括Visual Studio 6、Visual Studio Net 2003、VS2013、VS2015、VS2019、Dev-C++和CodeBlock。如果您使用的是其中一个,那么样本是预先配置好的,可以编译了。
如果您是C++编程新手,并且正在寻找一个免费的编译器来使用,我建议您使用Microsoft's Visual Studio Community。我发现这个编译器是最容易设置和使用的免费编译器。Visual Studio社区包括Windows 7和DirectX11 SDK,以及C++和Windows API文档。
如果您使用的是较旧的Microsoft Visual Studio 6.0编译器,则可能还需要安装并合并Platform SDK。
五、Win32++如何工作
5.1 使用Win32++
构成Win32++基础的代码位于include目录中。您不需要修改这些文件,而是从Win32++类继承,并在派生类中添加任何其他代码。例如,要创建SDI(单窗口)架构窗口,通常需要从CFrame派生自己的类,并把对标准框架的任何修改放在你自己类中。您可以重写WndProc成员函数,以包含您想要处理的任何其他消息。
一个单独的视图窗口放置在框架窗口的工作区上。通常,此视图窗口是通过从CWnd继承类来创建的。CFrame::SetView函数用于将视图窗口分配给框架。但是,对于MDI(多窗口)框架,CMDIFrame已经使用CMDIClient作为视图窗口,您可以使用CMDIFrame::AddMDIChild创建MDI子窗口的新实例。
5.2 面向对象方法
将面向对象的方法直接应用于Windows API编程的关键是要有一个C++类,它可以创建一个窗口,并包含自己的窗口过程作为成员函数。一旦我们有了这个类,我们就可以从它继承并重写窗口过程成员函数,以我们希望的方式处理每个派生窗口类型的消息。
创建这样的类并不简单,我怀疑这是MFC最初创建的原因之一。问题源于在创建窗口之前注册“窗口类”的方式。(这里的“类”一词指的是Windows API“窗口类”,与C++类不同。)以下代码片段显示了如何使用API注册窗口类:
WNDCLASSEX wc;
memset((WNDCLASSEX*)&wc, 0, sizeof(WNDCLASSEX));

wc.cbSize = sizeof(WNDCLASSEX);
//The name of the window procedure
wc.lpfnWndProc = WindowProc;
wc.hInstance = hInstance;
wc.lpszClassName = "TEST";
wc.hbrBackground = (HBRUSH)(COLOR_WINDOW + 1);

//Register the window class
::RegisterClassEx(&wc);
注意,我们需要提供窗口执行程序的函数名。窗口执行程序是我们控制接收到窗口消息时要做什么的过程。此函数必须完全符合Windows API所需的预定义标准。回调函数的典型声明如下:
LRESULT CALLBACK WindowProc(HWND wnd, UINT msg, WPARAM wparam, LPARAM lparam);我们可能会尝试将WindowProc函数设置为类的成员。不幸的是,每个类成员函数都有一个隐式this指针作为其参数之一,因此不能用作窗口的回调函数。如果这样做,WindowProc函数将不再符合预定义的标准,程序将无法编译。
我们可以使WindowProc函数成为类的静态成员函数。在静态函数中没有隐式this,这将正确编译。不幸的是,静态成员函数不能访问类对象(即,它没有this指针),也不能访问类的其他成员。正是这一点防止了静态成员函数以面向对象的方式使用。以下代码演示了静态成员函数方法的局限性:
class TestStatic

public:
  int member;

  void NormalFunction()

    //We can access member variables in a normal
    //member function
    member = 5;

    //The following line is equivalent to the one above
    this->member = 5;


  void static StaticFunction()

    //We cannot access member variables
    //in a static member function
    //The following line will give a compile error
    member = 5;

    //This will give an error too
    this->member = 5;

;
如果我们能够获得指向窗口类对象的指针(this指针),那么窗口执行程序的静态成员函数将非常有用。在创建窗口时,我们可以使用许多技术来访问指针。我选择的一个利用线程本地存储Thread Local Storage 来存储我们的指针,稍后将其插入STL(STL 是 C++ 通用库,由迭代器、算法、容器、仿函数、配接器和内存配置器组成)映射中。下面代码是如何做到的:
5.2.1 步骤一: 在CWinApp类中装载/安装线程本地存储(st_dwTlsIndex )以存储this指针:
CWinApp::CWinApp(HINSTANCE instance) : m_instance(instance)

  if (GetApp() == 0)

    st_dwTlsIndex = ::TlsAlloc();

    //snip
5.2.2 Step 2步骤二: 当CreateEx类创建窗口时,将this指针存储在线程本地存储(Thread Local Storage)中 :
// Ensure this thread has the TLS index set
TLSData* pTLSData = GetApp()->SetTlsIndex();

// Store the CWnd pointer in thread local storage
pTLSData->pCWnd = this;
5.2.3 Step 3步骤三: 在初始创建窗口期间,从线程本地存储中提取指针并将其添加到STL映射中:
// Retrieve the pointer to the TLS Data
TLSData* pTLSData = (TLSData*)TlsGetValue(GetApp()->GetTlsIndex());

// Retrieve pointer to CWnd object from Thread Local Storage TLS
w = pTLSData->pCWnd;

// Store the CWnd pointer in the HWND map
GetApp()->AddToMap(hwnd, w);

return w->WndProc(msg, wparam, lparam);
5.2.4 Step 4步骤四: 对于每个后续的窗口消息,我们从STL映射中提取指针,并使用它将消息处理重定向到适当的WndProc函数:
CWnd* w = GetApp()->GetCWndFromMap(hwnd);
return w->WndProc(msg, wparam, lparam);
5.2.5 详细的Window创建
现在我们已经了解了窗口过程,是时候在创建窗口时看看这些程序是如何组合在一起的了。这是创建窗口的代码:
inline HWND CWnd::CreateEx(DWORD exStyle, LPCTSTR pClassName, LPCTSTR pWindowName,
                             DWORD style, int x, int y, int width, int height, HWND parent,
                             HMENU idOrHMenu, LPVOID lparam /*= NULL*/)
// Creates the window by specifying all the window creation parameters

    assert( GetApp() );        // Test if Win32++ has been started
    assert( !IsWindow() );     // Only one window per CWnd instance allowed

    // Ensure a window class is registered
    CString className;
    if (pClassName == 0 || pClassName[0] == _T('\\0'))
        className = _T("Win32++ Window");
    else
        className = pClassName;

    WNDCLASS wc;
    ZeroMemory(&wc, sizeof(wc));
    wc.lpszClassName = className;
    wc.hbrBackground = reinterpret_cast(::GetStockObject(WHITE_BRUSH));
    wc.hCursor       = ::LoadCursor(NULL, IDC_ARROW);

    // Register the window class (if not already registered)
    if (RegisterClass(wc) == 0)

        TRACE("*** RegisterClass failed ***\\n");
        assert( false );


    // Ensure this thread has the TLS index set
    TLSData* pTLSData = GetApp()->SetTlsData();

    // Store the CWnd pointer in thread local storage
    pTLSData->pWnd = this;
    m_wnd = 0;

    // Create window
    HWND wnd = ::CreateWindowEx(exStyle, className, pWindowName, style, x, y, width, height,
                                hWParent, idOrMenu, GetApp()->GetInstanceHandle(), lparam);

    // Tidy up
    pTLSData->pWnd = NULL;

    if (wnd == 0)

        // Throw an exception when window creation fails
        throw CWinException(g_msgWndCreateEx);


    // Automatically subclass predefined window class types
    if (pClassName)

        ::GetClassInfo(GetApp()->GetInstanceHandle(), pClassName, &wc);
        if (wc.lpfnWndProc != GetApp()->m_callback)

            Subclass(wnd);

            // Override this to perform tasks after the window is attached.
            OnAttach();


    // Clear the CWnd pointer from TLS
    pTLSData->pWnd = NULL;

    // Post a message to trigger a call of OnInitialUpdate
    PostMessage(UWM_WINDOWCREATED);

    return wnd;
下一个代码段是第一次接收消息的窗口过程。我们从映射中提取指向CWnd对象的指针,并使用它将窗口消息的处理重定向到适当的WndProc函数:
inline LRESULT CALLBACK CWnd::StaticWindowProc(HWND wnd, UINT msg, WPARAM wparam, LPARAM lparam)
// All CWnd windows direct their messages here. This function redirects the message
// to the CWnd's WndProc function.

    assert( GetApp() );

    CWnd* w = GetApp()->GetCWndFromMap(wnd);
    if (w == 0)

        // The CWnd pointer wasn't found in the map, so add it now

        // Retrieve the pointer to the TLS Data
        TLSData* pTLSData = GetApp()->GetTlsData();
        assert(pTLSData);

        if (pTLSData)

            // Retrieve pointer to CWnd object from Thread Local Storage TLS
            w = pTLSData->pWnd;
            assert(w);              // pTLSData->pCWnd is assigned in CreateEx
            if (w)

                pTLSData->pWnd = NULL;

                // Store the CWnd pointer in the HWND map
                w->m_wnd = wnd;
                w->AddToMap();


    return w->WndProc(msg, wparam, lparam);
最后,下一个代码段显示StaticWindowProc调用的函数。通常,当我们从CWnd派生一个新类时,我们会重写这个函数来控制各种窗口消息的处理方式:
inline LRESULT CWnd::WndProc(UINT msg, WPARAM wparam, LPARAM lparam)

    // Override this function in your class derived from CWnd to handle
    //  window messages. A typical function might look like this:

    //	switch (msg)
    //
    //	case MESSAGE1:  return OnMessage1();
    //	case MESSAGE2:  return OnMessage2();
    //

    // The message functions should return a value recommended by the Windows API documentation.
    // Alternatively, return FinalWindowProc to continue with default processing.

    // Always pass unhandled messages on to WndProcDefault
    return WndProcDefault(msg, wparam, lparam);
使用该技术,我们能够将每个窗口消息转发到适当的CWnd对象。即使在创建窗口期间,也不会丢弃任何消息。该技术还支持所有窗口类型,包括对话框、通用控件、MDI框架和属性表。
六、示例教程
6.1 一个简单窗口 The Simplest Window
#define _WIN32_WINDOWS  0x0410
#define _WIN32_IE       0x0401

#include "wxx_wincore.h"

// Note:
//  * Add the Win32++\\include  directory to project's additional include directories


//
// CMyWindow is the application's main window.
class CMyWindow : public CWnd

public:
    CMyWindow()
    virtual void OnDestroy()  PostQuitMessage(0);     // Ends the program
    virtual ~CMyWindow()
;


// WinMain is the program's entry point. The program starts here.
//此处和window的主入口程序调用一致
int WINAPI WinMain(HINSTANCE, HINSTANCE, LPSTR, int)

    // Start Win32++
    CWinApp theApp;

    // Create a CMyWindow object
    CMyWindow myWindow;

    // Create (and display) the window
    myWindow.Create();

    // Run the application's message loop
    return theApp.Run();
此处的 int WINAPI WinMain(HINSTANCE, HINSTANCE, LPSTR, int)和window定义的主入口程序一致。
该程序有四个关键步骤:
- 启动Win32++。 我们在这里通过创建一个名为MyApp的CWinApp对象来实现这一点。
- 创建名为myWindow的CMyWindow对象。
- 通过调用Create函数创建默认窗口。
- 通过调用Run函数启动消息循环。
CMyWindow类继承自CWnd。CWnd是用于创建窗口的所有对象的基类。当窗口关闭时,我们重写CWnd的OnDestroy函数以结束程序。
6.2 使用继承创建窗口 Using Classes and Inheritance
上一教程中的程序直接调用CWinApp类。然而,通常情况下,我们会从这个类继承,以便对我们创建的CWinApp对象的类型有更多的控制权。
下面是我们如何从CWinApp派生类的示例。
// A class that inherits from CWinApp.
// It is used to run the application's message loop.
class CSimpleApp : public CWinApp

public:
    CSimpleApp()
    virtual ~CSimpleApp()
    virtual BOOL InitInstance();

private:
    CView m_View;
;

BOOL CSimpleApp::InitInstance()

    // Create the Window
    m_View.Create();

    return TRUE;
请注意,我们重写InitInstance方法以确定应用程序启动时发生的情况。在本例中,我们为m_View成员变量创建窗口。m_View成员变量是从CWnd继承的CView对象。CView的代码如下所示。
//  Add the Win32++\\include  directory to project's additional include directories

#include "wxx_wincore.h"


// A class that inherits from CWnd. It is used to create the window.
class CView : public CWnd

public:
    CView()
    virtual void OnDestroy()  PostQuitMessage(0);  // Ends the program
    virtual ~CView()
;
CSimpleApp和CView类在WinMain中使用如下
int APIENTRY WinMain(HINSTANCE, HINSTANCE, LPSTR, int)

    // Start Win32++
    CSimpleApp MyApp;

    // Run the application
    return MyApp.Run();
6.3 简单涂鸦程序 Using Messages to Create a Scribble Window
窗口可能需要响应的每个外部事件都通过消息发送到窗口。现在是时候通过处理这些消息来控制窗口的行为了。每个CWnd对象在WndProc函数中处理自己的消息。在本例中,我们将通过处理鼠标左键消息来创建一个简单的涂鸦程序。我们允许用户通过响应鼠标消息在窗口上绘制。当用户在按下鼠标左键的同时移动鼠标时,将在窗口上绘制一条线。
单击左按钮时,WM_LBUTTONDOWN消息将发送到窗口,并且光标位于窗口的工作区上。我们捕获鼠标输入并将当前鼠标位置存储在m_oldPt成员变量中。
光标移动时,WM_MOUSEMOVE消息将发布到窗口。如果未捕获鼠标,则消息将发布到包含光标的窗口。否则,消息将发布到捕获鼠标的窗口。我们检查左按钮是否也向下,并调用DrawLine在视图窗口中绘制线。
在鼠标捕获期间,当鼠标左键从向下变为向上时,WM_LBUTTONUP消息将发送到窗口。
窗口通过其窗口过程接收消息。我们拦截这些消息,并通过重写WndProc函数来采取自己的行动。
LRESULT CView::WndProc(UINT msg, WPARAM wparam, LPARAM lparam)

  switch (uMsg)

    case WM_LBUTTONDOWN: 	return OnLButtonDown(msg, wparam, lparam);
    case WM_MOUSEMOVE:	return OnMouseMove(msg, wparam, lparam);
    case WM_LBUTTONUP:	return OnLButtonUp(msg, wparam, lparam);


  //Use the default message handling for remaining messages
  return WndProcDefault(msg, wparam, lparam);
以下是WndProc中使用的函数的定义。当收到WM_LBUTTONDOWN消息时,我们使用SetCapture捕获鼠标输入。这允许我们的窗口接收鼠标消息,即使鼠标光标移动到我们的窗口之外。当释放鼠标左键时,我们停止使用ReleaseCapture捕捉鼠标输入。
LRESULT CView::OnLButtonDown(UINT, WPARAM, LPARAM lparam)

  // Capture mouse input.
  SetCapture();

  m_oldPt.x = GET_X_LPARAM(lparam);
  m_oldPt.y = GET_Y_LPARAM(lparam);

  return 0;


LRESULT CView::OnLButtonUp(UINT, WPARAM, LPARAM lparam)

  UNREFERENCED_PARAMETER(lparam);

  //Release the capture on the mouse
  ReleaseCapture();

  return 0;


LRESULT CView::OnMouseMove(UINT, WPARAM wparam, LPARAM lparam)

  // hold down the left mouse button and move mouse to draw lines.
  if (wparam & MK_LBUTTON)

    DrawLine(GET_X_LPARAM(lparam), GET_Y_LPARAM(lparam));
    m_oldPt.x = GET_X_LPARAM(lparam);
    m_oldPt.y = GET_Y_LPARAM(lparam);


  return 0;
运行效果如下:

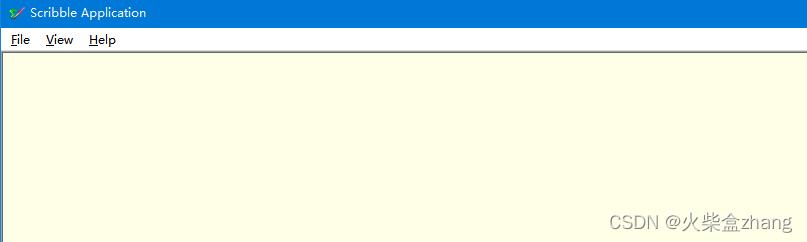
6.4 重新绘制窗口 Repainting the Window
上一个示例未能重新绘制窗口。每当窗口被调整大小、从最小化状态恢复或窗口的一部分被另一个窗口覆盖后显示时,都需要重新绘制窗口。
Windows API自动处理重新绘制。当窗口的一部分需要重新绘制时,窗口会向应用程序发送WM_PAINT消息。通常,您将使用代码来响应此消息,以重新绘制窗口的整个工作区。您不必担心需要重新绘制工作区的哪些部分,因为windows会自动为您处理这一部分。
Win32++已包含处理CWnd::WndProc中WM_PAINT消息的代码。我们需要做的就是编写OnDraw函数。对于我们这里的应用程序,我们可以将各个点存储在一个向量中,并让OnDraw函数再次绘制这些线。存储点的函数如下所示。
void CView::StorePoint(int x, int y, bool PenDown)

  PlotPoint P1;
  P1.x = x;
  P1.y = y;
  P1.PenDown = PenDown;

  m_points.push_back(P1); //Add the point to the vector
OnDraw函数如下所示。
void CView::OnDraw(CDC& dc)

  if (m_points.size() > 0)

    bool bDraw = false;  //Start with the pen up

    for (unsigned int i = 0 ; i < m_points.size(); i++)

      if (bDraw)
        dc.LineTo(m_points[i].x, m_points[i].y);
      else
        dc.MoveTo(m_points[i].x, m_points[i].y);

      bDraw = m_points[i].PenDown;
6.5 给涂鸦程序一个框架 Wrapping a Frame around our Scribble Window
本节生成简单框架应用程序。我们从Win32++中的CFrame类继承了一个名为CMainframe的类。注意我们如何使用SetView函数来指定框架的“视图”窗口。这个“视图”窗口恰好是与上一教程中显示的简单涂鸦应用程序相同的代码。通过这种方式,我们在之前的涂鸦应用程序周围包装一个框架。
HWND CMainFrame::Create(HWND parent)

    // Set m_View as the view window of the frame
    SetView(m_view);

    return CFrame::Create(parent);
CMainFrame类从CFrame继承OnCommand。此功能响应框架菜单和工具栏的输入。我们还没有实现许多这些输入,所以在这个阶段,大多数输入只是显示一个简单的消息框。
BOOL CMainFrame::OnCommand(WPARAM wparam, LPARAM lparam)

  UNREFERENCED_PARAMETER(lparam);

  // Process the messages from the Menu and Tool Bar
  switch (LOWORD(wparam))

    case IDM_FILE_NEW:	  return OnFileNew();
    case IDM_FILE_OPEN:	  return OnFileOpen();
    case IDM_FILE_SAVE:	  return OnFileSave();
    case IDM_FILE_SAVEAS:	  return OnFileSaveAs();
    case IDM_FILE_PRINT:	  return OnFilePrint();
    case IDW_VIEW_STATUSBAR:  return OnViewStatusBar();
    case IDW_VIEW_TOOLBAR:	  return OnViewToolBar();
    case IDM_HELP_ABOUT:	  return OnHelp();
    case IDM_FILE_EXIT:	  return OnFileExit();


  return FALSE;
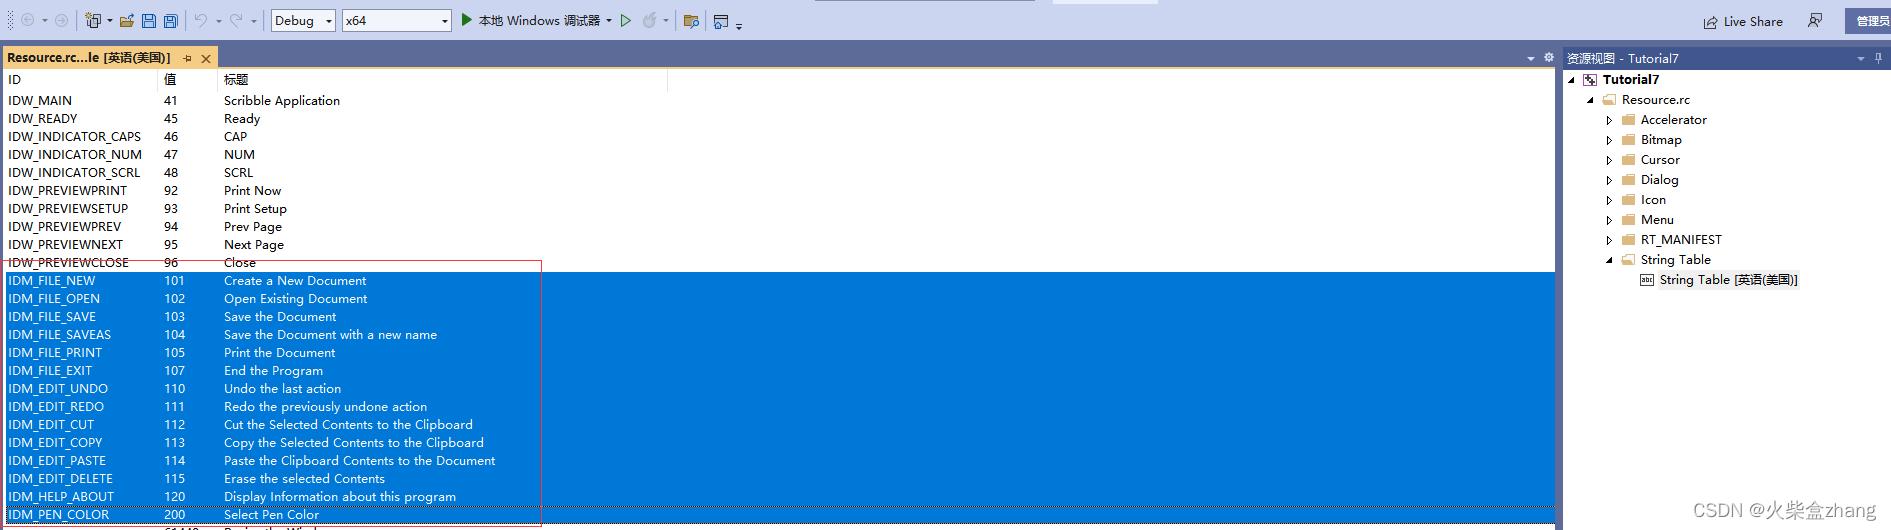
与6.3 比较增加了图标和菜单运行效果如下: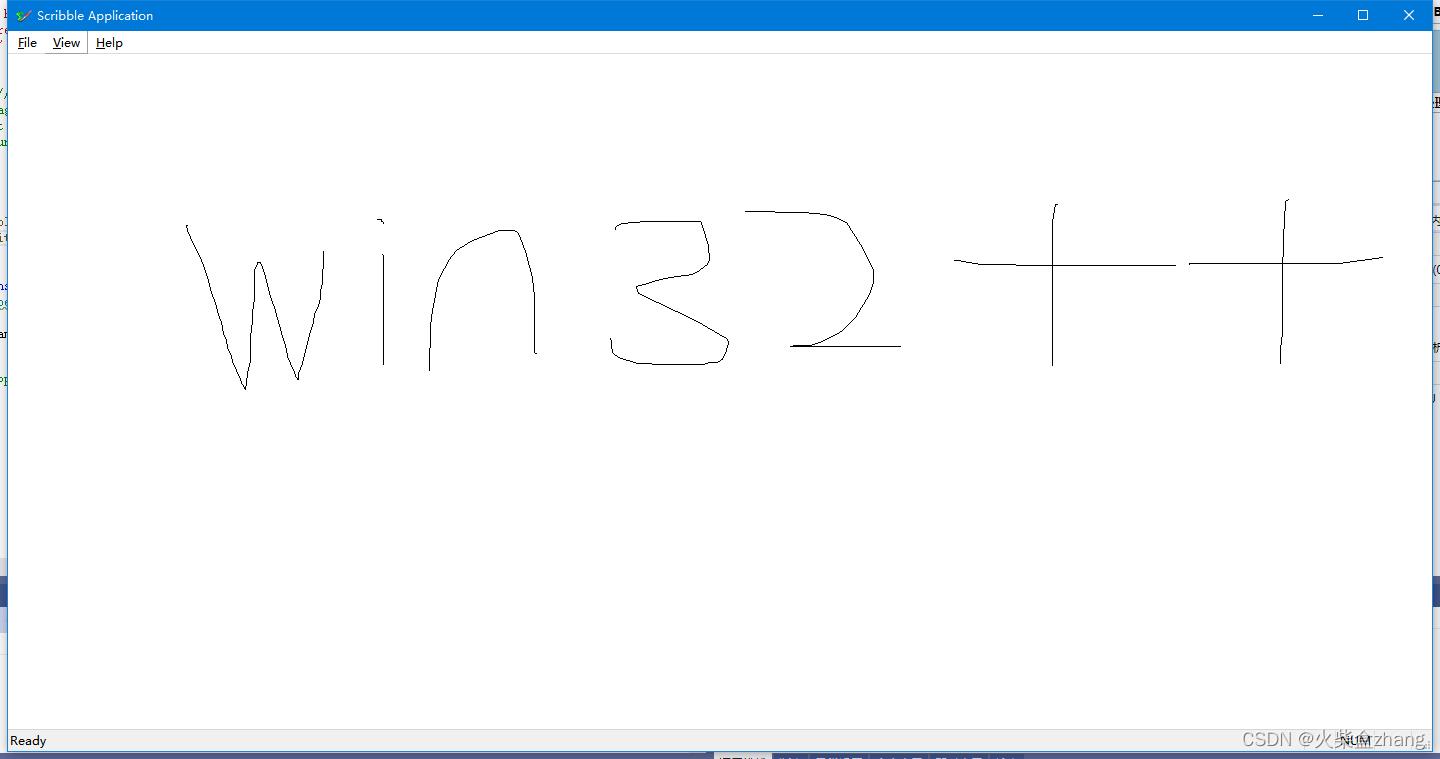
菜单资源如下图:

6.6 定制化窗口创建 Customising Window Creation
到目前为止,我们使用Win32++提供的默认参数来创建视图窗口。在这里,我们使用PreRegisterClass在创建窗口之前指定Window Class(不要与C++类混淆)参数。这将允许我们创建一个带有彩色背景的窗口并设置其光标。
void CView::PreRegisterClass(WNDCLASS &wc)

  // Set the background brush and cursor
  wc.hbrBackground = m_brush;
  wc.lpszClassName = "Scribble Window";
  wc.hCursor = GetApp()->LoadCursor(IDC_CURSOR1);
我们还可以使用PreCreate为窗口的边框提供凹陷边缘,从而使其具有3D外观。
void CView::PreCreate(CREATESTRUCT &cs)

  // Set the extra style to provide a sunken edge
  cs.dwExStyle = WS_EX_CLIENTEDGE;
PreRegisterClass中使用的游标IDC_CURSOR1在resource.rc中指定。资源rc文件是我们的资源脚本,包含各种窗口资源的规范,如位图、对话框、光标、图标、菜单等。资源rc被编译并链接到我们的应用程序中。下面是资源文件中指定的游标。
/
//
// Cursor
//

IDC_CURSOR1             CURSOR                  "res/Cursor.cur"
我们在CView的构造函数中创建背景笔刷。画笔是一个CBrush对象,当调用其析构函数时,它会自动删除画笔。代码展示了笔刷创建。
// Constructor
CView::CView() : m_penColor(RGB(0,0,0))

   m_brush.CreateSolidBrush(RGB(255,255,230));
背景颜色和光标如下图:

6.7 定制化工具栏 Customising the ToolBar
我们的框架窗口顶部有一个菜单和一个工具栏。自定义菜单相对简单,因为我们可以使用资源编辑器来执行该任务。然而,自定义工具栏是另一回事。虽然Microsoft Visual Studio附带的资源编辑器可以编辑工具栏资源,但这不是标准的,因此我们需要提出一种符合标准的修改工具栏的方法。
要为应用程序设置自己的工具栏,需要执行以下步骤:
- 修改工具栏位图。Modify the toolbar bitmap.

- 将工具栏资源ID添加到字符串表中。Add the toolbar resource IDs to to the string table.
- 将资源ID分配给工具栏按钮,如下所示。Assign resource IDs to the toolbar buttons, as shown below.
void CMainFrame::SetupToolBar()

  // Define our toolbar
  AddToolBarButton( IDM_FILE_NEW   );
  AddToolBarButton( IDM_FILE_OPEN  );
  AddToolBarButton( IDM_FILE_SAVE  );
  AddToolBarButton( 0 );				// Separator
  AddToolBarButton( IDM_EDIT_CUT,   FALSE );
  AddToolBarButton( IDM_EDIT_COPY,  FALSE );
  AddToolBarButton( IDM_EDIT_PASTE, FALSE );
  AddToolBarButton( IDM_FILE_PRINT );
  AddToolBarButton( 0 );				// Separator
  AddToolBarButton( IDM_PEN_COLOR );
  AddToolBarButton( 0 );				// Separator
  AddToolBarButton( IDM_HELP_ABOUT );

  // Note: By default a single bitmap with a resource ID of IDW_MAIN and
  //       a color mask of RGB(192,192,192) is used for the ToolBar.
  //       The color mask is a color used for transparency.
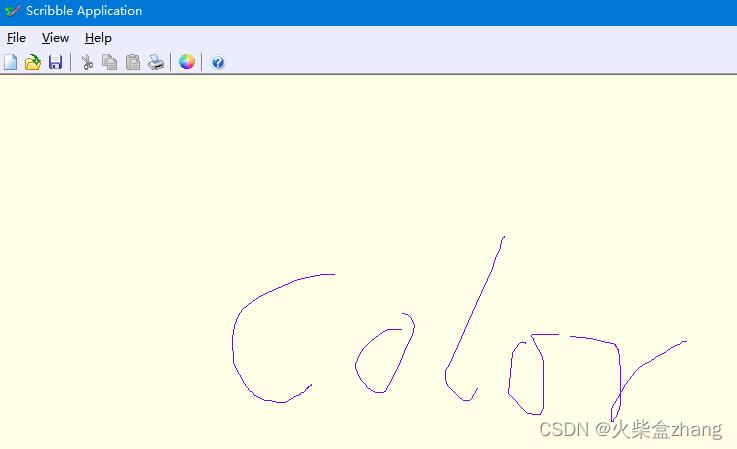
Windows提供了ChooseColor函数。此功能显示一个对话框,允许我们为笔选择颜色。使用ChooseColor的代码如下:
void CMainFrame::OnPenColor()

  // array of custom colors, initialized to white
  static COLORREF custColors[16] =  RGB(255,255,255), RGB(255,255,255), RGB(255,255,255), RGB(255,255,255),
                                     RGB(255,255,255), RGB(255,255,255), RGB(255,255,255), RGB(255,255,255),
                                     RGB(255,255,255), RGB(255,255,255), RGB(255,255,255), RGB(255,255,255),
                                     RGB(255,255,255), RGB(255,255,255), RGB(255,255,255), RGB(255,255,255) ;

  CColorDialog colorDlg;
  ColorDlg.SetCustomColors(custColors);

  // Initialize the Choose Color dialog
  if (colorDlg.DoModal(*this) == IDOK)

    // Store the custom colors in the static array
    memcpy(custColors, colorDlg.GetCustomColors(), 16*sizeof(COLORREF));

    // Retrieve the chosen color
    m_view.SetPenColor(colorDlg.GetColor());
运行效果如下:

6.8 文件加载和保存 Loading and Saving Files
在节教程中,我们将演示如何将数据保存到文件中,然后再次加载。
6.8.1 在CView和CDoc之间传输数据
在上一节教程中,我们的绘图点数据存储在CView的向量成员变量中。在本教程中,我们将这些数据移动到CDoc类。将数据加载并保存到磁盘文件的代码也添加到CDoc中。像这样从视图中分离数据通常被称为文档/视图体系结构。
我们的CDoc类是CView类的成员变量。
class CMainFrame : public CFrame

public:
  CMainFrame();
  virtual ~CMainFrame();

  CDoc& GetDoc()  return m_view.GetDoc();
  void LoadFile(LPCTSTR str);

  LRESULT OnDropFile(WPARAM wparam);

  void OnFileExit();
  void OnFileNew();
  void OnFileOpen();
  void OnFilePrint();
  void OnFileSave();
  void OnFileSaveAs();
  void OnPenColor();

protected:
  virtual BOOL OnCommand(WPARAM wparam, LPARAM lparam);
  virtual void SetupToolBar();
  virtual LRESULT WndProc(UINT msg, WPARAM wparam, LPARAM lparam);

private:
  CView m_view;
  CString m_pathName;

;
我们的CView类将PlotPoint数据存储在CDoc中。它使用以下函数访问CDoc. CView::GetDoc 返回对CDoc的引用,而CView::GetPoints返回对包含PlotPoints的向量的引用
CDoc& CView::GetDoc()

  return m_doc;


std::vector& CView::GetAllPoints()

  return GetDoc().GetAllPoints();
6.8.2 保存数据
要保存数据,我们执行以下步骤:
- 使用CFileDialog打开对话框,并选择要将数据保存到的文件名。
- 使用CArchive将数据写入文件。
下面代码段显示如何使用SaveFileDialog函数选择要写入的文件。
void CMainFrame::OnFileSaveAs()

  CFileDialog fileDlg(FALSE, _T("dat"), 0, OFN_OVERWRITEPROMPT, _T("Scribble Files (*.dat)\\0*.dat\\0\\0"));
  fileDlg.SetTitle(_T("Save File"));

  // Bring up the file open dialog retrieve the selected filename
  if (fileDlg.DoModal(*this) == IDOK)

    CString str = fileDlg.GetPathName();

    // Save the file
    if (GetDoc().FileSave(str))

      // Save the file name
      m_pathName = str;
      AddMRUEntry(m_pathName);
下一段代码演示了如何将CDoc的内容写入存档。请注意,写入存档失败会引发FileException。在这里,如果写入存档失败,我们使用捕获来显示相关信息。
BOOL CDoc::FileSave(LPCTSTR szFilename)

  BOOL isFileSaved = FALSE;

  try

    CArchive ar(szFilename, CArchive::store);
    ar << *this;
    isFileSaved = TRUE;

  catch (const CFileException &e)

    // An exception occurred. Display the relevant information.
    ::MessageBox(NULL, e.GetText(), _T("Failed to Save File"), MB_ICONWARNING);


  return isFileSaved;
CDoc继承自CObject。CDoc提供了一个虚拟Serialize函数,我们可以重写该函数来定义CDoc类在存档中的存储方式。在我们定义的Serialize函数中,CArchive的IsStorageing函数用于测试存档是否正在加载或存储,以便我们可以采取适当的操作。
这是CDoc的Serialize函数。存储时,我们首先存储PlotPoint的数量,然后存储包含每个PlotPoint的ArchiveObject。加载时,我们读取PlotPoint的数量,然后读取包含每个PlotPoint的ArchiveObject。然后将PlotPoints推到我们的向量中。
void CDoc::Serialize(CArchive& ar)
// Uses CArchive to stream data to or from a file


  if (ar.IsStoring())

    // Store the number of points
    UINT points = GetPoints().size();
    ar << points;

    // Store the PlotPoint data
    std::vector::iterator iter;
    for (iter = GetPoints().begin(); iter < GetPoints().end(); ++iter)

      ArchiveObject ao( &(*iter), sizeof(PlotPoint) );
      ar << ao;


  else

    UINT points;
    PlotPoint pp = 0;
    GetPoints().clear();

    // Load the number of points
    ar >> points;

    // Load the PlotPoint data
    for (UINT u = 0; u < points; ++u)

      ArchiveObject ao( &pp, sizeof(pp) );
      ar >> ao;
      GetPoints().push_back(pp);
6.8.3 加载数据
从文件中读取数据的过程相当类似。涉及的步骤如下:
- 使用CFile::OpenFileDialog打开对话框并选择要加载的文件。
- 使用CArchive从文件中检索数据。
下面的代码段演示了如何使用OpenFileDialog选择要加载的文件。
void CMainFrame::OnFileOpen()

  CFileDialog fileDlg(TRUE, _T("dat"), 0, OFN_FILEMUSTEXIST, _T("Scribble Files (*.dat)\\0*.dat\\0\\0"));
  fileDlg.SetTitle(_T("Open File"));

  // Bring up the file open dialog retrieve the selected filename
  if (fileDlg.DoModal(*this) == IDOK)

    // Load the file
    LoadFile(fileDlg.GetPathName());
下面代码从所选文件的内容加载PlotPoint矢量的代码。如果归档文件未能写入文件,我们再次捕获异常并显示结果。
void CMainFrame::LoadFile(LPCTSTR fileName)

  // Retrieve the PlotPoint data
  if (GetDoc().FileOpen(fileName))

    // Save the filename
    m_fileName = fileName;

  else
    m_filehName=_T("");

  GetView().Invalidate();


BOOL CDoc::FileOpen(LPCTSTR fileName)

  GetPoints().clear();
  BOOL isFileOpened = FALSE;

  try

    CArchive ar(fileName, CArchive::load);
    ar >> *this;
    isFileOpened = TRUE;


  catch (const CWinException& e)

    // An exception occurred. Display the relevant information.
    ::MessageBox(NULL, e.GetText(), _T("Failed to Load File"), MB_ICONWARNING);

    GetPoints().clear();


  return isFileOpened;
6.8.4 支持文件拖拉
加载文件的另一种方法是将其拖拉到视图窗口中。这就是所谓的拖放。支持拖放所需的步骤如下:
- 在 CView::OnCreate方法中增加DragAcceptFiles支持
int CView::OnCreate(CREATESTRUCT&)

  // Support Drag and Drop on this window
  DragAcceptFiles(TRUE);
  return 0;
- 将WM_DROPFILES消息的处理程序添加到CView::WndProc
LRESULT CView::WndProc(UINT msg, WPARAM wparam, LPARAM lparam)

  switch (uMsg)

    case WM_DROPFILES:	return OnDropFiles(msg, wparam, lparam);
    case WM_LBUTTONDOWN:	return OnLButtonDown(msg, wparam, lparam);
    case WM_MOUSEMOVE:	return OnMouseMove(msg, wparam, lparam);
    case WM_LBUTTONUP:	return OnLButtonUp(msg, wparam, lparam);


  //Use the default message handling for remaining messages
  return WndProcDefault(msg, wparam, lparam);
- 添加 CView::OnDropFiles成员函数。
LRESULT CView::OnDropFiles(UINT msg, WPARAM wparam, LPARAM lparam)

  UNREFERENCED_PARAMETER(msg);
  UNREFERENCED_PARAMETER(lparam);

  HDROP drop = (HDROP)wparam;
  UINT length = DragQueryFile(drop, 0, 0, 0);

  if (length > 0)

    CString fileName;
    DragQueryFile(drop, 0, fileName.GetBuffer(length), length+1);
    fileName.ReleaseBuffer();

    // Send a user defined message to the frame window
    GetParent().SendMessage(UWM_DROPFILE, (WPARAM)fileName.c_str(), 0);

    DragFinish(drop);


  return 0;
6.9 打印Printing
在本节教程,我们将演示如何将位图发送到打印机。本例中的位图将是我们在视图窗口中绘制的位图。生成的打印输出将调整大小以匹配原始图形的大小。此任务可分为几个步骤:
6.9.1 从视图窗口提取位图
当我们在视图窗口上绘制时,实际上是在绘制附加到视图窗口的设备上下文的位图。在这里,我们将此位图复制到兼容位图 compatible bitmap。
   // Copy the bitmap from the View window
  CClientDC viewDC(GetView());
  CMemDC memDC(viewDC);
  memDC.CreateCompatibleBitmap(viewDC, width, height);
  memDC.SelectObject(viewBitmap);
  memDC.BitBlt(0, 0, width, height, viewDC, 0, 0, SRCCOPY);
  CBitmap bmView = memDC.DetachBitmap();
6.9.2 选择打印机
这一步相当直接。我们声明一个PRINTDLG结构,并在PRINTDLG函数中使用它。PrintDlg函数打开一个对话框,允许我们选择打印机,并将其设备上下文存储在PrintDlg结构中。
   CPrintDialog printDlg;

  // Bring up a dialog to choose the printer
  if (printDlg.DoModal(GetView()) == IDOK) // throws exception if there is no default printer
注意:如果没有配置打印机或无法创建对话框,CPrintDialog::DoModal 将引发CResourceException。应使用try/catch块来捕获DoModal引发的异常。
6.9.3 启动打印作业
在将输出发送到打印机之前,应调用StartDoc函数。此功能可确保多页文档不会与其他打印作业穿插在一起。然后为打印输出的每一页调用StartPage(和相应的EndPage)。
   // Zero and then initialize the members of a DOCINFO structure.
  DOCINFO di = 0;
  di.cbSize = sizeof(DOCINFO);
  di.lpszDocName = _T("Scribble Printout");

  // Begin a print job by calling the StartDoc function.
  StartDoc(pd.hDC, &di);

  // Inform the driver that the application is about to begin sending data.
  StartPage(pd.hDC);
6.9.4 从位图中提取位图图像数据
为了使用StretchDIBits功能函数(下文使用),我们首先需要位图图像数据。这通过使用GetDIBits返回。在下面的代码示例中,它被调用两次,第一次是获取大小字节数组以保存数据,第二次是填充字节数组。
   // Get the dimensions of the View window
  CRect viewRect = GetView().GetClientRect();
  int width = viewRect.Width();
  int height = viewRect.Height();

  // Fill the BITMAPINFOHEADER structure
  BITMAPINFOHEADER bih;
  ZeroMemory(&bih, sizeof(BITMAPINFOHEADER));
  bih.biSize = sizeof(BITMAPINFOHEADER);
  bih.biHeight = height;
  bih.biWidth = width;
  bih.biPlanes = 1;
  bih.biBitCount =  24;
  bih.biCompression = BI_RGB;

  // Note: BITMAPINFO and BITMAPINFOHEADER are the same for 24 bit bitmaps
  // Get the size of the image data
  BITMAPINFO* pBI = reinterpret_cast<BITMAPINFO*>(&bih);
  memDC.GetDIBits(bmView, 0, height, NULL, pBI, DIB_RGB_COLORS);

  // Retrieve the image data
  std::vector imageData(bih.biSizeImage, 0);	// a vector to hold the byte array
  byte* byteArray = &imageData.front();
  memDC.GetDIBits(bmView, 0, height, byteArray, pBI, DIB_RGB_COLORS);
6.9.5 将调整大小的图像数据复制到打印机的设备上下文
StretchDIBits是此处用于将位图信息复制到打印机的设备上下文的函数,因为位图需要调整大小,以便在打印页面上保持与原件相同的尺寸。以下代码段显示如何计算缩放因子并调用StretchDIBits函数。
  // Determine the scaling factors required to print the bitmap and retain its original proportions.
 double viewPixelsX = double(viewDC.GetDeviceCaps(LOGPIXELSX));
 double viewPixelsY = double(viewDC.GetDeviceCaps(LOGPIXELSY));
 double printPixelsX = double(printDC.GetDeviceCaps(LOGPIXELSX));
 double printPixelsY = double(printDC.GetDeviceCaps(LOGPIXELSY));
 double scaleX = printPixelsX / viewPixelsX;
 double scaleY = printPixelsY / viewPixelsY;

 int scaledWidth = int(width * scaleX);
 int scaledHeight = int(height * scaleY);

 // Use StretchDIBits to scale the bitmap and maintain its original proportions
 printDC.StretchDIBits(0, 0, scaledWidth, scaledHeight, 0, 0, width, height,
                       byteArray, pBI, DIB_RGB_COLORS, SRCCOPY);
6.9.6 结束打印作业
要完成打印作业,将调用EndPage以指示打印到此页面已完成,然后调用EndDoc结束打印作业。
   // Inform the driver that the page is finished.
  EndPage(pd.hDC);

  // Inform the driver that document has ended.
  EndDoc(pd.hDC);
6.9.7 在CDoc中访问CView类
CDoc::Print方法使用GetView访问CView类。GetView的定义如下。
const CView& CDoc::GetView() const

  CMainFrame& frame = GetScribbleApp().GetMainFrame();
  return static_cast(frame.GetView());
6.10 打印预览
在前面的教程中,我们看到了如何将输出发送到打印机。在本教程中,我们将演示如何在将打印页发送到打印机之前预览打印页。
许多支持打印的应用程序也支持打印预览。打印预览为用户提供了一个机会,可以在打印前查看输出的效果,并进行任何必要的调整。
6.10.1 申明CPrintPreview类变量
CPrintPreview的工作原理与打印页面的功能相同。用于打印页面的函数称为PrintPage,声明如下。
void PrintPage(CDC& dc, UINT page = 1);当我们声明CPrintPreview变量时,我们将PrintPage函数的源指定为模板参数。在下面的代码中,PrintPage是CView的成员函数,因此我们将CView指定为模板参数。
CPrintPreview m_preview<CView>;6.10.2 初始化 Print Preview
当我们使用CPrintPreview时,我们使用SetSource来指定PrintPage函数的源。然后,我们使用DoPrintPreview指定所有者窗口,以从CPrintPreview接收消息并创建预览。
以下代码显示了如何在框架视图中显示打印预览。我们使用SetView将框架的视图更改为CPrintPreview变量。
// Previews a print job before sending it to the printer.
void CMainFrame::OnFilePreview()

    try

        // Get the device contect of the default or currently chosen printer
        CPrintDialog printDlg;
        CDC printerDC = printDlg.GetPrinterDC();

        // Create the preview window if required
        if (!m_preview.IsWindow())
            m_preview.Create(*this);

        // Specify the source of the PrintPage function
        m_preview.SetSource(m_view);

        // Set the preview's owner (for messages)
        m_preview.DoPrintPreview(*this);

        // Swap views
        SetView(m_preview);

        // Hide the menu and toolbar
        ShowMenu(FALSE);
        ShowToolBar(FALSE);

        // Update status
        CString status = _T("Printer: ") + printDlg.GetDeviceName();
        SetStatusText(status);


    catch (const CException& e)

        // An exception occurred. Display the relevant information.
        MessageBox(e.GetText(), _T("Print Preview Failed"), MB_ICONWARNING);
        SetView(m_view);
        ShowMenu(GetFrameMenu() != 0);
        ShowToolBar(GetToolBar().GetButtonCount() > 0);
6.10.3Handling Messages from CPrintPreview
CPrintPreview类向其所有者窗口发送以下消息。
- UWM_PREVIEWCLOSE - 按下CPrintPreview的“关闭”按钮时发送。
- UWN_PREVIEWNOW - 按下CPrintPreview的“立即打印”按钮时发送。
- UWM_PREVIEWSETUP - 按下CPrintPreview的“打印设置”按钮时发送。
// Handle the frame's messages.
LRESULT CMainFrame::WndProc(UINT msg, WPARAM wparam, LPARAM lparam)

    switch (msg)

    case UWM_PREVIEWCLOSE:      OnPreviewClose();   break;
    case UWM_PREVIEWNOW:        OnPreviewPrint();   break;
    case UWM_PREVIEWSETUP:      OnPreviewSetup();   break;


    return WndProcDefault(msg, wparam, lparam);
在下面的代码中,我们通过显示一个对话框来响应UWM_PREVIEWSETUP消息,该对话框允许用户选择打印选项,如纸张大小。一旦用户做出选择,我们调用DoPrintPreview以显示带有新选项的页面。
// Called when the Print Preview's "Print Setup" button is pressed.
void CMainFrame::OnPreviewSetup()

    // Call the print setup dialog.
    CPrintDialog printDlg(PD_PRINTSETUP);
    try

        // Display the print dialog
        if (printDlg.DoModal(*this) == IDOK)

            CString status = _T("Printer: ") + printDlg.GetDeviceName();
            SetStatusText(status);


    catch (const CException& e)

        // An exception occurred. Display the relevant information.
        MessageBox(e.GetErrorString(), e.GetText(), MB_ICONWARNING);


    // Initiate the print preview.
    m_preview.DoPrintPreview(*this);
在下面的代码中,我们通过向打印机发送页面而不启动对话框来响应UWM_PREVIEWNOW消息。
// Called when the Print Preview's "Print Now" button is pressed.
void CMainFrame::OnPreviewPrint()

    m_view.QuickPrint(_T("Frame Sample"));
在下面的代码中,我们通过将帧的视图恢复为正常来响应UWM_PREVIEWCLOSE消息。无需销毁CPrintPreview窗口,因为当我们使用SetView选择m_view作为帧的视图时,它是隐藏的。
// Called when the Print Preview's "Close" button is pressed.
void CMainFrame::OnPreviewClose()

    // Swap the view
    SetView(m_view);

    // Show the menu and toolbar
    ShowMenu(GetFrameMenu() != 0);
    ShowToolBar(GetToolBar().IsWindow());

    SetStatusText(LoadString(IDW_READY));
6.11 最后调整
构成Win32++基础的代码位于include目录中。您不需要修改这些文件,而是从Win32++类继承,并在派生类中添加任何其他代码。例如,要创建SDI(单窗口)架构窗口,通常需要从CFrame派生自己的类,并把对标准框架的任何修改放在你自己类中。您可以重写WndProc成员函数,以包含您想要处理的任何其他消息。
一个单独的视图窗口放置
6.11.1 保存程序windows位置大小
用户将期望现代应用程序保存其设置,例如框架窗口的位置和大小。这些设置存储在注册表中。LoadRegistrySettings用于设置注册表项的名称。通常,名称采用“CompanyName\\\\ApplicationName”的形式,如下所示。
HWND CMainFrame::Create(HWND parent)

    // Set m_View as the view window of the frame
    SetView(m_view);

    // Set the registry key name, and load the initial window position
    // Use a registry key name like "CompanyName\\\\Application"
    LoadRegistrySettings(_T("Win32++\\\\Scribble Sample"));

    return CFrame::Create(parent);
如果使用LoadRegistrySetting函数设置了注册表项名称,则应用程序启动时将从注册表加载注册表设置,并在应用程序结束时将其存储在注册表中。如果希望在注册表中存储其他设置,请重写CMainFrame中的LoadRegistrySettings和SaveRegistrySettings函数。
6.11.2 保存最近使用清单
加载和存储文件的应用程序通常允许用户从最近使用的文件名列表中进行选择。该MRU列表也存储在注册表中。要将此功能添加到Win32++应用程序,请使用LoadRegistryMRUSettings函数指定MRU列表中的条目数(最多16个),如下所示。
HWND CMainFrame::Create(HWND parent)

    // Set m_View as the view window of the frame
    SetView(m_view);

    // Set the registry key name, and load the initial window position
    // Use a registry key name like "CompanyName\\\\Application"
    LoadRegistrySettings(_T("Win32++\\\\Scribble Sample"));

    // Load the settings from the registry with 4 MRU entries
    LoadRegistryMRUSettings(4);

    return CFrame::Create(parent);
要查看菜单中列出的MRU条目,请将“最近使用的文件”菜单项添加到资源中的菜单定义中。rc如下:
MENUITEM "Recent Files", IDW_FILE_MRU_FILE1, GRAYED6.11.3 命令行参数
当程序启动时,命令行参数被传递给程序。GetCommandLine函数用于检索命令行字符串。CommandLineToArgvW可以解析此字符串并将其转换为LPWSTR指针数组。
以下代码演示了当文件名作为命令行参数提供时如何加载文件。
void CMainFrame::OnInitialUpdate()

  // Here we process the command line arguments, and automatically load a file if one is specified.
  // GetCommandLineArgs retrieves our command line arguments and stores them in a vector of CString.

  std::vector<CString> args = GetCommandLineArgs();
  // The second argument (if any) contains our file name.
  if (args.size() > 1)

    GetDoc().FileOpen(args[1]);
这允许应用程序在从Windows资源管理器中选择并打开文件时启动并加载该文件。这也可以通过将数据文件拖放到程序的图标或.exe文件上,为运行应用程序提供拖放支持。
6.11.4 使用跟踪(Tracing)调试应用程序
一种重要的调试技术是跟踪应用程序运行时发生的情况。跟踪允许您在Visual Studio的输出窗格(或您使用的任何集成开发环境)中显示消息或变量的内容。
为了利用这一点,您需要执行以下操作:
- 在调试模式下运行应用程序 (见下文)
- 使用TRACE函数显示消息
要在调试模式下运行应用程序,需要定义_debug变量。当您在调试模式下编译时,Microsoft的Visual Studio产品会为您定义此变量。对于其他编译器,应使用适当的编译器选项来设置此变量。此示例的源代码以及下载部分中的示例,包括用于DevC++和CodeBlock调试模式的项目文件,以使此任务更容易。
如果未在调试模式下运行,TRACE语句将无效。如果您愿意,可以将它们保留在释放模式中。
在本节的示例代码中,我们将跟踪添加到涂鸦应用程序,以显示我们绘制的线的鼠标位置。
下面代码是添加到CView::OnMouseMove进行跟踪的代码。
CString str;
str.Format( _T("Draw Point: %hd, %hd\\n"), GET_X_LPARAM(lParam), GET_Y_LPARAM(lParam) );
TRACE(str);
6.11.5 处理异常
Win32++框架在无法执行某些任务时会引发异常。可能引发异常的任务示例包括:
- 无法创建窗口或对话框。Failure to create a window or dialog.
- 创建线程失败。Failure to create a thread.
- 无法创建GDI资源,如笔或画笔。Failure to create a GDI resource such as a pen or brush.
- 在设备上下文中选择GDI资源(如位图)失败。Failure to select a GDI resource such as a bitmap into a device context.
- 无法打开或读取文件。Failure to open or read from a file.
我们可以使用异常处理来警告这些问题,并可能允许我们的程序继续运行。
以下代码显示了如何显示程序启动时可能引发的异常。
// WinMain is the program's entry point. The program starts here.
int WINAPI WinMain(HINSTANCE, HINSTANCE, LPSTR, int)

  try

    // Start Win32++
    CScribbleApp theApp;

    // Run the application.
    return theApp.Run();


  // Catch all unhandled CException types.
  catch (const CException &e)

    // Display the exception and quit.
    ::MessageBox(0, e.GetErrorString(), e.GetText(), MB_ICONWARNING);

    return -1;
下面的代码显示了如何处理程序处理窗口消息时可能引发的异常。
// Handle the frame's messages.
LRESULT CMainFrame::WndProc(UINT msg, WPARAM wparam, LPARAM lparam)

    try

        switch (msg)

        case UWM_DROPFILE:          OnDropFile(wparam); break;
        case UWM_PREVIEWCLOSE:      OnPreviewClose();   break;
        case UWM_PRINTNOW:          OnPreviewPrint();   break;
        case UWM_PRINTSETUP:        OnPreviewSetup();   break;


        return WndProcDefault(msg, wparam, lparam);


    // Catch all CException types.
    catch (const CException& e)

        // Display the exception and continue.
        ::MessageBox(0, e.GetText(), AtoT(e.what()), MB_ICONERROR);

        return 0;
请注意,此代码还将处理WndProcDefault调用的函数中引发的异常,如OnCommand、OnDraw、OnNotify等。预期引发异常的代码(如使用文件或存档)也可能需要自己的异常处理。
七、其他例子
本小结的源代码例子可以在源代码samples目录中找到.
7.1 浏览器
此示例演示如何使用CWebBrowser类在Win32++框架内显示internet浏览器。浏览器不需要ATL或任何特定于Microsoft的代码

以上是关于C++ Win32程序编写入门的主要内容,如果未能解决你的问题,请参考以下文章