基于 nginx-http-flv-module模块搭建IPC摄像头视频推拉流服务器
Posted 奔跑的大白啊
tags:
篇首语:本文由小常识网(cha138.com)小编为大家整理,主要介绍了基于 nginx-http-flv-module模块搭建IPC摄像头视频推拉流服务器相关的知识,希望对你有一定的参考价值。
前言
近期因项目需要,开始了解IPC(网络摄像头)的视频流的实时播放、帧图像处理、Web页面展示等多种操作, 因要实现Web页面无需安装Flash无需输入用户名和密码的方式实时预览视频,经过多种方案的比较,最终选用FFmpeg+nginx( nginx-http-flv-module)+java+flv.js的解决方案,这次主要记录下视频流服务器的搭建过程。
正文
环境准备
操作系统(MacOS)
-
Nginx-1.19.3(下载地址:http://nginx.org/download/)
-
Nginx-http-flv-module(下载地址:https://github.com/winshining/nginx-http-flv-module))
注意: 将解压后的Nginx和nginx-http-flv-module放到同一目录下 -
FFmpeg–4.3.1(下载地址:https://ffmpeg.org/releases)
编译nginx时可能需要下载的包:
-
pcre-8.44(下载地址:https://ftp.pcre.org/pub/pcre/)注意: 下载pcre而不是pcre2
-
openssl-1.1.1h(下载地址:https://www.openssl.org/source/)
将nginx-http-flv-module 编译到Nginx
1、进入nginx目录,执行configure,添加nginx-http-flv-module模块
./configure --add-module=/usr/local/src/nginx-http-flv-module-master
2、执行make命令,编译
make
3、执行make install,安装
make install
配置nginx.conf
nginx.conf中添加内容如下:
#  此部分和http同级,在http部分的外面
rtmp
        server
            listen 1935;
            application myapp
                # 开启实时流模式
                live on;
                record off;


http
    server

       listen 8083;
       server_name localhost;

    location /rtmpLive
            flv_live on;
            chunked_transfer_encoding  on; #open 'Transfer-Encoding: chunked' response
            add_header 'Access-Control-Allow-Credentials' 'true'; #add additional HTTP header
            add_header 'Access-Control-Allow-Origin' '*'; #add additional HTTP header
            add_header Access-Control-Allow-Headers X-Requested-With;
            add_header Access-Control-Allow-Methods GET,POST,OPTIONS;
            add_header 'Cache-Control' 'no-cache';
FFmpeg命令行方式推流
某品牌IPC rtsp地址:
rtsp://username:password@ip:554/Streaming/Channels/ChanelNum
注意: 使用vlc播放此地址视频流,确定可播放
推流命令
说明: rtmp://localhost:1935/myapp/mystream
1935为nginx.conf中 rtmp监听的端口;
myapp为nginx.conf中rtmp下的application的名称;
mystream为自定义名称,需和最终http协议访问视频流名称保持一致;
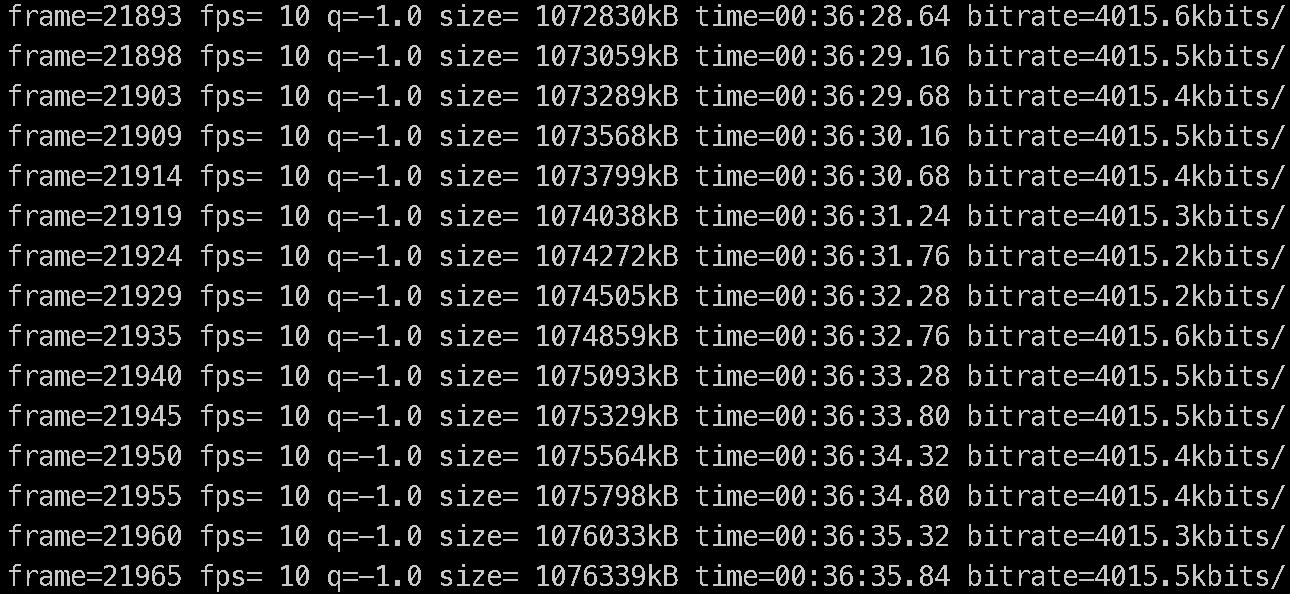
ffmpeg -i rtsp://username:password@ip:554/Streaming/Channels/ChanelNum -vcodec copy -acodec copy -f flv -s 800x600 rtmp://localhost:1935/myapp/mystream
推流正常的话,会出现如下截图情况:

下载安装FFmpeg
下载(下载地址:https://ffmpeg.org/releases)
安装(源码安装或brew安装,读者自行百度吧)
FFmpegAPI方式推流(Java)
rtspUrl 为rtsp视频流地址 “rtsp://”+name+":"+password+"@" + ip + “:554/Streaming/Channels/”+ChanelNum;
nginxRtmpUrl 为根据nginx.conf的配置拼接到的rtmp地址 :rtmp://localhost:1935/myapp/mystream (myapp为rtmp下application部分的名称,mystream为自定义名称,和最终访问http地址保持一致)
public static Integer pushVideoAsRTSP(String rtspUrl, String nginxRtmpUrl)
        int flag = -1;
        try
            String command = "ffmpeg ";
            command += " -i " + rtspUrl;
            command += " -vcodec copy -acodec copy -f flv -s 800x600 " + nginxRtmpUrl;
            log.info("ffmpeg推流命令:" ,command);
            Process process = Runtime.getRuntime().exec(command);
            BufferedReader br= new BufferedReader(new InputStreamReader(process.getErrorStream()));
            String line = "";
            while ((line = br.readLine()) != null)
                log.info("视频推流信息[]", line);

            flag = process.waitFor();
        catch (Exception e)
            e.printStackTrace();

        return flag;
最终效果
rtmpUrl:
rtmp://localhost:1935/myapp/mystream

httpUrl:
说明:此处的8083和rtmpLive均对应nginx.conf中配置; mystream对应FFmpeg命令行或API方式自定义的stream名称
http://localhost:8083/rtmpLive?port=1935&app=myapp&stream=mystream

遇到问题
- 编译nginx时(执行./configure xxx…)提示缺少pcre

解决: 下载pcre源码包(下载地址:https://ftp.pcre.org/pub/pcre/)注意: 下载pcre而不是pcre2)
编译&安装
cd /usr/local/src/pcre-8.44
./configure --prefix=/usr/local
sudo make
sudo make install
再次执行configure命令,指定pcre所在路径
# --with-pcre=/usr/local/src/pcre-8.44
 ./configure --add-module=/usr/local/src/nginx-http-flv-module-master  --with-pcre=/usr/local/src/pcre-8.44
- 编译nginx时(执行./configure xxx…)提示缺少openssl
./configure: error: SSL modules require the OpenSSL library.
You can either do not enable the modules, or install the OpenSSL library
into the system, or build the OpenSSL library statically from the source
with nginx by using --with-openssl= option.
解决:
下载、安装openssl(下载地址:https://www.openssl.org/source/)
进入源码目录,编译、安装
cd /Users/admin/Downloads/video-test/openssl-1.1.1h
./config
sudo make
sudo make install
编译时指定openssl的路径:
  # --with-openssl=/usr/local/ssl
 ./configure --add-module=/usr/local/src/nginx-http-flv-module-master  --with-pcre=/usr/local/src/pcre-8.44  --with-openssl=/usr/local/ssl
再次编译nginx,遇到openssl找不到某些文件的问题,类似下面这样:

查看openssl中配置文件(/usr/local/src/nginx-1.19.3/auto/lib/openssl/conf)发现:

如上图,看到conf文件路径中的.openssl文件在我的MacOS 中是不存在,所以会提示文件不存在错误;
那么对比本地系统中文件目录,就修改conf文件路径如下:
CORE_INCS="$CORE_INCS $OPENSSL/include"
CORE_DEPS="$CORE_DEPS $OPENSSL/include/openssl/ssl.h"
CORE_LIBS="$CORE_LIBS $OPENSSL/lib/libssl.a"
CORE_LIBS="$CORE_LIBS $OPENSSL/lib/libcrypto.a"
CORE_LIBS="$CORE_LIBS $NGX_LIBDL"
再次执行编译命令,就可以了~
 # --with-openssl=/usr/local
 ./configure --add-module=/usr/local/src/nginx-http-flv-module-master  --with-pcre=/usr/local/src/pcre-8.44  --with-openssl=/usr/local
感谢大佬们的博客:
http://www.demodashi.com/demo/17181.html
https://github.com/winshining/nginx-http-flv-module/blob/master/README.CN.md)
https://blog.csdn.net/u013091013/article/details/53640318/
https://blog.csdn.net/winshining/article/details/74910586
https://www.cnblogs.com/kawhileonardfans/p/13044468.html
https://blog.csdn.net/qq_22633333/article/details/96288603#comments
还有很多,感谢广大网友~~
总结
生活原本沉闷,但跑起来就会有风。

以上是关于基于 nginx-http-flv-module模块搭建IPC摄像头视频推拉流服务器的主要内容,如果未能解决你的问题,请参考以下文章