用HarmonyOS ArkUI来开发一个购物应用程序
Posted _waylau
tags:
篇首语:本文由小常识网(cha138.com)小编为大家整理,主要介绍了用HarmonyOS ArkUI来开发一个购物应用程序相关的知识,希望对你有一定的参考价值。
本文演示如果用HarmonyOS的ArkUI来开发一个购物应用程序。体验HarmonyOS 3最新的API 9,欢迎大家一起参与构建这个万物互联的时代!
活动主页
HarmonyOS线上Codelabs挑战赛已经开启,该系列挑战赛将围绕HarmonyOS的基础组件和容器组件、三方库和数据库等技术特性展开,开发者们可以通过体验基于HarmonyOS特性和能力的应用开发,快速构建有趣、有用的应用程序。
有兴趣的朋友一起参与吧。
活动主页:
获取HarmonyOS应用源码
HarmonyOS的ArkUI来开发的购物应用程序“ArkUIShopping”,全部代码可以在《跟老卫学HarmonyOS开发》项目中找到(链接见文末“参考引用”)。有兴趣的网友可以clone该代码到本地进行运行、测试、修改。
接下来将介绍该购物应用程序“ArkUIShopping”是如何实现的。
通过DevEco Studio 3创建应用
有关DevEco Studio 3的安装配置,可以参考前文《• 玩转HarmonyOS 3必装DevEco Studio 3,注意避弹》这里就不在赘述。
首选是打开DevEco Studio 3,可以看到如下界面。
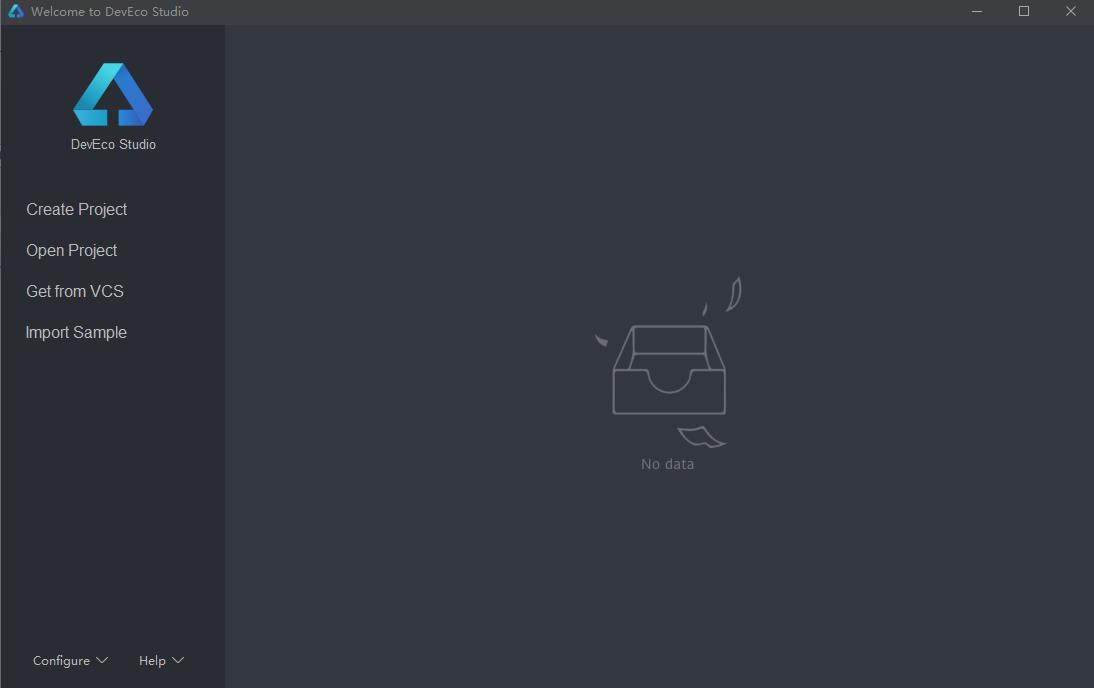
点击“Create Project”来创建ArkUI程序“ArkUIShopping”。
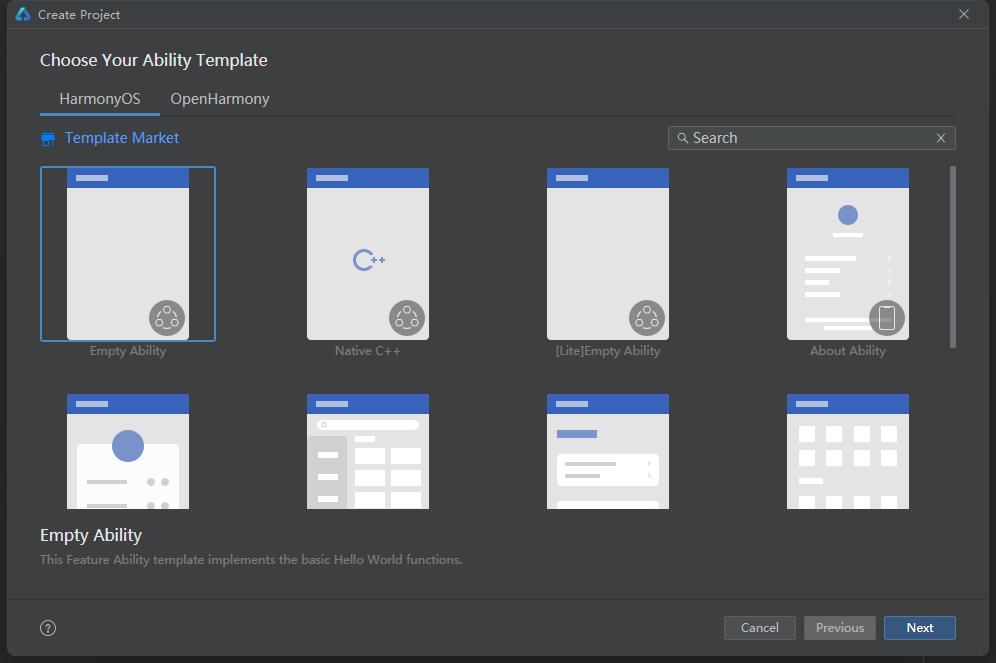
选择模板
选择空模板Empty Ability,点击“Next”执行下一步。
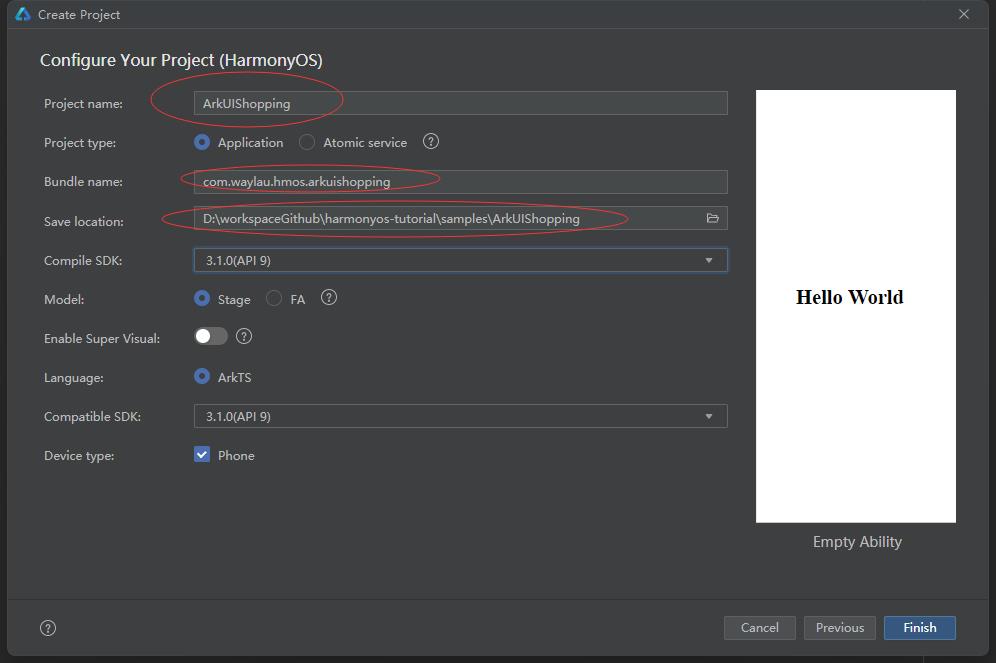
配置项目
配置项目信息,重要是以下圈中部分。其他配置按照默认配置即可。点击“Finish”执行下一步。
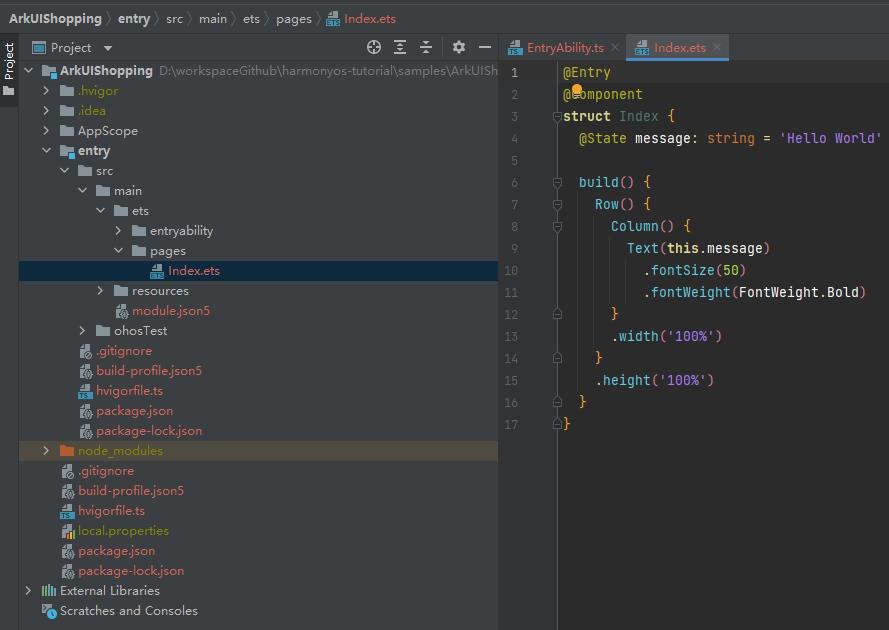
程序初始化完成之后,就能在该程序基础上进行代码开发、运行。
运行HarmonyOS应用
打开Device Manager

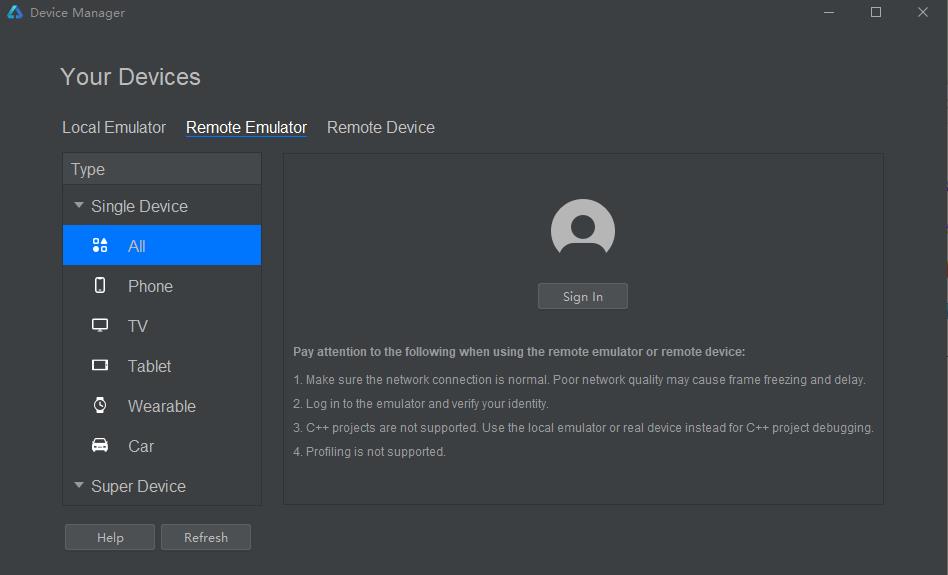
登入华为账号
点击“Sign In”登入个人注册的华为账号。如果没有,则参考本文最后的链接进行注册。

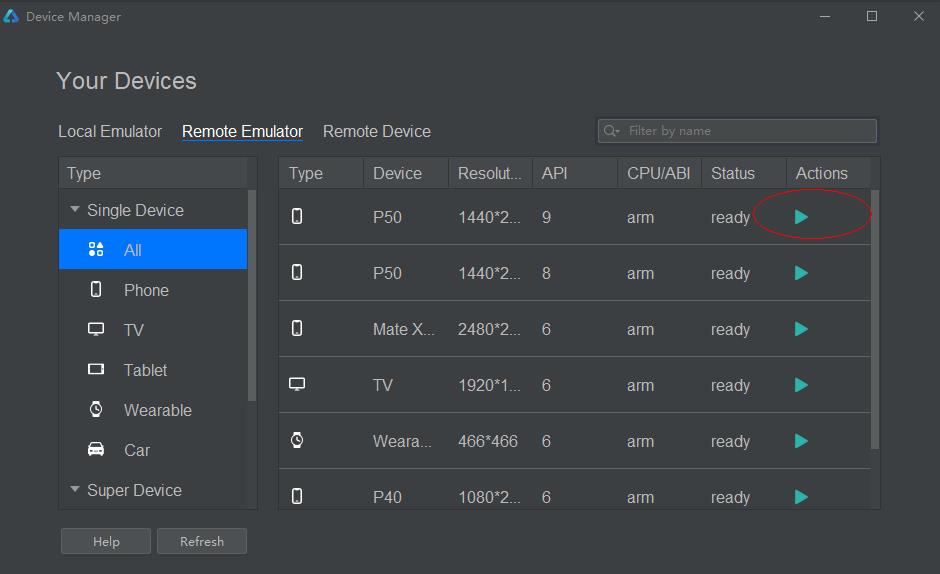
启动远程模拟器
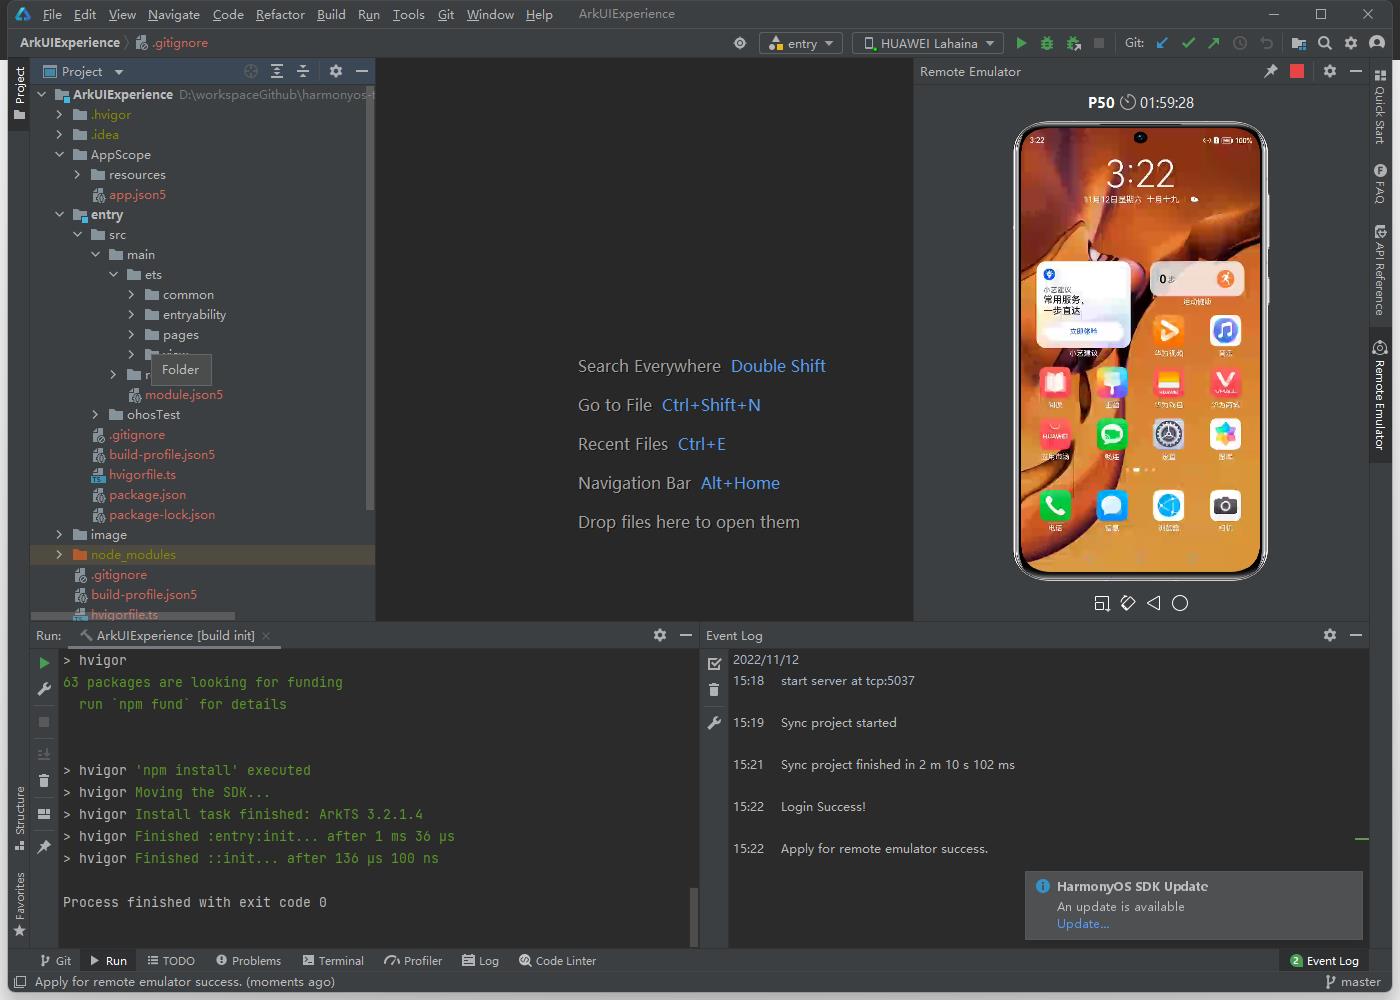
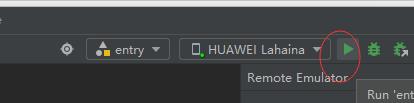
运行应用
点击下命的三角形按钮以启动应用
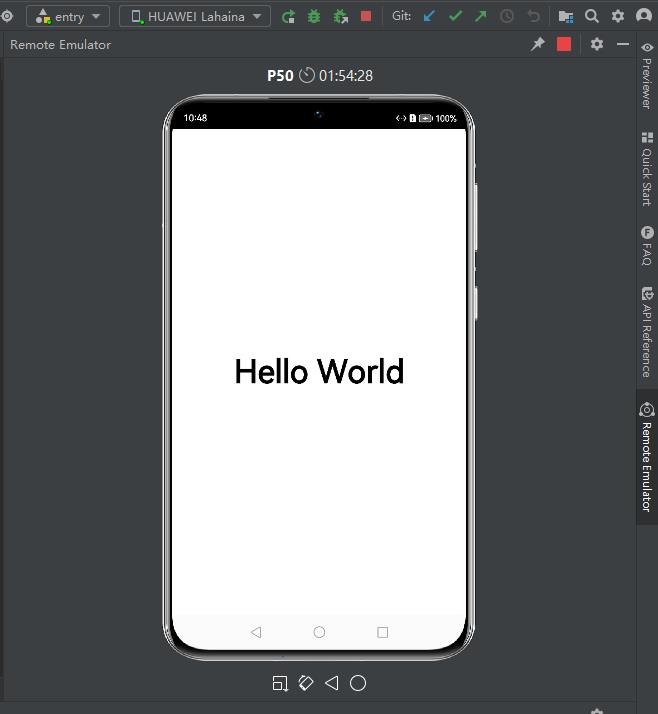
应用运行效果图如下。
完善代码
在空模板的基础上,我们初步添加业务代码,来最终实现购物应用。
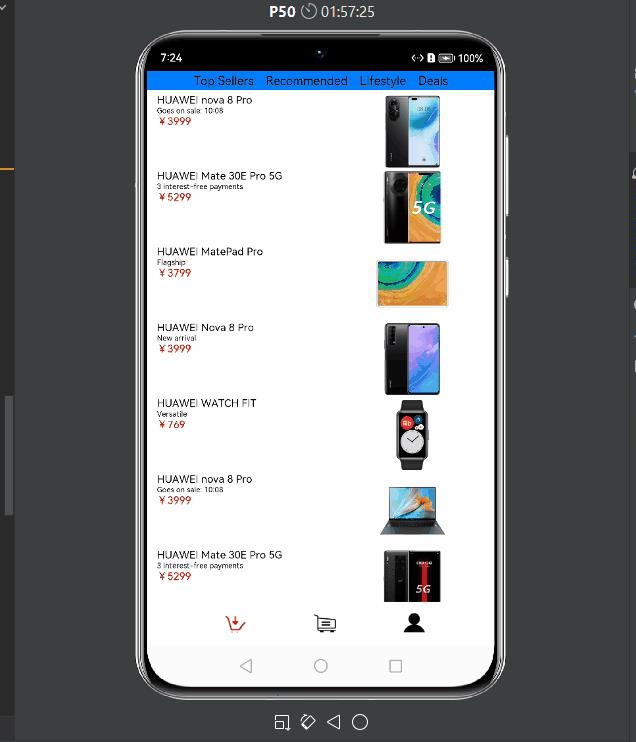
实现商品列表页签
主界面商品列表页签主要由下面三个部分组成:
- 顶部的Tabs组件。
- 中间TabContent组件内包含List组件。其中List组件的item是一个水平布局,由一个垂直布局和一个Image组件组成;item中的垂直布局由3个Text组件组成。
- 底部的页签导航。
下面来一起创建第一个页面。
在pages目录下面新建一个Page.。

该Page命名为HomePage。
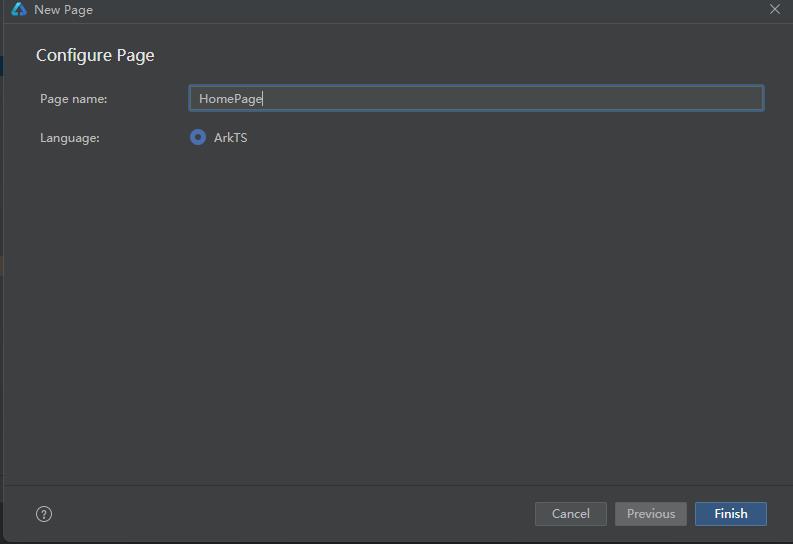
创建完成之后,会在pages目录下面生产一个HomePage.ets文件,HomePage.ets文件默认的代码如下。
@Entry
@Component
struct HomePage
  @State message: string = 'Hello World'

  build()
    Row()
      Column()
        Text(this.message)
          .fontSize(50)
          .fontWeight(FontWeight.Bold)

      .width('100%')

    .height('100%')


复制
新建与pages文件夹同级的model文件夹,并在model目录下新建ArsData.ets、GoodsData.ets、Menu.ets和GoodsDataModels.ets文件,其中ArsData.ets、GoodsData.ets、Menu.ets是数据实体类,GoodsDataModels.ets是存放这三种实体数据集合,并定义了获取各种数据集合的方法。数据实体包含实体的属性和构造方法,可通过new ArsData(string,string) 来获取ArsData对象。
ArsData.ets内容如下:
let NextId = 0;
export class ArsData
  id: string;
  title: string;
  content: string;

  constructor(title: string, content: string)
    this.id = `$NextId++`;
    this.title = title;
    this.content = content;


复制
GoodsData.ets内容如下:
let NextId = 0;
export class GoodsData
  id: string;
  title: string;
  content: string;
  price: number;
  imgSrc: Resource;

  constructor(title: string, content: string, price: number, imgSrc: Resource)
    this.id = `$NextId++`;
    this.title = title;
    this.content = content;
    this.price = price;
    this.imgSrc = imgSrc;


复制
Menu.ets内容如下:
let NextId = 0;
export class Menu
  id: string;
  title: string;
  num: number;

  constructor(title: string, num: number)
    this.id = `$NextId++`;
    this.title = title;
    this.num = num;


export class ImageItem
  id: string;
  title: string;
  imageSrc: Resource;

  constructor(title: string, imageSrc: Resource)
    this.id = `$NextId++`;
    this.title = title;
    this.imageSrc = imageSrc;


复制
GoodsDataModels.ets内容如下:
import   GoodsData from './GoodsData'

import Menu, ImageItem from './Menu'
import ArsData from './ArsData'

export function initializeOnStartup(): Array<GoodsData>
  let GoodsDataArray: Array<GoodsData> = []
  GoodsComposition.forEach(item =>
    console.log(item.title);
    GoodsDataArray.push(new GoodsData(item.title, item.content, item.price, item.imgSrc));
  )
  return GoodsDataArray;


export function getIconPath(): Array<string>
  let IconPath: Array<string> = ['nav/icon-buy.png','nav/icon-shopping-cart.png','nav/icon-my.png']

  return IconPath;


export function getIconPathSelect(): Array<string>
  let IconPathSelect: Array<string> = ['nav/icon-home.png','nav/icon-shopping-cart-select.png','nav/icon-my-select.png']

  return IconPathSelect;


export function getDetailImages(): Array<string>
  let detailImages: Array<string> = ['computer/computer1.png','computer/computer2.png','computer/computer3.png','computer/computer4.png','computer/computer5.png','computer/computer6.png']

  return detailImages;


export function getMenu(): Array<Menu>
  let MenuArray: Array<Menu> = []
  MyMenu.forEach(item =>
    MenuArray.push(new Menu(item.title,item.num));
  )
  return MenuArray;


export function getTrans(): Array<ImageItem>
  let ImageItemArray: Array<ImageItem> = []
  MyTrans.forEach(item =>
    ImageItemArray.push(new ImageItem(item.title,item.imageSrc));
  )
  return ImageItemArray;


export function getMore(): Array<ImageItem>
  let ImageItemArray: Array<ImageItem> = []
  MyMore.forEach(item =>
    ImageItemArray.push(new ImageItem(item.title,item.imageSrc));
  )
  return ImageItemArray;


export function getArs(): Array<ArsData>
  let ArsItemArray: Array<ArsData> = []
  ArsList.forEach(item =>
    ArsItemArray.push(new ArsData(item.title,item.content));
  )
  return ArsItemArray;


const GoodsComposition: any[] = [

    "title": 'HUAWEI nova 8 Pro ',
    "content": 'Goes on sale: 10:08',
    "price": '3999',
    "imgSrc": $rawfile('picture/HW (1).png')
  ,

    "title": 'HUAWEI Mate 30E Pro 5G',
    "content": '3 interest-free payments ',
    "price": '5299',
    "imgSrc": $rawfile('picture/HW (2).png')
  ,

    "title": 'HUAWEI MatePad Pro',
    "content": 'Flagship ',
    "price": '3799',
    "imgSrc": $rawfile('picture/HW (3).png')
  ,

    "title": 'HUAWEI Nova 8 Pro',
    "content": 'New arrival ',
    "price": '3999',
    "imgSrc": $rawfile('picture/HW (4).png')
  ,

    "title": 'HUAWEI WATCH FIT',
    "content": 'Versatile',
    "price": '769',
    "imgSrc": $rawfile('picture/HW (5).png')
  ,

    "title": 'HUAWEI nova 8 Pro ',
    "content": 'Goes on sale: 10:08',
    "price": '3999',
    "imgSrc": $rawfile('picture/HW (6).png')
  ,

    "title": 'HUAWEI Mate 30E Pro 5G',
    "content": '3 interest-free payments ',
    "price": '5299',
    "imgSrc": $rawfile('picture/HW (7).png')
  ,

    "title": 'HUAWEI MatePad Pro',
    "content": 'Flagship ',
    "price": '3799',
    "imgSrc": $rawfile('picture/HW (8).png')
  ,

    "title": 'HUAWEI Nova 8 Pro',
    "content": 'New arrival ',
    "price": '3999',
    "imgSrc": $rawfile('picture/HW (9).png')
  ,

    "title": 'HUAWEI WATCH FIT',
    "content": 'Versatile',
    "price": '769',
    "imgSrc": $rawfile('picture/HW (10).png')
  ,
]

const MyMenu: any[] = [

    'title': 'Favorites',
    'num': '10'
  ,

    'title': 'Searched',
    'num': '1000'
  ,

    'title': 'Following',
    'num': '100'
  ,

    'title': 'Followers',
    'num': '10000'

]


const MyTrans: any[] = [

    'title': 'Post: 520',
    'imageSrc': $rawfile('nav/icon-menu-release.png')
  ,

    'title': 'Sold: 520',
    'imageSrc': $rawfile('nav/icon-menu-sell.png')
  ,

    'title': 'Bought: 10',
    'imageSrc': $rawfile('nav/icon-menu-buy.png')

]

const MyMore: any[] = [

    'title': 'Guide',
    'imageSrc': $rawfile('nav/icon-menu-buy.png')
  ,

    'title': 'Create',
    'imageSrc': $rawfile('nav/icon-menu-buy.png')
  ,

    'title': 'Poster',
    'imageSrc': $rawfile('nav/icon-menu-buy.png')
  ,

    'title': 'Games',
    'imageSrc': $rawfile('nav/icon-menu-buy.png')
  ,

    'title': 'Jobber',
    'imageSrc': $rawfile('nav/icon-menu-buy.png')
  ,

    'title': 'Myself',
    'imageSrc': $rawfile('nav/icon-menu-buy.png')
  ,

    'title': 'About',
    'imageSrc': $rawfile('nav/icon-menu-buy.png')
  ,

    'title': 'Rental',
    'imageSrc': $rawfile('nav/icon-menu-buy.png')
  ,

    'title': 'Author',
    'imageSrc': $rawfile('nav/icon-menu-buy.png')
  ,

]

const ArsList: any[] =[

    'title': 'Display Size',
    'content': '13.9 inches',
  ,

    'title': 'Memory',
    'content': '16 GB',
  ,

    'title': 'Marketing Name',
    'content': 'HUAWEI MateBook X Pro',
  ,

    'title': 'Color Gamut',
    'content': '100% sRGB color gamut (Typical)',
  ,

    'title': 'Battery',
    'content': '56 Wh (rated capacity)',
  ,

    'title': 'Storage',
    'content': '512 GB',
  ,

    'title': 'Resolution',
    'content': '3000x2000',
  ,

    'title': 'Processor',
    'content': '11th Gen Intel® Core™ i7-1165G7 Processor',
  ,

    'title': 'CPU Cores',
    'content': '4',
  ,

    'title': 'Launch Time',
    'content': 'January 2021',

]
复制
在HomePage.ets文件中创建商品列表页签相关的组件,添加GoodsHome代码如下:
@Component
struct GoodsHome
  private goodsItems: GoodsData[]

  build()
    Column()
      Tabs()
        TabContent()
          GoodsList( goodsItems: this.goodsItems );

        .tabBar("Top Sellers")
        .backgroundColor(Color.White)
        TabContent()
          GoodsList( goodsItems: this.goodsItems );

        .tabBar("Recommended")
        .backgroundColor(Color.White)
        TabContent()
          GoodsList( goodsItems: this.goodsItems );

        .tabBar("Lifestyle")
        .backgroundColor(Color.White)
        TabContent()
          GoodsList( goodsItems: this.goodsItems );

        .tabBar("Deals")
        .backgroundColor(Color.White)

      .barWidth(500)
      .barHeight(25)
      .scrollable(true)
      .barMode(BarMode.Scrollable)
      .backgroundColor('#007DFF')
      .height(700)


    .alignItems(HorizontalAlign.Start)
    .width('100%')


复制
在GoodsHome中使用Tabs组件,在Tabs组件中设置4个TabContent,给每个TabContent设置tabBar属性,并设置TabContent容器中的内容GoodsList组件,GoodsList组件代码如下:
@Component
struct GoodsList
  private goodsItems: GoodsData[]

  build()
    Column()
      List()
        ForEach(this.goodsItems, item =>
          ListItem()
            GoodsListItem( goodsItem: item )

        , item => item.id.toString())

      .height('100%')
      .width('100%')
      .align(Alignment.Top)
      .margin(top: 5)


复制
在GoodsList组件中遍历商品数据集合,ListItem组件中设置组件内容,并使用Navigator组件给每个Item设置顶级跳转路由,GoodsListItem组件代码如下:
@Component
struct GoodsListItem
  private goodsItem: GoodsData

  build()
    Navigator( target: 'pages/ShoppingDetail' )
      Row()
        Column()
          Text(this.goodsItem.title)
            .fontSize(14)
          Text(this.goodsItem.content )
            .fontSize(10)
          Text('¥' + this.goodsItem.price)
            .fontSize(14)
            .fontColor(Color.Red)

        .height(100)
        .width('50%')
        .margin(left: 20)
        .alignItems(HorizontalAlign.Start)
        Image(this.goodsItem.imgSrc)
          .objectFit(ImageFit.ScaleDown)
          .height(100)
          .width('40%')
          .renderMode(ImageRenderMode.Original)
          .margin(right: 10,left:10)


      .backgroundColor(Color.White)


    .params( goodsData: this.goodsItem )
    .margin( right: 5)

复制
在HomePage.ets中创建文件入口组件(Index)以及底部页签导航组件(HomeBottom),导入需要使用到的数据实体类以及需要使用的方法和组件,每个page文件都必须包含一个入口组件,使用@Entry修饰,HomePage文件中的入口组件(Index)代码如下:
import GoodsData from '../model/GoodsData'
import initializeOnStartup,getIconPath,getIconPathSelect from '../model/GoodsDataModels'
import ShoppingCart from './ShoppingCart.ets'
import MyInfo from './MyPage.ets'

@Entry
@Component
struct Index
  @Provide currentPage: number = 1
  private goodsItems: GoodsData[] = initializeOnStartup()
  build()
    Column()
      Scroll()
        Column()
          if (this.currentPage == 1)
            GoodsHome( goodsItems: this.goodsItems )
           else if (this.currentPage == 2)
            //购物车列表
            ShoppingCart()
           else
            //我的
            MyInfo()


        .height(700)

      .flexGrow(1)
      HomeBottom()

    .backgroundColor("white")


复制
从入口组件的代码中可以看出,我们定义了一个全局变量currentPage ,并且使用@provide修饰,在其子组件(HomeBottom)中使用@Consume修饰。当子组件currentPage发生变化的时候,父组件currentPage也会发生变化,会重新加载页面,显示不同的页签。在入口组件中,通过initializeOnStartup获取商品列表数据(goodsItems)并传入GoodsHome组件中,HomeBottom组件代码如下:
@Component
struct HomeBottom
  @Consume currentPage: number
  private iconPathTmp: string[] =  getIconPath()
  private iconPathSelectsTmp: string[] =  getIconPathSelect()
  @State iconPath: string[] =  getIconPath()
  build()
    Row()
      List()
        ForEach(this.iconPath, item =>
          ListItem()
            Image($rawfile(item))
              .objectFit(ImageFit.Cover)
              .height(30)
              .width(30)
              .renderMode(ImageRenderMode.Original)
              .onClick(()=>
                if(item==this.iconPath[0])
                  this.iconPath[0]=this.iconPathTmp[0]
                  this.iconPath[1]=this.iconPathTmp[1]
                  this.iconPath[2]=this.iconPathTmp[2]
                  this.currentPage=1

                if(item==this.iconPath[1])
                  this.iconPath[0]=this.iconPathSelectsTmp[0]
                  this.iconPath[1]=this.iconPathSelectsTmp[1]
                  this.iconPath[2]=this.iconPathTmp[2]
                  this.currentPage=2

                if(item==this.iconPath[2])
                  this.iconPath[0]=this.iconPathSelectsTmp[0]
                  this.iconPath[1]=this.iconPathTmp[1]
                  this.iconPath[2]=this.iconPathSelectsTmp[2]
                  this.currentPage=3

              )

          .width(120)
          .height(40)
        , item => item)

      .margin(left:10)
      .align(Alignment.BottomStart)
      .listDirection(Axis.Horizontal)

    .alignItems(VerticalAlign.Bottom)
    .height(30)
    .margin(top:10 ,bottom:10)


复制
底部组件是由一个横向的图片列表组成,iconPath是底部初始状态下的3张图片路径数组。遍历iconPath数组,使用Image组件设置图片路径并添加到List中,给每个Image组件设置点击事件,点击更换底部3张图片。在HomeBottom中,iconPath使用的是@State修饰,当iconPath数组内容变化时,页面组件有使用到的地方都会随之发生变化。
在MyPage.ets文件中新建MyTransList组件和MoreGrid组件,MyTransList组件代码如下:
@Component
struct MyTransList
  private imageItems: ImageItem[] = getTrans()
  build()
    Column()
      Text('My Transaction')
        .fontSize(20)
        .margin( left: 10 )
        .width('100%')
        .height(30)
      Row()
        List()
          ForEach(this.imageItems, item =>
            ListItem()
              DataItem( imageItem: item )

          , item => item.id.toString())

        .height(70)
        .width('100%')
        .align(Alignment.Top)
        .margin( top: 5)
        .listDirection(Axis.Horizontal)


    .height(120)


复制
MoreGrid组件代码如下:
@Component
struct MoreGrid
  private gridRowTemplate: string = ''
  private imageItems: ImageItem[] = getMore()
  private heightValue: number

  aboutToAppear()
    var rows = Math.round(this.imageItems.length / 3);
    this.gridRowTemplate = '1fr '.repeat(rows);
    this.heightValue = rows * 75 ;


  build()
    Column()
      Text('More')
        .fontSize(20)
        .margin( left: 10 )
        .width('100%')
        .height(30)
      Scroll()
        Grid()
          ForEach(this.imageItems, (item: ImageItem) =>
            GridItem()
              DataItem( imageItem: item )

          , (item: ImageItem) => item.id.toString())

        .rowsTemplate(this.gridRowTemplate)
        .columnsTemplate('1fr 1fr 1fr')
        .columnsGap(8)
        .rowsGap(8)
        .height(this.heightValue)

      .padding( left: 16, right: 16 )

    .height(400)


复制
在MyTransList和MoreGrid组件中都包含子组件DataItem,为避免的重复代码,可以把多次要用到的结构体组件化,这里的结构体就是图片加上文本的上下结构体,DataItem组件内容如下:
@Component
struct MenuItem
private menu: Menu
build()
Column()
Text(this.menu.title)
.fontSize(15)
Text(this.menu.num+'')
.fontSize(13)
.height(50)
.width(80)
.margin(left: 8,right:8)
.alignItems(HorizontalAlign.Start)
.backgroundColor(Color.White)
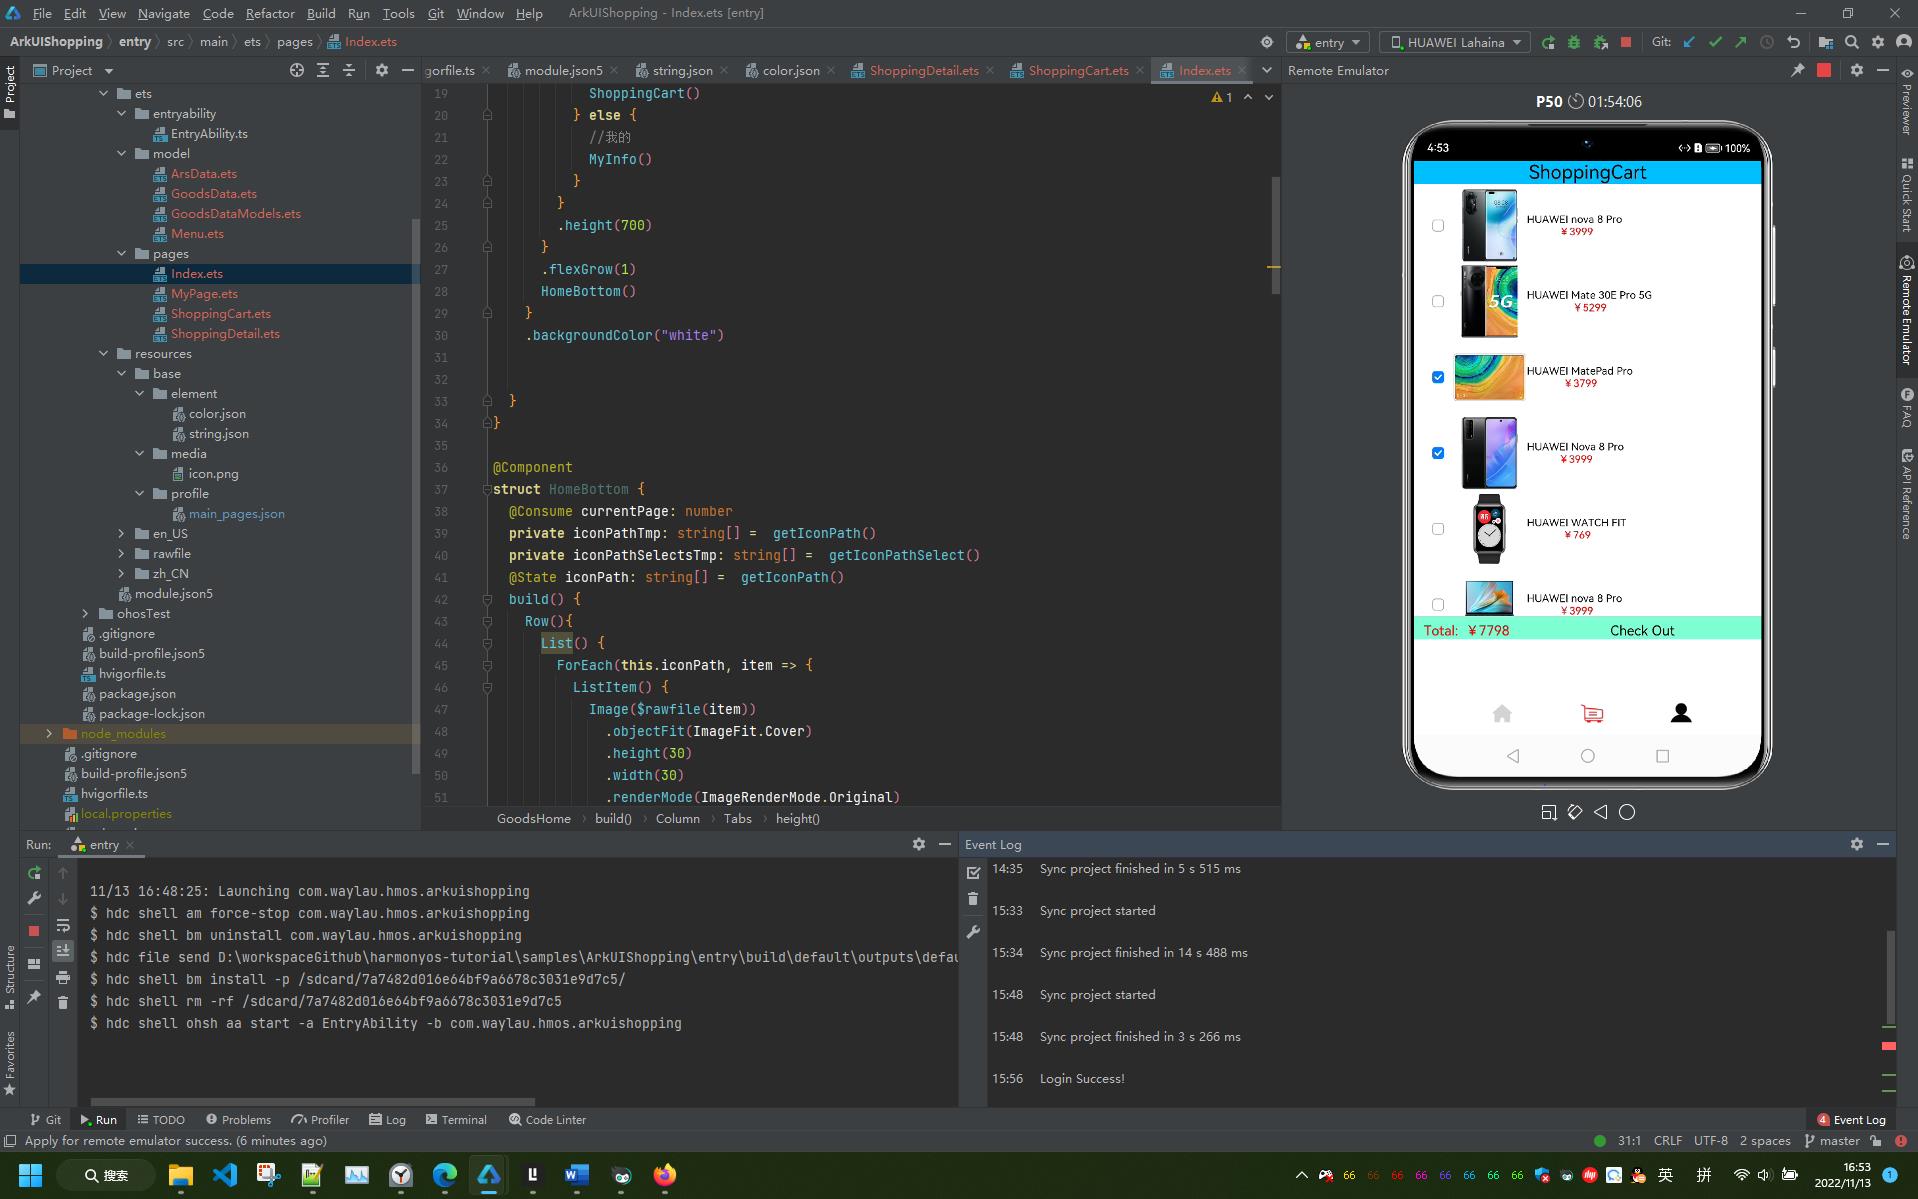
复制实现购物车页签
主界面购物车页签主要由下面三部分组成:
- 顶部的Text组件。
- 中间的List组件,其中List组件的item是一个水平的布局内包含一个toggle组件,一个Image组件和一个垂直布局,其item中的垂直布局是由2个Text组件组成。
- 底部一个水平布局包含两个Text组件。
构建一个购物车页签,给商品列表的每个商品设置一个单选框,可以选中与取消选中,底部Total值也会随之增加或减少,点击Check Out时会触发弹窗。下面我们来完成ShoppingCart页签。
在pages目录下面新建一个Page ,命名为ShoppingCart.。在ShoppingCart.ets文件中添加入口组件(ShoppingCart),并导入需要使用到的数据实体类、方法和组件。ShoppingCart组件代码如下:
@Entry
@Component
export struct ShoppingCart
  @Provide totalPrice : number =0
  private goodsItems: GoodsData[] = initializeOnStartup()
  build()
    Column()
      Column()
        Text('ShoppingCart')
          .fontColor(Color.Black)
          .fontSize(25)
          .margin( left: 60,right:60 )
          .align(Alignment.Center)

      .backgroundColor('#FF00BFFF')
      .width('100%')
      .height(30)

      ShopCartList( goodsItems: this.goodsItems );
      ShopCartBottom()

    .alignItems(HorizontalAlign.Start)


复制
新建ShopCartList组件用于存放购物车商品列表,ShopCartList组件代码如下
@Component
struct ShopCartList

  private goodsItems: GoodsData[]

  build()
    Column()
      List()
        ForEach(this.goodsItems, item =>
          ListItem()
            ShopCartListItem( goodsItem: item )

        , item => item.id.toString())

      .height('100%')
      .width('100%')
      .align(Alignment.Top)
      .margin(top: 5)

    .height(570)


复制
ShopCartListItem组件代码如下:
@Component
struct ShopCartListItem
  @Consume totalPrice: number
  private goodsItem: GoodsData

  build()
    Row()
      Toggle(type: ToggleType.Checkbox)
        .width(10)
        .height(10)
        .onChange((isOn:boolean) =>
          if(isOn)
            this.totalPrice +=parseInt(this.goodsItem.price+'',0)
          else
            this.totalPrice -= parseInt(this.goodsItem.price+'',0)

        )
      Image(this.goodsItem.imgSrc)
        .objectFit(ImageFit.ScaleDown)
        .height(100)
        .width(100)
        .renderMode(ImageRenderMode.Original)
      Column()
        Text(this.goodsItem.title)
          .fontSize(14)
        Text('¥' + this.goodsItem.price)
          .fontSize(14)
          .fontColor(Color.Red)


    .height(100)
    .width(180)
    .margin(left: 20)
    .alignItems(VerticalAlign.Center)
    .backgroundColor(Color.White)


复制
在ShopCartListItem中使用Toggle的单选框类型来实现每个item的选择和取消选择,在Toggle的onChage事件中来改变totalPrice的数值。
新建ShopCartBottom组件,ShopCartBottom组件代码如下:
@Component
struct ShopCartBottom
  @Consume totalPrice: number
  build()
    Row()
      Text('Total:  ¥'+this.totalPrice)
        .fontColor(Color.Red)
        .fontSize(18)
        .margin(left:20)
        .width(150)
      Text('Check Out')
        .fontColor(Color.Black)
        .fontSize(18)
        .margin(right:20,left:100)
        .onClick(()=>
          prompt.showToast(
            message: 'Checking Out',
            duration: 10,
            bottom:100
          )
        )

    .height(30)
    .width('100%')
    .backgroundColor('#FF7FFFD4')
    .alignItems(VerticalAlign.Bottom)


复制
实现我的页签
我的页签主要由下面四部分组成:
- 顶部的水平布局。
- 顶部下面的文本加数字的水平List。
- My Transactio模块,图片加文本的水平List。
- More模块,图片加文本的Grid。
构建主页我的页签,主要可以划分成下面几步:
- 在pages目录下面新建一个Page 命名为MyPage
- 在MyPage.ets文件中添加入口组件(MyInfo)
MyInfo组件内容如下:
import getMenu,getTrans,getMore from '../model/GoodsDataModels'
import Menu, ImageItem from '../model/Menu'
@Entry
@Component
export struct MyInfo

  build()
    Column()
      Row()
        Image($rawfile('nav/icon-user.png'))
          .margin(left:20)
          .objectFit(ImageFit.Cover)
          .height(50)
          .width(50)
          .renderMode(ImageRenderMode.Original)
          .margin(left:40,right:40)
        Column()
          Text('John Doe')
            .fontSize(15)
          Text('Member Name : John Doe                     >')

        .height(60)
        .margin(left:40,top:10)
        .alignItems(HorizontalAlign.Start)

      TopList()
      MyTransList()
      MoreGrid()


    .alignItems(HorizontalAlign.Start)
    .width('100%')
    .flexGrow(1)


复制
入口组件中还包含TopList,MyTransList和MoreGrid三个子组件。代码如下:
@Component
struct TopList
private menus: Menu[] = getMenu()
build()
Row()
List()
ForEach(this.menus, item =>
ListItem()
MenuItem( menu: item )
, item => item.id.toString())
.height('100%')
.width('100%')
.margin(top: 5)
.edgeEffect(EdgeEffect.None)
.listDirection(Axis.Horizontal)
.width('100%')
.height(50)
@Component
struct MyTransList
private imageItems: ImageItem[] = getTrans()
build()
Column()
Text('My Transaction')
.fontSize(20)
.margin( left: 10 )
.width('100%')
.height(30)
Row()
List()
ForEach(this.imageItems, item =>
ListItem()
DataItem( imageItem: item )
, item => item.id.toString())
.height(70)
.width('100%')
.align(Alignment.Top)
.margin( top: 5)
.listDirection(Axis.Horizontal)
.height(120)
@Component
struct MoreGrid
private gridRowTemplate: string = ''
private imageItems: ImageItem[] = getMore()
private heightValue: number
aboutToAppear()
var rows = Math.round(this.imageItems.length / 3);
this.gridRowTemplate = '1fr '.repeat(rows);
this.heightValue = rows * 75 ;
build()
Column()
Text('More')
.fontSize(20)
.margin( left: 10 )
.width('100%')
.height(30)
Scroll()
Grid()
ForEach(this.imageItems, (item: ImageItem) =>
GridItem()
DataItem( imageItem: item )
, (item: ImageItem) => item.id.toString())
.rowsTemplate(this.gridRowTemplate)
.columnsTemplate('1fr 1fr 1fr')
.columnsGap(8)
.rowsGap(8)
.height(this.heightValue)
.padding( left: 16, right: 16 )
.height(400)
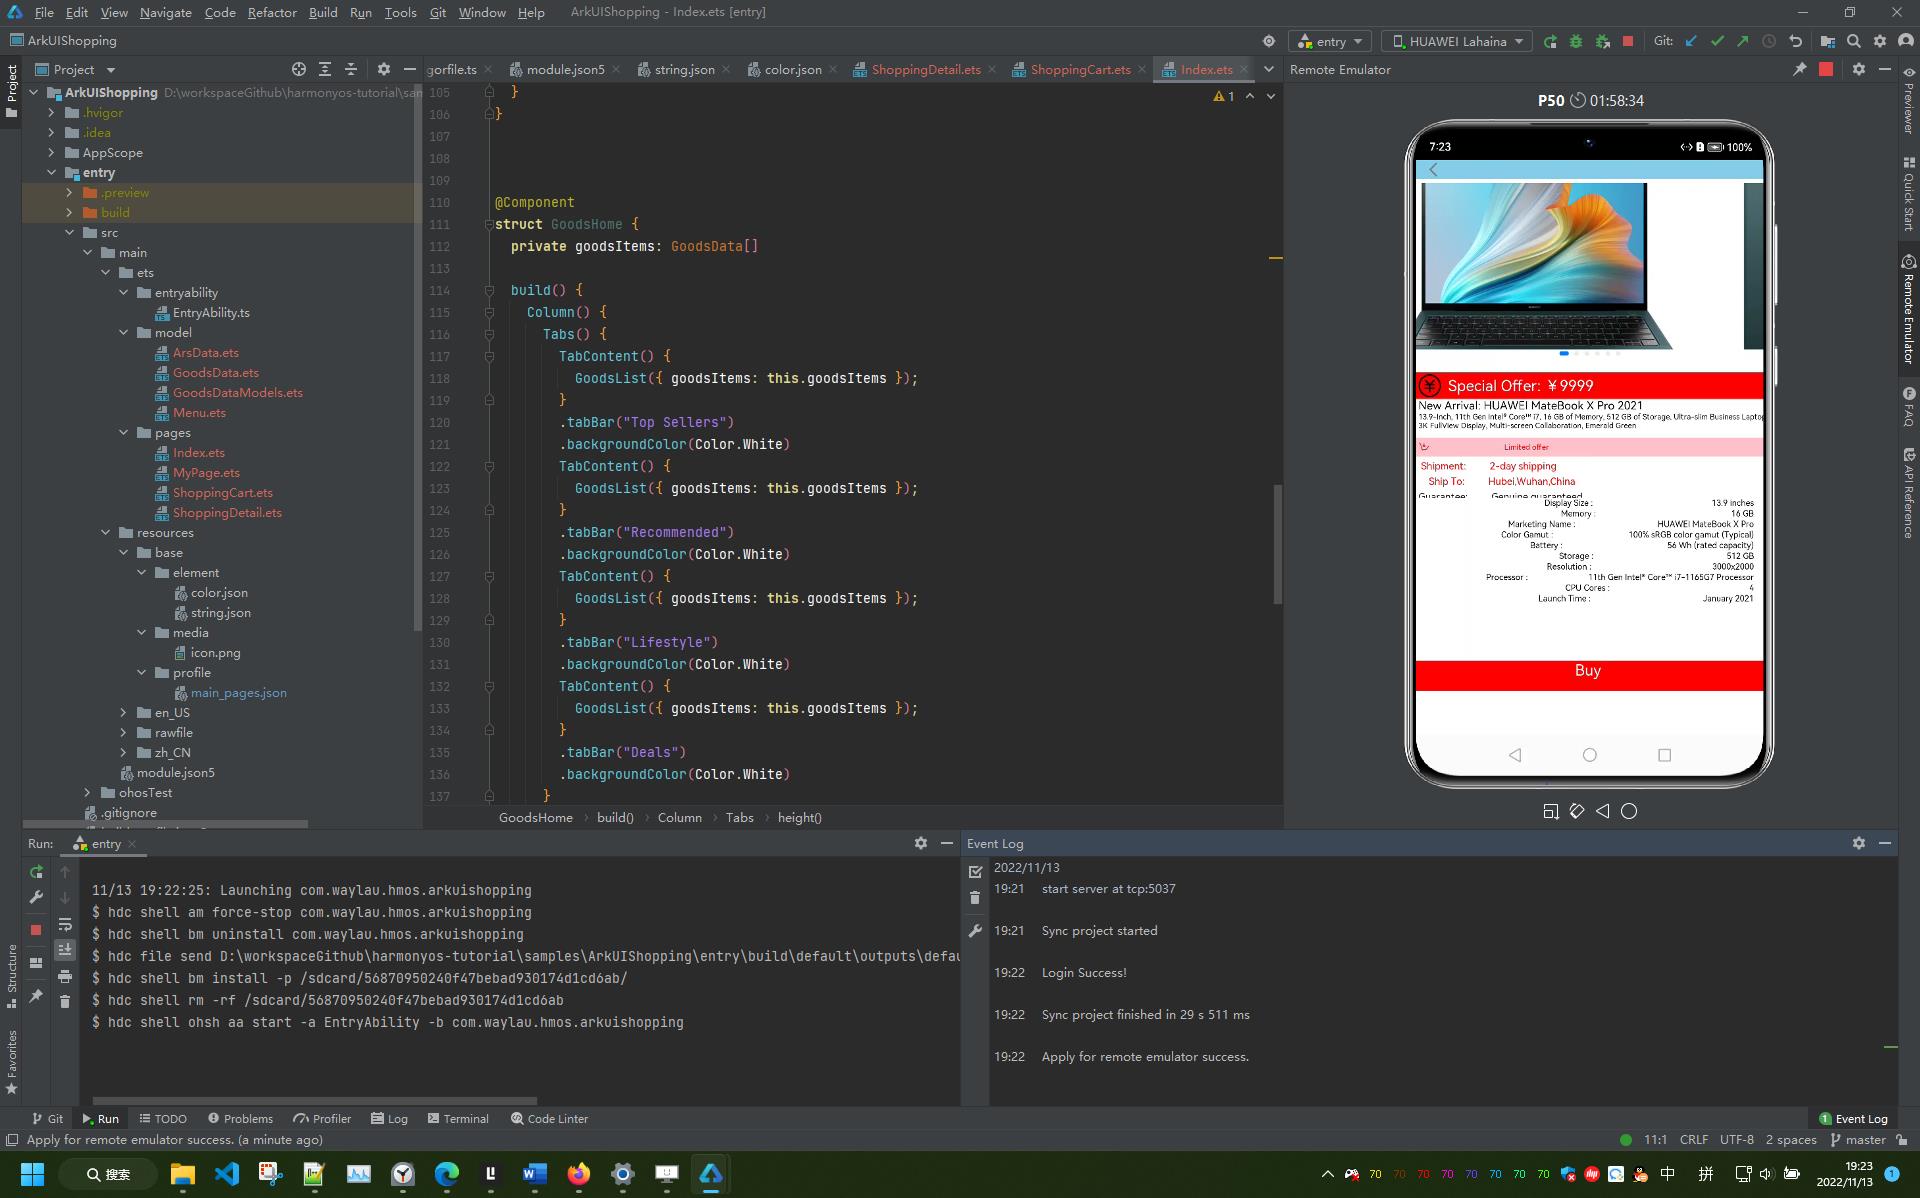
复制实现商品详情页面
商品详情页面主要由下面五部分组成:
- 顶部的返回栏。
- Swiper组件。
- 中间多个Text组件组成的布局。
- 参数列表。
- 底部的Buy。
把上面每一部分都封装成一个组件,然后再放到入口组件内,当点击顶部返回图标时返回到主页面的商品列表页签,点击底部Buy时,会触发进度条弹窗。
在pages目录下面新建一个Page, 命名为ShoppingDetail。在ShoppingDetail.ets文件中创建入口组件,组件内容如下:
import router from '@system.router';
import ArsData from '../model/ArsData'
import getArs,getDetailImages from '../model/GoodsDataModels'
import prompt from '@system.prompt';

@Entry
@Component
struct ShoppingDetail
  private arsItems: ArsData[] =  getArs()
  private detailImages: string[] = getDetailImages()
  build()
    Column()
      DetailTop()
      Scroll()
        Column()
          SwiperTop()
          DetailText()
          DetailArsList( arsItems: this.arsItems )
          Image($rawfile('computer/computer1.png'))
            .height(220)
            .width('100%')
            .margin(top:30)
          Image($rawfile('computer/computer2.png'))
            .height(220)
            .width('100%')
            .margin(top:30)
          Image($rawfile('computer/computer3.png'))
            .height(220)
            .width('100%')
            .margin(top:30)
          Image($rawfile('computer/computer4.png'))
            .height(220)
            .width('100%')
            .margin(top:30)
          Image($rawfile('computer/computer5.png'))
            .height(220)
            .width('100%')
            .margin(top:30)
          Image($rawfile('computer/computer6.png'))
            .height(220)
            .width('100%')
            .margin(top:30)

        .width('100%')
        .flexGrow(1)

      .scrollable(ScrollDirection.Vertical)
      DetailBottom()

    .height(630)


复制
顶部DetailTop组件代码如下:
@Component
struct DetailTop
  build()
    Column()
      Row()
        Image($rawfile('detail/icon-return.png'))
          .height(20)
          .width(20)
          .margin( left: 20, right: 250 )
          .onClick(() =>
            router.push(
              uri: "pages/HomePage"
            )
          )


      .width('100%')
      .height(25)
      .backgroundColor('#FF87CEEB')

    .width('100%')
    .height(30)


复制
SwiperTop组件代码如下:
@Component
struct SwiperTop
  build()
    Column()
      Swiper()
        Image($rawfile('computer/computer1.png'))
          .height(220)
          .width('100%')
        Image($rawfile('computer/computer2.png'))
          .height(220)
          .width('100%')
        Image($rawfile('computer/computer3.png'))
          .height(220)
          .width('100%')
        Image($rawfile('computer/computer4.png'))
          .height(220)
          .width('100%')
        Image($rawfile('computer/computer5.png'))
          .height(220)
          .width('100%')
        Image($rawfile('computer/computer6.png'))
          .height(220)
          .width('100%')


      .index(0)
      .autoPlay(true)
      .interval(3000)
      .indicator(true)
      .loop(true)
      .height(250)
      .width('100%')

    .height(250)
    .width('100%')


复制
DetailText组件代码如下:
@Component
struct DetailText
  build()
    Column()
      Row()
        Image($rawfile('computer/icon-promotion.png'))
          .height(30)
          .width(30)
          .margin(left:10)
        Text('Special Offer: ¥9999')
          .fontColor(Color.White)
          .fontSize(20)
          .margin(left:10)


      .width('100%')
      .height(35)
      .backgroundColor(Color.Red)
      Column()
        Text('New Arrival: HUAWEI MateBook X Pro 2021')
          .fontSize(15)
          .margin(left:10)
          .alignSelf(ItemAlign.Start)
        Text('13.9-Inch, 11th Gen Intel® Core™ i7, 16 GB of Memory, 512 GB of Storage, Ultra-slim Business Laptop, 3K FullView Display, Multi-screen Collaboration, Emerald Green')
          .fontSize(10)
          .margin(left:10)
        Row()
          Image($rawfile('nav/icon-buy.png'))
            .height(15)
            .width(15)
            .margin(left:10)
          //TODO 暂不支持跑马灯组件,用Text代替
          Text('Limited offer')
            .fontSize(10)
            .fontColor(Color.Red)
            .margin(left:100)


        .backgroundColor(Color.Pink)
        .width('100%')
        .height(25)
        .margin(top:10)
        Text(' Shipment:         2-day shipping')
          .fontSize(13)
          .fontColor(Color.Red)
          .margin(left:10,top:5)
          .alignSelf(ItemAlign.Start)
        Text('    Ship To:         Hubei,Wuhan,China')
          .fontSize(13)
          .fontColor(Color.Red)
          .margin(left:10,top:5)
          .alignSelf(ItemAlign.Start)
          .onClick(()=>
            prompt.showDialog(title:'select address',)

          )
        Text('Guarantee:         Genuine guaranteed')
          .fontSize(13)
          .margin(left:10,top:5)
          .alignSelf(ItemAlign.Start)

      .height(150)
      .width('100%')

    .height(160)
    .width('100%')


复制
DetailArsList组件代码如下:
@Component
struct DetailArsList
  private arsItems: ArsData[]
  build()
    Scroll()
      Column()
        List()
          ForEach(this.arsItems, item =>
            ListItem()
              ArsListItem( arsItem: item )

          , item => item.id.toString())

        .height('100%')
        .width('100%')
        .margin( top: 5 )
        .listDirection(Axis.Vertical)

      .height(200)


复制
ArsListItem组件代码如下:
@Component
struct ArsListItem
  private arsItem: ArsData

  build()
    Row()
      Text(this.arsItem.title+" :")
        .fontSize(11)
        .margin(left:20)
        .flexGrow(1)
      Text( this.arsItem.content)
        .fontSize(11)
        .margin(right:20)


    .height(14)
    .width('100%')
    .backgroundColor(Color.White)


复制
DetailBottom组件代码如下:
@Component
struct DetailBottom
  @Provide
  private value : number=1
  dialogController : CustomDialogController = new CustomDialogController(
    builder: DialogExample(action: this.onAccept),
    cancel: this.existApp,
    autoCancel: true
  );

  onAccept()


  existApp()


  build()
    Column()
      Text('Buy')
        .width(40)
        .height(25)
        .fontSize(20)
        .fontColor(Color.White)
        .onClick(()=>
          this.value=1
          this.dialogController.open()
        )

    .alignItems(HorizontalAlign.Center)
    .backgroundColor(Color.Red)
    .width('100%')
    .height(40)


复制
DialogExample自定义弹窗组件代码如下:
@CustomDialog
struct DialogExample
@Consume
private value : number
controller: CustomDialogController;
action: () => void;
build()
Column()
Progress(value: this.value++ >=100?100:this.value, total: 100, style: ProgressStyle.Eclipse)
.height(50)
.width(100)
.margin(top:5)
.height(60)
.width(100)
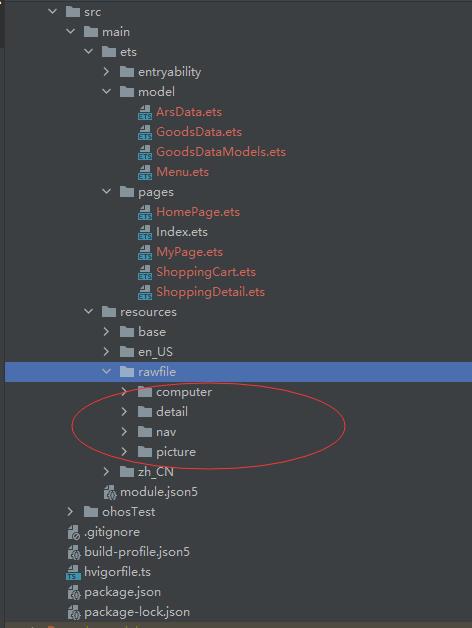
复制添加资源文件
程序中所用到的资源文件都放置到resources\\rawfile目录下。
删除index.ets
因为程序的入口文件已经改为了HomePage.ets文件,因此需要删除Index.ets文件。
HomePage.ets文件重新命名
把HomePage.ets文件重新命名为Index.ets文件。
程序运行效果
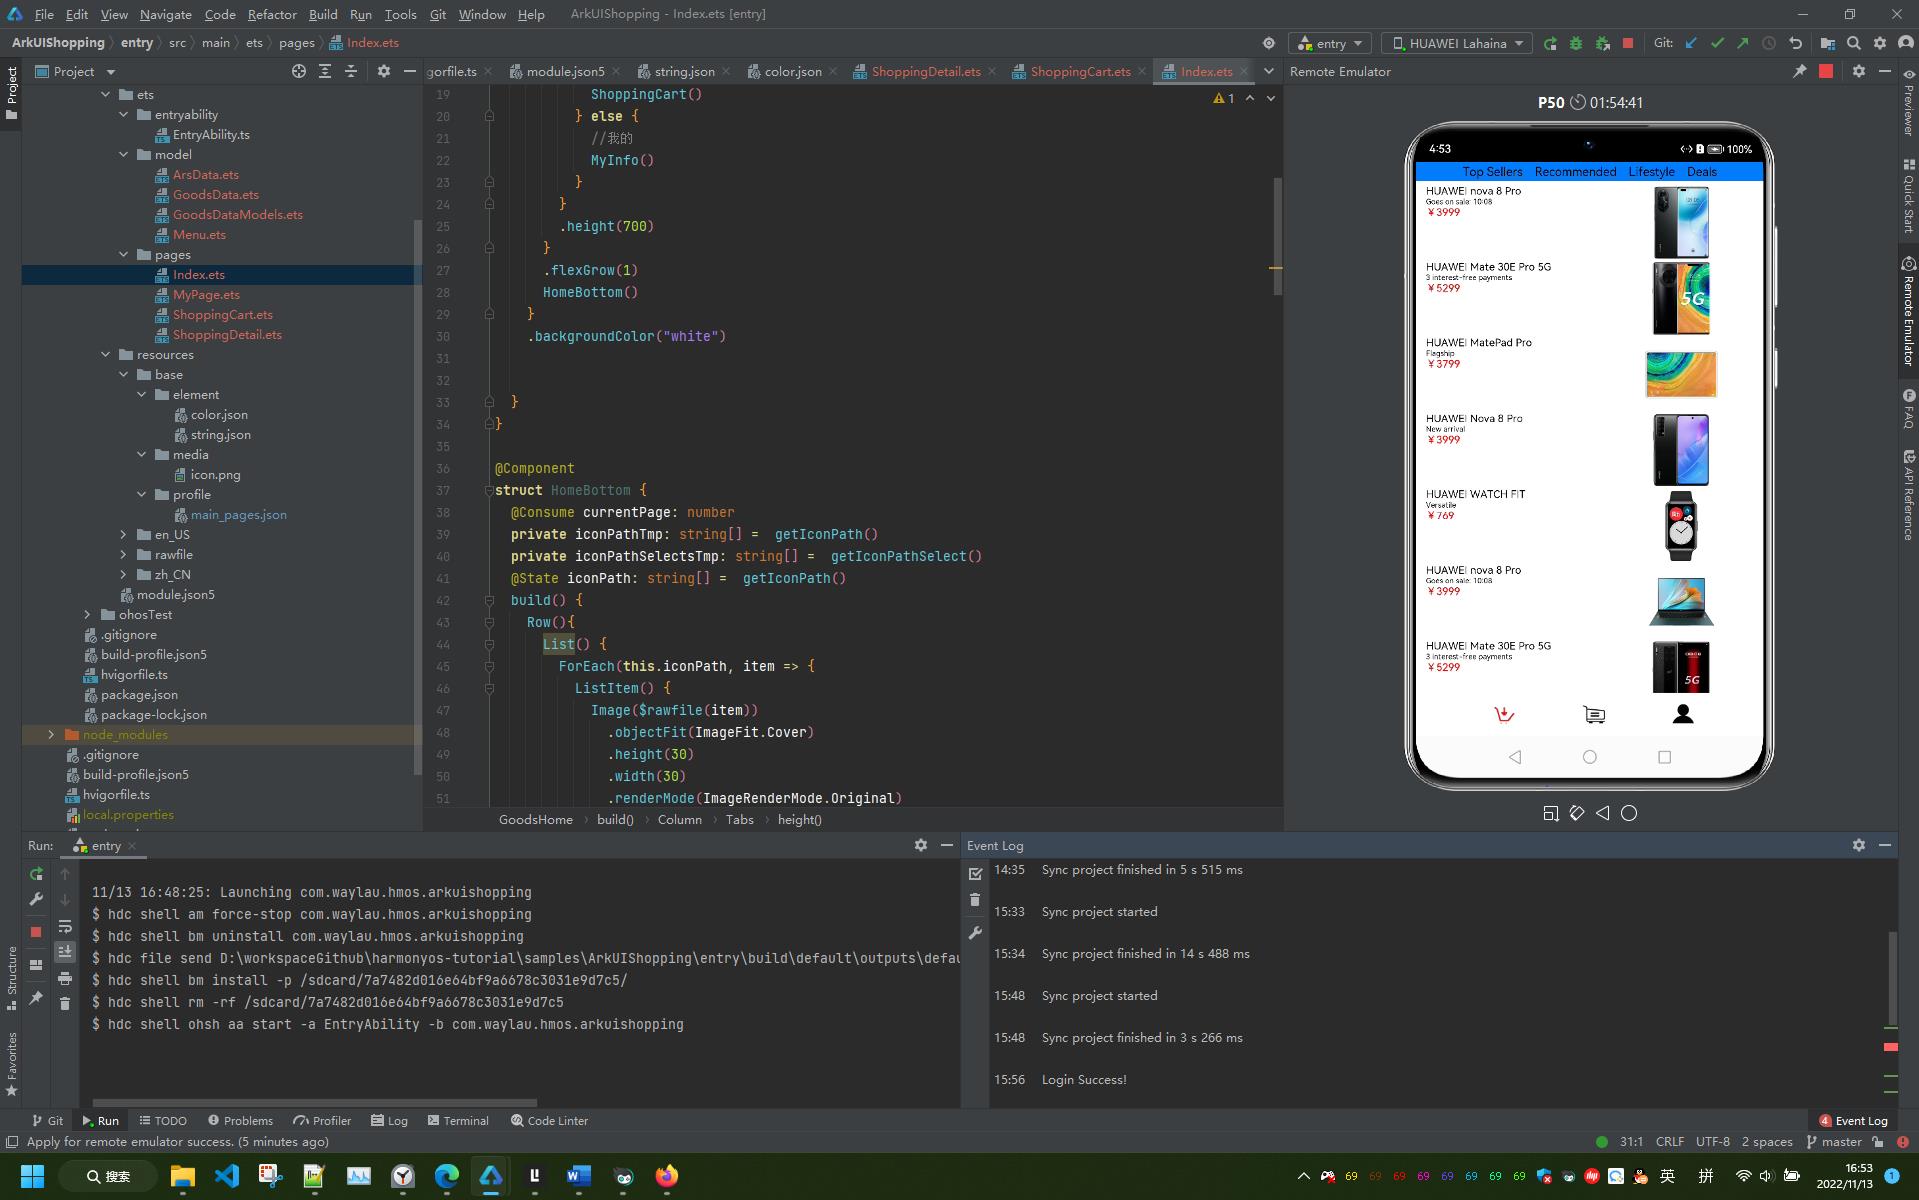
完整演示视频见B站:【老卫搬砖】025期:用HarmonyOS ArkUI来开发一个购物应用程序_哔哩哔哩_bilibili
源码
见 https://github.com/waylau/harmonyos-tutorial 中的“ArkUIShopping”
参考引用
- 《跟老卫学HarmonyOS开发》 开源免费教程,https://github.com/waylau/harmonyos-tutorial
- 《鸿蒙 HarmonyOS 应用开发从入门到精通战》(柳伟卫著,北京大学出版社)https://item.jd.com/13696724.html、http://product.dangdang.com/29386650.html
- 玩转HarmonyOS 3必装DevEco Studio 3,注意避弹 华为开发者论坛
- https://developer.huawei.com/consumer/cn/codelabsPortal/carddetails/HarmonyOS-ShoppingEts
以上是关于用HarmonyOS ArkUI来开发一个购物应用程序的主要内容,如果未能解决你的问题,请参考以下文章