OpenStack 运维 - 环境部署 | 报错排查 [T版]
Posted serendipity_cat
tags:
篇首语:本文由小常识网(cha138.com)小编为大家整理,主要介绍了OpenStack 运维 - 环境部署 | 报错排查 [T版]相关的知识,希望对你有一定的参考价值。
OpenStack 运维 - 环境部署
一、环境配置
| 主机 | CPU | 内存 | 双网卡 | 操作系统 |
|---|---|---|---|---|
| 控制节点-ct | 2C4T | 8G | NAT:192.168.0.100 VMnet:192.168.1.100 | CentOS 7-9 最小化安装 |
| 计算节点-c1 | 2C4T | 8G | NAT:192.168.0.200 VMnet:192.168.1.200 | CentOS 7-9 最小化安装 |
| 计算节点-c2 | 2C4T | 8G | NAT:192.168.0.250 VMnet:192.168.1.250 | CentOS 7-9 最小化安装 |
二、基础配置
1. 配置国内YUM源
NAT网卡用于下载工具 VM网卡用于内部连接
mv *.repo repo_bak;
curl -o /etc/yum.repos.d/CentOS-Base.repo http://mirrors.aliyun.com/repo/Centos-7.repo
#建议在线源多下载两次,有时可能不是最新状态

yum clean all && yum makecache fast
2. 修改主机名及关闭防火墙
hostnamectl set-hostname ct #c1/c2
su -

systemctl stop firewalld
systemctl disable firewalld
setenforce 0

vim /etc/sysconfig/selinux
SELINUX=disabled
3. 安装相关环境依赖包
多下载安装几次,一直到看到出现软件包已安装并且是最新版本为止,因为有时可能会漏装!
yum -y install net-tools bash-completion vim gcc gcc-c++ make pcre  pcre-devel expat-devel cmake bzip2 lrzsz net-tools
#EXPAT是C语言发开库

yum -y install centos-release-openstack-train python-openstackclient openstack-selinux openstack-utils
#OpenStack的train版本仓库源安装包、OpenStack客户端及openstack-selinux安装包
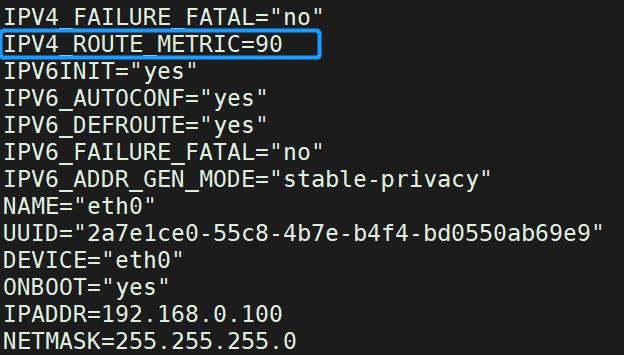
4. 调优 NAT 网卡及配置 DNS 和 映射
修改主网卡(NAT)
IPV4_ROUTE_METRIC=90		#增加此配置,调优优先级,NAT网卡优先

echo "192.168.1.100 ct
192.168.1.200 c1
192.168.1.250 c2" >> /etc/hosts

echo "nameserver 114.114.114.114
nameserver 114.114.115.115" >> /etc/resolv.conf
5. 配置免交护
#全部按回车
ssh-keygen -t rsa

#节点之间互相免交护
ssh-copy-id ct
ssh-copy-id c1
ssh-copy-id c2
6. 配置时间同步
所有节点安装
yum install chrony -y
控制节点ct
vim /etc/chrony.conf

#server 0.centos.pool.ntp.org iburst
#server 1.centos.pool.ntp.org iburst
#server 2.centos.pool.ntp.org iburst
#server 3.centos.pool.ntp.org iburst
server ntp6.aliyun.com iburst
#iburst表示尽快同步
allow 192.168.1.0/24
#允许1.0网段同步
查看时间同步
chronyc sources
计算节点c1/2
vim /etc/chrony.conf
#server 0.centos.pool.ntp.org iburst
#server 1.centos.pool.ntp.org iburst
#server 2.centos.pool.ntp.org iburst
#server 3.centos.pool.ntp.org iburst
server ct iburst

----
systemctl enable chronyd.service
systemctl restart chronyd.service
chronyc sources

crontab -e
*/5 * * * * /usr/bin/chronyc sources >>/var/log/chronyc.log
三、系统环境配置
控制节点ct
1. 安装及配置 MariaDB
yum -y install mariadb mariadb-server python2-Pymysql
#此包用于openstack的控制端连接mysql所需要的模块,如果不安装,则无法连接数据库

yum -y install libibverbs

--

vim /etc/my.cnf.d/openstack.cnf
#添加MySQL子配置文件,增加如下内容
[mysqld]
bind-address = 192.168.1.100
default-storage-engine = innodb
innodb_file_per_table = on
max_connections = 4096
collation-server = utf8_general_ci
character-set-server = utf8

#详解:
[mysqld]
bind-address = 192.168.1.100			//控制节点局域网地址
default-storage-engine = innodb 		//默认存储引擎
innodb_file_per_table = on 				//每张表独立表空间文件
max_connections = 4096 					//最大连接数
collation-server = utf8_general_ci 		//默认字符集
character-set-server = utf8				//字符集类型,避免乱码

--
systemctl enable mariadb
systemctl start mariadb

--
mysql_secure_installation
#执行MariaDB安全配置脚本
Enter current password for root (enter for none):			//回车
OK, successfully used password, moving on...
Set root password? [Y/n] Y									//设置root密码?
Remove anonymous users? [Y/n] Y								//删除匿名用户?
 ... Success!
Disallow root login remotely? [Y/n] N						//是否不允许root用户远程登陆?
 ... skipping.
Remove test database and access to it? [Y/n] Y 				//是否删除test测试库?
Reload privilege tables now? [Y/n] Y 						//现在重新加载特权表?
2. 安装 RabbitMQ
yum -y install rabbitmq-server

systemctl enable rabbitmq-server.service
systemctl start rabbitmq-server.service

--
rabbitmqctl add_user openstack RABBIT_PASS
#创建消息队列用户,用于controler和计算节点连接rabbitmq的认证(关联)

rabbitmqctl set_permissions openstack ".*" ".*" ".*"
#配置openstack用户的操作权限(正则,配置读写权限)

--
netstat -natp | grep 25672
#567是Rabbitmq默认端口
netstat -natp | grep 5672
#25672是Rabbit的测试工具CLI的端口

--
rabbitmq-plugins list
#查看rabbitmq插件列表

rabbitmq-plugins enable rabbitmq_management
#开启rabbitmq的web管理界面的插件,端口为15672

--
netstat -natp | grep 5672
#检查端口

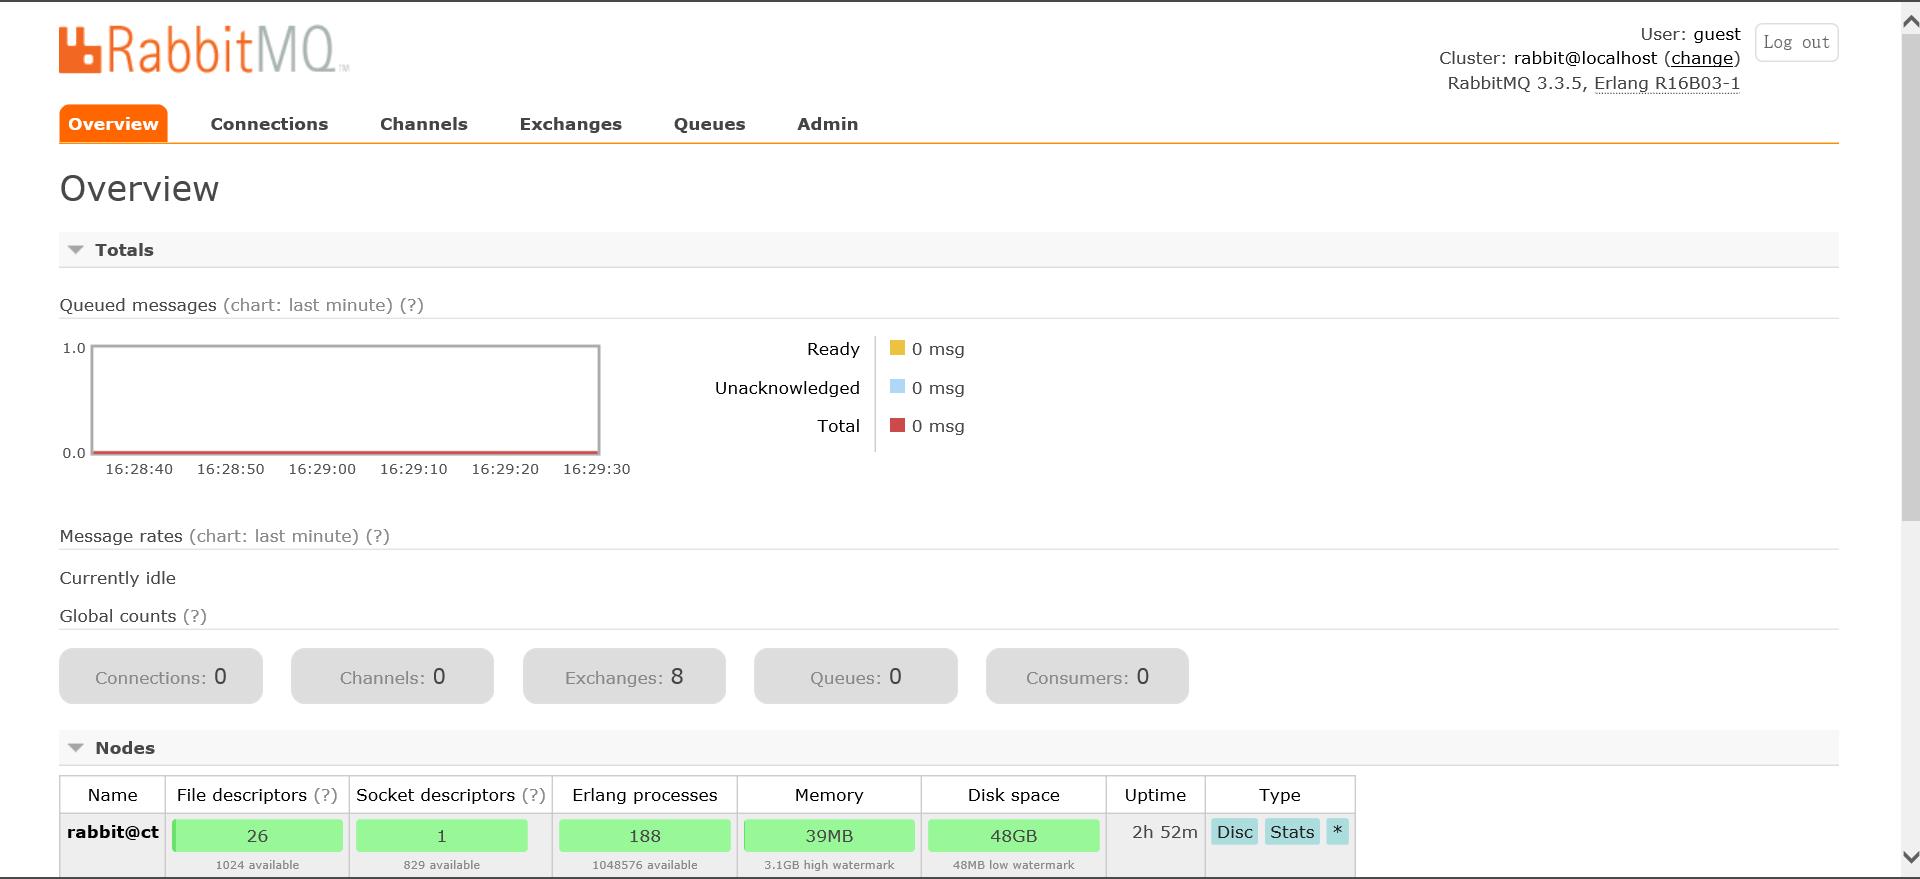
浏览器访问"192.168.0.100:15672"[NAT]
账号密码默认均为"guest"

3. 安装 memcached
yum install -y memcached python-memcached
#python-*模块在OpenStack中起到连接数据库的作用

cat /etc/sysconfig/memcached
#查看Memcached配置文件

--

systemctl enable memcached
systemctl start memcached

netstat -nautp | grep 11211

4. 安装etcd
yum -y install etcd

cd /etc/etcd/
vim etcd.conf
删除所有内容,复制粘贴以下内容并进行修改

ETCD_DATA_DIR="/var/lib/etcd/default.etcd"
ETCD_LISTEN_PEER_URLS="http://192.168.1.100:2380"
ETCD_LISTEN_CLIENT_URLS="http://192.168.1.100:2379"
ETCD_NAME="ct"
ETCD_INITIAL_ADVERTISE_PEER_URLS="http://192.168.1.100:2380"
ETCD_ADVERTISE_CLIENT_URLS="http://192.168.1.100:2379"
ETCD_INITIAL_CLUSTER="ct=http://192.168.1.100:2380"
ETCD_INITIAL_CLUSTER_TOKEN="etcd-cluster-01"
ETCD_INITIAL_CLUSTER_STATE="new"

#设置开机自启并检测端口开放
systemctl enable etcd.service
systemctl start etcd.service
netstat -anutp |grep 2379
netstat -anutp |grep 2380

5. 安装OpenStack组件
计算节点c1/c2
yum -y install centos-release-openstack-train python-openstackclient openstack-selinux openstack-utils
四、报错解决
Error: unable to connect to node rabbit@localhost: nodedown
DIAGNOSTICS
===========
attempted to contact: [rabbit@localhost]
rabbit@localhost:
-
connected to epmd (port 4369) on localhost
-
epmd reports node ‘rabbit’ running on port 25672
-
TCP connection succeeded but Erlang distribution failed
-
Hostname mismatch: node “rabbit@ct” believes its host is different. Please ensure that hostnames resolve the same way locally and on “rabbit@ct”
current node details:
- node name: ‘rabbitmq-cli-12@ct’
- home dir: /var/lib/rabbitmq
- cookie hash: oV+N20QLBoBQrAgHFUTACg==
解决办法:修改host名字只是零时的,需要使用su -才能正真生效
以上是关于OpenStack 运维 - 环境部署 | 报错排查 [T版]的主要内容,如果未能解决你的问题,请参考以下文章
OpenStack 运维 - 部署Keystone组件 [T版]
OpenStack 运维 - 部署Keystone组件 [Train版]