processing实现的跳动心形
Posted 阿宝逃离地球
tags:
篇首语:本文由小常识网(cha138.com)小编为大家整理,主要介绍了processing实现的跳动心形相关的知识,希望对你有一定的参考价值。
processing实现的跳动心形
心型的实现公式原理参考这个博主的文章
近来看到的电视剧《点燃我,温暖你》里出现的跳动心形,就很心动想要自己去实现一下,用processing做可视化很方便,也许TouchDesign更方便但是这个不太熟悉还是用processing了。最后做不出来电视剧里的效果,就这样先吧。
自己做出了来的效果如下:

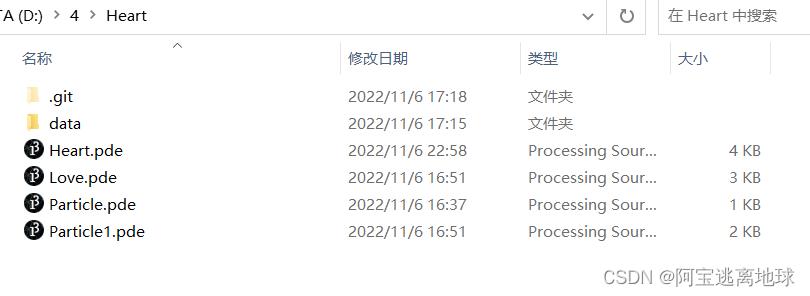
文件里的内容

Particle.pde
粒子的接口(方便我自己测试)
interface Particle

  void Caculate(float s, float t) ;
  void DrawParticle(float s, float t);
  void SetIndext(boolean b);
Particle1.pde
粒子类Particle1,实现接口Particle
class Particle1 implements Particle
  // 坐标
  PVector v;
  // 计算坐标的各项参数
  public float  xa, ya1, ya2, ya3, ya4;

  // 参数设置函数
  public void SetIndext(boolean b)
    if (b)
      xa+=0.001*500+0.3;
      ya1+=0.001*500+0.1;
      ya3+=0.1;
     else
      xa-=0.001*500+0.3;
      ya1-=0.001*500+0.1;
      ya3-=0.1;


  // 圆点粒子的坐标
  float r;

  // 坐标的随机范围
  float r1, r2;

  // 构造器,初始化成员
  public Particle1(float r1, float r2)
    v= new PVector(0, 0);
    this.xa = 15;
    this.ya1 = 13;
    this.ya2 = 5;
    this.ya3 = 3;
    this.ya4 = 0.1;
    this.r = 7;
    this.r1 = r1;
    this.r2 = r2;


  // 坐标计算
  void Caculate(float s, float t)
    this.v.x=this.xa *s* pow(sin(t), 3)+random(this.r1, width/2);
    this.v.y=this.ya1* cos(t) - this.ya2* cos(2 * t) - this.ya3* cos(3 * t) - this.ya4*cos(4 * t);
    this.v.y = -this.v.y*s+random(this.r2, height/2);


  // 粒子绘制
  void DrawParticle(float s, float t)
    Caculate(s, t);

    fill(162, 56, 72, random(255) );
    noStroke();
    ellipse(this.v.x, this.v.y, random(r), random(r));


  // 粒子的销毁
  void Destroy()
Love.pde
使用粒子绘制心形曲线,Love类,通过改变size参数和粒子的坐标计算的参数来改变爱心的大小
class Love

  // 爱心的大小
  float size;
  // 弧度,取值范是[0,2*pi]
  float t;
  // 弧度变化参数
  float vt;
  // t的最大值,循环的次数
  float maxt;
  int maxi;
  // 初始大小的爱心大小和最大的心形的小
  float sizeInit, sizeMax;
  // 存放粒子的参数
  ArrayList<Particle> ps;
  // 粒子坐标的偏离范围
  float r1, r2;

  //标记变化的flag
  boolean flag;


  // 构造器初始化参数
  public Love(float r1, float r2)
    this.Init();

    this.size = 8f;
    this.sizeInit = 7f;
    this.sizeMax = 10f;


    this.r1 = r1;
    this.r2 = r2;
    InitArrayList();


  // 构造器初始化参数,可以设置粒子运动动范围的大小
  public Love(float r1, float r2, float size, float  sizeInit, float sizeMax, float vt)
    Init();
    this.r1 = r1;
    this.r2 = r2;
    this.vt = vt;
    this.size = size;
    this.sizeInit = sizeInit;
    this.sizeMax = sizeMax;
    // 初始化各个粒子
    InitArrayList();


  void Init()
    this.t = 0;
    this.vt = 0.001;
    this.maxt = TWO_PI;
    this.maxi = ceil(maxt/vt);

    flag = true;


  void InitArrayList()
    ps = new ArrayList<Particle>();
    for (int i=0; i<maxi; i++)
      ps.add(new Particle1(this.r1, this.r2));


  void InitArrayList(int addNum)
    int allNum = addNum + maxi;
    ps = new ArrayList<Particle>();
    for (int i=0; i<allNum; i++)
      ps.add(new Particle1(this.r1, this.r2));


  // 绘制爱心
  void DrawLove()
    for (int i = 0; i<maxi; i++)

      // 创建粒子
      Particle pp = ps.get(i);
      //Particle pp = new Particle1(this.r1,this.r2);
      // 计算粒子坐标并且绘制粒子
      pp.DrawParticle(this.size, this.t);

      t+=vt;


  // 爱心的运动,即改变大小
  // 先绘制后大小变化
  void PuTong()
    DrawLove();
    Move();


  void Move()
    if (size<this.sizeInit || size>this.sizeMax)
      this.flag = !this.flag;

    if (this.flag==true)
      size+=0.4;
     else
      size-=0.4;


    SetLoveIndex(flag);


  void SetLoveIndex(boolean f)
     for(int i=0;i<maxi;i++)
        ps.get(i).SetIndext(f);
Heart.pde
import processing.sound.*; //所用到的库sound
// 操作要播放的音乐文件对象
SoundFile file;
ArrayList<Love> loveList;
// 一颗心
Love love;
Love love1;
//=======================================
void setup()
  // 画布大小
  size(1920, 1080);
  //背景颜色
  background(0, 0, 0);
  frameRate(7);
  //Init();
  loveList = new ArrayList<Love>();
  loveList.add(new Love(width/2-30, height/2-40));//测试用
  loveList.add(new Love(width/2-10, height/2-10, 7f, 7f, 10f, 0.001));
  loveList.add(new Love(width/2-100, height/2-100, 7f, 7f, 10f, 0.001));
  // 播放背景音频,背景音频放在data文件夹里
  file = new SoundFile(this, "心脏在跳动_耳聆网_[声音ID:11421].wav");
  file.loop(); // 循环
  file.play(); // 播放


//=======================================
void draw()
  // 刷新背景
  background(0, 0, 0);

  loveList.get(1).PuTong();
  loveList.get(2).PuTong();
以上是关于processing实现的跳动心形的主要内容,如果未能解决你的问题,请参考以下文章