vue3学习随便记10
Posted sjg20010414
tags:
篇首语:本文由小常识网(cha138.com)小编为大家整理,主要介绍了vue3学习随便记10相关的知识,希望对你有一定的参考价值。
深入组件
自定义事件
事件名规则和组件prop一样,即 JS 中 camelCase,html中 kebab-case。
this.$emit('myEvent')<my-component @my-event="doSomething"></my-component>自定义事件在组件的 emits 选项上定义。如果在 emits 选项中定义了原生事件(如 click),则组件自定义事件将替代原生事件侦听器。与props类似,在 emits 选项定义事件时,可以使用对象语法来给事件添加验证。添加事件验证时,应该为事件分配一个函数,该函数接收传递给 $emit 调用的参数,并返回一个布尔值指示事件是否有效。
app.component('custom-form',
  emits:
    // 没有验证
    click: null,

    // 验证 submit 事件
    submit: ( email, password ) =>
      if (email && password)
        return true
       else
        console.warn('Invalid submit event payload!')
        return false


  ,
  methods:
    submitForm(email, password)
      this.$emit('submit',  email, password )


)
这一块代码还没仔细理解运行场景。
自定义组件可以用 v-model 实现双向绑定,默认组件上的 v-model 用 modelValue (如 title) 作为 prop 和 update:modelValue (如 update:title)作为事件(没有这个事件时数据只能从父级向子组件流动,这个事件响应使得 prop被修改,子组件状态反映到父级 attribute值)。这个前面我们已经有说明。
因为用 v-model 双向绑定时,使用了 modelValue,所以,单个组件实例上可以有多个 v-model 绑定,绑定到不同的 modelValue,如
<user-name
  v-model:first-name="firstName"
  v-model:last-name="lastName"
></user-name>
app.component('user-name',
props:
firstName: String,
lastName: String
,
emits: ['update:firstName', 'update:lastName'],
template: `
<input
type="text"
:value="firstName"
@input="$emit('update:firstName', $event.target.value)">
<input
type="text"
:value="lastName"
@input="$emit('update:lastName', $event.target.value)">
`
)在我们前面学习表单输入绑定时,已经看到了 v-model 可以使用内置修饰符 .trim/.number/.lazy,Vue允许我们自定义 v-model 修饰符。下面的过程展示了自定义修饰符 capitalize 实现首字母大小。
<my-component v-model.capitalize="myText"></my-component>添加到 v-model 的修饰符将通过 modelModifiers 这个组件 prop 通知到组件(modelModifiers 默认值为空对象,是 default 工厂函数返回的,参见前一篇),即外部 v-model绑定时带.capitalize修饰符,被组件内的 modelModifiers prop捕获(除了绑定本身要对应一个prop,修饰符也对应一个prop,前者名称为 modelValue,后者名称为 modelModifiers)。
app.component('my-component',
  props:
    modelValue: String,
    modelModifiers:
      default: () => ()

  ,
  emits: ['update:modelValue'],
  template: `
    <input type="text"
      :value="modelValue"
      @input="$emit('update:modelValue', $event.target.value)">
  `,
  created()
    console.log(this.modelModifiers) //  capitalize: true

)
我们看到修饰符被捕获了。我们希望这个修饰符起点作用,而上述代码中,内部 input事件直接引发组件的 update:modelValue事件,从而直接修改 v-model 绑定的变量myText的值了,我们需要在这个中间插入一个首字母大写的过滤动作:给组件添加方法 emitValue,并且把组件内 input 事件回调绑定到方法 emitValue,在 emitValue 方法中,先过滤(根据modelModifiers这个prop中有没有名为capitalize的修饰符判断是否过滤),再引发组件的 update:modelValue事件。当然,created()钩子并不需要,可以删除。
  methods:
    emitValue(e)
      let value = e.target.value
      if (this.modelModifiers.capitalize)
        value = value.charAt(0).toUpperCase() + value.slice(1)

      this.$emit('update:modelValue', value)

  ,
  template: `<input
    type="text"
    :value="modelValue"
    @input="emitValue">`
对于带参数的 v-model 绑定(prop不是默认的modelValue,而是命名的,因为命名,可以不止一个prop,参见本篇前面的多个 v-model 绑定),生成的 prop 名称将为 参数名 + 'Modifiers',例如
<my-component v-model:description.capitalize="myText"></my-component>v-model 绑定时参数为 description,所以,props必然存在 description,然后修饰符 capitalize 也要对应一个 prop,此时,props必然存在 descriptionModifiers,有关description的修饰符将被这个prop捕获
app.component('my-component',
  props: ['description', 'descriptionModifiers'],  // 这2个 prop
  emits: ['update:description'],
  template: `
    <input type="text"
      :value="description"
      @input="$emit('update:description', $event.target.value)">
  `,
  created()
    console.log(this.descriptionModifiers) //  capitalize: true  后1个prop捕获修饰符

)
插槽 slot
插槽内容
我们前面已经用过 <slot>,也就是组件定义时的一个占位符,组件使用方的 innerHTML(可以包含各种HTML甚至其他Vue组件)会填充到这个占位符。如果组件没有<slot>占位符,组件使用方的 innerHTML 都会被抛弃掉。
渲染作用域
    <div id="app">
        <todo-button action="delete">
            做第  n  项作业,完成后执行  action
        </todo-button>
    </div>
    <script>
        const app = Vue.createApp(
            data()
                return
                    n: 1


        )
        app.component('todo-button',
            template: `
                <button class="btn-primary">
                    <slot></slot>
                </button>
            `
        )
        app.mount('#app')
    </script>
上面的代码,将出现警告,因为 action 中的 action不可访问,因为插槽(内容“做第……”)不能访问 <todo-button>的作用域,插槽的作用域是组件的使用方的作用域。换句话说,父级模板里所有内容都是在父级作用域中编译的;子模板里的所有内容都是在子作用域编译的。插槽内容是组件使用方提供的,所以它的作用域在使用方(父级)作用域。
备用内容
备用内容就是使用方不提供内容时的默认内容,在组件定义时直接嵌入到<slot></slot>中间即可,即 <slot>备用内容</slot>
<button type="submit">
  <slot>提交</slot>
</button><submit-button></submit-button>上述代码渲染后按钮的文字是“提交”。下述代码渲染的按钮文字是“保存”
<submit-button>
  保存
</submit-button>
命名插槽
不给插槽命名,使用默认插槽(名字为 default),只能有一个插槽,给插槽命名,就不受限制了。给插槽命名就是给<slot>元素使用特殊的attribute:name
<div class="container">
  <header>
    <slot name="header"></slot>
  </header>
  <main>
    <slot></slot>
  </main>
  <footer>
    <slot name="footer"></slot>
  </footer>
</div>
组件的使用方,需要在一个 <template>元素上使用 v-slot 指令,来指明把 <template>内的内容替换到哪个slot位置
<base-layout>
  <template v-slot:header>
    <h1>这里是标题</h1>
  </template>

  <template v-slot:default>
    <p>一节主要内容</p>
    <p>另一节主要内容</p>
  </template>

  <template v-slot:footer>
    <p>页脚是一些联系信息</p>
  </template>
</base-layout>
v-slot 指令只能用于<template>元素或者独占默认插槽(见后)。
作用域插槽与插槽prop
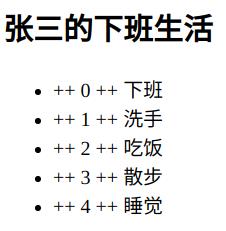
前面我们知道,父级插槽内容中是不能访问到子组件的数据的,但有时我们的确想让插槽内容可以去访问到子组件的数据,为了实现这一点,我们可以为<slot>元素添加attribute,即插槽prop。使用插槽prop,可以实现子组件变量被父级插槽内容利用的效果。插槽prop的常见应用场合是组件被用来渲染一个项目数组时,我们想自定义每个项目的渲染方式,即组件定制方为组件使用方保留一定的灵活性。下面的例子,纯粹为了演示
    <div id="app">
        <todo-list :title="title">
            <template v-slot:default="slotProps">
                <span>++  slotProps.index  ++ </span>
                <span> slotProps.item </span>
            </template>
        </todo-list>
    </div>
    <script>
        const app = Vue.createApp(
            data()
                return
                    title: '张三的下班生活'


        )
        app.component('todo-list',
            props: ['title'],
            data()
                return
                    items: ['下班', '洗手', '吃饭', '散步', '睡觉']

            ,
            template: `
                <h2> title </h2>
                <ul>
                    <li v-for="(item, index) in items">
                        <slot :item="item" :index="index"></slot>
                    </li>
                </ul>
            `
        )
        app.mount('#app')
    </script>
todo-list 组件有一个组件prop title,对于组件prop,数据是从组件使用方到组件内的。todo-list组件有一个slot,未命名(即default插槽),对于slot,内容是从组件使用方到组件内的。组件todo-list的slot虽然在 v-for 循环内,但词法上是一个(default)。slot prop 则把组件内的变量绑定到插槽prop,组件使用方可以用一个对象(v-slot:插槽名="对象名",带值的v-slot)接收该插槽的所有插槽prop,从而最终数据从组件内到组件使用方。
独占默认插槽的缩写语法
在上面的例子中,组件接收内容的只有默认插槽,此时,组件的标签可以被当做插槽的模板来使用,即省去template。
        <todo-list :title="title" v-slot:default="slotProps">
            <span>++  slotProps.index  ++ </span>
            <span> slotProps.item </span>
        </todo-list>
上述写法还可以进一步简化,因为插槽不指定就是默认插槽,所以,可以省去 v-slot 的参数 default
        <todo-list :title="title" v-slot="slotProps">
            <span>++  slotProps.index  ++ </span>
            <span> slotProps.item </span>
        </todo-list>
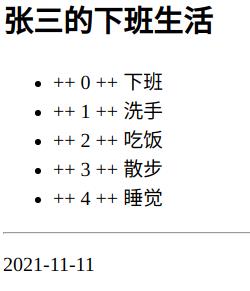
独占默认插槽是特殊的,如果出现多个插槽,应该始终为每一个插槽使用完整的 <template> 语法。我们为组件添加一个date数据属性和一个名为other的插槽,放在页脚部位,other插槽有名为date的插槽prop,绑定的值为date数据属性,从而组件使用方可以定制页脚的渲染方式。
            data()
                return
                    items: ['下班', '洗手', '吃饭', '散步', '睡觉'],
                    date: '2021-11-11'

            ,
            template: `
                <h2> title </h2>
                <ul>
                    <li v-for="(item, index) in items">
                        <slot :item="item" :index="index"></slot>
                    </li>
                </ul>
                <slot :date="date" name="other"></slot>
            `
<todo-list :title="title">
<template v-slot:default="slotProps">
<span>++ slotProps.index ++ </span>
<span> slotProps.item </span>
</template>
<template v-slot:other="otherSlotProps">
<hr>
<p> otherSlotProps.date </p>
</template>
</todo-list>
此时,因为组件有两个插槽,我们需要使用标准<template>语法,v-slot指令参数指明是哪个插槽,值分别接收各自的插槽prop的值。
解构插槽prop
作用域插槽的内部工作原理是把插槽内容包括在一个单参数的函数里:
function (slotProps)
  // ... 插槽内容 ...
因此,slotProps 可以替换成任何能够作为函数形参的 javascript 表达式,利用 ES2015+ 解构语法,可以简化插槽prop的使用,使模板更清晰。
            <template v-slot:default=" index: i, item: todo ">
                <span>++  i  ++ </span>
                <span> todo </span>
            </template>
            <template v-slot:other=" date: date ">
                <hr>
                <p> date </p>
            </template>
动态插槽名
Vue的指令参数可以是动态参数名,这一点同样适用于 v-slot 指令,v-slot 指令使用动态参数名就可以定义动态的插槽名
<base-layout>
  <template v-slot:[dynamicSlotName]>
    ...
  </template>
</base-layout>
命名插槽的缩写
v-on 和 v-bind 指令有缩写,v-slot 指令也有缩写,即 v-slot:插槽名 替换为 #插槽名
            <template #default=" index: i, item: todo ">
                .....
            </template>
            <template #other=" date: date ">
                .....
            </template>
使用缩写语法,即使只有一个默认插槽,也必须用 #default="..." 指明插槽名,不能写 #="..."
以上是关于vue3学习随便记10的主要内容,如果未能解决你的问题,请参考以下文章