NodeMCU学习笔记--- 编写第一个NodeMCU程序“Hello World!“
Posted 初五霸
tags:
篇首语:本文由小常识网(cha138.com)小编为大家整理,主要介绍了NodeMCU学习笔记--- 编写第一个NodeMCU程序“Hello World!“相关的知识,希望对你有一定的参考价值。
NodeMCU学习笔记(2)— 编写第一个NodeMCU程序"Hello World!"
提示:作者使用 ESP8266 进行开发学习。
文章目录
前言
根据文章《NodeMCU学习笔记(1)— 硬件介绍、固件制作、烧录》,完成了固件的烧录,ESP8266就成为了NodeMCU。在NodeMCU下可以进行Lua编程,可以调用固件编译好的模块。外围扩展可使用GPIO,I2C,SPI等。
本篇文章将使用Lua编写一个每两秒输出显示"Hello World!" 字符串的程序。主要学习内容有:
- 使用ESPlorer编写Lua代码;
- 使用ESPlorer下载程序到NodeMCU(ESP8266);
- 查看输出信息。
一、主程序(初始化程序)
NodeMCU上电之后,会自动调用init.lua程序。init.lua就是NodeMCU最开始执行的程序。相当于我们C语言中的主函数Main。当然在NodeMCU叫初始化函数更为合适。
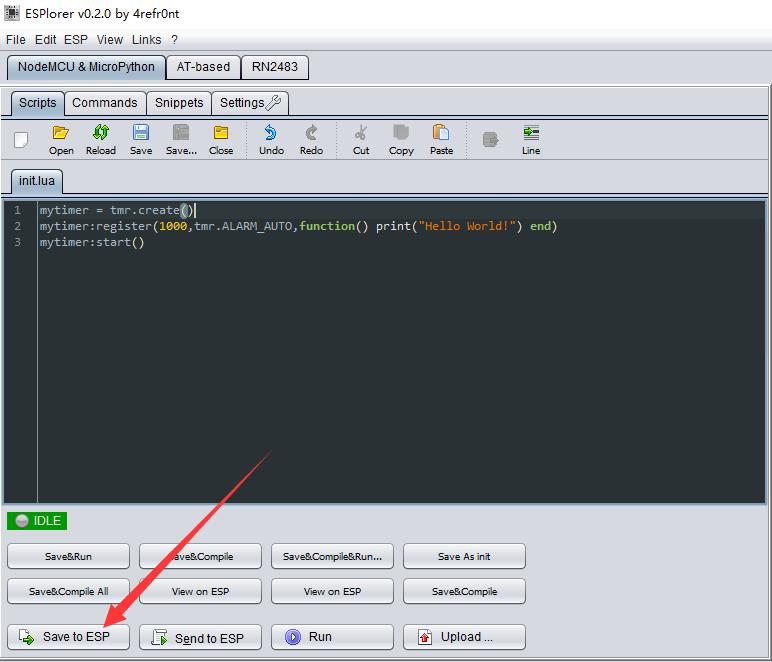
(1)在ESPlorer代码区编写如下代码:
mytimer = tmr.create()
mytimer:register(1000,tmr.ALARM_AUTO,function() print("Hello World!") end)
mytimer:start()
代码主要含义是:
1)创建一个动态定时器对象;
2)注册定时器,每三秒调用回调函数,其中回调函数就是
function() print("Hello World!") end
3)启动定时器。
函数具体说明如下:
tmr.create()
Creates a dynamic timer object; see below for its method table.
Dynamic timer can be used instead of numeric ID in control functions. Also can be controlled in object-oriented way.
Functions supported in timer object:
tobj:register()
Configures a timer and registers the callback function to call on expiry.
To free up the resources with this timer when done using it, call tobj:unregister() on it. For one-shot timers this is not necessary, unless they were stopped before they expired.
tobj:start()
Starts or restarts a previously configured timer. If the timer is running the timer is restarted only when restart parameter is true. Otherwise false is returned signaling error.
更详细说明,可以查看我文章后面的参考链接。
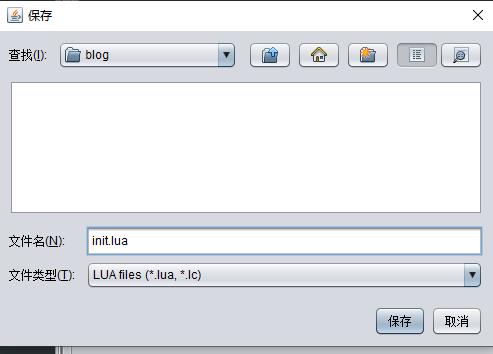
(2)编写完代码,保存为init.lua。

注意:一定要保存为init.lua名称,不然程序不会被执行。
二、程序下载
(1)点击Save to ESP即可下载程序到ESP8266。

注意:如果下载程序有问题,可以参考文章最后的总结。
三、查看输出信息
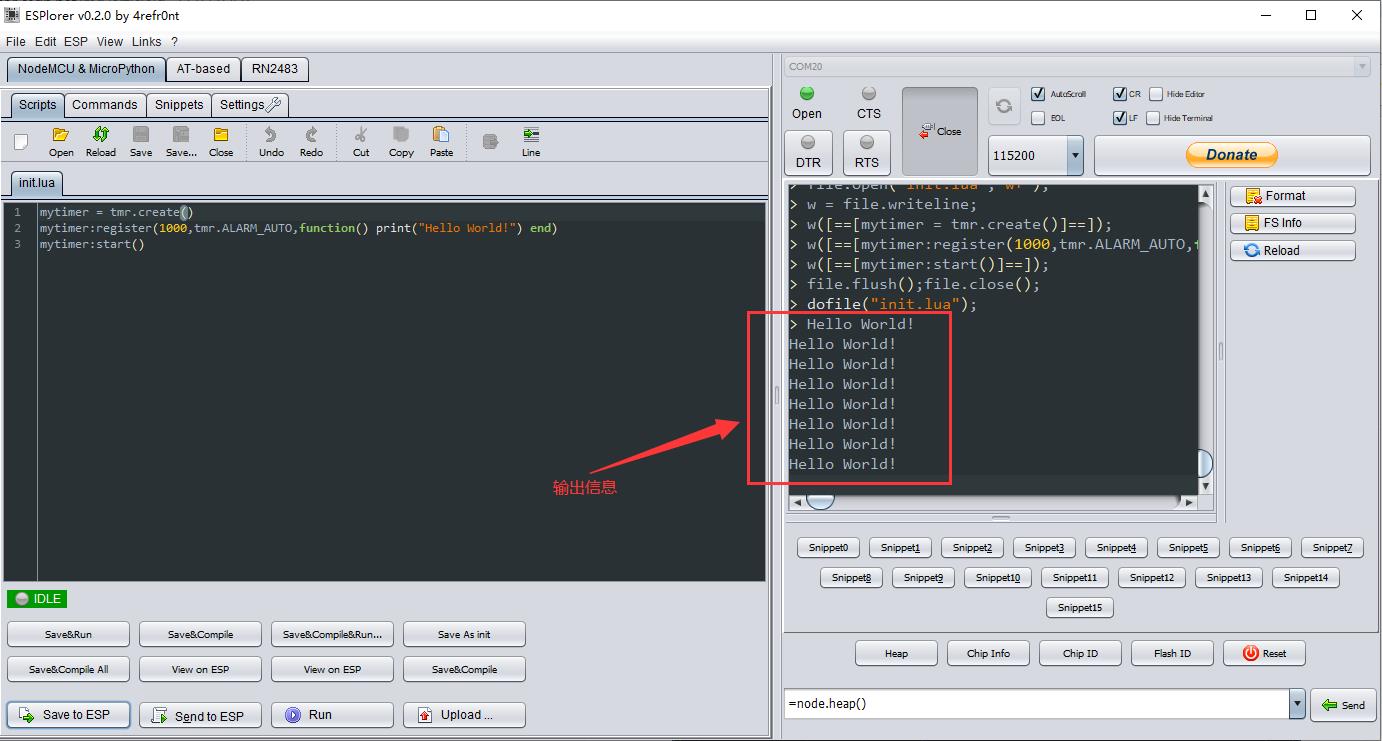
如下图所示,程序每秒钟会输出"Hello World!"。

四、总结
本文编写了NodeMCU第一个程序,使用了定时器定时执行回调函数。程序并不是很难,但有可能编写不注意,写错代码。下载也可能遇到问题,或者说,程序下载后,没有按照程序逻辑执行,这都是因为ESP8266下载时,需要删除原来的程序。以下是我总结的下载注意事项。
下载注意事项:
- 检查程序是否有问题;
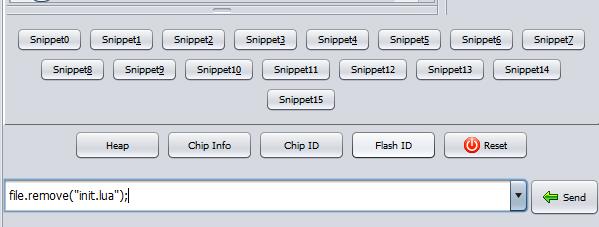
- 使用下面指令,删除init.lua程序,复位ESP8266,然后重新下载程序。
file.remove("init.lua");
如下图所示,点击Send即可发送命令到ESP8266,几秒后,复位ESP8266,然后重新下载程序。

参考文章:
[1]https://nodemcu.readthedocs.io/en/release/modules/tmr/#tmrcreate
[2]https://www.runoob.com/lua/lua-tutorial.html
上一篇文章:NodeMCU学习笔记(1)— 硬件介绍、固件制作、烧录
下一篇文章:NodeMCU学习笔记(3)— WI-FI连接使用
以上是关于NodeMCU学习笔记--- 编写第一个NodeMCU程序“Hello World!“的主要内容,如果未能解决你的问题,请参考以下文章