2022快速部署一个可用的EFK-7.17架构
Posted 丶重明
tags:
篇首语:本文由小常识网(cha138.com)小编为大家整理,主要介绍了2022快速部署一个可用的EFK-7.17架构相关的知识,希望对你有一定的参考价值。
目录
本文意为快速拉起一个可用的EFK开发测试环境,不会涉及高级配置。
0.环境准备
-
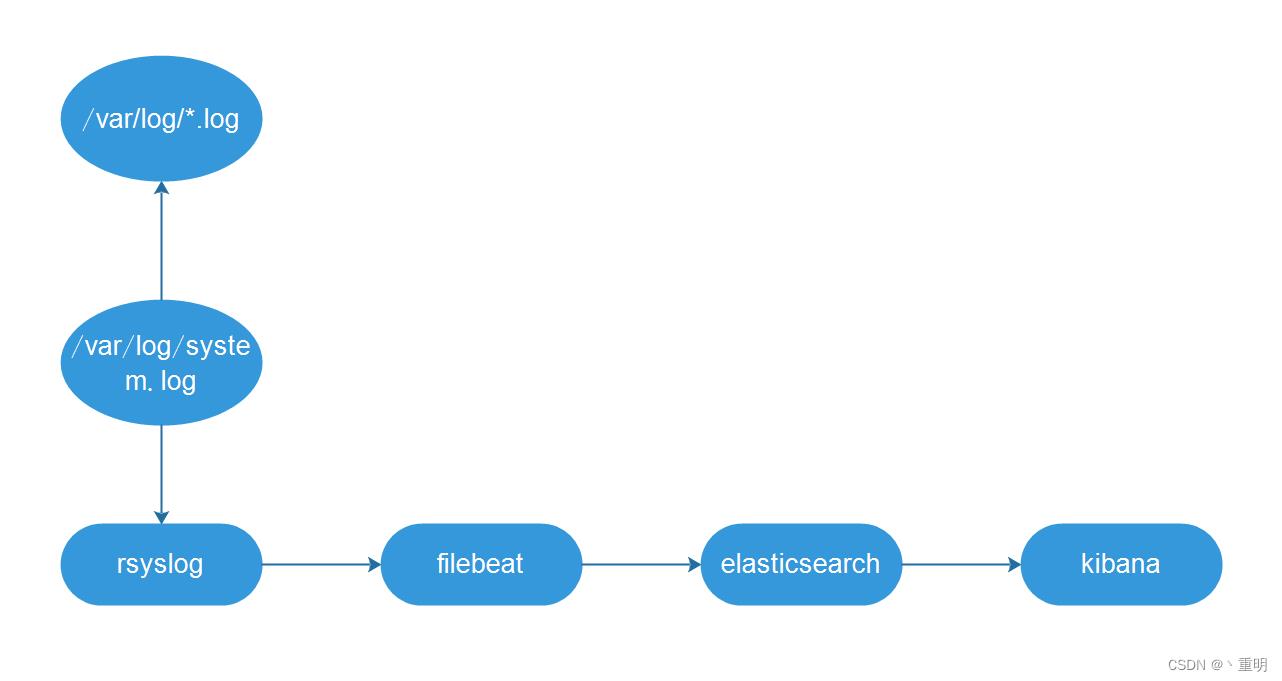
架构图
将/var/log下的所有日志归档为system.log后,通过filebeat收集后发送给elasticsearch,通过kibana展示

-
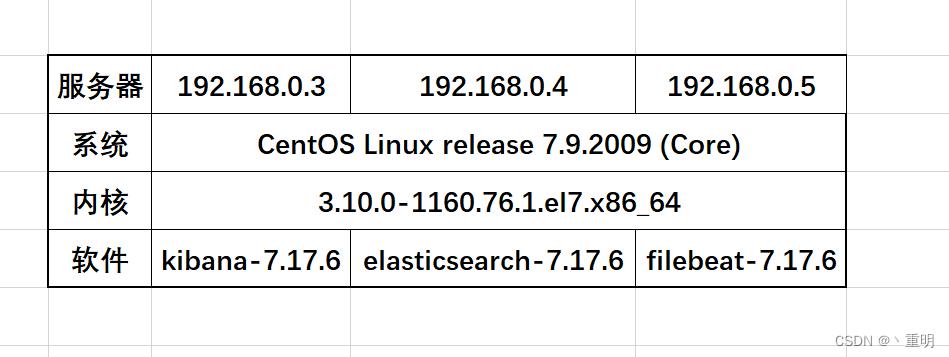
服务器环境

-
hosts本地解析
192.168.0.5	centos7.9
192.168.0.4	es-node01
192.168.0.3	kibana
1.部署Elasticsearch服务
如果你有多台es节点想组成集群,请参考步骤4内容
- 下载及安装es服务
wget https://artifacts.elastic.co/downloads/elasticsearch/elasticsearch-7.17.6-x86_64.rpm
wget https://artifacts.elastic.co/downloads/elasticsearch/elasticsearch-7.17.6-x86_64.rpm.sha512
yum install perl-Digest-SHA -y
shasum -a 512 -c elasticsearch-7.17.6-x86_64.rpm.sha512
sudo rpm --install elasticsearch-7.17.6-x86_64.rpm
- 修改jvm.options配置
注意:安装es服务会自带openjdk,也可以自行安装其他jdk
[root@es-node01 ~]# vim /etc/elasticsearch/jvm.options

-Xms1g
-Xmx1g
- 修改es配置文件
[root@es-node01 ~]# vim /etc/elasticsearch/elasticsearch.yml

cluster.name: my-es
node.name: es-node01
path.data: /var/lib/elasticsearch
path.logs: /var/log/elasticsearch
network.host: 192.168.0.4
http.port: 9200
discovery.seed_hosts: ["192.168.0.4"]
cluster.initial_master_nodes: ["192.168.0.4"]
- 启动服务并设置开机自启动
systemctl enable --now elasticsearch.service
- 查看状态
[root@es-node01 ~]# curl 192.168.0.4:9200

  "name" : "es-node01",
  "cluster_name" : "my-es",
  "cluster_uuid" : "mQsAIA_aSrakIjU0nxMm7w",
  "version" :
    "number" : "7.17.6",
    "build_flavor" : "default",
    "build_type" : "rpm",
    "build_hash" : "f65e9d338dc1d07b642e14a27f338990148ee5b6",
    "build_date" : "2022-08-23T11:08:48.893373482Z",
    "build_snapshot" : false,
    "lucene_version" : "8.11.1",
    "minimum_wire_compatibility_version" : "6.8.0",
    "minimum_index_compatibility_version" : "6.0.0-beta1"
  ,
  "tagline" : "You Know, for Search"

[root@es-node01 ~]# curl 192.168.0.4:9200/_cat/nodes
192.168.0.4 45 96 8 0.07 0.20 0.13 cdfhilmrstw * es-node01
2.部署Kibana服务
- 下载及安装Kibana服务
wget https://artifacts.elastic.co/downloads/kibana/kibana-7.17.6-x86_64.rpm
sudo rpm --install kibana-7.17.6-x86_64.rpm
- 修改kibana配置文件,修改以下几项基础配置,其他使用默认即可
[root@kibana ~]# vim /etc/kibana/kibana.yml

# 允许访问kibana的主机
server.host: "0.0.0.0"
# 如果有多个es节点,可以在后面加上:[“http://es1”“http://es2”]
elasticsearch.hosts: ["http://192.168.0.4:9200"]
# 设置语言
i18n.locale: "zh-CN"
- 启动kibana服务
systemctl enable --now kibana.service
- 查看状态
[root@kibana ~]# netstat -utpln
tcp        0      0 0.0.0.0:5601            0.0.0.0:*               LISTEN      12185/node
- 浏览器访问Kibana测试:IP:5601(我使用的阿里云的公网ip)

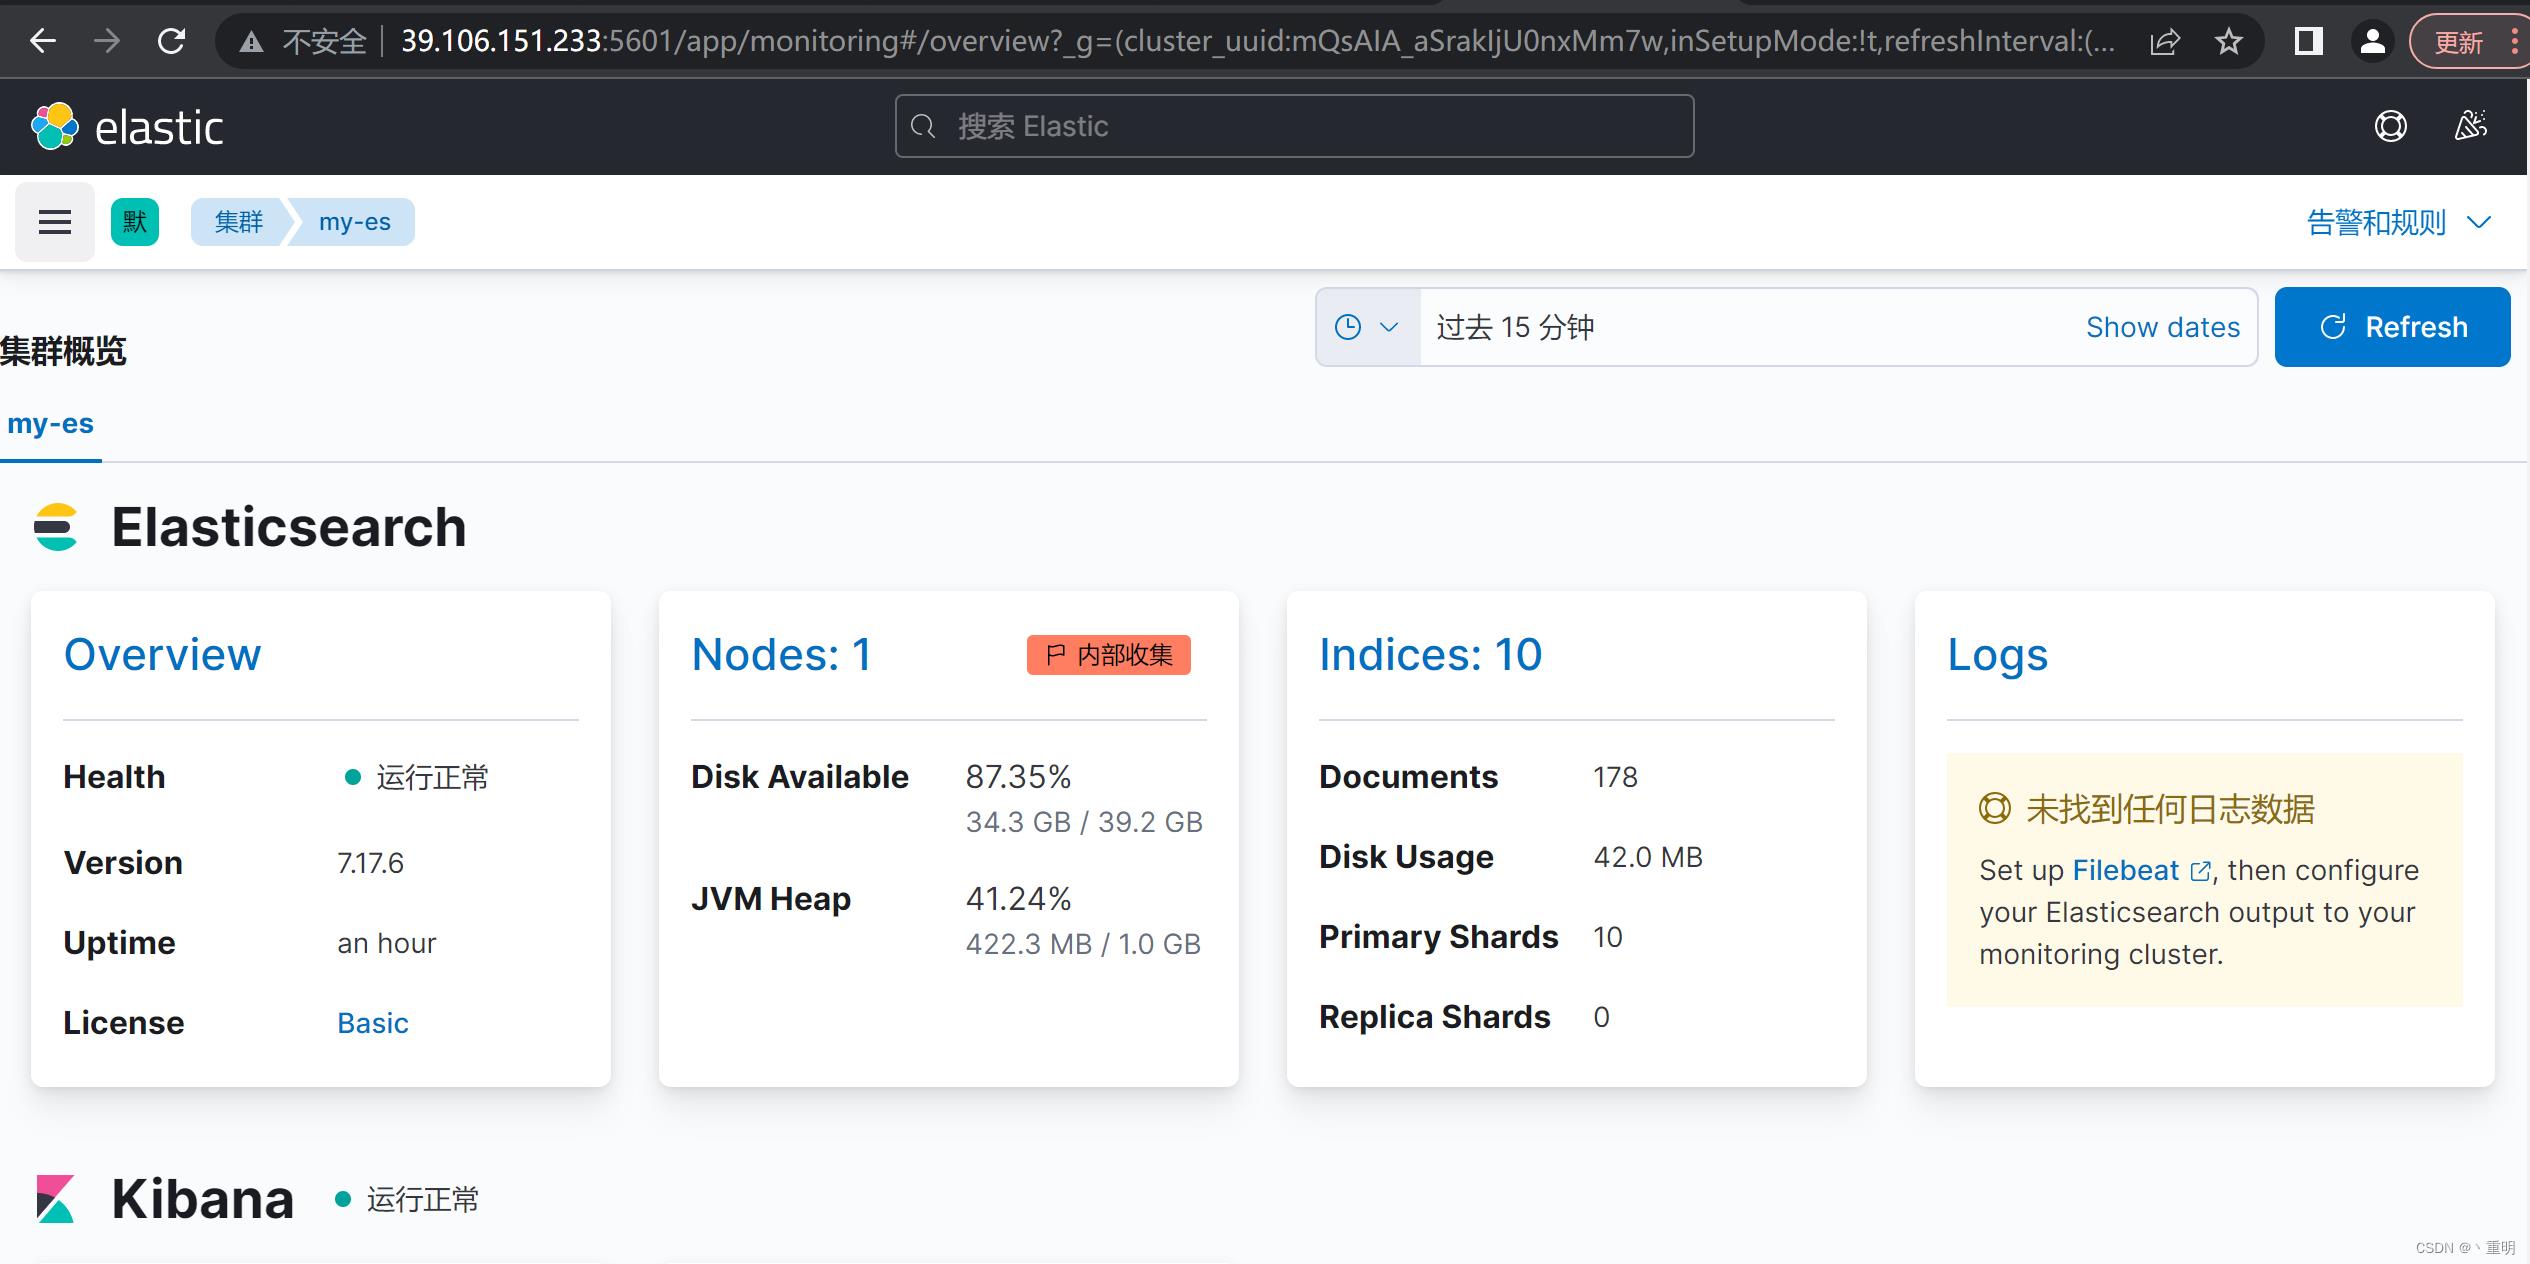
- 点击左侧菜单栏(三个横)找到堆栈监测可以看到添加的es节点

3.部署Filebeat服务
- 下载及安装Filebeat
curl -L -O https://artifacts.elastic.co/downloads/beats/filebeat/filebeat-7.17.6-x86_64.rpm
sudo rpm -vi filebeat-7.17.6-x86_64.rpm
- 配置Filebeat连接es集群
[root@centos7 ~]# vim /etc/filebeat/filebeat.yml

# 配置kibana连接
setup.kibana:
  host: "192.168.0.3:5601"
# 配置es连接
output.elasticsearch:
  hosts: ["192.168.0.4:9200"]
- 配置rsyslog把日志归档在一个文件,没有的话yum安装一下
[root@centos7 ~]# vim /etc/rsyslog.conf
*.*     /var/log/system.log
[root@centos7 ~]# systemctl restart rsyslog.service
- 配置filebeat收集系统日志
# 开启系统模块
[root@centos7 ~]# filebeat modules enable system

# 配置系统模块
[root@centos7 ~]# vim /etc/filebeat/modules.d/system.yml

    var.paths: ["/var/log/system.log"]

# 加载素材资源
[root@centos7 ~]# filebeat setup -e

Loaded Ingest pipelines #最后显示
- 启动filebeat服务
[root@centos7 ~]# systemctl enable --now filebeat.service
- 在kibana中查看是否有日志输出
点击菜单栏后点击日志:

点击概览也能看到柱状图

- 如果有多个数据源就可以循环步骤3来收集日志
4.相关链接
【2022】Elasticsearch-7.17.6集群部署
这部分内容就到这里,高级内容会在以后的内容中出现
以上是关于2022快速部署一个可用的EFK-7.17架构的主要内容,如果未能解决你的问题,请参考以下文章