android 自定义view: 蛛网/雷达图
Posted 史大拿
tags:
篇首语:本文由小常识网(cha138.com)小编为大家整理,主要介绍了android 自定义view: 蛛网/雷达图相关的知识,希望对你有一定的参考价值。
本系列自定义View全部采用kt
系统mac
android studio: 4.1.3
kotlin version1.5.0
gradle: gradle-6.5-bin.zip
本篇效果:

蛛网图其实就是由多个多边形来组成蛛网的,那么先来画1个多边形来练练手
画多边形
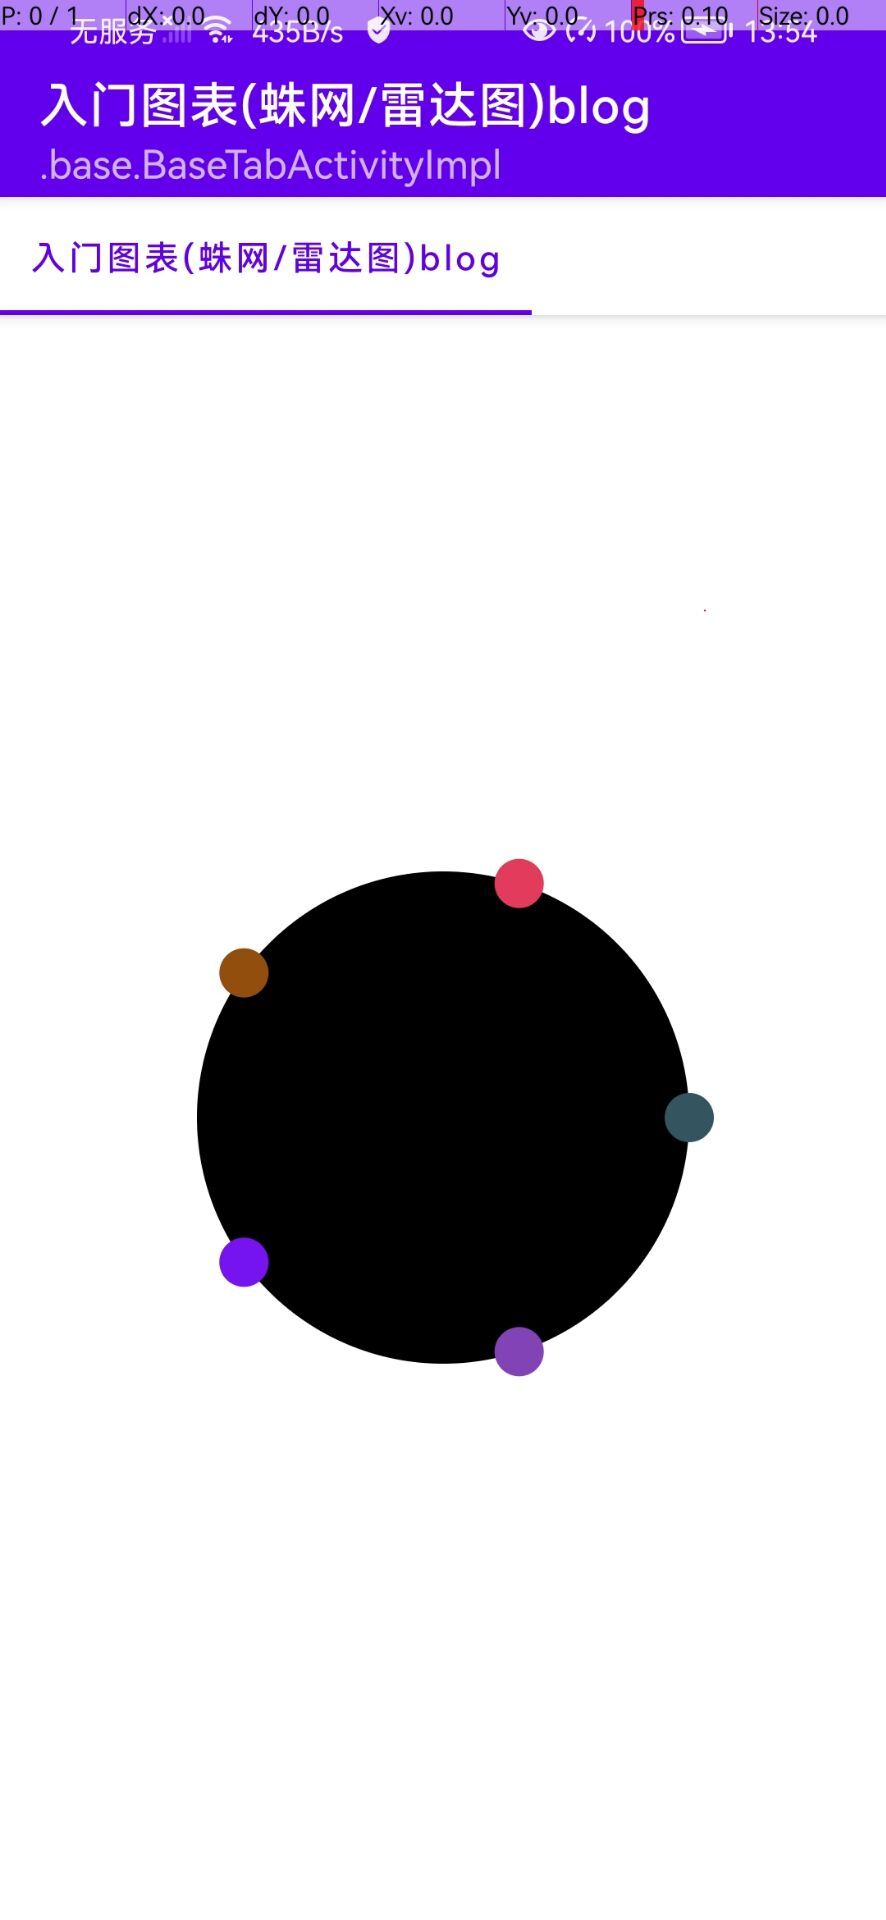
首先我们先来画一个五边形,
想要绘制一个五边形,那么就是求出5个点即可
例如这样:

首先我们需要定义圆的半径,也是五边形的“半径”
只需要算出每一个角的角度,那么就可以通过三角函数算出每一个点的坐标
- 0的角度为360 / 5 * 0
- 1的角度为360 / 5 * 1
- 2的角度为360 / 5 * 2
- 3的角度为360 / 5 * 3
- 4的角度为360 / 5 * 4
来看看代码:
class E3PolygonChartBlogView @JvmOverloads constructor(
    context: Context, attrs: AttributeSet? = null, defStyleAttr: Int = 0
) : View(context, attrs, defStyleAttr)

    companion object
        // 半径
        val SMALL_RADIUS = 100.dp

        // 几边形
        const val COUNT = 5


    private val paint = Paint(Paint.ANTI_ALIAS_FLAG)

    // 中心位置
    private val centerLocation by lazy
        PointF(width / 2f, height / 2f)


    override fun onDraw(canvas: Canvas)

        val cx = centerLocation.x
        val cy = centerLocation.y
        // 辅助圆
        canvas.drawCircle(cx, cy, SMALL_RADIUS, paint)


        // 每一个的间隔
        val eachAngle = 360 / COUNT
        (0 until COUNT).forEach

            val angle = it * eachAngle.toDouble()

            val x =
                (SMALL_RADIUS * cos(Math.toRadians(angle)) + centerLocation.x).toFloat()
            val y =
                (SMALL_RADIUS * sin(Math.toRadians(angle)) + centerLocation.y).toFloat()

            paint.color = colorRandom
            // 绘制每一个小圆
            canvas.drawCircle(x, y, 10.dp, paint)
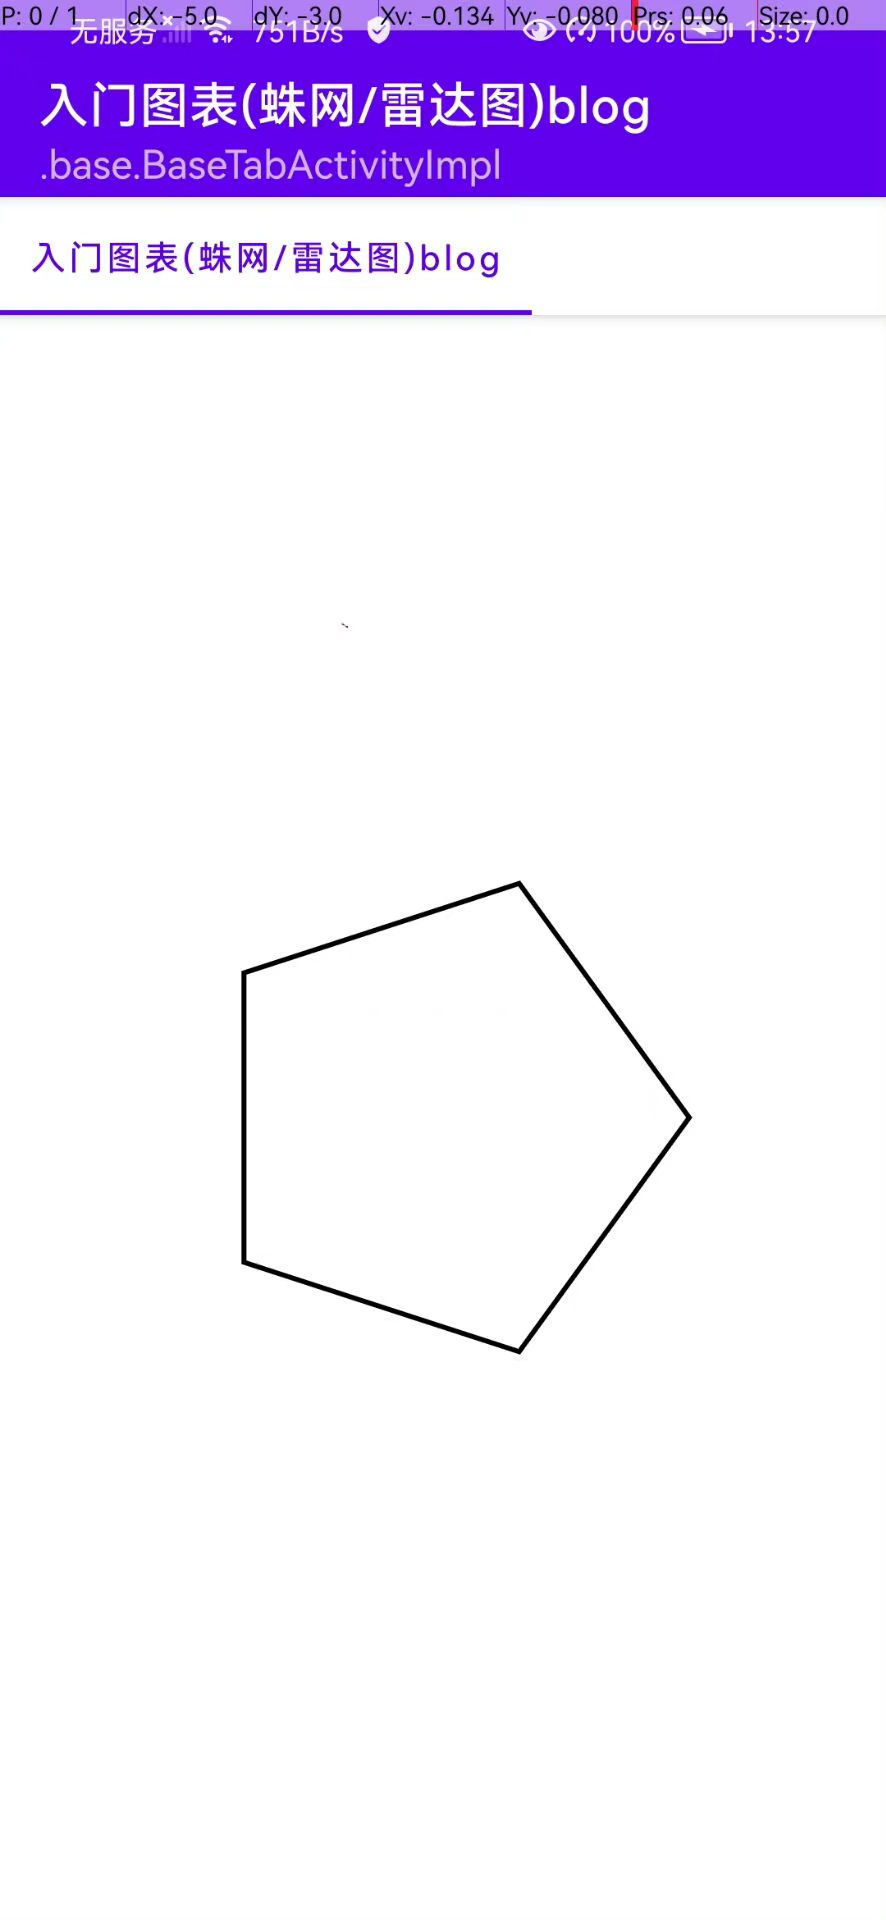
那么五边形其实就是吧5个点连接起来即可
  private val paint = Paint(Paint.ANTI_ALIAS_FLAG)

    private val path = Path()
    override fun onDraw(canvas: Canvas)

        // 每一个的间隔
        val eachAngle = 360 / COUNT
        (0 until COUNT).forEach
            val angle = it * eachAngle.toDouble()
            val x =
                (SMALL_RADIUS * cos(Math.toRadians(angle)) + centerLocation.x).toFloat()
            val y =
                (SMALL_RADIUS * sin(Math.toRadians(angle)) + centerLocation.y).toFloat()
						// 连接每一个点
            if (it == 0)
                path.moveTo(x, y)
             else
                path.lineTo(x, y)


        path.close() // 闭合

        paint.strokeWidth = 2.dp
        paint.style = Paint.Style.STROKE
        canvas.drawPath(path, paint) // 绘制
        path.reset()
绘制多条五边形
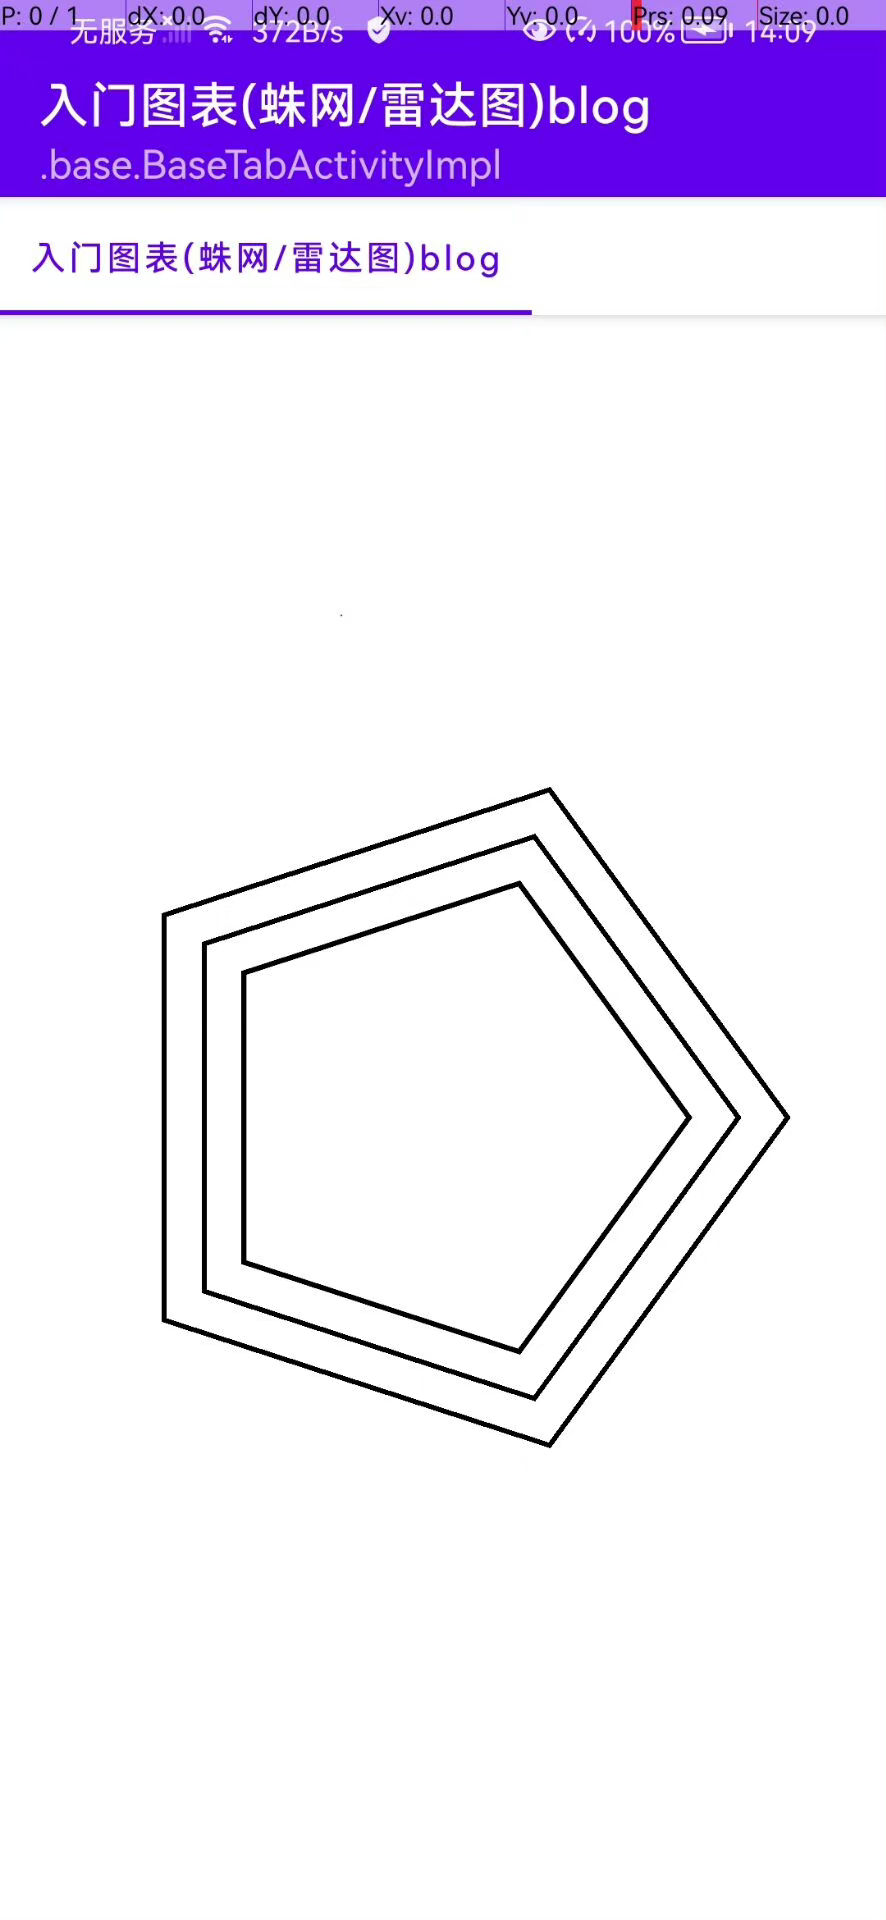
假如需要绘制成这样子:

刚才我们绘制的是最中心绿色的五边形,
那么这里就需要定义一个变量,来标识每一个五边形之间的间距
例如蓝色五边形和绿色五边形的间距为20.dp
那么蓝色五边形 五个点的半径 = 绿色五边形的半径 + 20.dp
以此类推
class E3PolygonChartBlogView @JvmOverloads constructor(
    context: Context, attrs: AttributeSet? = null, defStyleAttr: Int = 0
) : View(context, attrs, defStyleAttr)

    companion object
        // 半径
        val SMALL_RADIUS = 100.dp

        // 几边形
        const val COUNT = 5

        // 有几条边
        const val NUMBER = 3

        // 每一条边的间隔
        val INTERVAL = 20.dp


    private val paint = Paint(Paint.ANTI_ALIAS_FLAG)

    // 中点
    private val centerLocation by lazy
        PointF(width / 2f, height / 2f)


    private val path = Path()
    override fun onDraw(canvas: Canvas)
        // 每一个的间隔
        val eachAngle = 360 / COUNT

        // 循环有几条边
        (0 until NUMBER).forEachIndexed  index, element ->

            // 循环每一条边有几个点
            (0 until COUNT).forEach  count ->
                // 半径 = 当前是第几条边 * 间距 + 最中间的距离
                val radius = element * INTERVAL + SMALL_RADIUS

                val angle = count * eachAngle.toDouble()

                val x =
                    (radius * cos(Math.toRadians(angle)) + centerLocation.x).toFloat()
                val y =
                    (radius * sin(Math.toRadians(angle)) + centerLocation.y).toFloat()
                if (count == 0)
                    path.moveTo(x, y)
                 else
                    path.lineTo(x, y)


            path.close() // 闭合
            paint.strokeWidth = 2.dp
            paint.style = Paint.Style.STROKE
            canvas.drawPath(path, paint)
            paint.reset()
连接最外层和最内层
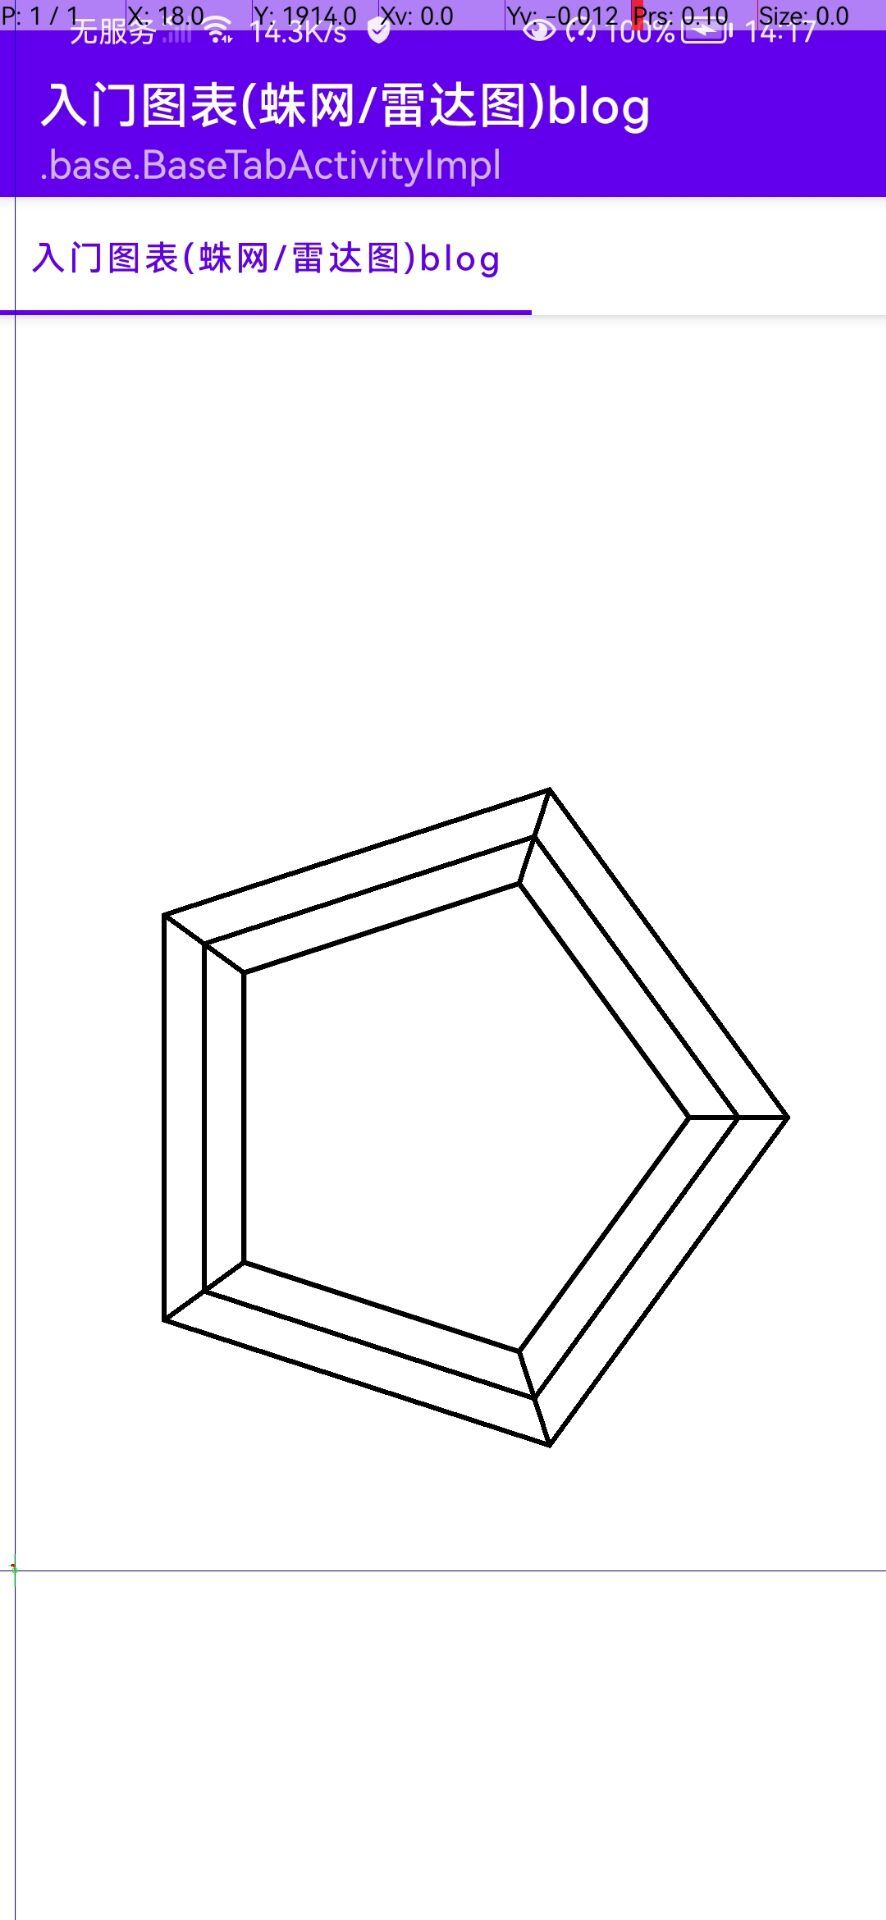
连接最内层和最外层也比较简单, 只需要循环有几条边的时候判断是否是最外层,
然后将最外层的点和最内层的点相连接即可
如果需要和中心点相连接,那么stop点为 centerLocation即可
override fun onDraw(canvas: Canvas)
        // 每一个的间隔
        val eachAngle = 360 / COUNT
        // 循环有几条边
        (0 until NUMBER).forEachIndexed  index, element ->

            // 循环每一条边有几个点
            (0 until COUNT).forEach  count ->
                // 半径 = 当前是第几条边 * 间距 + 最中间的距离
                val radius = element * INTERVAL + SMALL_RADIUS
                val angle = count * eachAngle.toDouble()

                val x =
                    (radius * cos(Math.toRadians(angle)) + centerLocation.x).toFloat()
                val y =
                    (radius * sin(Math.toRadians(angle)) + centerLocation.y).toFloat()
                 .....

                // 当前是最后一层
                if (index == NUMBER - 1)
                    // 最内层x,y 坐标
                    val stopX =
                        (SMALL_RADIUS * cos(Math.toRadians(angle)) + centerLocation.x).toFloat()
                    val stopY =
                        (SMALL_RADIUS * sin(Math.toRadians(angle)) + centerLocation.y).toFloat()
                    canvas.drawLine(x, y, stopX, stopY, paint)
                    // 连接中心点
                    // canvas.drawLine(x, y, centerLocation.x, centerLocation.y, paint)


            path.close() // 闭合

            canvas.drawPath(path, paint)
            paint.reset()
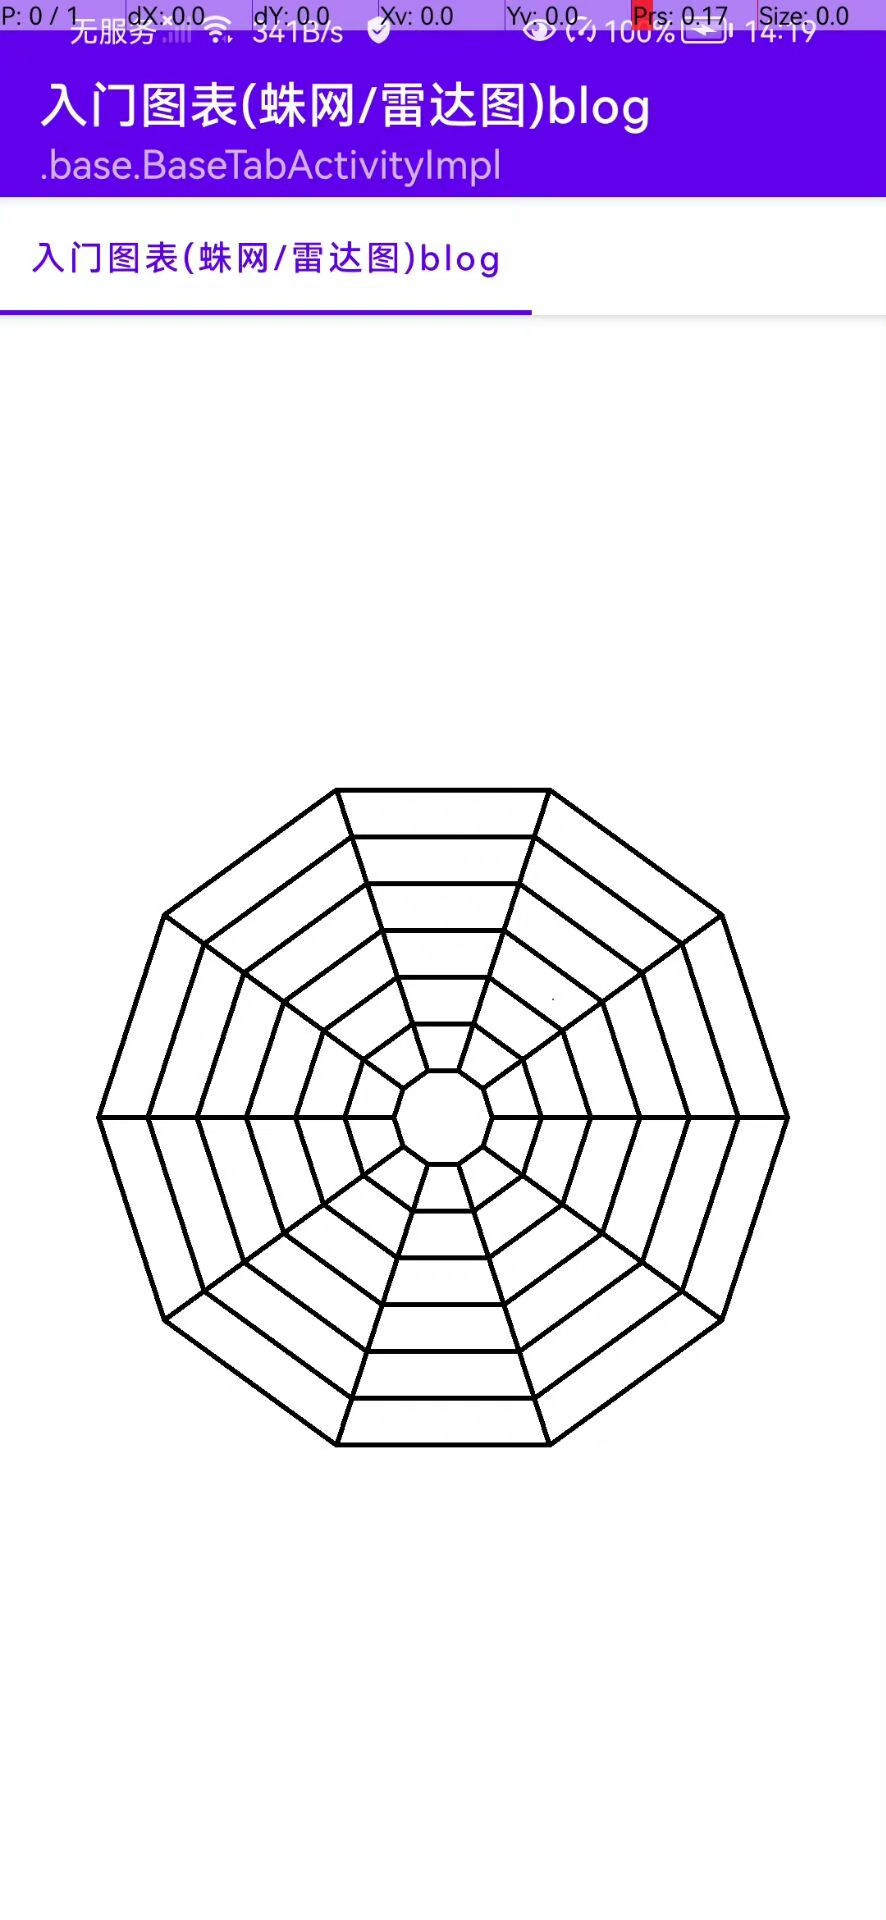
那么现在需要一个
- 10边形
- 每一条边有7个点
- 最中心的半径为 20.dp
- 每一个边的间距 = 20.dp
只需要改这4个变量即可:
companion object
    // 半径
    val SMALL_RADIUS = 20.dp

    // 几边形
    const val COUNT = 10

    // 有几条边
    const val NUMBER = 7

    // 每一条边的间隔
    val INTERVAL = 20.dp
绘制文字
还是和上面的套路一样,先来思考文字需要绘制到什么地方?

我们的多边形只到红色的,那么为了保持和最外层有一点距离,所以我们需要将文字绘制到虚线处,
还是当绘制最外层的时候开始绘制 文字
    @SuppressLint("DrawAllocation")
    override fun onDraw(canvas: Canvas)

        // 每一个的间隔
        val eachAngle = 360 / COUNT
        // 循环有几条边
        (0 until NUMBER).forEachIndexed  index, element ->

            // 循环每一条边有几个点
            (0 until COUNT).forEach  count ->
                // 半径 = 当前是第几条边 * 间距 + 最中间的距离
                val radius = element * INTERVAL + SMALL_RADIUS
                val angle = count * eachAngle.toDouble()

                val x =
                    (radius * cos(Math.toRadians(angle)) + centerLocation.x).toFloat()
                val y =
                    (radius * sin(Math.toRadians(angle)) + centerLocation.y).toFloat()
                ...

                // 绘制最外层和内层连接线
               	...


                // 设置文字
                if (index == NUMBER - 1)
                    val text = "文字$count"

                    val rect = Rect()

                    // 计算文字宽高 计算完成之后会把值赋值给rect
                    paint.getTextBounds(text, 0, text.length, rect)
                    val textWidth = rect.width()
                    val textHeight = rect.height()

                    val tempRadius = radius + textHeight
                    val textX =
                        (tempRadius * cos(Math.toRadians(angle)) + centerLocation.x).toFloat() - textWidth / 2f
                    val textY =
                        (tempRadius * sin(Math.toRadians(angle)) + centerLocation.y).toFloat()

                    paint.textSize = 16.dp
                    paint.style = Paint.Style.FILL
                    paint.color = E3PolygonChartView.TEXT_COLOR
                    // 绘制最外层文字
                    canvas.drawText(text, textX, textY, paint)


          ...
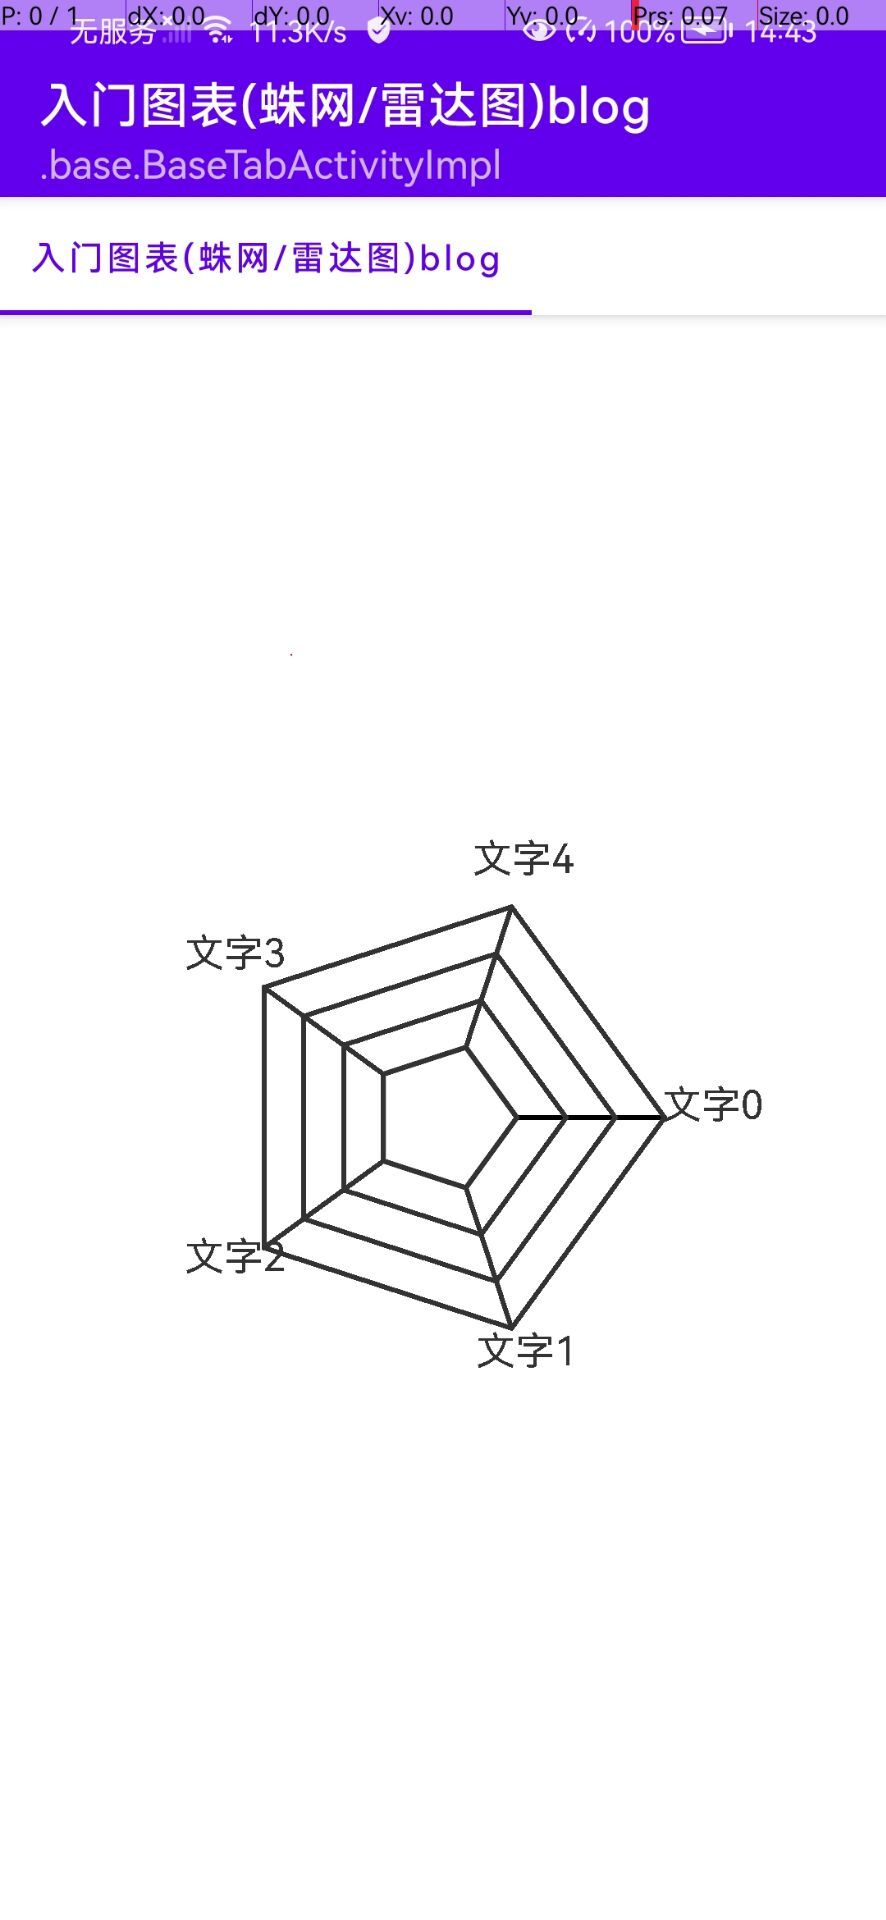
到目前为止,蛛网的雏形就差不多了,接下来绘制具体的数据
绘制数据
绘制数据之前先来看看现在点的坐标
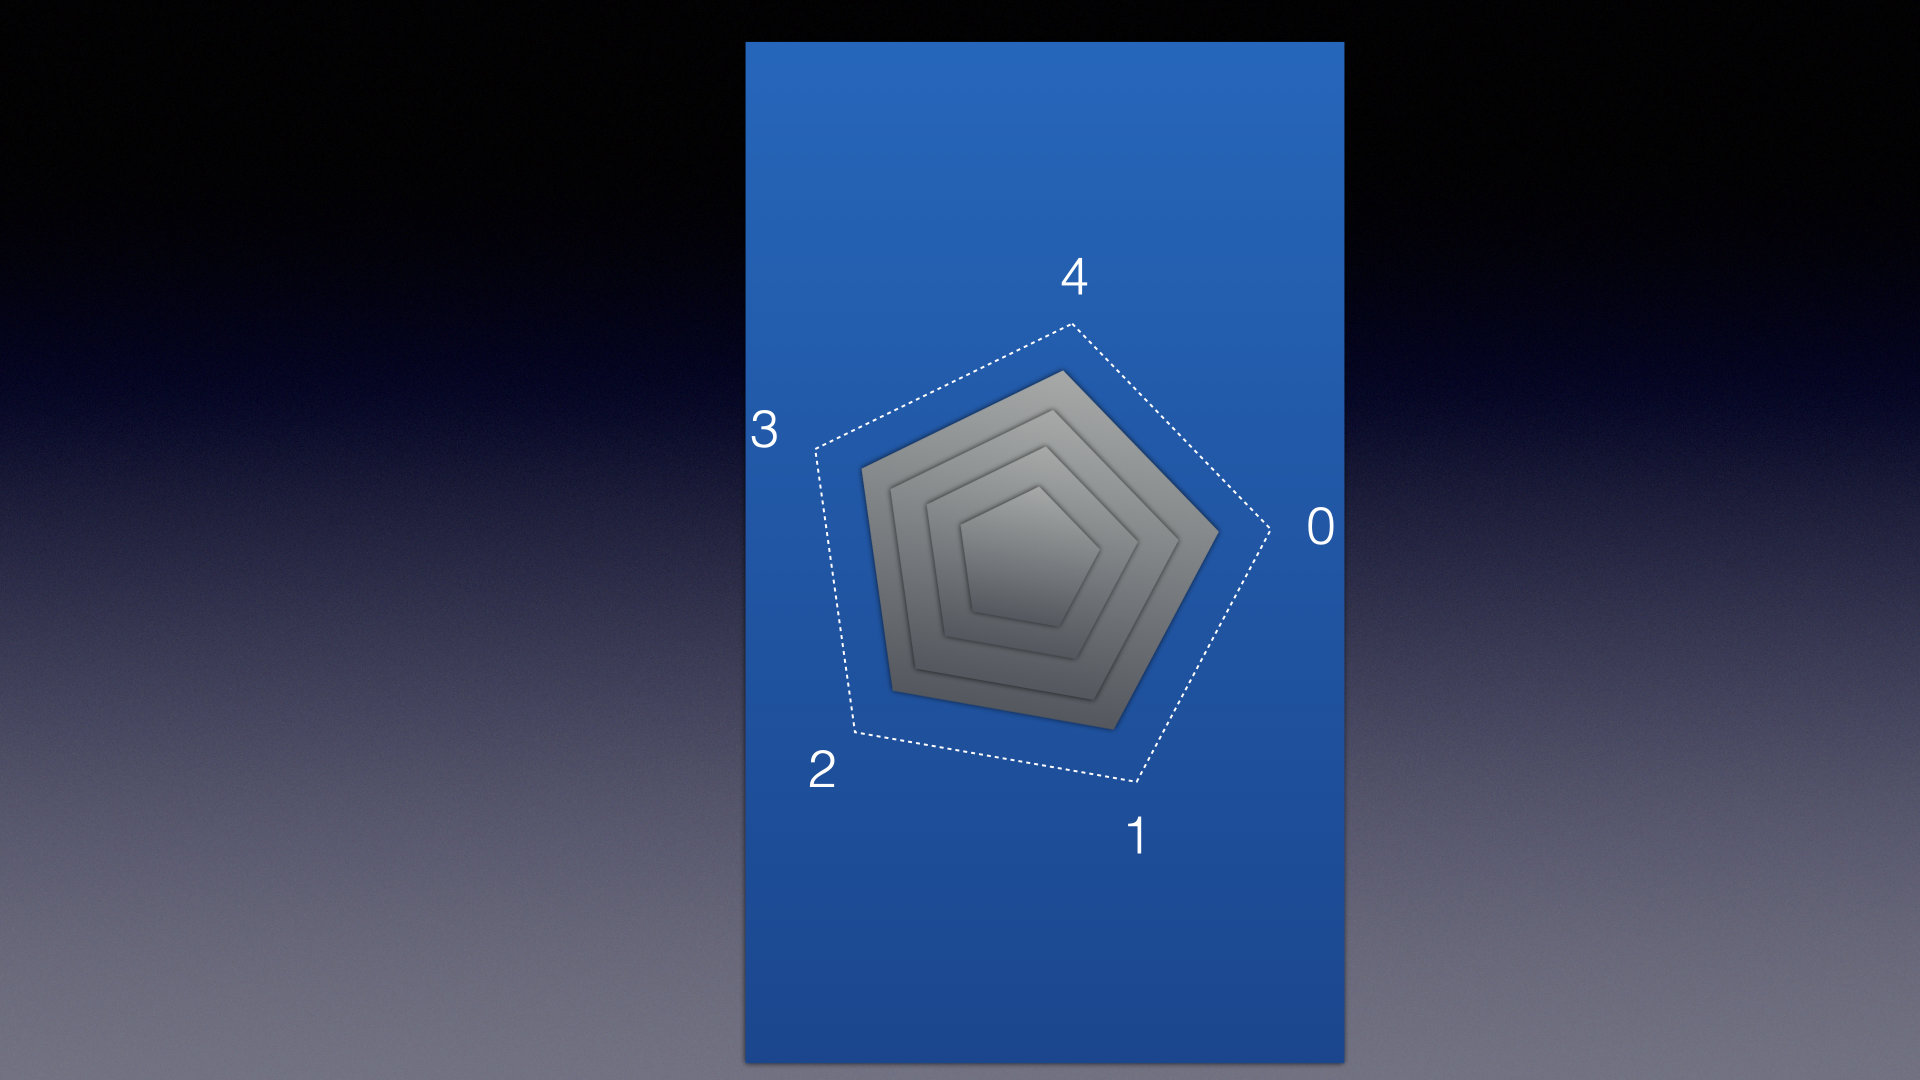
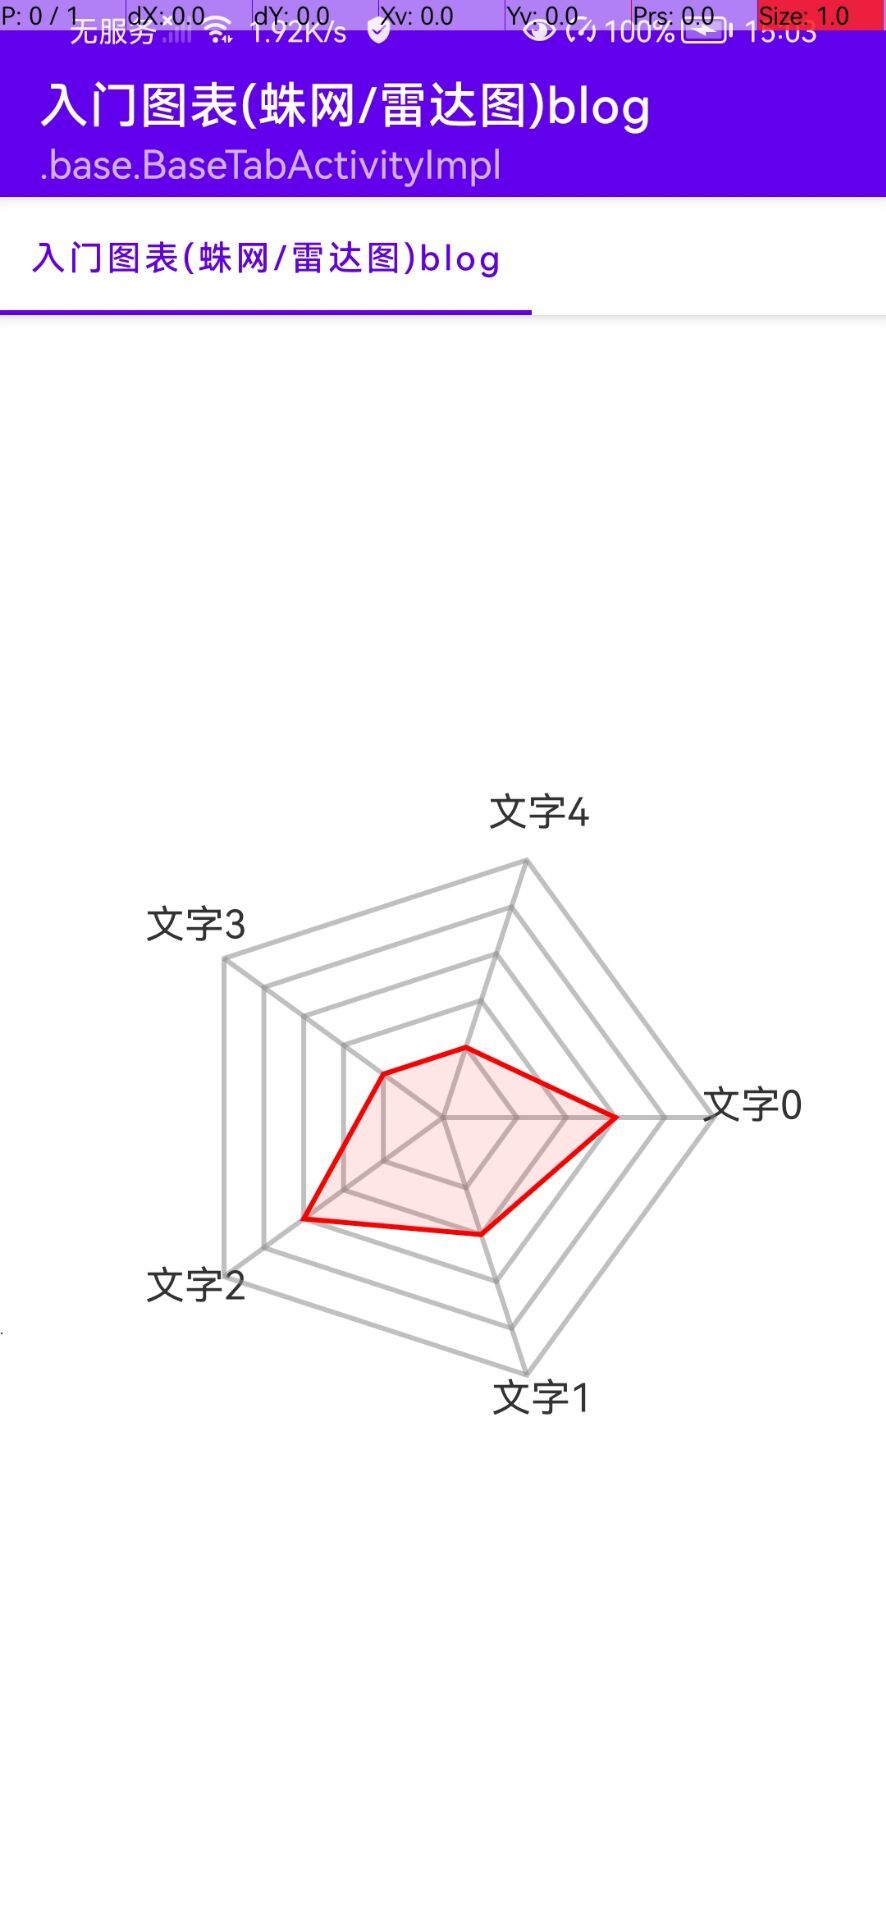
假设我们当前需要设置的数据为 3,2,3,1,1
那么我们只需要从0坐标开始,算出每一个对应的五边形即可
那么最终结果应该为:

override fun onDraw(canvas: Canvas)

  			// 绘制网格
         ...

  			// 绘制数据
        drawArea(canvas)


var data = listOf(3f, 2f, 3f, 1f, 1f)
 private fun drawArea(canvas: Canvas)
        data.forEachIndexed  index, value ->
            val location = getLocation(index, value)

            if (index == 0)
                path.moveTo(location.x, location.y)
             else
                path.lineTo(location.x, location.y)


        path.close()


        paint.style = Paint.Style.STROKE
        paint.color = Color.RED
        canvas.drawPath(path, paint) // 绘制边

        paint.style = Paint.Style.FILL
        paint.alpha = (255 * 0.1).toInt()
        canvas.drawPath(path, paint) // 绘制内边
        path.reset()
/*
 * 作者:史大拿
 * 创建时间: 9/27/22 2:54 PM
 * @number 第几个点
 * @count 第几条边
 */
private fun getLocation(number: Int, count: Float): PointF = let
    // 角度
    val angle = 360 / COUNT * number

    // 半径
    val radius = (count - 1) * INTERVAL + SMALL_RADIUS

    val x =
        (radius * cos(Math.toRadians(angle.toDouble())) + centerLocation.x).toFloat()
    val y =
        (radius * sin(Math.toRadians(angle.toDouble())) + centerLocation.y).toFloat()

    return PointF(x, y)
手势滑动
雷达图的手势滑动和其他的不太一样, 因为他需要计算的是角度
场景1(右下角)

假设当前滑动的位置在右下角,那么他的角度就为 红色的角度
- 红色的角度 = atan(dy / dx)
场景2 (左下角)

假设当前滑动的位置在左下角,那么他的角度就为 黑色的角度 + 绿色的角度
-
绿色角度 = 90度
-
红色的角度 = atan(dy / dx)
-
黑色角度 = 90 - 红色角度
场景3(左上角)

假设当前滑动的位置在左上角,那么他的角度就为 红色的角度 + 绿色角度
dx = centerLocation.x - event.x
dy = centerLocation.x - event.y
- 红色的角度 = atan(dy / dx)
- 绿色的角度 = 180度
场景4(右上角)

假设当前滑动的位置在右上角,那么他的角度就为 绿色角度 + 黑色角度
- 黑色角度 = 90度 - 红色角度
- 红色角度 = atan(dy / dx)
- 绿色角度 = 270度
判断是否是左上角 或者右上角,只需要判断两个点的x,y值即可
来看看计算角度代码:
@param startP: 开始点
@param endP: 结束点

fun PointF.angle(endP: PointF): Float
    val startP = this

    // 原始位置
    val angle = if (startP.x >= endP.x && startP.y >= endP.y)
        Log.e("szjLocation", "end在start右下角")
        0
     else if (startP.x >= endP.x && startP.y <= endP.y)
        Log.e("szjLocation", "end在start右上角")
        270
     else if (startP.x <= endP.x && startP.y <= endP.y)
        Log.e("szjLocation", "end在start左上角")
        180
     else if (startP.x <= endP.x && startP.y >= endP.y)
        Log.e("szjLocation", "end在start左下角")
        90
     else
        0

    // 计算距离
    val dx = startP.x - endP.x
    val dy = startP.y - endP.y
    // 弧度
    val radian = abs(atan(dy / dx))

    // 弧度转角度
    var a = Math.toDegrees(radian.toDouble()).toFloat()

    if (startP.x <= endP.x && startP.y >= endP.y)
        // 左下角
        a = 90 - a
     else if (startP.x >= endP.x && startP.y <= endP.y)
        // 右上角
        a = 90 - a

    return a + angle
var offsetAngle = 0f // 偏移角度
private var downAngle = 0f // 按下角度
private var originAngle = 0f // 原始角度

@SuppressLint("ClickableViewAccessibility")
override fun onTouchEvent(event: MotionEvent): Boolean
    when (event.action)
        MotionEvent.ACTION_DOWN ->
            downAngle = centerLocation.angle(PointF(event.x, event.y))
            originAngle = offsetAngle

     以上是关于android 自定义view: 蛛网/雷达图的主要内容,如果未能解决你的问题,请参考以下文章