React入门之Redux:react-redux基本使用
Posted 安之ccy
tags:
篇首语:本文由小常识网(cha138.com)小编为大家整理,主要介绍了React入门之Redux:react-redux基本使用相关的知识,希望对你有一定的参考价值。
前言
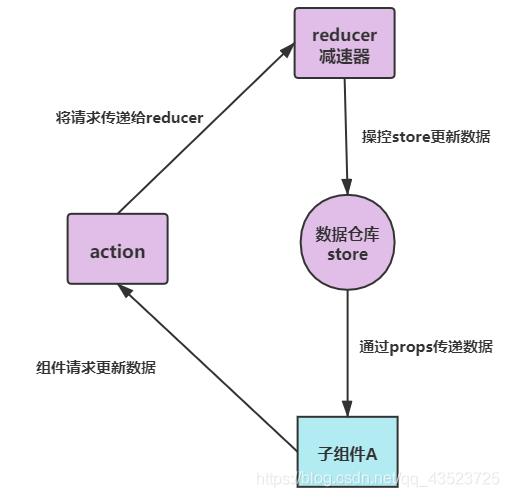
在上一篇文章中,我们简要地模拟和梳理了一下redux的使用流程,本篇文章则使用react-redux库来实现store管理数据的效果
上文的图搬过来,加深印象
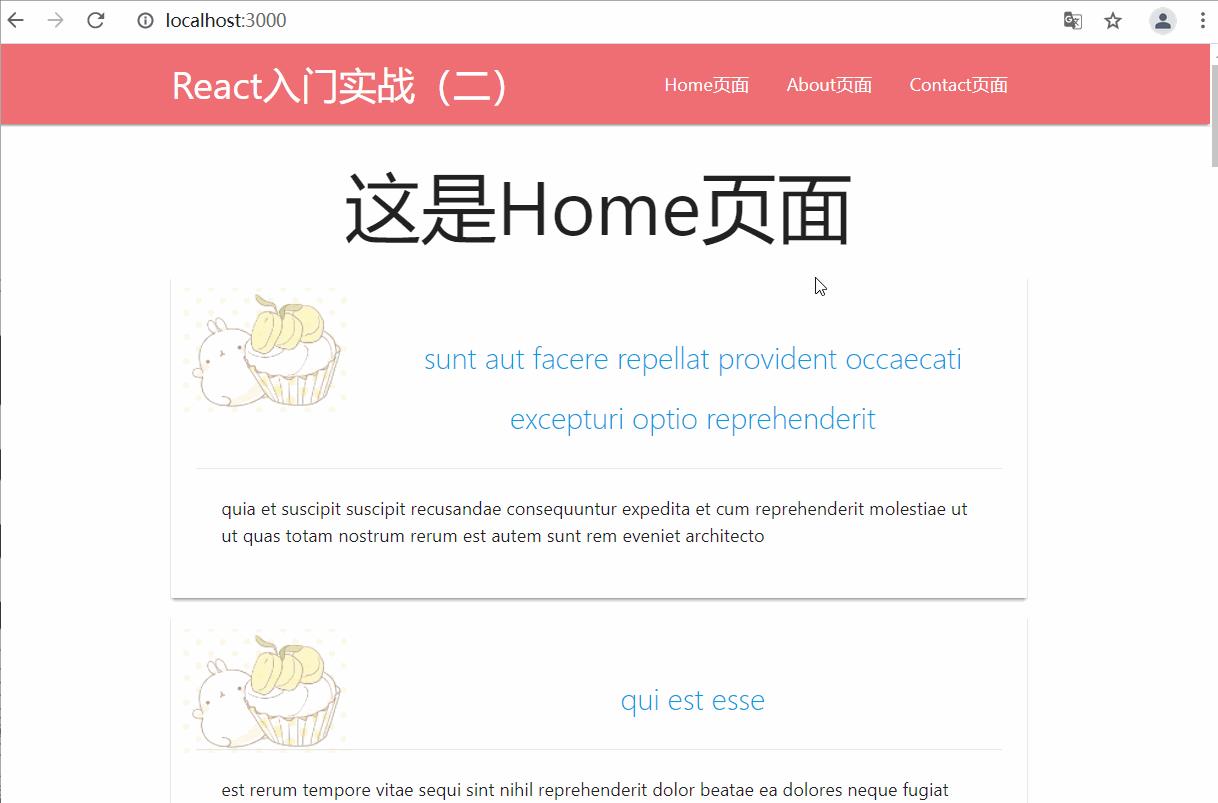
本篇文章的案例选用这篇文章的项目,目前该项目展示的效果是这样的:
-
主页面为home页面,
-
页面展示了20条数据,这些数据是通过axios请求、从JsonPlaceHolder上获取的;
-
每条记录都是一个card,点击某个card,可以跳转到该条记录的详情页
-
Home页面从JsonPlaceHolder请求了数据,通过props传递给详情页Post,数据存储在Home页面的state中;
-
需要跳转到详情页时,Post根据得到的post_id再次向axios发起数据请求
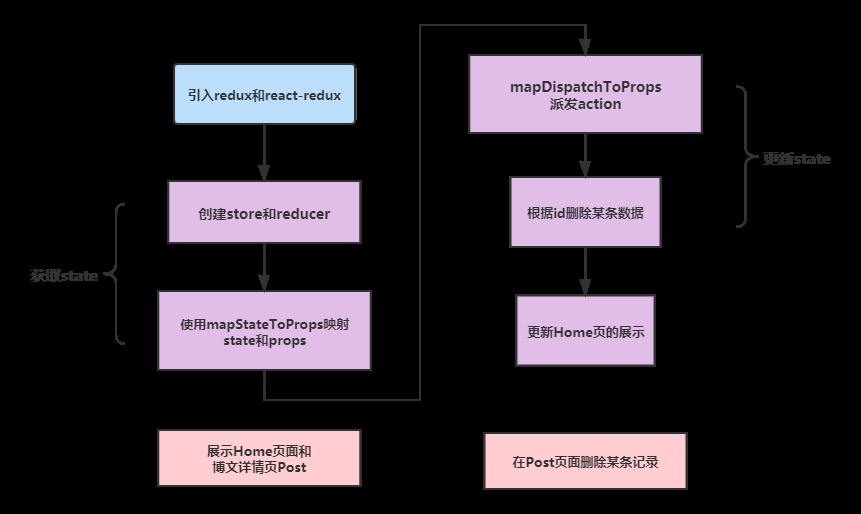
使用redux改造该项目
- 数据存储在store中
- 通过Provider使 React 组件可被连接、通过connect真正连接redux的store和react组件,让store和组件能够交互
- 数据需要更新时,通过action提交请求,让减速器reducer更新数据
- 使用connect的第一个参数mapStateToProps将state映射成props,组件可以使用this.props获取state
- 使用connect的第二个参数mapDispatchToProps派发action,将数据更新的请求交给reducer
redux改造
安装与引入
安装react 和 react-redux
npm install redux react-redux
创建store
在index.js文件中引入redux并解构获得createStore
import  createStore  from 'redux';

const store = createStore(rootReducer)
定义减速器reducer
将减速器抽离成一个单独的文件
在src文件夹下新建文件夹reducers,再新建一个routReducer.js
// 初始化state中的posts字段为JsonPlaceHolder中的三条记录
const initState =
    posts:[

            "userId": 1,
            "id": 1,
            "title": "sunt aut facere repellat provident occaecati excepturi optio reprehenderit",
            "body": "quia et suscipit\\nsuscipit recusandae consequuntur expedita et cum\\nreprehenderit molestiae ut ut quas totam\\nnostrum rerum est autem sunt rem eveniet architecto"
          ,

            "userId": 1,
            "id": 2,
            "title": "qui est esse",
            "body": "est rerum tempore vitae\\nsequi sint nihil reprehenderit dolor beatae ea dolores neque\\nfugiat blanditiis voluptate porro vel nihil molestiae ut reiciendis\\nqui aperiam non debitis possimus qui neque nisi nulla"
          ,

            "userId": 1,
            "id": 3,
            "title": "ea molestias quasi exercitationem repellat qui ipsa sit aut",
            "body": "et iusto sed quo iure\\nvoluptatem occaecati omnis eligendi aut ad\\nvoluptatem doloribus vel accusantium quis pariatur\\nmolestiae porro eius odio et labore et velit aut"

    ]

// 设置rootReducer
const rootReducer = (state = initState, action)=>
    return state;


export default rootReducer;
另:记得在index.js中引入rootReducer
react-redux的引入
在index.js中引入react-redux
import Provider from 'react-redux'
使用Provider包裹我们的主组件App,连接React和Redux
Provider的更多理解可以查看这篇文章:here和这篇
ReactDOM.render(
  <React.StrictMode>
    <Provider store=store><App /></Provider>
  </React.StrictMode>,
  document.getElementById('root')
);
mapStateToProps
Home页的改造
引入react-redux的connect方法,让store与reatc真正连接
import connect from 'react-redux'
将state映射成props,传入connect,返回一个高阶组件,增强Home组件,使它能够与redux交互
// 将state映射成props
const mapStateToProps = (state) =>
    return
        posts:state.posts


// connect接收mapStateToProps,返回一个高阶组件,让Home组件能够与redux交互,拿到state数据
export default connect(mapStateToProps)(Home)
将Home组件render函数中的this.state.props改为this.props
// 解构获得posts
// const  posts  = this.state;
// 使用redux传递过来的props
const posts = this.props
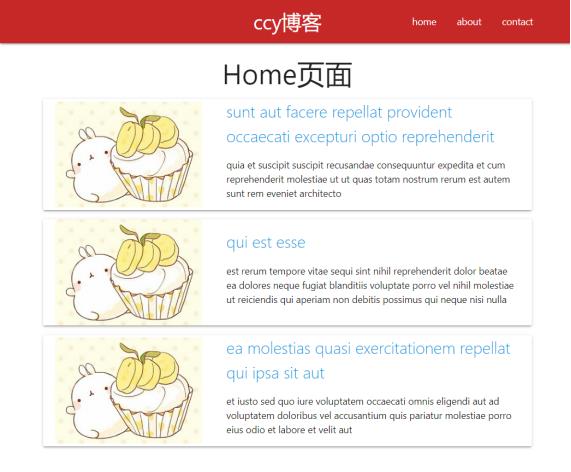
效果:Home页面可以展示store中的三条记录
博文详情页Post的改造
原本单篇博客的详情页是通过axios再次请求的,改为向redux请求数据
注释掉state和钩子函数请求数据的代码,引入react-redux
import connect from 'react-redux'
根据post_id在state中寻找这篇博文的详情数据并传递给Post
const mapStateToProps = (state, ownProps)=>
    let id = ownProps.match.params.post_id;
    return
        post:state.posts.find(post =>String(post.id) === id)


export default connect(mapStateToProps)(Post)
把render函数中的this.state.props改为this.props
        // 解构
        // const post = this.state;
        const post = this.props;
效果:

mapDispatchToProps vs dispatch派发action
设置mapDispatchToProps,派发action
// 派发action 根据id删除post
const mapDispatchToProps = (dispatch) =>
    return
        deletePost: (id) => dispatch( type: 'DELETE_POST', id: id )


export default connect(mapStateToProps, mapDispatchToProps)(Post)
添加一个删除按钮,并设置点击事件,当点击按钮,就触发dispatch分发,删除该条博文
在博文的p标签后面加这个按钮
<div className='center'>
	<button className='btn red' onClick=this.handleClick>删除博客</button>
</div>
定义点击事件
    //删除博客按钮
    handleClick = ()=>
        this.props.deletePost(this.props.post.id);
设置reducer,当action类型为DELETE_POST时,从state中删除这条博文的记录
// 设置rootReducer
const rootReducer = (state = initState, action)=>
    if (action.type === 'DELETE_POST')
        let newPosts = state.posts.filter(post=>
            return post.id !== action.id
        )
        return
            ...state,
            posts:newPosts


    return state;
设置重定向,当删除某条博文后,跳转到home页面
在删除按钮的点击事件中设置
    //删除博客按钮
    handleClick = ()=>
        this.props.deletePost(this.props.post.id);
        // 删除之后跳转到home页面
        this.props.history.push('/')
效果:


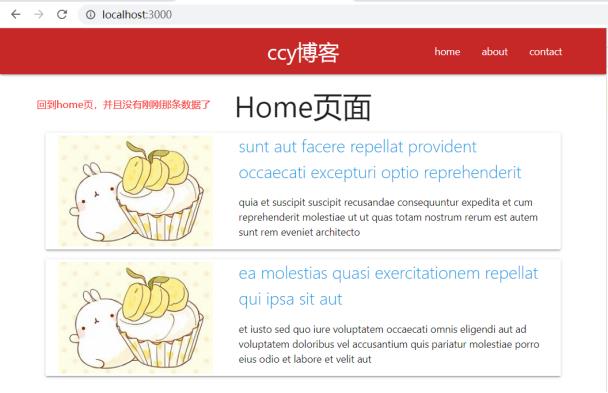
action生成器
为了提高代码的复用性、简洁性、组件化,将post相关的action设置抽离出一个文件
在src下新建一个文件夹actions,里面新建一个文件postActions.js
export const deletePost = (id)=>
    type:"DELETE_POST",
    id
在Post.js文件中引入并使用
引入:
import deletePost from '../action/postActions'
使用:
const mapDispatchToProps = (dispatch) =>
    return
        // deletePost: (id) => dispatch( type: 'DELETE_POST', id: id )
        deletePost: (id) => dispatch(deletePost(id))
Post.js完整代码:
// import axios from "axios";
import React,  Component  from "react";
import  connect  from 'react-redux'
import  deletePost  from '../action/postActions'

class Post extends Component
    // // 初始化state,存储路由参数post_id,确定id可以获得之后,直接存储具体博文post
    // state =
    //     // id:null,
    //     post:null
    //
    // // 在挂载完成时向服务器请求数据,先看看Route传递过来的props
    // componentDidMount()
    //     let id = this.props.match.params.post_id;
    //     axios.get("http://jsonplaceholder.typicode.com/posts/" + id).then(res=>
    //         // console.log(res);
    //         this.setState(
    //             post:res.data
    //         )
    //     )
    //     // console.log(this.props);
    //     // this.setState(
    //     //     id
    //     // )
    //

    // 数据从redux更新


    //删除博客按钮
    handleClick = () =>
        this.props.deletePost(this.props.post.id);
        // 删除之后跳转到home页面
        this.props.history.push('/')


    render()
        // 解构
        // const post = this.state;
        const  post  = this.props;
        // console.log(this.props);
        // 判断post是否有数据
        const postShow = post ? (
            <div className='post' key=post.id>
                <h4>post.title</h4>
                <p>post.body</p>
                <div className='center'>
                    <button className='btn red' onClick=this.handleClick>删除博客</button>
                </div>
            </div>
        ) : (
            <div className='container'>博文正在加载中......</div>
        )
        return (
            <div className="container">
                postShow
            </div>
        )


// 将state映射成props
const mapStateToProps = (state, ownProps) =>
    let id = ownProps.match.params.post_id;
    return
        post: state.posts.find(post => String(post.id) === id)
        // post:state.posts.find(post =>post.id === id)


// 派发action 根据id删除post
const mapDispatchToProps = (dispatch) =>
    return
        // deletePost: (id) => dispatch( type: 'DELETE_POST', id: id )
        deletePost: (id) => dispatch(deletePost(id))


export default connect(mapStateToProps, mapDispatchToProps)(Post)
以上是关于React入门之Redux:react-redux基本使用的主要内容,如果未能解决你的问题,请参考以下文章