OkHttp3 源码分析
Posted 安卓开发-顺
tags:
篇首语:本文由小常识网(cha138.com)小编为大家整理,主要介绍了OkHttp3 源码分析相关的知识,希望对你有一定的参考价值。
提起android网络框架就不得不聊一下square公司开源的OKHttp 框架,今天就请跟着本文的思路来看下OKHttp3的源码。
目录
1、重试重定向拦截器:RetryAndFollowUpInterceptor
5、请求服务器拦截器:CallServerInterceptor
本文会从两大主线来分析OKHttp3的源码:
主线一:分发器(涉及同步、异步任务分发和相关队列、线程池等模块)
主线二:拦截器(重试重定向、桥接、缓存、连接、请求服务器五大拦截器)
一、分发器
1、同步任务分发
我们先看一下一个普通的OKHttp同步请求:
//第一步:构建OkhttpClient对象
OkHttpClient client= new OkHttpClient();
//第二步:构建一个Request对象
Request request = new Request.Builder()
         .url("https:xxx")
         .build();
//第三步:构建一个Call对象
Call call = client.newCall(request);
//第四步:执行同步请求
Response response = call.execute();
其中最后一行call.execute执行就会将call添加到同步任务队列并执行,下面我们看源码:
首先Call是一个接口,execute方法真正的实现在RealCall里面
package okhttp3;

import java.io.IOException;
//实现类是RealCall
public interface Call extends Cloneable
    ...

    Response execute() throws IOException;

    void enqueue(Callback var1);
    ...
RealCall相关源码:
package okhttp3;
final class RealCall implements Call

    public Response execute() throws IOException
        synchronized(this)
            if (this.executed)
                throw new IllegalStateException("Already Executed");


            this.executed = true;


        this.captureCallStackTrace();
        this.eventListener.callStart(this);

        Response var2;
        try
            // ========= 关键代码1 =================
            this.client.dispatcher().executed(this);
            // ========= 关键代码2 =================
            Response result = this.getResponseWithInterceptorChain();
            if (result == null)
                throw new IOException("Canceled");


            var2 = result;
         catch (IOException var7)
            this.eventListener.callFailed(this, var7);
            throw var7;
         finally
            // ========= 关键代码3 =================
            this.client.dispatcher().finished(this);


        return var2;
我们看到关键代码1:this.client.dispatcher().executed(this);
这里是调用OkHttpClient里面的分发器Dispatcher的executed方法,这里的分发器是在创建OkHttpClient时自动创建的
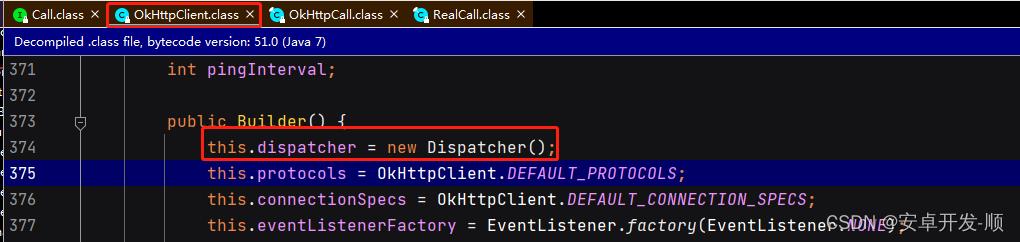
当前如果有需要我们也可以自定义一个分发器去替换系统的分发器,一般默认用系统的就可以。
我们看Dispatcher的executed方法:
package okhttp3;

public final class Dispatcher
    ...
    //同步任务队列
    private final Deque<RealCall> runningSyncCalls = new ArrayDeque();

    synchronized void executed(RealCall call)
        this.runningSyncCalls.add(call);

    ...
很简单,直接加入到了同步任务队列:runningSyncCalls:。
在看关键代码2:Response result = this.getResponseWithInterceptorChain();
这一步会去执行当前的任务
  Response getResponseWithInterceptorChain() throws IOException
    // Build a full stack of interceptors.
    List<Interceptor> interceptors = new ArrayList<>();
    //添加所有拦截器
    interceptors.addAll(client.interceptors());
    interceptors.add(retryAndFollowUpInterceptor);
    interceptors.add(new BridgeInterceptor(client.cookieJar()));
    interceptors.add(new CacheInterceptor(client.internalCache()));
    interceptors.add(new ConnectInterceptor(client));
    if (!forWebSocket)
      interceptors.addAll(client.networkInterceptors());

    interceptors.add(new CallServerInterceptor(forWebSocket));

    //责任链模式 构建Chain对象
    Interceptor.Chain chain = new RealInterceptorChain(interceptors, null, null, null, 0,
        originalRequest, this, eventListener, client.connectTimeoutMillis(),
        client.readTimeoutMillis(), client.writeTimeoutMillis());

    //执行请求
    return chain.proceed(originalRequest);
这里使用了责任链模式,这里加入的拦截器会以"U形"方式执行,我们的任务也会在经过层层拦截器的处理之后被执行,拦截器的相关原理在下面的第二条主线上会分析。
在看关键代码3:this.client.dispatcher().finished(this);
这一步会移除同步队列中的当前任务,请注意下方代码中的注释
package okhttp3;

public final class Dispatcher
  ...

  /** Used by @code Call#execute to signal completion. */
  void finished(RealCall call)
    finished(runningSyncCalls, call, false);


  private <T> void finished(Deque<T> calls, T call, boolean promoteCalls)
    int runningCallsCount;
    Runnable idleCallback;
    synchronized (this)
      //========= 关键代码 移除同步队列里的任务 ==========
      if (!calls.remove(call)) throw new AssertionError("Call wasn't in-flight!");
      if (promoteCalls) promoteCalls();
      runningCallsCount = runningCallsCount();
      idleCallback = this.idleCallback;


    if (runningCallsCount == 0 && idleCallback != null)
      idleCallback.run();


  ...
到此为止,同步请求任务的分发、执行相关的逻辑就分析结束了。
2、异步任务分发
我们先看一下一个普通的OKHttp异步请求:
//第一步:构建OkhttpClient对象
OkHttpClient client= new OkHttpClient();
//第二步:构建一个Request对象
Request request = new Request.Builder()
         .url("https:xxx")
         .build();
//第三步:构建一个Call对象
Call call = client.newCall(request);
//第四步:构建Callback对象
Callback callback = new Callback()
            @Override
            public void onFailure(Call call, IOException e)
                //执行出错


            @Override
            public void onResponse(Call call, Response response) throws IOException
                //执行成功

        ;
//第五步:执行同步请求
Response response = call.enqueue(callback);
其中最后一行call.enqueue(callback)执行就会将call添加到异步任务队列并执行,下面我们看源码:
写于2022年6月13号,明天继续...
3、线程池的封装
二、拦截器
1、重试重定向拦截器:RetryAndFollowUpInterceptor
2、桥接拦截器:BridgeInterceptor
3、缓存拦截器:CacheInterceptor
4、连接拦截器:ConnectInterceptor
5、请求服务器拦截器:CallServerInterceptor
以上是关于OkHttp3 源码分析的主要内容,如果未能解决你的问题,请参考以下文章