延迟渲染与前向渲染
Posted wolf96
tags:
篇首语:本文由小常识网(cha138.com)小编为大家整理,主要介绍了延迟渲染与前向渲染相关的知识,希望对你有一定的参考价值。
The basic idea behind deferred shading is to perform all visibility testing before performing any lighting computations.
-RealTimeRendering 3rd
延迟着色的基本思想是在执行任何光照计算之前执行所有可见性测试。
General goal of the approaches is to reduce the amount
of fragments shaded (i.e., shade final visible fragments
only).https://robotized.arisona.ch/wp-content/uploads/2013/10/deferred_rendering_131113.pdf
延迟着色的基本目标是减少fs的数量(即,只渲染最终可见的片段)
Unity中的两种流程
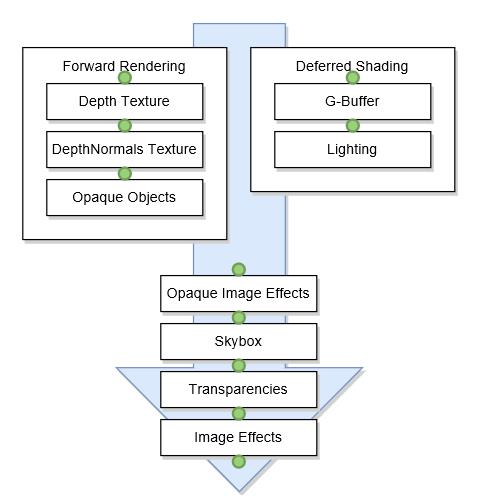
前向渲染的问题:
1.前向渲染是在fragement shader之后做深度测试所以,所有物体就算被遮挡也要走一遍fs,如果多光源就要走光源*所有物体像素次fs(也可以通过 early depth test来解决这个问题
Today most GPUs support a hardware feature called early depth testing. Early depth testing allows the depth test to run before the fragment shader runs. Wherever it is clear a fragment is never going to be visible (it is behind other objects) we can prematurely discard the fragment.
Fragment shaders are usually quite expensive so wherever we can avoid running them we should. A restriction on the fragment shader for early depth testing is that you shouldn't write to the fragment's depth value. If a fragment shader would write to its depth value, early depth testing is impossible; OpenGL won't be able to figure out the depth value beforehand.
https://learnopengl.com/Advanced-OpenGL/Depth-testing
)
2.如果后期处理需要相机的depth/normal,就需要再走一/二遍所有物体fs来得到这两张贴图(Unity做了优化处理,相机的depth与shadow depth map一起https://docs.unity3d.com/Manual/SL-CameraDepthTexture.html)
从上面几个问题看,如果前向渲染场景物体层次摆放过多(远近堆了很多物体,因为没有深度测试),或者有很多光源,或者fs写的复杂,都会提升消耗
延迟渲染解决了前向渲染的问题:
延迟渲染所有不透明的物体走一遍fs,利用MRT返回许多数据,有贴图颜色,法线,或者世界坐标位置,光照模型参数等等属性信息,以下为Unity中GBuffer包含信息,之后计算所有光照,然后再做一次全屏幕的着色处理,就解决了上面两个问题
https://docs.unity3d.com/Manual/RenderTech-DeferredShading.html
-
RT0, ARGB32 format: Diffuse color (RGB), occlusion (A).
-
RT1, ARGB32 format: Specular color (RGB), roughness (A).
-
RT2, ARGB2101010 format: World space normal (RGB), unused (A).
-
RT3, ARGB2101010 (non-HDR) or ARGBHalf (HDR) format: Emission + lighting + lightmaps
+ reflection probes
buffer.
-
Depth+Stencil buffer
So the default g-buffer layout is 160 bits/pixel (non-HDR) or 192 bits/pixel (HDR).
If using the Shadowmask or Distance Shadowmask modes for Mixed lighting, a fifth target is used:
-
RT4, ARGB32 format: Light occlusion values (RGBA).
延迟渲染的问题:
1.需要显卡支持SM3.0的API和MRT等
2.占用更多显存
3.增加带宽
4.对半透明物体依然是前向渲染
5.不能使用MSAA(硬件AA)
6.所有物体都需要 Receive Shadows
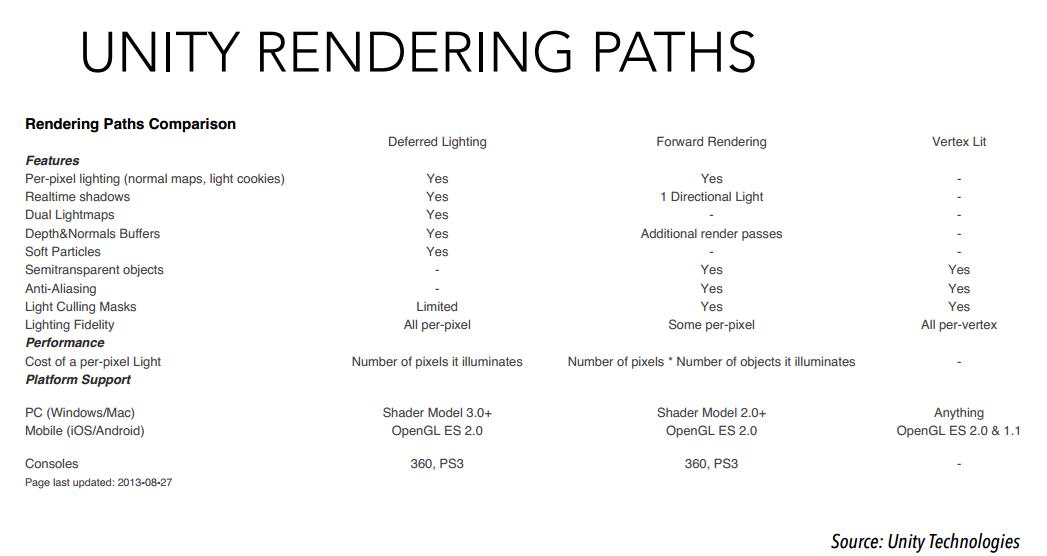
延迟渲染:
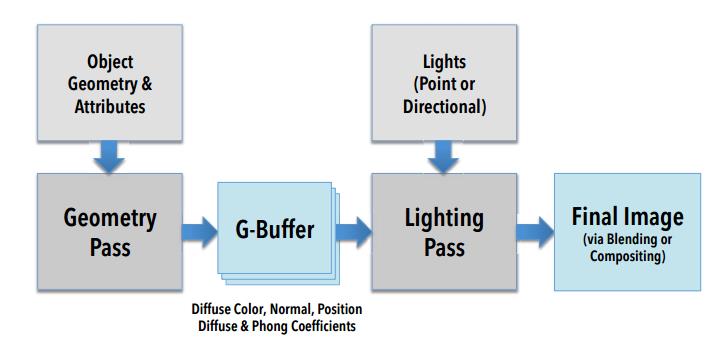
Unity流程:
vs->gs->fs输出GBuffer->渲染反射到RT3(此时RT3有自发光信息)->Light pass渲染光照到RT3(此时RT3有自发光+反射)->绘制depth shadow map->screen space shadow->计算最终结果
关于Light pass
在前向渲染中每个光照要走一遍所有物体的forward add pass,如果是点光源,点光源范围照不到的物体也要走一遍,在延迟渲染的光照计算中,只计算光照范围内的光照计算,点光源范围外的物体不参与运算,这也就使得延迟渲染用很多光源计算量也不大
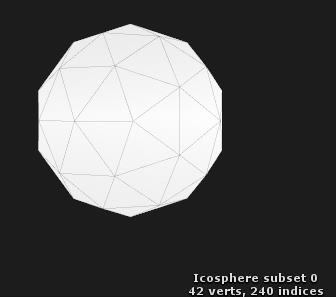
实现方法是点光源或者spot light绘制一个体积,点光源绘制球体或者立方体,spot light绘制椎体,绘制光源时只绘制这个体积(这个体积的投影)就可以,虽然会多出一些面,但是也比全部计算所有(lightpass此时是屏幕像素中所有)fs要省
也就是说需要像前向渲染一样绘制所有体积的fs(light pass),参数如下图,_LightTextureB0为点光源衰减贴图,_LightTexture0为spot light衰减贴图
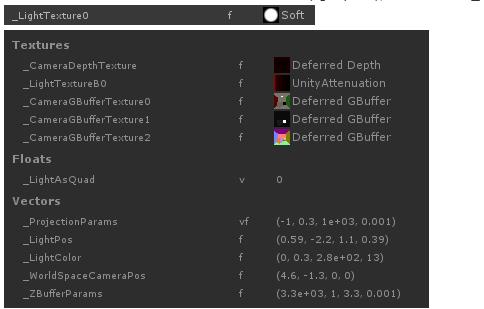
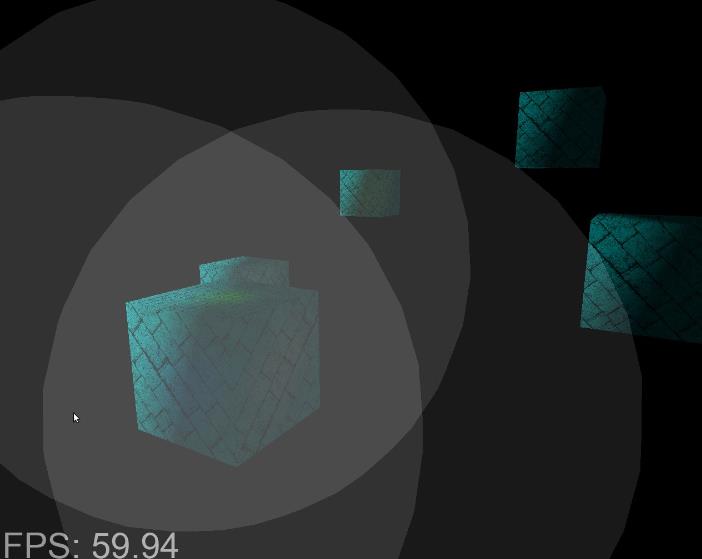
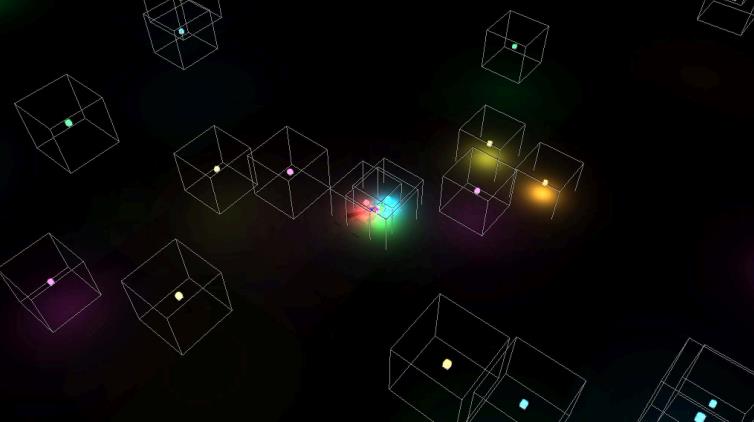
在Unity中LightPass是这么算的Hidden/Internal-DeferredShading
half4 CalculateLight (unity_v2f_deferred i)


    float3 wpos;

    float2 uv;

    float atten, fadeDist;

    UnityLight light;

    UNITY_INITIALIZE_OUTPUT(UnityLight, light);

    UnityDeferredCalculateLightParams (i, wpos, uv, light.dir, atten, fadeDist);

    light.color = _LightColor.rgb * atten;

    // unpack Gbuffer

    half4 gbuffer0 = tex2D (_CameraGBufferTexture0, uv);

    half4 gbuffer1 = tex2D (_CameraGBufferTexture1, uv);

    half4 gbuffer2 = tex2D (_CameraGBufferTexture2, uv);

    UnityStandardData data = UnityStandardDataFromGbuffer(gbuffer0, gbuffer1, gbuffer2);

    float3 eyeVec = normalize(wpos-_WorldSpaceCameraPos);

    half oneMinusReflectivity = 1 - SpecularStrength(data.specularColor.rgb);

    UnityIndirect ind;

    UNITY_INITIALIZE_OUTPUT(UnityIndirect, ind);

    ind.diffuse = 0;

    ind.specular = 0;

    half4 res = UNITY_BRDF_PBS (data.diffuseColor, data.specularColor, oneMinusReflectivity, data.smoothness, data.normalWorld, -eyeVec, light, ind);

    return res;
会计算BRDF与前向渲染算法相同
但是这样会有两个问题:
1.当相机进入光的体积,光的背面被剔除,这个光就不能被渲染
2.如果光很小什么都没照到(体积内没有物体),这个体积也要绘制一遍
利用stencil buffer可以解决这个问题http://ogldev.atspace.co.uk/www/tutorial37/tutorial37.html
步骤:
1.因为画过GBuffer,所以有深度贴图可以进行深度测试
2.进制写入depth buffer,现在开始depth buffer为只读
3.禁止背面剔除,因为需要光体积的正面和背面进行判断
4. Set the stencil test to always succeed(清空为0)
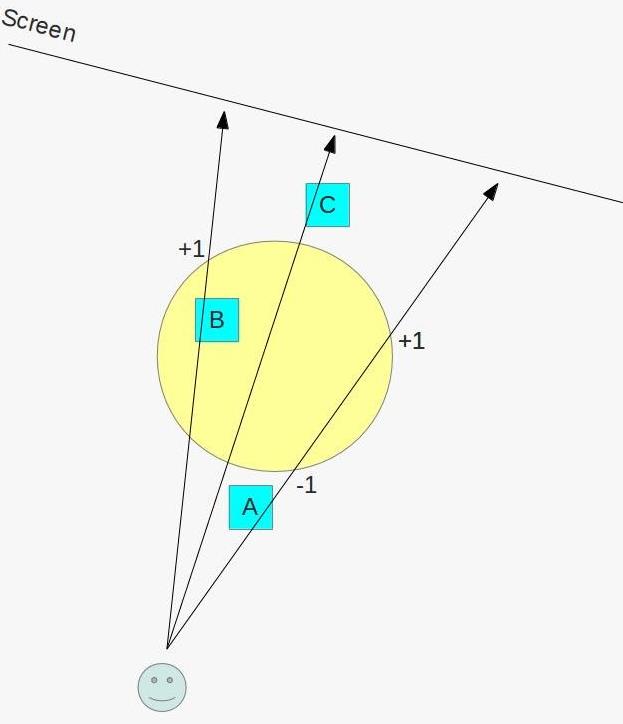
5.在画背面的时候,如果深度测试失败,就增加stencil buffer的值。如果深度测试或模板测试成功就不变
6.在画正面的时候,如果深度测试失败,就减少stencil buffer的值。如果深度测试或模板测试成功就不变
7.渲染光体积
如下图所示
A物体部分光体积,前面没有通过深度测试,将stencil-1,背面也没通过深度测试,将stencil+1,此时stencil = 0,光体积不渲染
C物体部分光体积,前面深度测试成功stencil不变,背面深度测试成功stencil不变,此时stencil = 0,光体积不渲染
B物体部分光体积,前面深度测试成功stencil不变,背面深度测试失败,将stencil+1,此时stencil = 1,光体积渲染
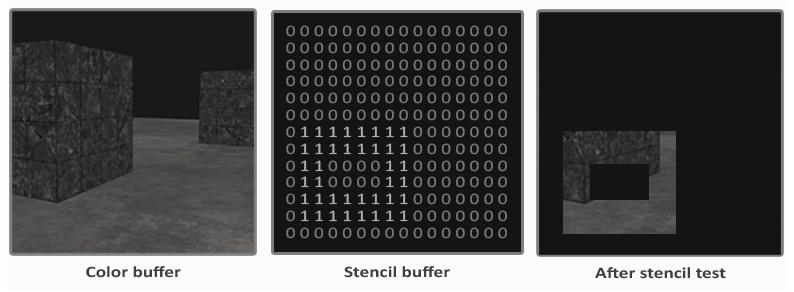
一个模板缓冲的简单例子https://learnopengl.com/Advanced-OpenGL/Stencil-testing
We render the geometry into the G buffer, setup the stencil test/operation according to the above and then render the bounding sphere of each light into the stencil buffer. The peculiar stencil setup that we saw guarantees that only the pixels in the stencil buffer covered by objects inside the bounding sphere will have a value greater than zero. We call this step the Stencil Pass and since we are only interested in writing into the stencil buffer we use a null fragment shader.Next we render the sphere again using the lighting fragment shader but this time we configure the stencil test to pass only when the stencil value of the pixel is different from zero. All the pixels of objects outside the light volume will fail the stencil test and we will calculate lighting on a very small subset of the pixels that are actually covered by the light sphere.
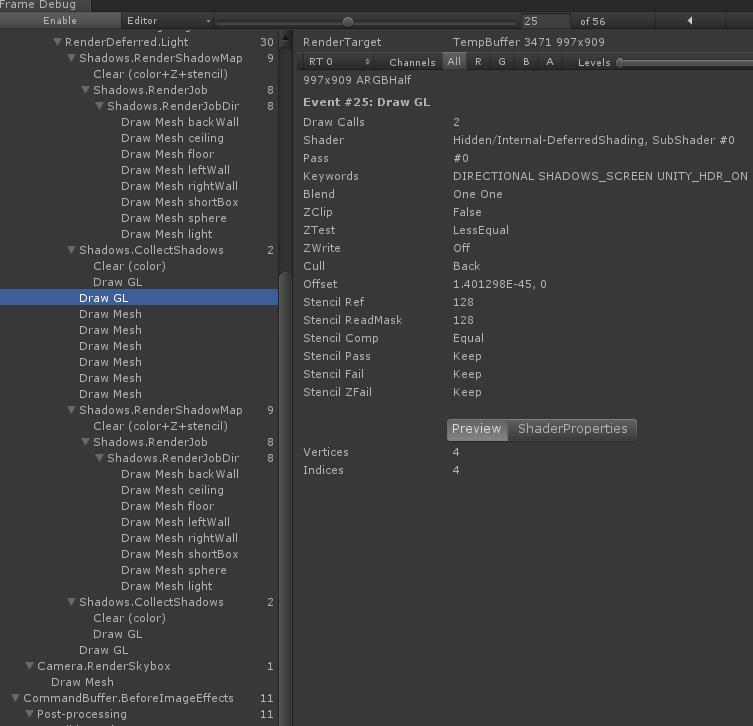
在Unity的FrameDebugger可以看到这个过程,先写入Stencil(使用Shader "Hidden/Internal-StencilWrite"),再绘制一个光体积(使用Shader "Hidden/Internal-DeferredShading")
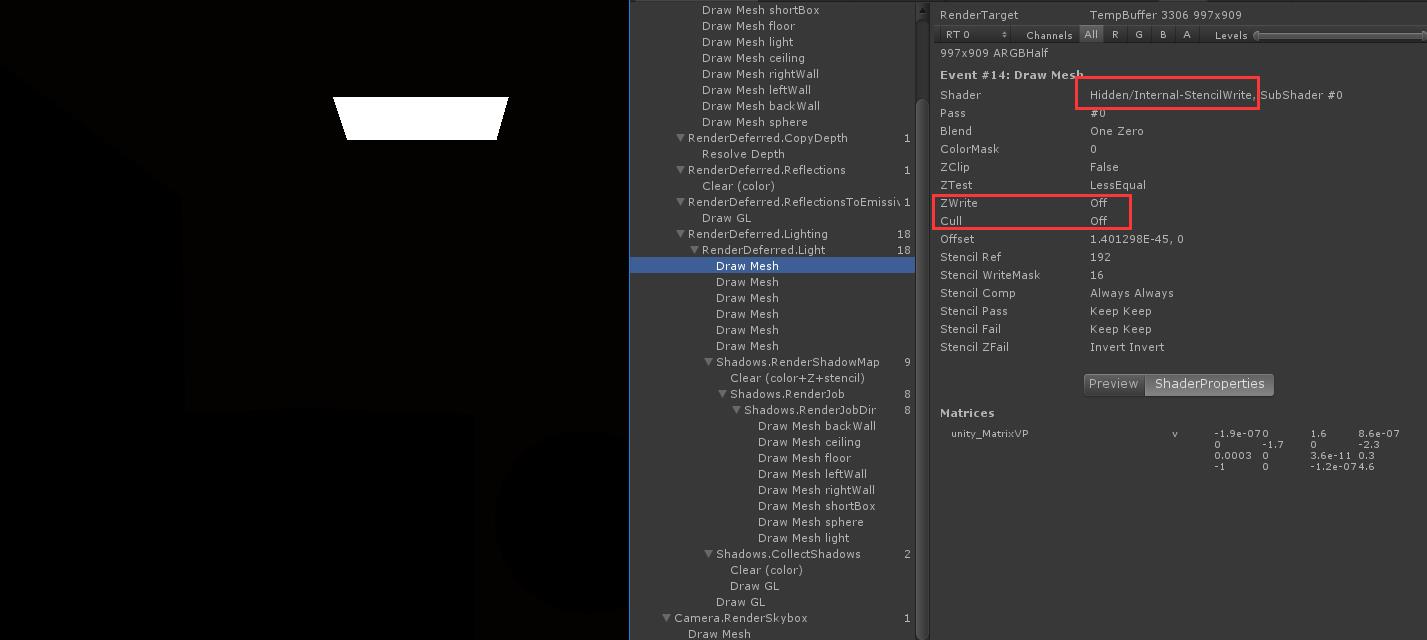
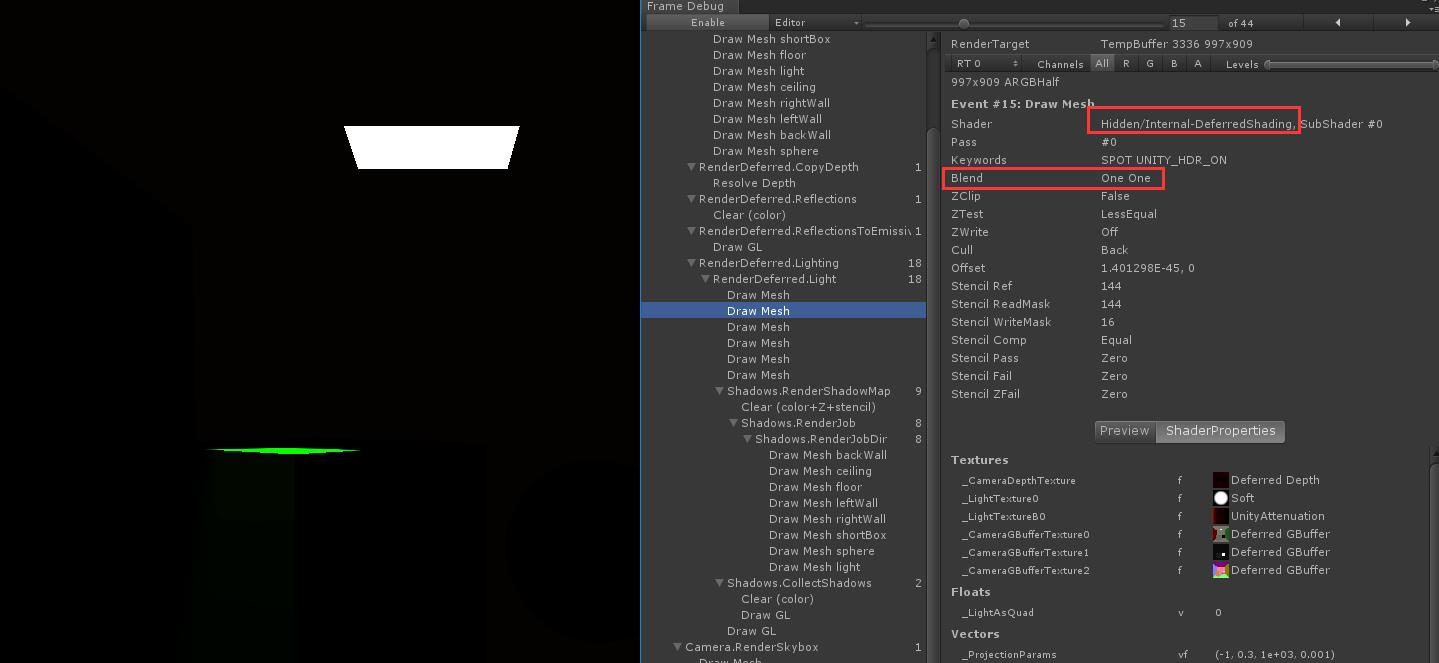
渲染到了一张TempBuffer,,应该就是RT3
这样就解决了上面两个问题,如果光体积没有包含任何物件就不会通过模板测试不会渲染,不背面剔除就算相机进入光体积也没有问题
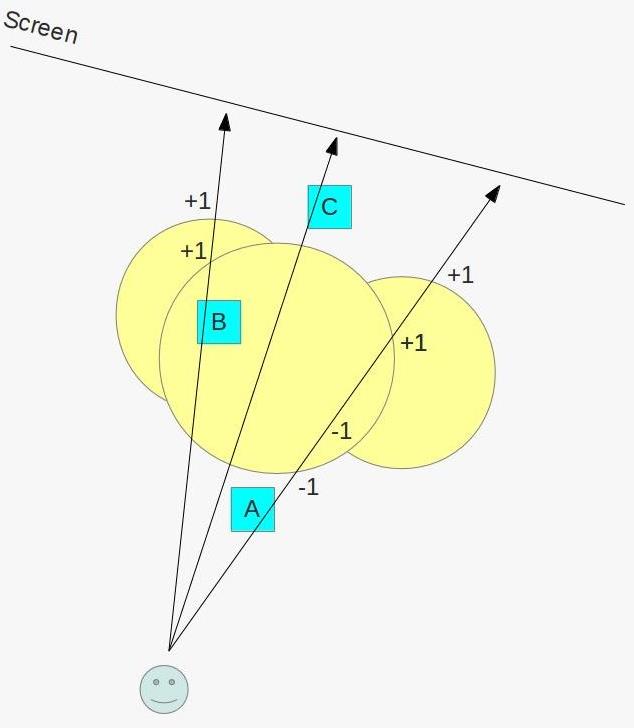
当多个光源也是生效的,,但是Unity中还是一个光源一个Stencil pass+一个Light pass
Unity文档中也说https://docs.unity3d.com/Manual/SL-Stencil.html
Stencil functionality for objects rendered in the deferred rendering path
is somewhat limited, as during the base pass and lighting pass the stencil buffer is used for other purposes. During those two stages stencil state defined in the shader will be ignored and only taken into account during the final pass. Because of that it’s not possible to mask out these objects based on a stencil test, but they can still modify the buffer contents, to be used by objects rendered later in the frame. Objects rendered in the forward rendering
path following the deferred path (e.g. transparent objects or objects without a surface shader) will set their stencil state normally again.
在base pass和lighting pass时StencilBuffer被用来计算光照了,所以在这两个pass其他shader的模板测试会被忽略
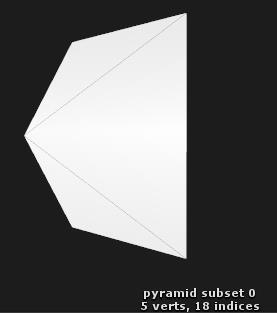
在FrameDebugger里可以看到光照体积模型,
spotLight的光照体积:
pointlight的光照体积:
Direct light的光照是一个DrawGL,全屏绘制:
关于延迟渲染HDR
光照在LDR会编码为ARGB8 buffer
HDR会加到浮点Buffer
在延迟渲染中如果开启HDR,RT3也就是光照信息的GBuffer会用ARGBHalf格式的贴图,也就是说光照细节会增加
RT3, ARGB2101010 (non-HDR) or ARGBHalf (HDR) format: Emission + lighting + lightmaps
+ reflection probes
buffer.
在Hidden/Internal-DeferredShading有两个Pass,第一个是Light Pass
注释写到
// Pass 1: Lighting pass
// LDR case - Lighting encoded into a subtractive ARGB8 buffer
// HDR case - Lighting additively blended into floating point buffer Pass
如果是LDR,在生成GBuffer的fs中,对自发光,,也就是光照部分进行exp2处理,因为需要将其编码到ARGB8图片,HDR信息全部写在floating point buffer就不需要编码
    #ifndef UNITY_HDR_ON

        emissiveColor.rgb = exp2(-emissiveColor.rgb);

    #endif
Hidden/Internal-DeferredShading也是这样
    half4 c = CalculateLight(i);

    #ifdef UNITY_HDR_ON

    return c;

    #else

    return exp2(-c);

    #endif
如果是LDR在延迟渲染的最后(不透明部分),会走Hidden/Internal-DeferredShading的Pass2
// Pass 2: Final decode pass.
// Used only with HDR off, to decode the logarithmic buffer into the main RT
return -log2(tex2D(_LightBuffer, i.texcoord));
也就是说LDR会多一个Pass来处理解码,而且编码解码会丢失细节
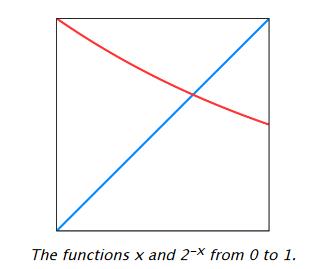
上图红色部分是LDR编码,蓝色是HDR不需要编码,2(-(0-1))也就是将[0,1]的信息编码为[0,0.5]中,正好减少一半
参考:
OpenGL:
http://ogldev.atspace.co.uk/www/tutorial35/tutorial35.html
https://robotized.arisona.ch/wp-content/uploads/2013/10/deferred_rendering_131113.pdf
http://www.realtimerendering.com/blog/deferred-lighting-approaches/
Unity:
https://catlikecoding.com/unity/tutorials/rendering/part-13/Rendering-13.pdf
--------by wolf96 2018/12/11
以上是关于延迟渲染与前向渲染的主要内容,如果未能解决你的问题,请参考以下文章