[11]深入浅出工作开源框架Camunda:部署HTML表单
Posted 朱清云的技术博客
tags:
篇首语:本文由小常识网(cha138.com)小编为大家整理,主要介绍了[11]深入浅出工作开源框架Camunda:部署HTML表单相关的知识,希望对你有一定的参考价值。
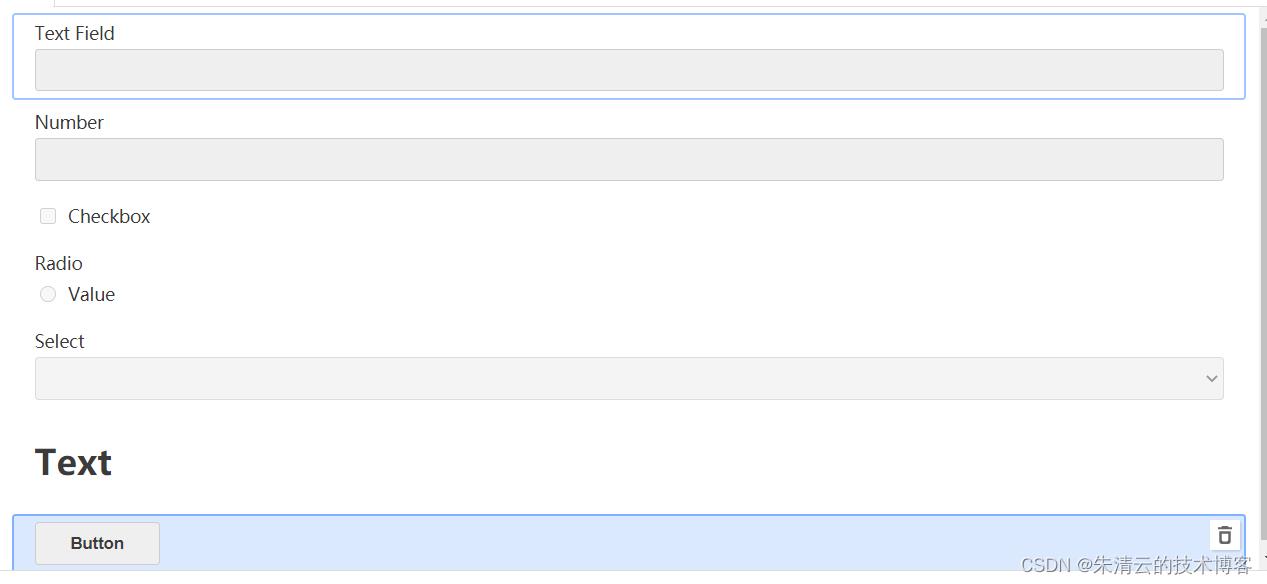
Camunda不仅仅支持类似于JSON格式的表单,也支持html格式的表单。支持Camunda JSON表单格式比较简单,比如类似下面的表达。
  "schemaVersion": 2,
  "components": [

      "label": "Text Field",
      "type": "textfield",
      "id": "Field_0kpmyne",
      "key": "field_1kjqk1b"
    ,

      "label": "Number",
      "type": "number",
      "id": "Field_1pp63a0",
      "key": "field_1iy0fgh"
    ,

      "label": "Checkbox",
      "type": "checkbox",
      "id": "Field_09m9mbv",
      "key": "field_1iufp4h"
    ,

      "values": [

          "label": "Value",
          "value": "value"

      ],
      "label": "Radio",
      "type": "radio",
      "id": "Field_0tanpr2",
      "key": "field_0wz7jwp"
    ,

      "values": [

          "label": "Value",
          "value": "value"

      ],
      "label": "Select",
      "type": "select",
      "id": "Field_0uvqqg4",
      "key": "field_0vwokcn"
    ,

      "text": "# Text",
      "type": "text",
      "id": "Field_1mmwz20"
    ,

      "action": "submit",
      "label": "Button",
      "type": "button",
      "id": "Field_1kwxmg4",
      "key": "field_184exnw"

  ],
  "type": "default",
  "id": "Form_1kmjw6v"
其UI视图如下:

那么如果需要部署一个带表单的应用,且是独立部署,不是把流程和html表单嵌入到Java应用里面应该如何做呢?
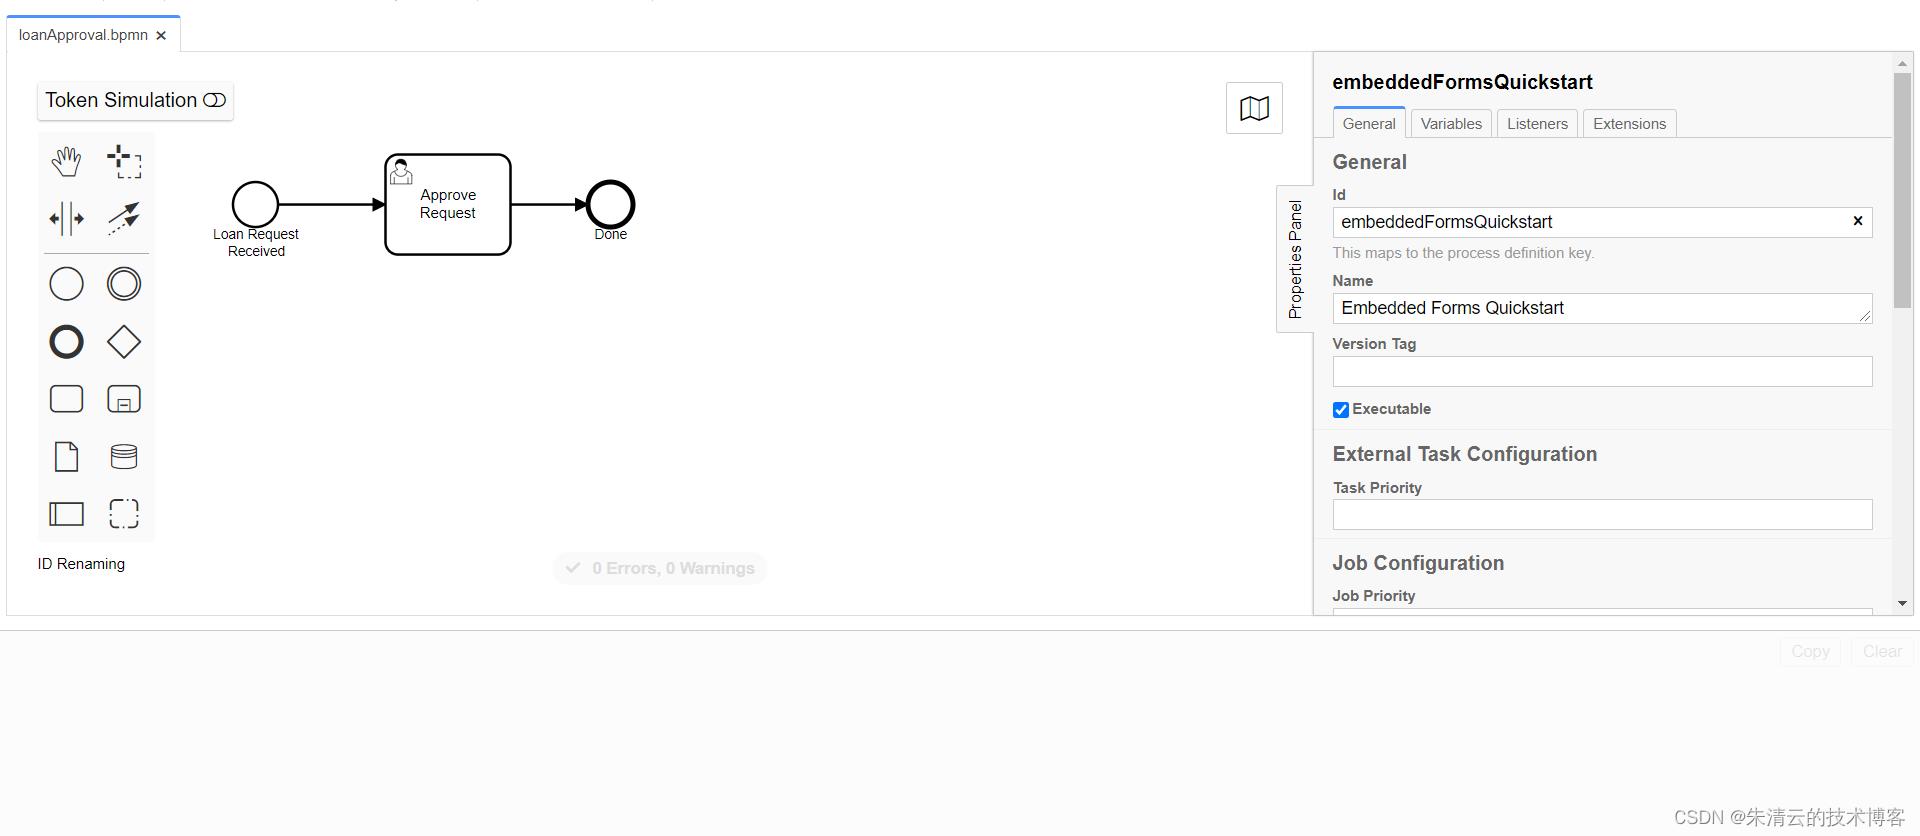
比如下面的流程和表单。

其流程文件(loanApproval.bpmn)源码如下:
<?xml version="1.0" encoding="UTF-8"?>
<bpmn2:definitions xmlns:xsi="http://www.w3.org/2001/XMLSchema-instance" xmlns:bpmn2="http://www.omg.org/spec/BPMN/20100524/MODEL" xmlns:bpmndi="http://www.omg.org/spec/BPMN/20100524/DI" xmlns:camunda="http://camunda.org/schema/1.0/bpmn" xmlns:dc="http://www.omg.org/spec/DD/20100524/DC" xmlns:di="http://www.omg.org/spec/DD/20100524/DI" id="_r7y_gEa-EeO5NO3lqhkDkg" targetNamespace="http://camunda.org/examples" exporter="Camunda Modeler" exporterVersion="4.11.1" xsi:schemaLocation="http://www.omg.org/spec/BPMN/20100524/MODEL BPMN20.xsd">
<bpmn2:process id="embeddedFormsQuickstart" name="Embedded Forms Quickstart" isExecutable="true">
<bpmn2:startEvent id="StartEvent_1" name="Loan Request Received" camunda:formKey="embedded:deployment:start-form.html">
<bpmn2:outgoing>SequenceFlow_1</bpmn2:outgoing>
</bpmn2:startEvent>
<bpmn2:sequenceFlow id="SequenceFlow_1" sourceRef="StartEvent_1" targetRef="UserTask_1" />
<bpmn2:endEvent id="EndEvent_1" name="Done">
<bpmn2:incoming>SequenceFlow_3</bpmn2:incoming>
</bpmn2:endEvent>
<bpmn2:userTask id="UserTask_1" name="Approve Request" camunda:formKey="embedded:deployment:task-form.html" camunda:assignee="demo">
<bpmn2:incoming>SequenceFlow_1</bpmn2:incoming>
<bpmn2:outgoing>SequenceFlow_3</bpmn2:outgoing>
</bpmn2:userTask>
<bpmn2:sequenceFlow id="SequenceFlow_3" sourceRef="UserTask_1" targetRef="EndEvent_1" />
</bpmn2:process>
<bpmndi:BPMNDiagram id="BPMNDiagram_1">
<bpmndi:BPMNPlane id="BPMNPlane_1" bpmnElement="embeddedFormsQuickstart">
<bpmndi:BPMNEdge id="BPMNEdge_SequenceFlow_3" bpmnElement="SequenceFlow_3" sourceElement="_BPMNShape_UserTask_3" targetElement="_BPMNShape_EndEvent_8">
<di:waypoint x="398" y="118" />
<di:waypoint x="460" y="118" />
<bpmndi:BPMNLabel>
<dc:Bounds x="533" y="268" width="0" height="0" />
</bpmndi:BPMNLabel>
</bpmndi:BPMNEdge>
<bpmndi:BPMNEdge id="BPMNEdge_SequenceFlow_1" bpmnElement="SequenceFlow_1" sourceElement="_BPMNShape_StartEvent_3" targetElement="_BPMNShape_UserTask_3">
<di:waypoint x="212" y="118" />
<di:waypoint x="298" y="118" />
<bpmndi:BPMNLabel>
<dc:Bounds x="347" y="268" width="0" height="0" />
</bpmndi:BPMNLabel>
</bpmndi:BPMNEdge>
<bpmndi:BPMNShape id="_BPMNShape_StartEvent_3" bpmnElement="StartEvent_1">
<dc:Bounds x="176" y="100" width="36" height="36" />
<bpmndi:BPMNLabel>
<dc:Bounds x="160" y="136" width="69" height="27" />
</bpmndi:BPMNLabel>
</bpmndi:BPMNShape>
<bpmndi:BPMNShape id="_BPMNShape_EndEvent_8" bpmnElement="EndEvent_1">
<dc:Bounds x="460" y="100" width="36" height="36" />
<bpmndi:BPMNLabel>
<dc:Bounds x="465" y="136" width="27" height="14" />
</bpmndi:BPMNLabel>
</bpmndi:BPMNShape>
<bpmndi:BPMNShape id="_BPMNShape_UserTask_3" bpmnElement="UserTask_1">
<dc:Bounds x="298" y="78" width="100" height="80" />
</bpmndi:BPMNShape>
</bpmndi:BPMNPlane>
</bpmndi:BPMNDiagram>
</bpmn2:definitions>
其有两个表单,启动的节点(Load Request Recevied)和用户任务(Approve Request)。
其分别关联了下面的表单:
(1)开始节点的表单(start-form.html)
<h3>Embedded Forms Quickstart</h3>
<form role="form"
      name="variablesForm">

  <div class="row">

    <div class="col-xs-6">
      <h2>Loan Data</h2>

      <!-- Loan Type -->
      <div class="form-group">
        <label for="selectLoanType">Type of the loan</label>
        <div class="controls">
          <!--select box -->
          <select id="selectLoanType"
                  required
                  class="form-control"
                  name="loanType"
                  cam-variable-name="loanType"
                  cam-variable-type="String"
                  ng-change="calculateLoan()">
            <option value="mortage" checked>Mortage Loan (5%)</option>
            <option value="cashAdvance">Cash Advance (10%)</option>
          </select>
        </div>

        <!-- Custom validation message for select box -->
        <p ng-if="variablesForm.loanType.$invalid" style="color: red">
          Please select a loan type.
        </p>
      </div>

      <!-- Loan Amount -->
      <div class="form-group">
        <label for="inputLoanAmount">Amount</label>
        <div class="controls">
          <input id="inputLoanAmount"
                 required
                 class="form-control"
                 cam-variable-type="Double"
                 cam-variable-name="loanAmount"
                 min="1000"
                 ng-change="calculateLoan()"
                 name="loanAmount"
                 type="number"/>
        </div>
      </div>

      <!-- Runtime in Years -->
      <div class="form-group">
        <label for="inputLoanRuntime">Runtime (Years)</label>
        <div class="controls">
          <input id="inputLoanRuntime"
                 required
                 class="form-control"
                 cam-variable-type="Double"
                 cam-variable-name="loanRuntime"
                 min="2" max="30"
                 ng-change="calculateLoan()"
                 name="loanRuntime"
                 type="number"/>
        </div>
      </div>

      <!-- calculate monthly payment -->
      Projected monthly payment:
      <p ng-if="monthlyPayment" class="alert alert-success">
        monthlyPayment€ at interest% interest rate.
      </p>

      <p ng-if="!monthlyPayment" class="alert alert-danger">
        Invalid selection.
      </p>

      <!-- The following code demonstrates use of custom scripting.

            The 'cam-script' directive makes sure the the script is loaded and can bind to the angular $scope for the form.

            Access to form fields is provided through $scope.variablesForm.
         -->
      <script cam-script type="text/form-script">
      $scope.calculateLoan = function()
        var form = $scope.variablesForm;

        if(!form.loanType.$valid || !form.loanAmount.$valid || !form.loanRuntime.$valid)
          $scope.monthlyPayment = undefined;

         else

          var loanAmount = form.loanAmount.$modelValue;
          var years = form.loanRuntime.$modelValue;
          var loanType = form.loanType.$modelValue;
          var interestRate = 0;

          if(loanType == "mortage")
            interestRate = 0.05;
           else if(loanType == "cashAdvance")
            interestRate = 0.10;


          $scope.interest = 100 * interestRate;

          // calculate monthly payment using special formula provided by Bobby G
          $scope.monthlyPayment = Math.round((loanAmount * ((Math.pow((1+interestRate),years)*interestRate) / (Math.pow((1+interestRate),years)-1))) * (1/12));


      以上是关于[11]深入浅出工作开源框架Camunda:部署HTML表单的主要内容,如果未能解决你的问题,请参考以下文章