Windows系统编译GSL2.7用于C语言编程(2022.5.8)
Posted jing_zhong
tags:
篇首语:本文由小常识网(cha138.com)小编为大家整理,主要介绍了Windows系统编译GSL2.7用于C语言编程(2022.5.8)相关的知识,希望对你有一定的参考价值。
Windows系统编译GSL2.7用于C语言编程(2022.5.8)
- 1、 GSL(GNU Scientific Library)
- 2、Windows下利用MSYS2编译GSL库
- 3、基于GSL库编写C语言代码(CodeBlocks / Visual Studio)
- 4、总结
- 5、参考WIki
1、 GSL(GNU Scientific Library)
1.1 GSL简介
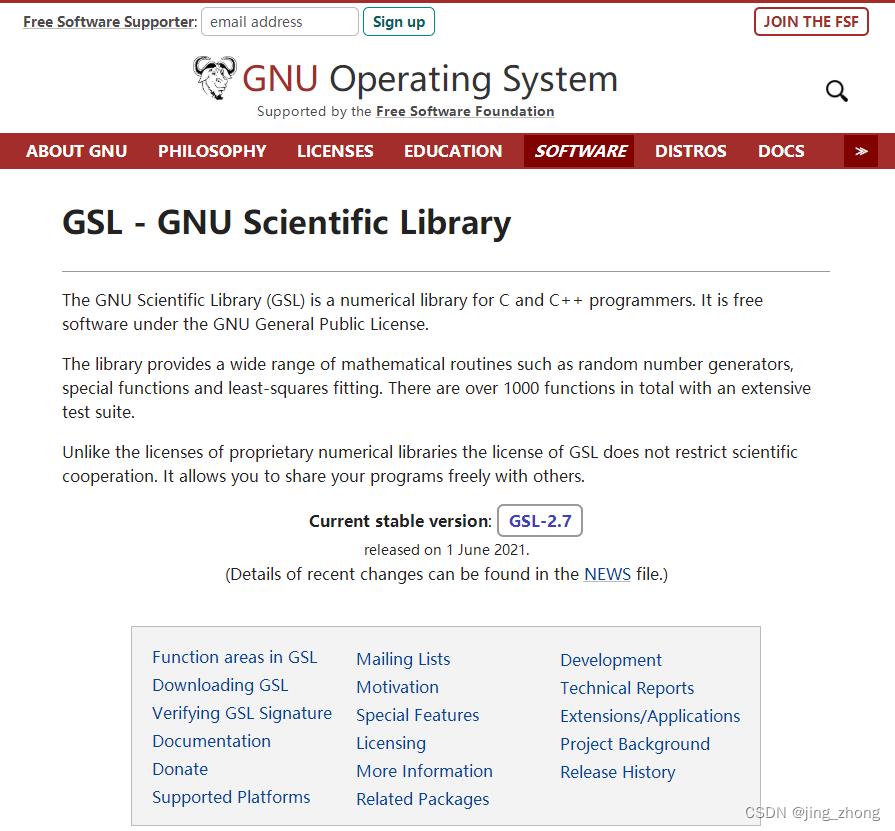
GSL(GNU Scientific Library)是一个面向C和C++编程语言的数值计算库,它是GNU General Public License通用公共许可下的开放软件。GSL库提供了大量的数学日常运算函数,涉及领域如随机数生成器、复数、向量、矩阵、排序、快速傅里叶变换、随机分布、统计、插值、离散小波变换、稀疏矩阵、线性代数、最小二乘拟合等,还允许自己与他人自由分享程序,代码开源,开发者可对用户社区贡献改进代码。GSL是在GNU/Linux平台上由gcc编译器所开发,满足GNU Coding Standards标准,同时其源码已被证实可以在Linux(gcc编译器)、Unix(gcc编译器) 和 Microsoft Windows等平台进行编译使用,但Window系统下编译较为困难,最好还是选择Linux系统编译,便捷快速。
GSL库具有以下五个特点:
- 采用面向对象的设计,不同的算法可以很容易地插入或在运行时更改,而无需重新编译程序;
- 面向普通用户,任何了解
C编程的人都可立即开始使用该库; - 界面设计简单,可链接到非常高级的语言,如
GNU Guile或Python; - 具有线程安全性;
- 易于编译,且不依赖于其他包。
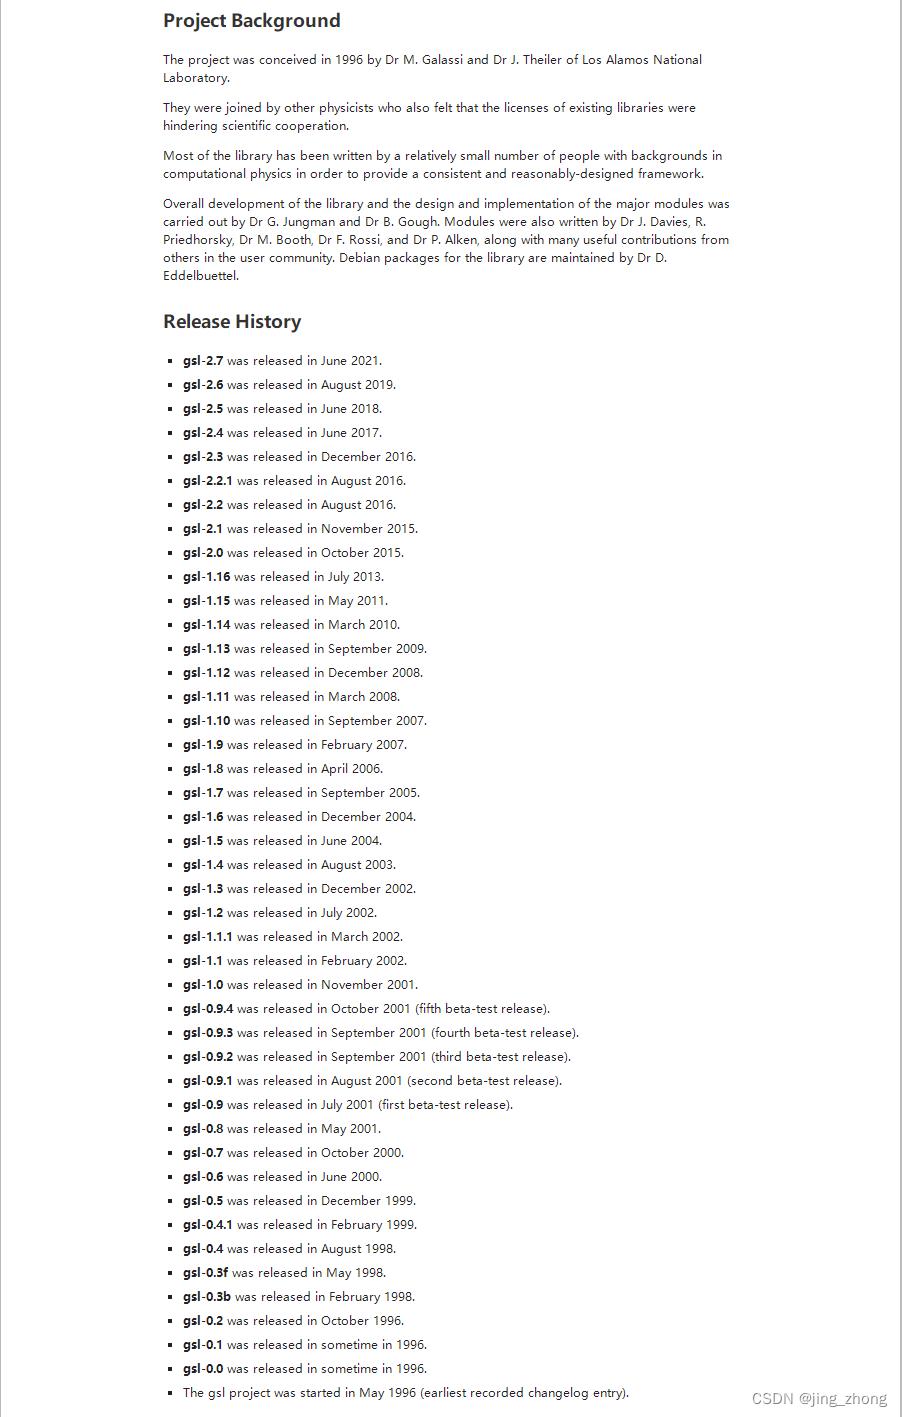
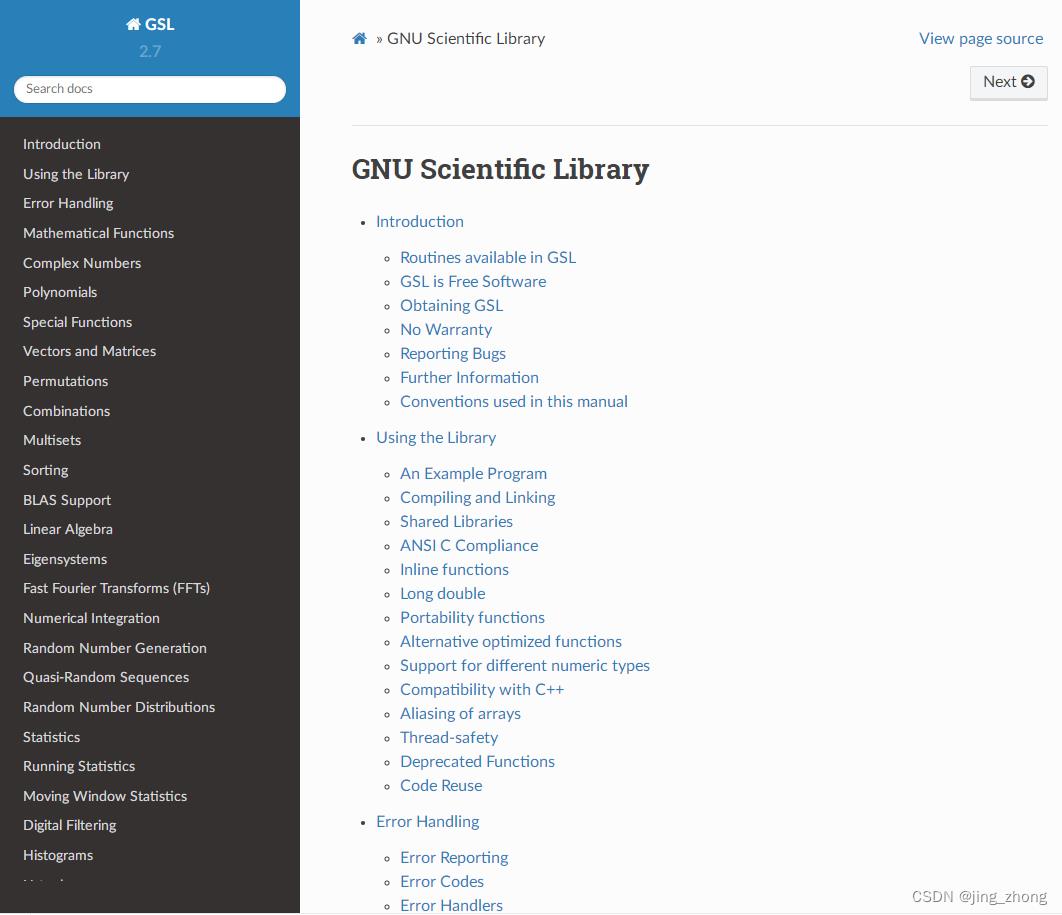
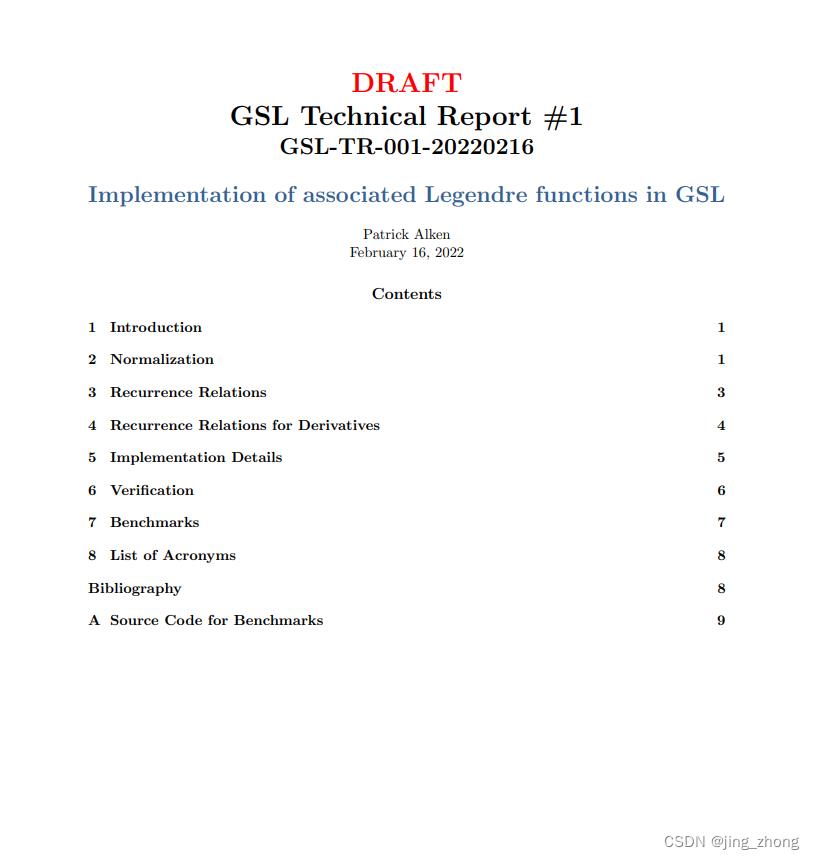
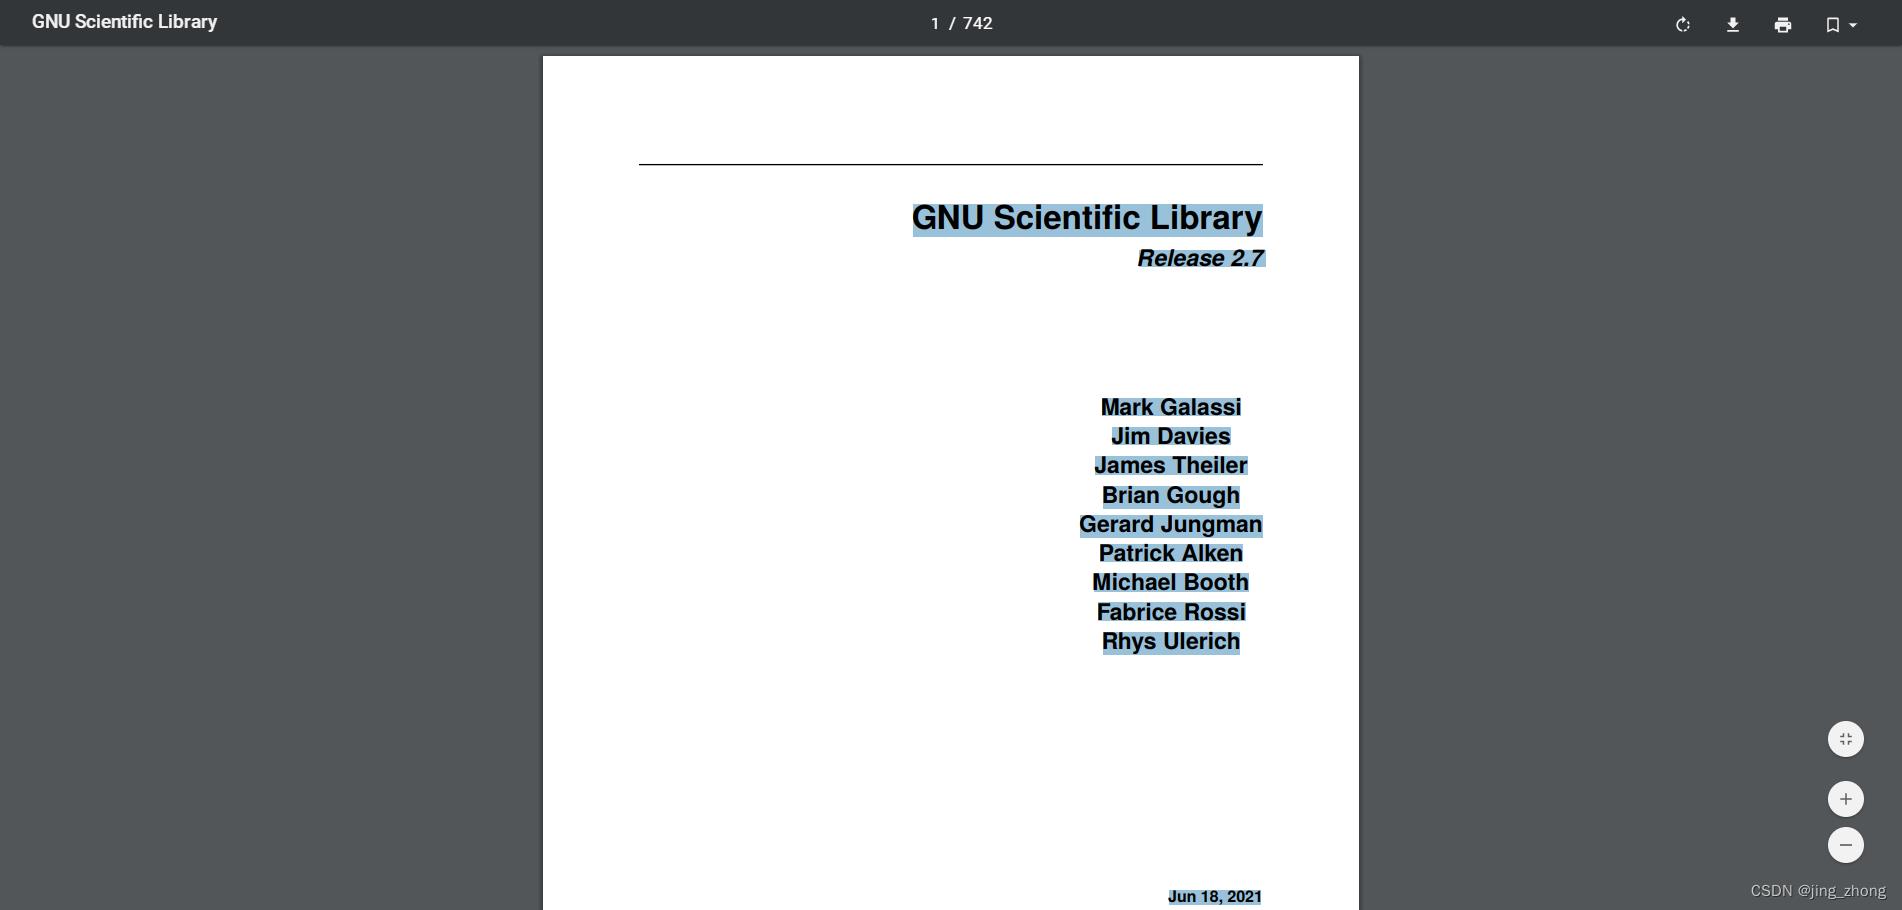
截至目前,GSL已经发布了很多版本,从gsl-1.0到gsl-2.7,当前最新且稳定的版本为gsl-2.7,各版本的下载地址有两个:https://mirrors.tripadvisor.com/gnu/gsl/和https://ftp.gnu.org/gnu/gsl/。官网的帮助文档地址有html 帮助文档、pdf 帮助文档和技术报告。
| 
|
| 
|
1.2 前人在Windows平台下已编译好的GSL库(版本太低)
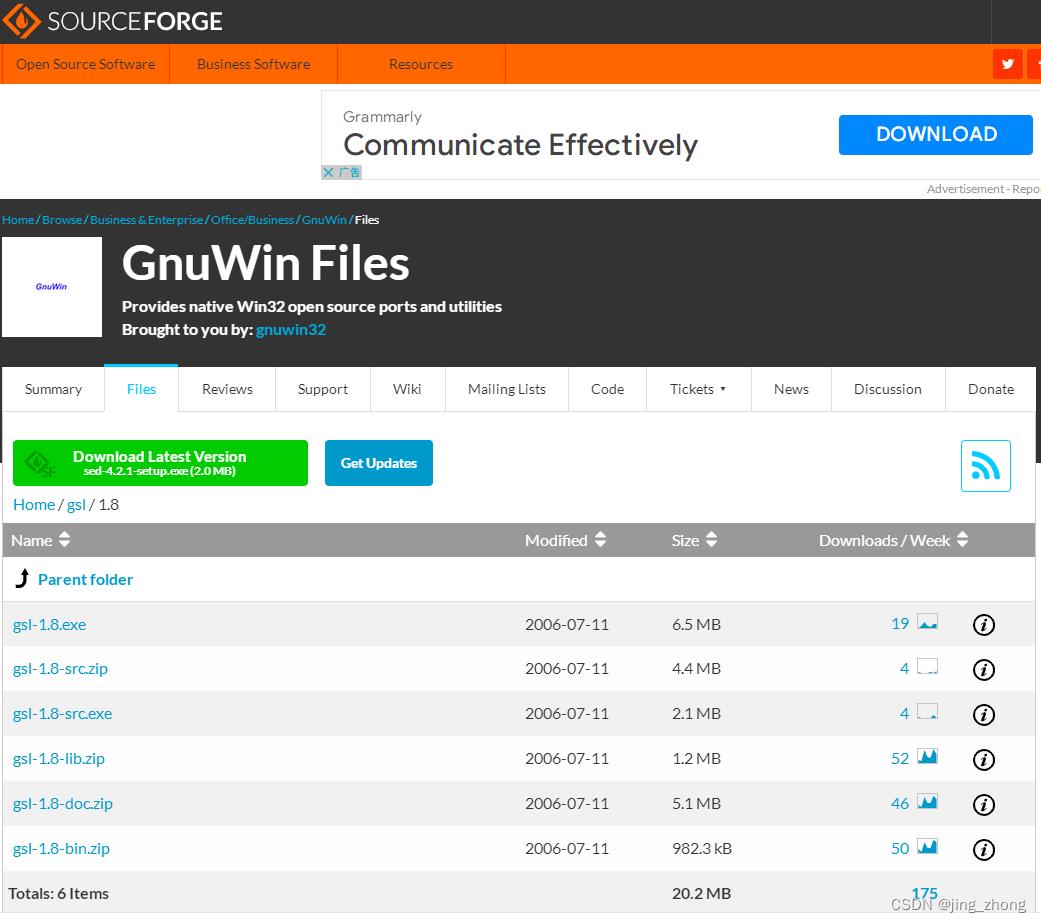
进入Gsl for Windows网站可看到1.8版本的GSL编译库,在该页面点击Complete package, except sources右侧的Setup,进入Gnu Win Files,下载gsl-1.8.exe后安装并配置成功后应该就可使用了。

| 
|
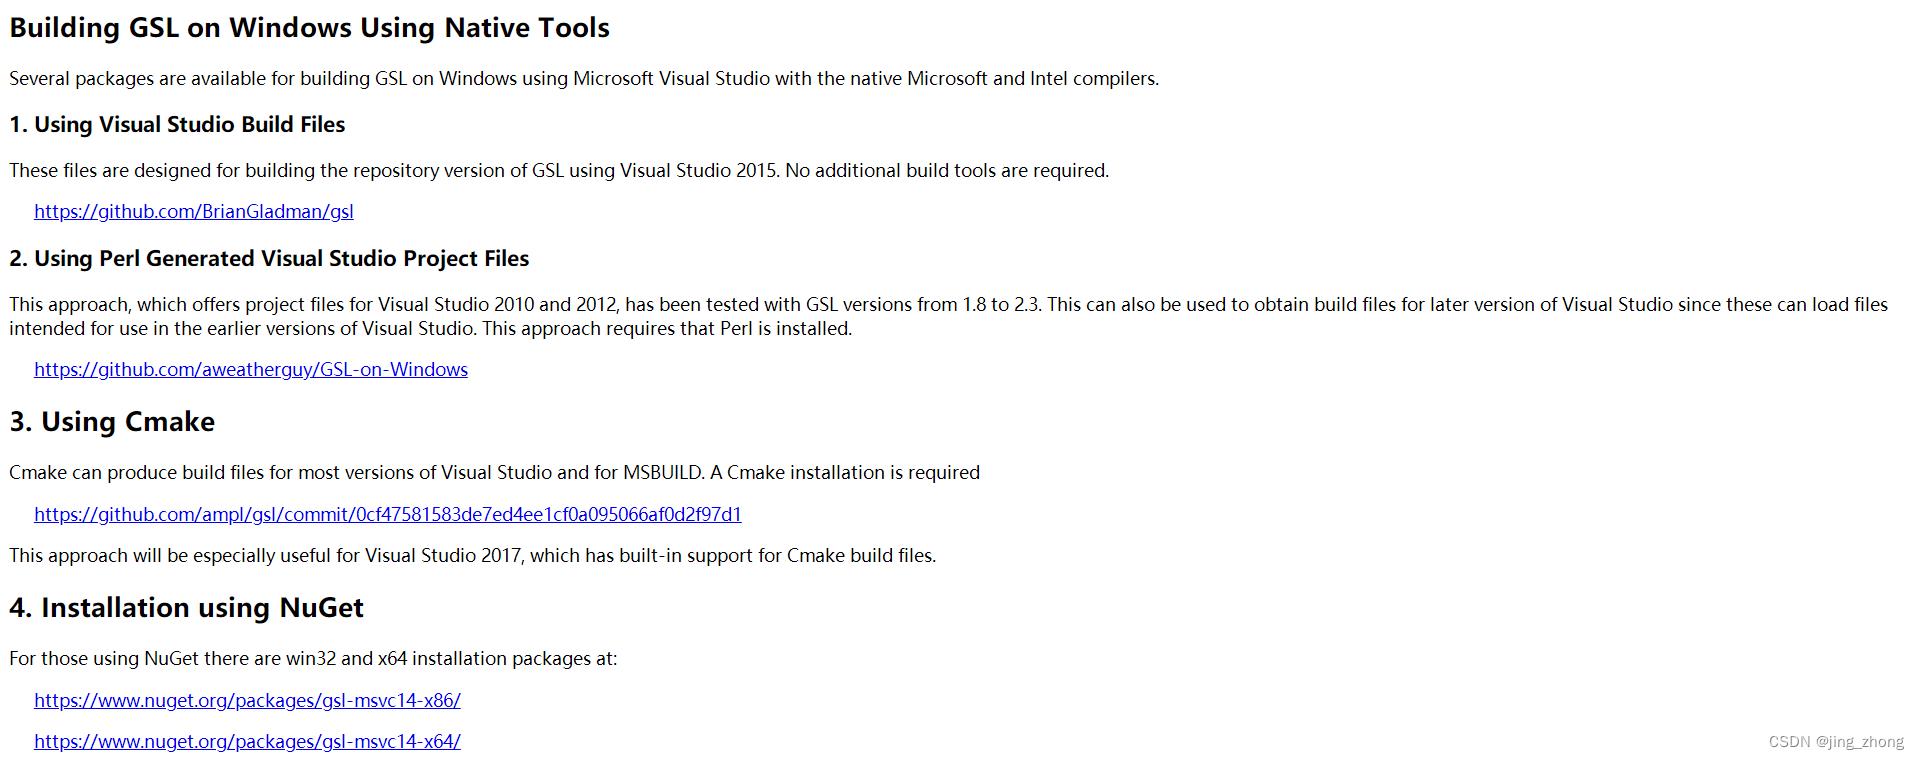
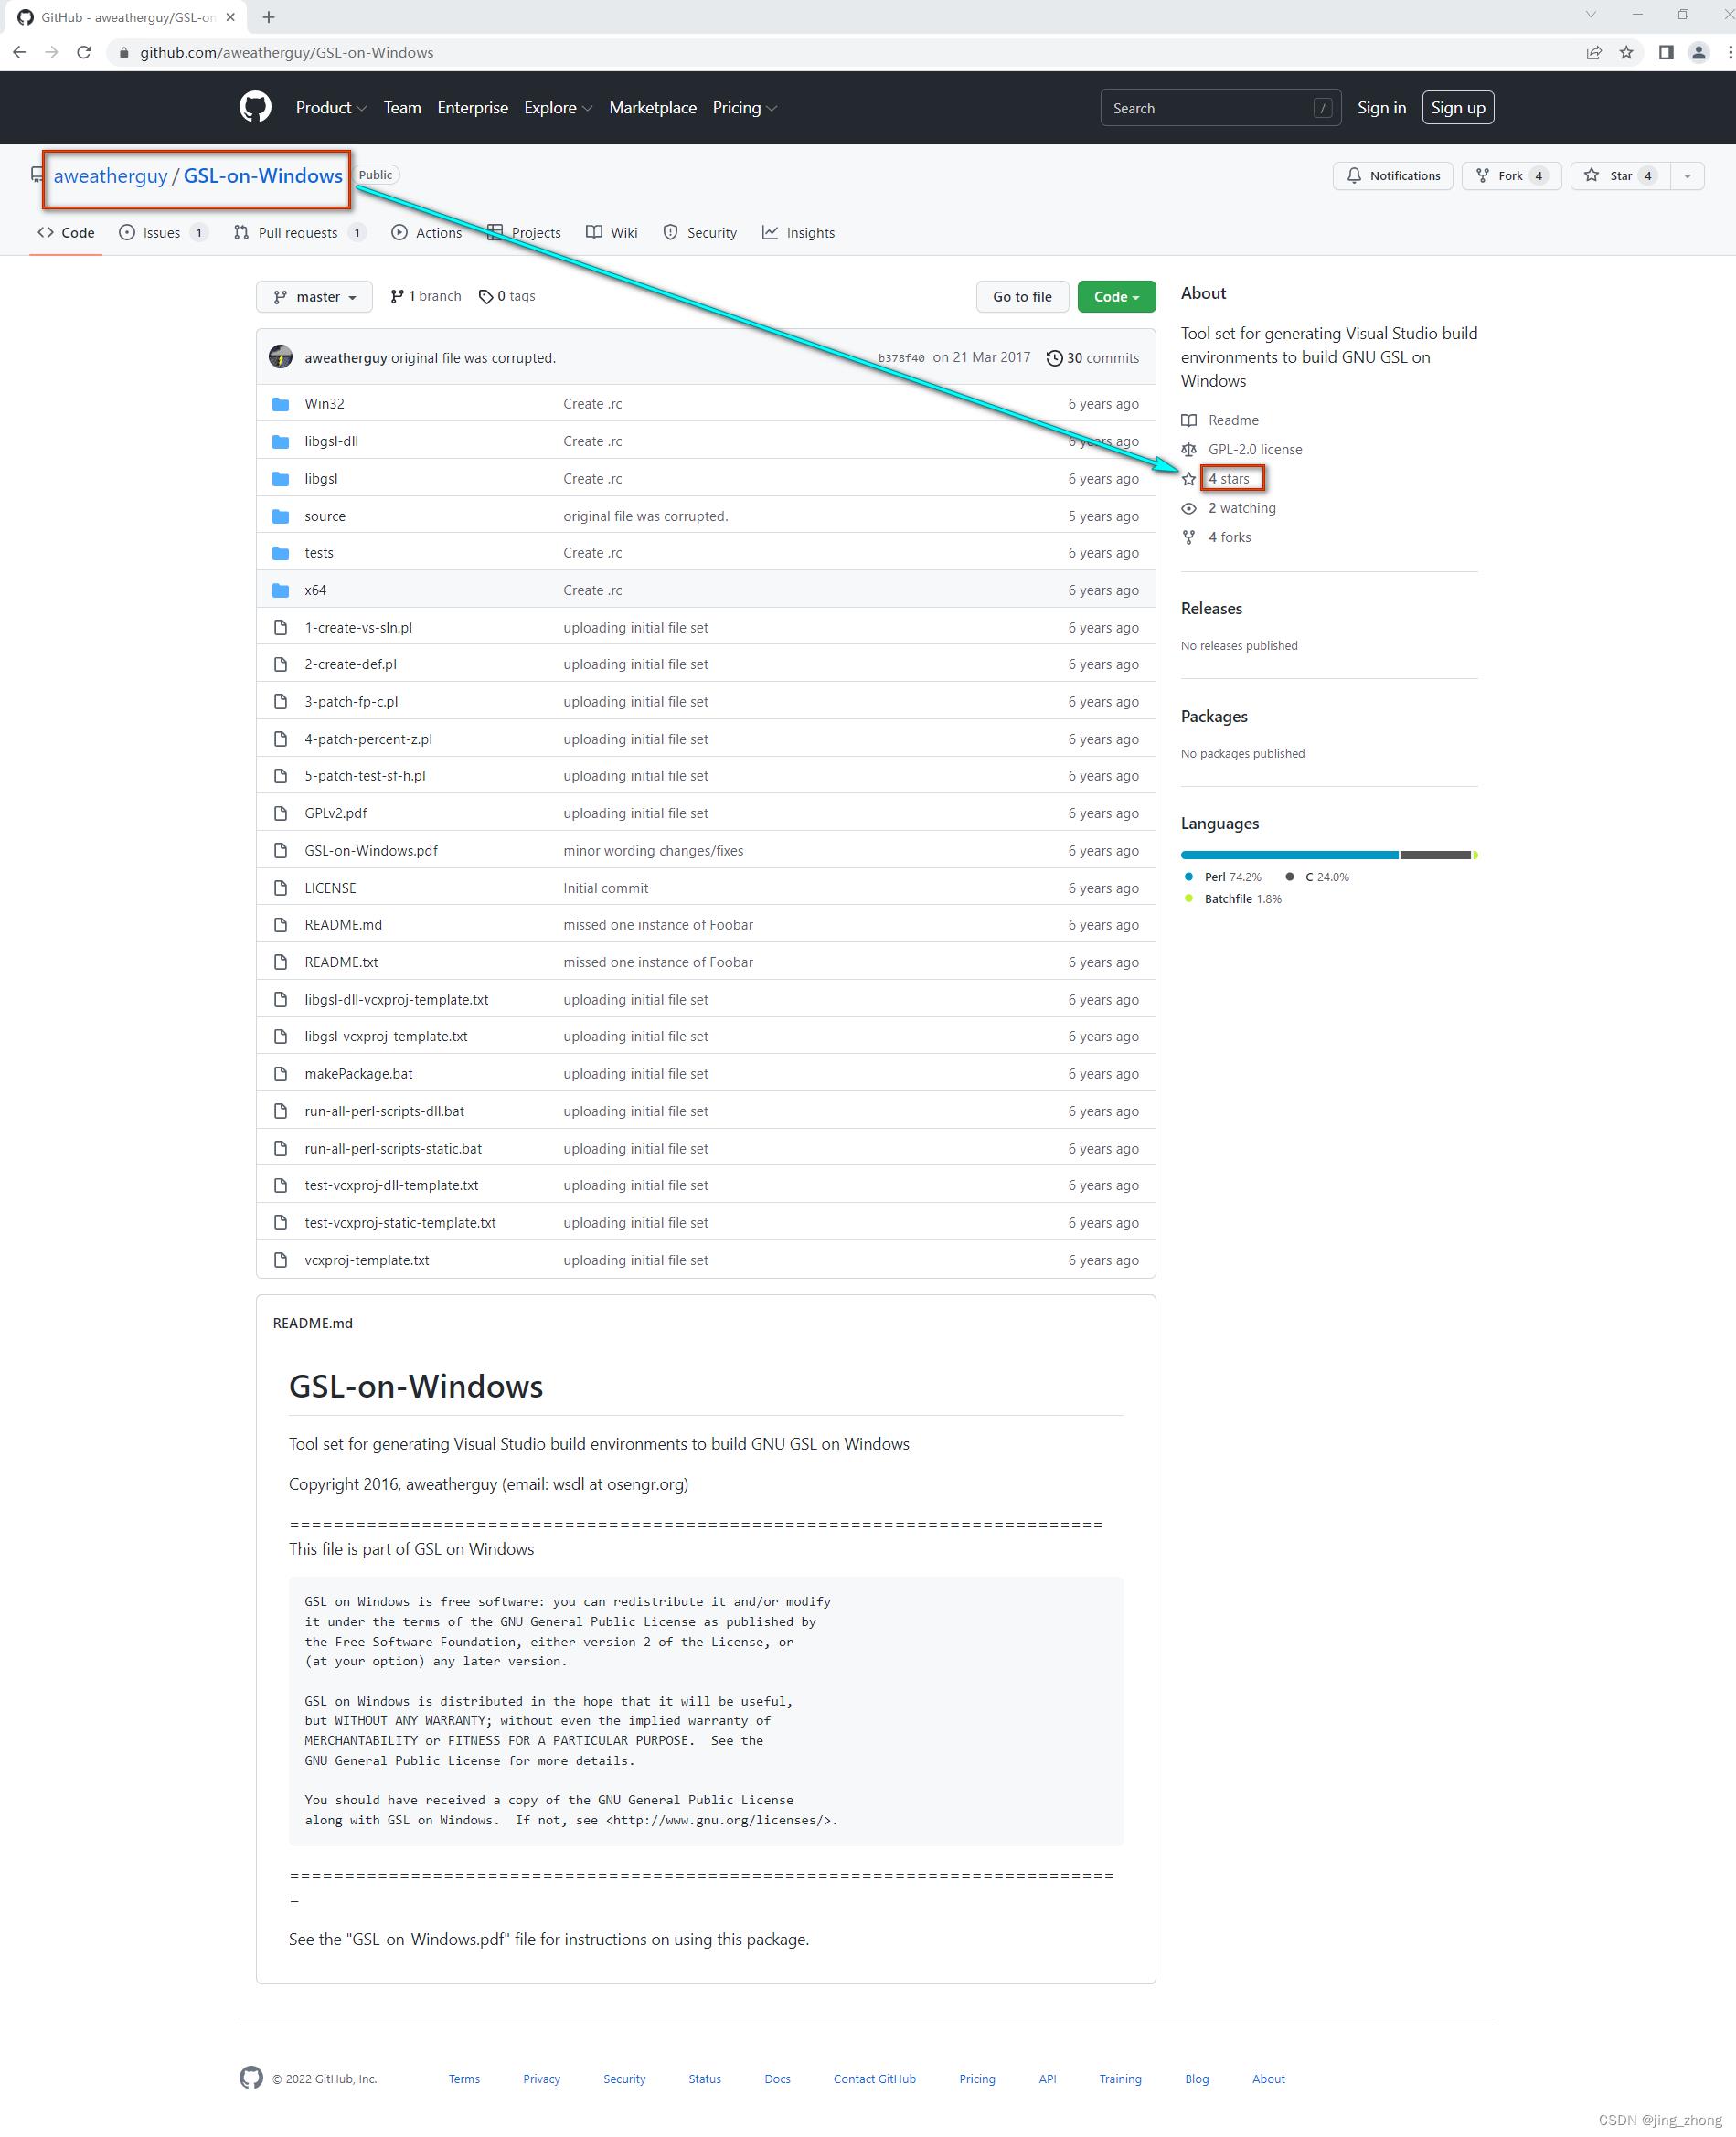
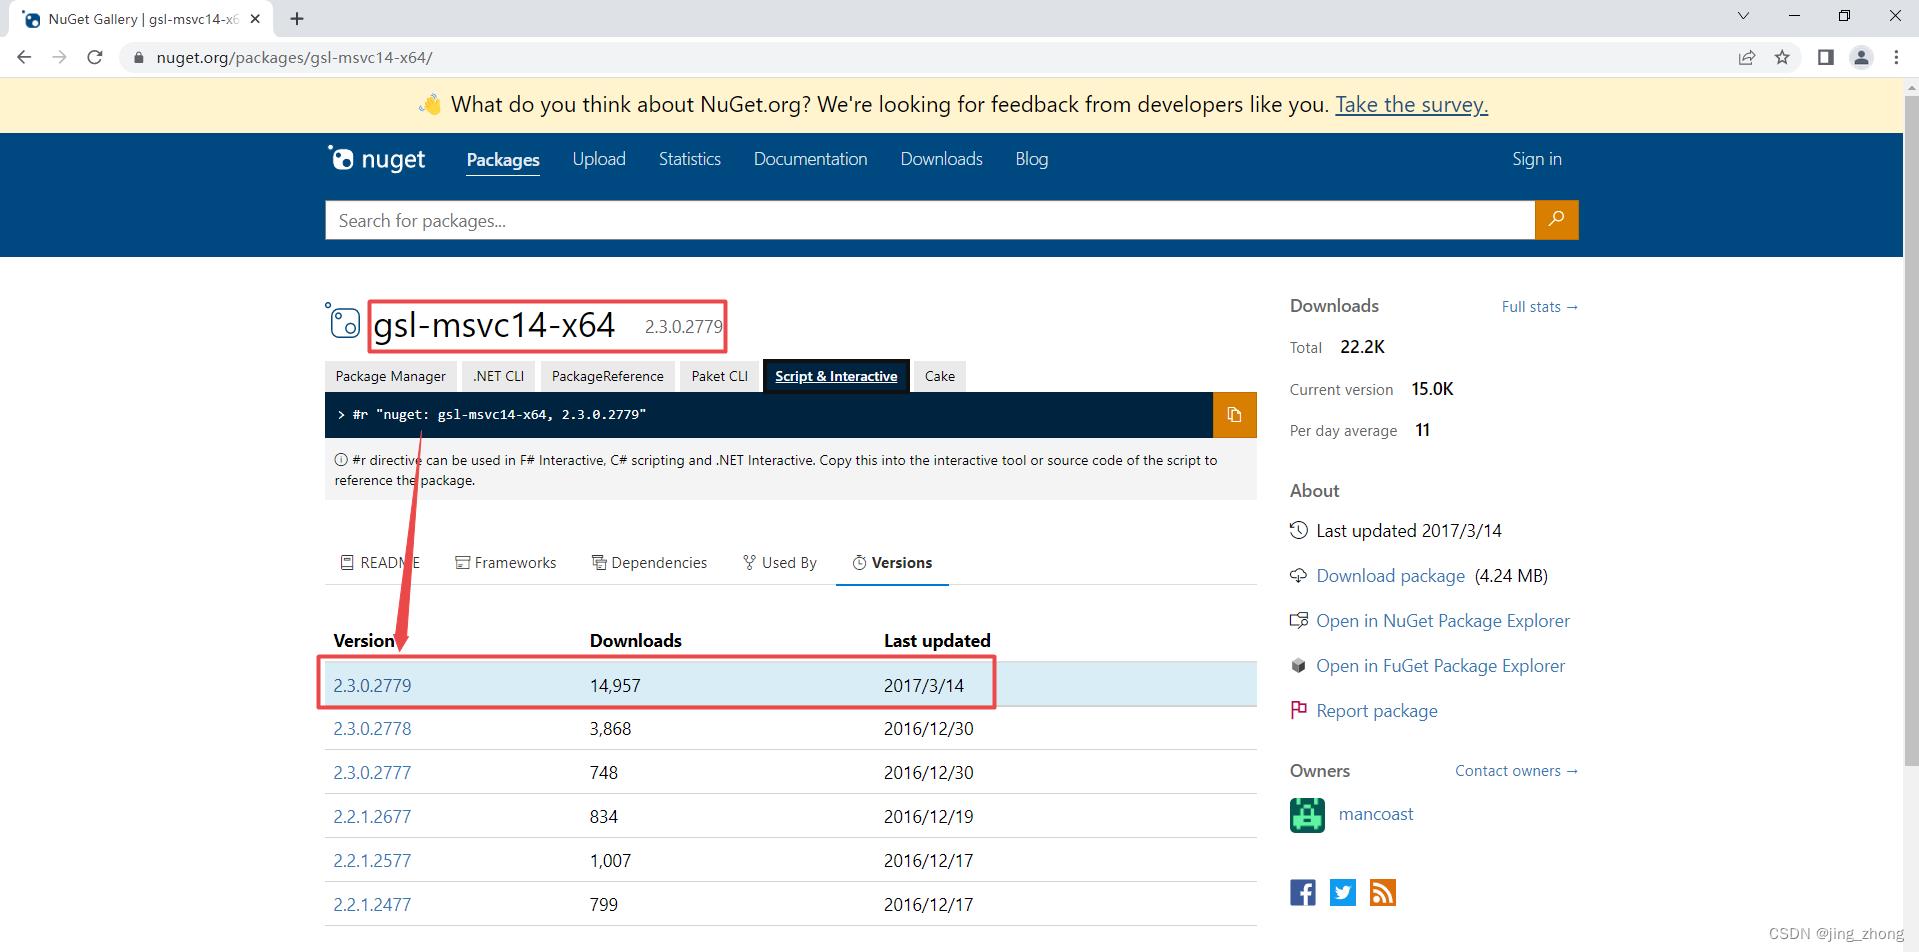
另外GSL官网也明确指出一些开发者提供了一些方法可轻松地在Windows平台上构建GSL库,详情见Building GSL on Windows Using Native Tools中的四种方法。个人感觉前两种方法过于陈旧,而NuGet安装包的方法版本只到GSL2.3.0,如果觉得版本还可以接受则可采用;个人感觉基于CMake的方法可以尝试,毕竟其Star数不少。

| 
|
| 
|
曾经的开发者们尽管采用了众多方法在Windows上构建GSL库,但这些方法已经编译的GSL库版本太低,没有及时更新,或许无法满足个人对新版本GSL库的需求,因此还是需要自己动手编译最新版本的GSL库(看个人喜好)。
2、Windows下利用MSYS2编译GSL库
2.1 MSYS2 简介
MSYS2并不是“一个统治所有人的工具”,而是试图专注于它擅长的东西。它提供了一个基于开源软件的本地构建环境,当用户已经熟悉Linux时,它会让您感到宾至如归。有充分的理由在Windows上为不同的任务使用多种不同的环境和工具。MSYS2是一个工具和库的集合,能为构建、安装和运行本机Windows软件提供一个易于使用的Linux环境。它包括一个名为mintty、bash的命令行终端、git和subversion等版本控制系统、tar和awk等工具,甚至还有autotools等构建系统,所有这些都是基于Cygwin的修改版本。尽管其中一些核心部件基于Cygwin,但MSYS2的重点是为本机Windows软件提供构建环境,并且使用Cygwin的部件保持在最低限度。
MSYS2的包管理器为pacman。MSYS2软件发行版使用pacman来管理(安装、删除和更新)二进制软件包,并首先构建这些软件包。MSYS2中的包与流行的Linux发行版中的包类似。软件包是包含一段软件的存档,这通常意味着可执行文件、运行库、数据、共享和静态链接库、头文件、配置文件和手册页。软件包还包含元数据,如软件名称、用途描述、版本号、供应商、校验和,以及软件正常运行所需的依赖项列表。
MSYS2为GCC、mingw-w64、CPython、CMake、Meson、OpenSSL、FFmpeg、Rust、Ruby等提供了最新的本机版本。为了方便安装软件包并保持更新,它提供了一个名为Pacman的软件包管理系统,Arch Linux用户应该熟悉该系统。它带来了许多强大的功能,如依赖解析和简单的完整系统升级,以及直接和可复制的包构建,软件包存储库包含2500多个准备安装的预构建软件包。安装后,包含的文件将被提取到MSYS2安装目录中,元数据存储在本地数据库中。它有6个软件包存储库,如经典的msys2、mingw32和mingw64,以及更新的ucrt64、clang32和clang64。msys2中的包与Linux发行版中的包一样命名,其他版本中的包的前缀为mingw-w64-i686(适用于32位包)或mingw-w64-x86_64(适用于带有辅助前缀clang或ucrt的64位包)。
2.2 Windows系统安装MSYS2

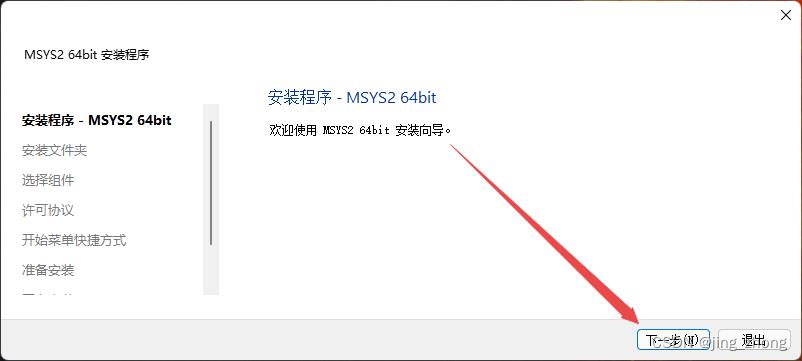
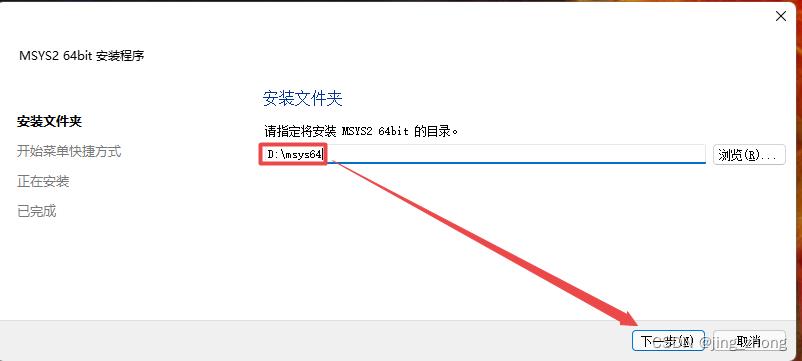
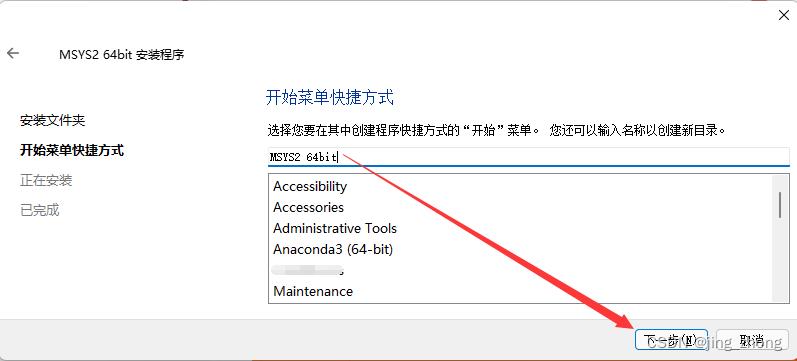
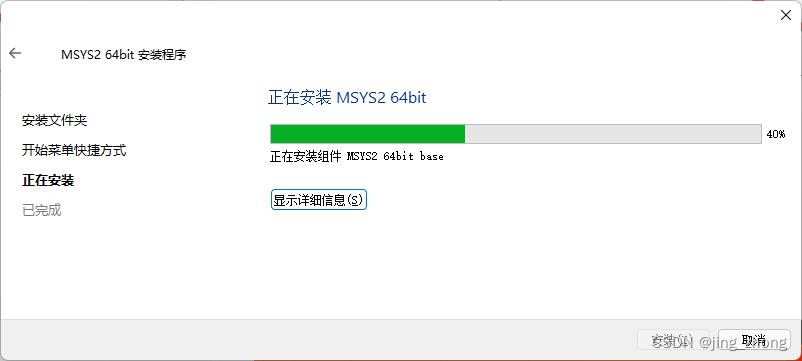
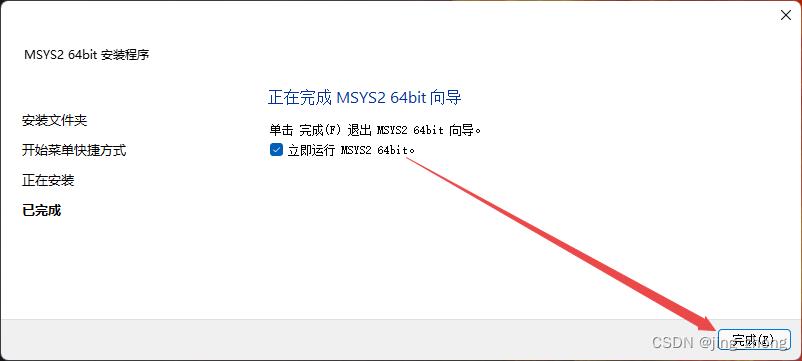
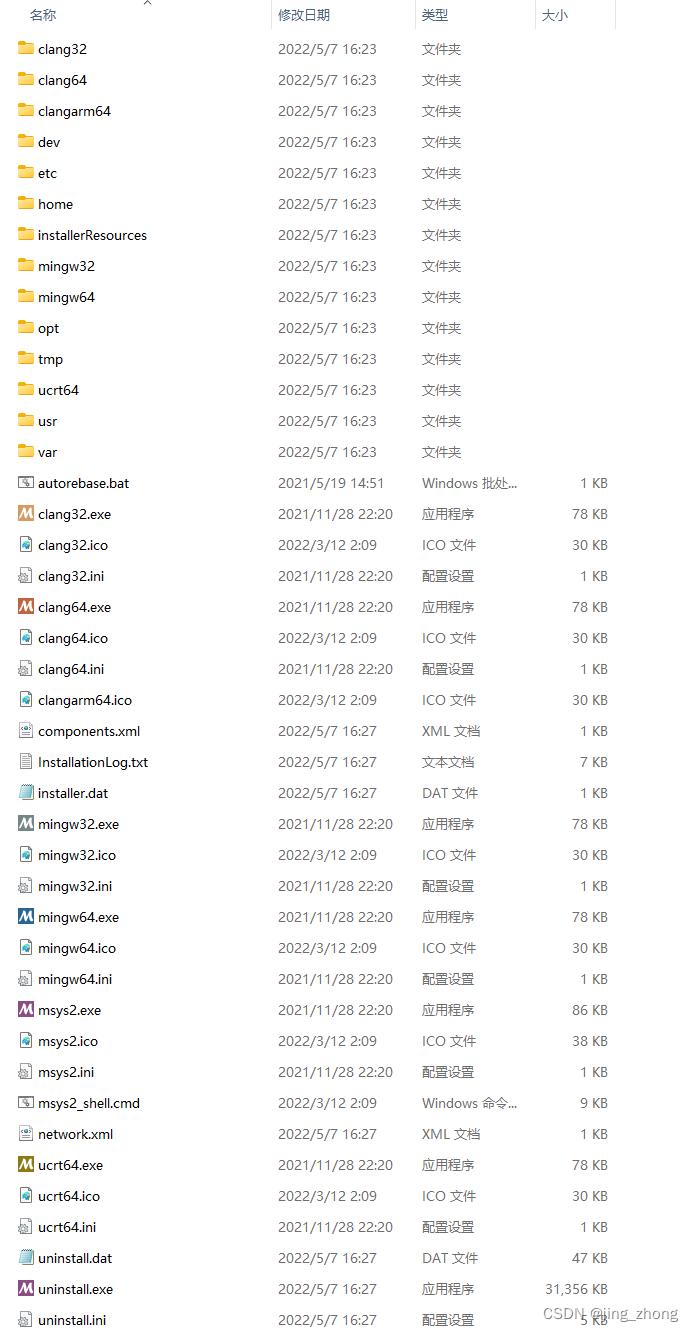
首先到MSYS2官网下载安装包msys2-x86_64-20220503.exe,双击进行安装,在安装程序窗口点击下一步,选择安装文件夹为D:\\msys64后直接安装即可。
 |  |
 |  |
 | |
| 
|
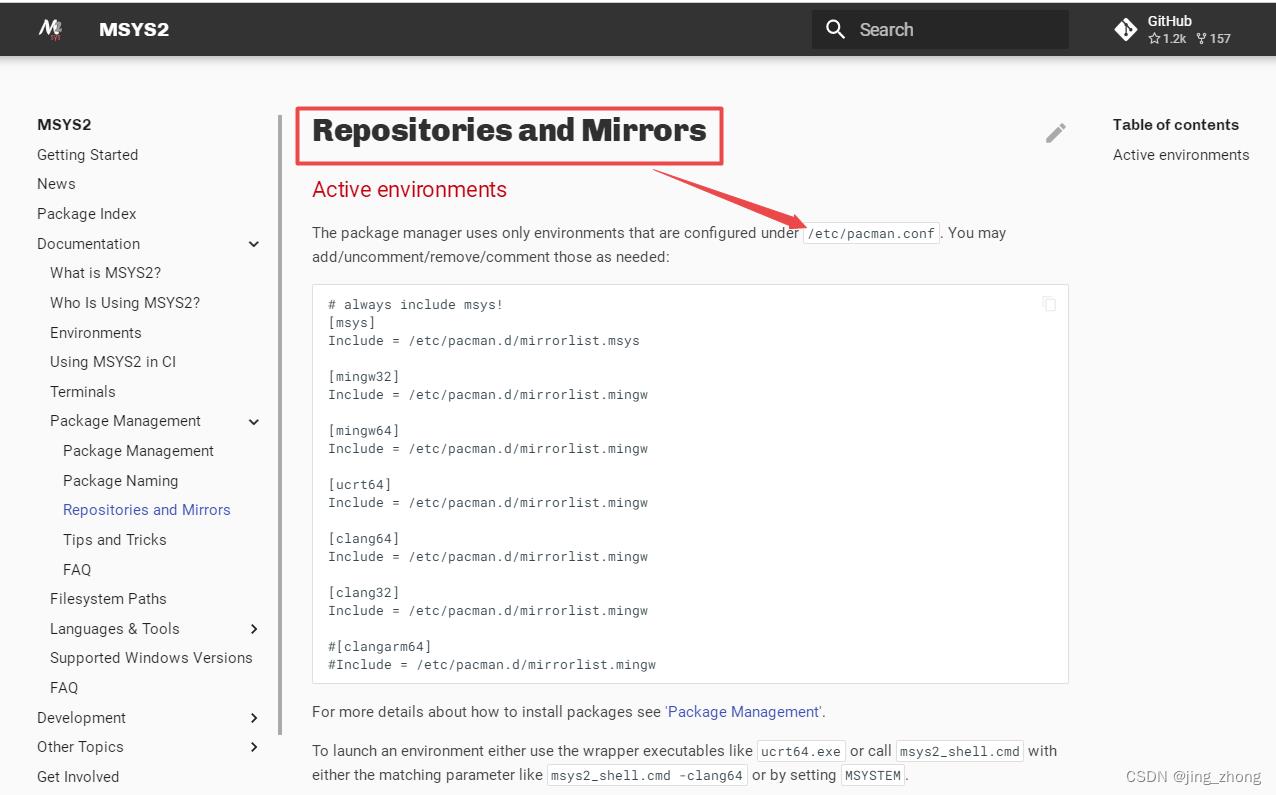
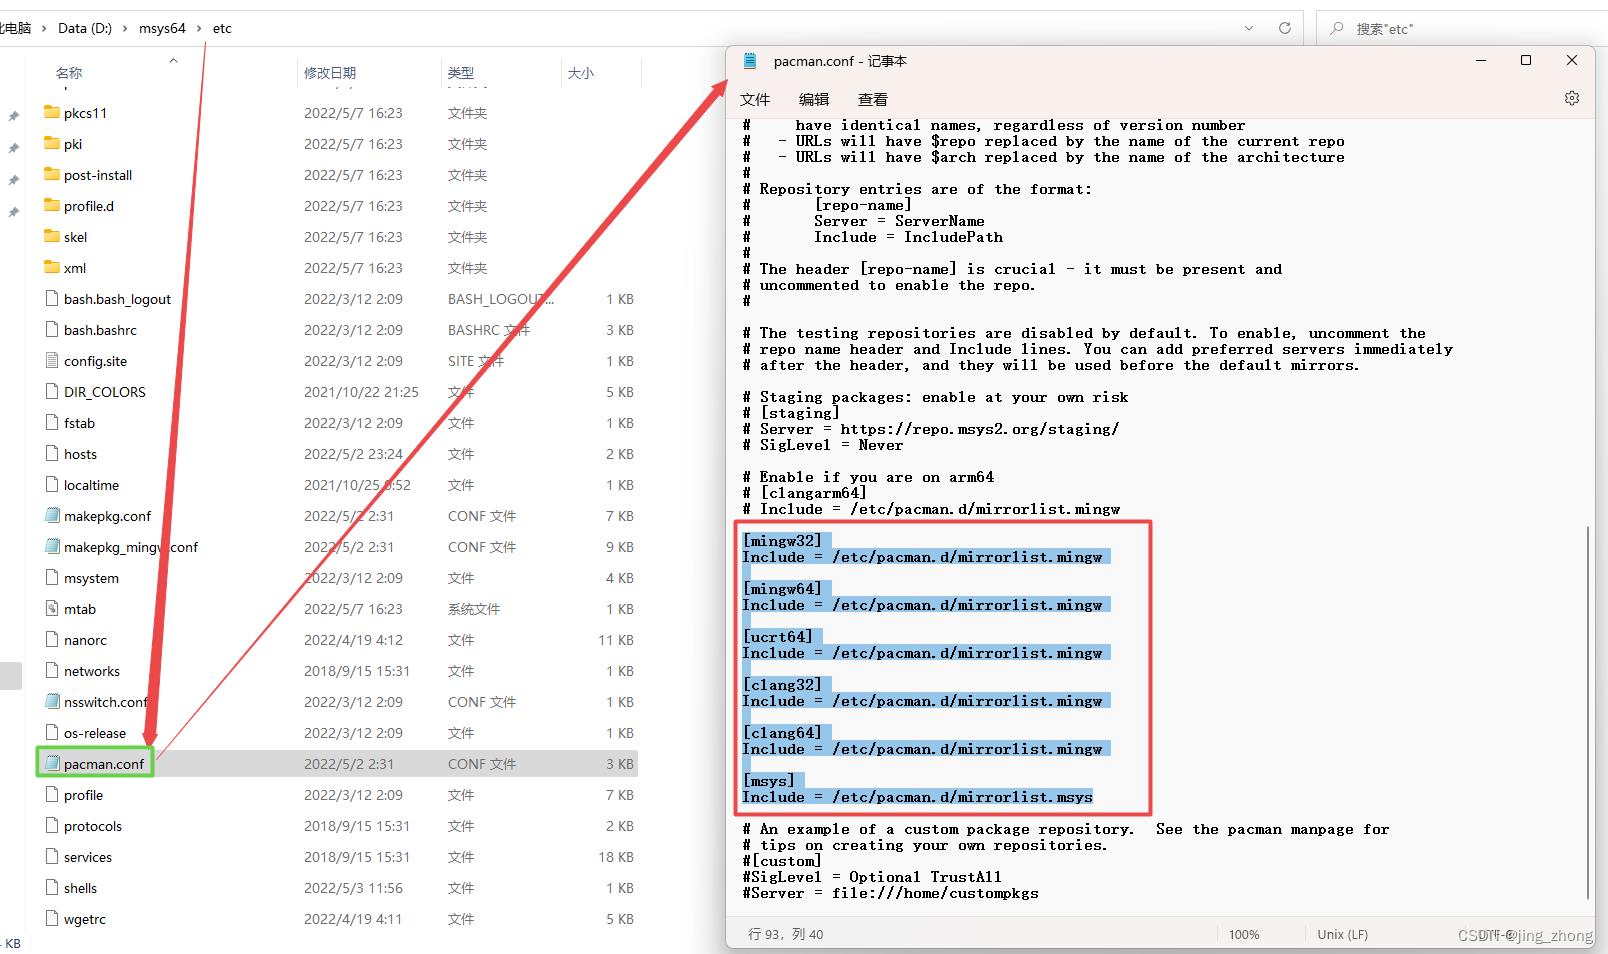
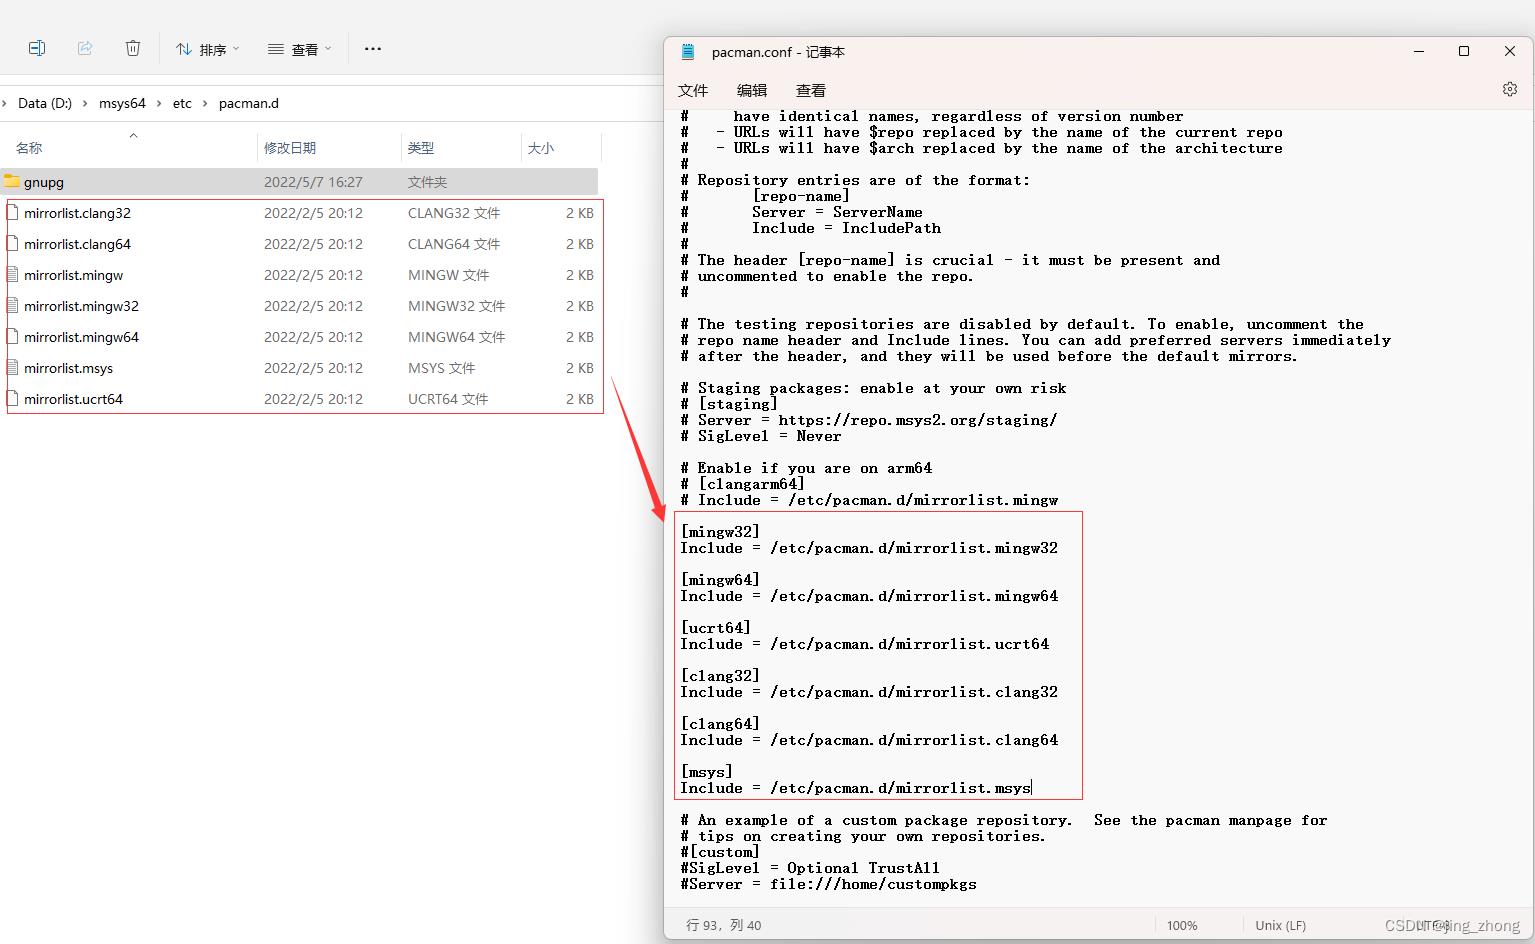
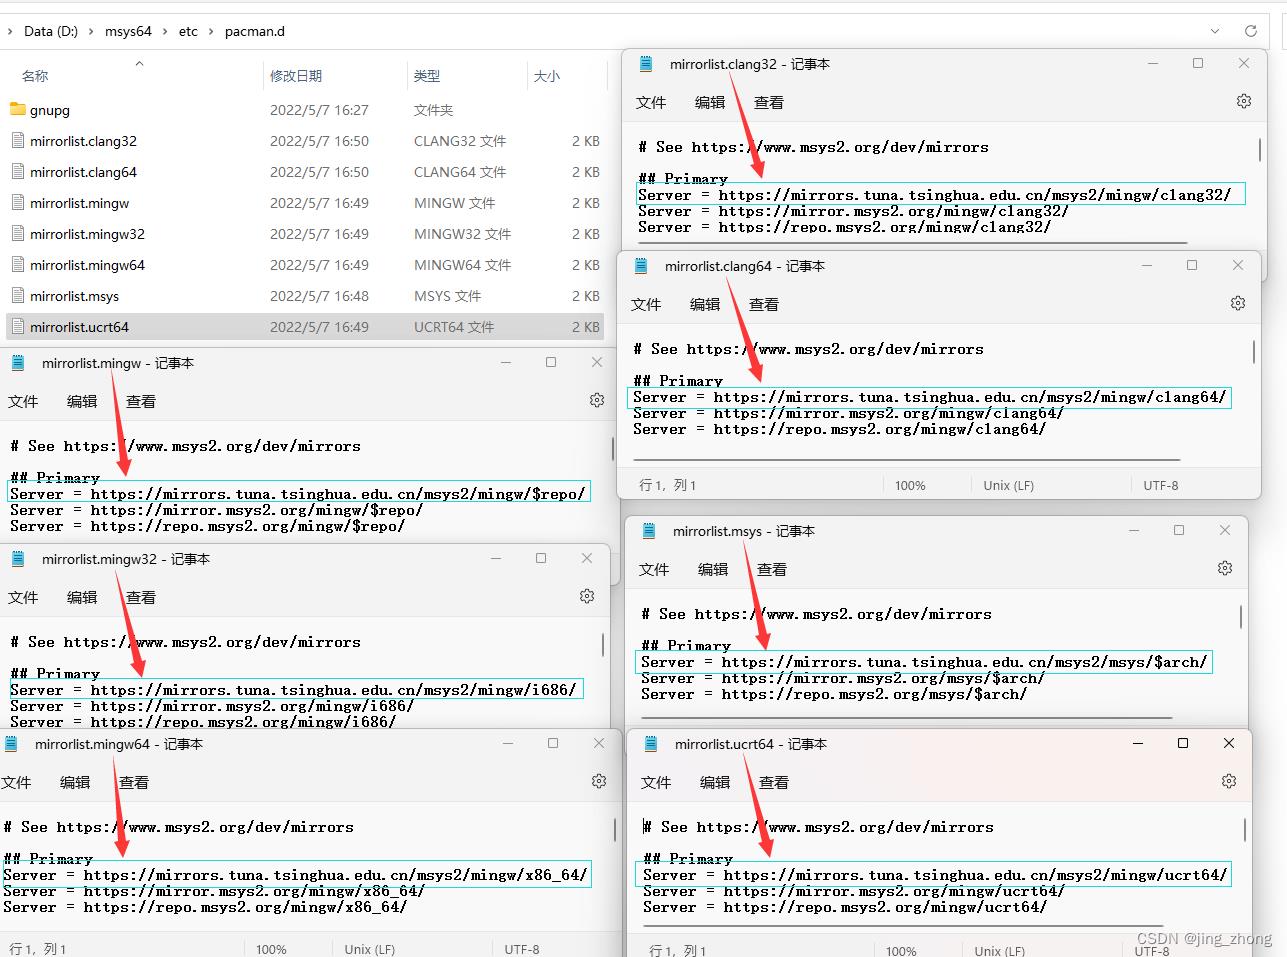
安装完成后,由于MSYS2需要安装依赖库,考虑到网络访问等原因,将MSYS2镜像改为清华源镜像,也就是说,所有依赖库都优先从国内清华源镜像网站下载。具体设置步骤为:(1)打开/etc/pacman.conf文件,分别设置mingw32、mingw64、ucrt64、clang32、clang64、msys的Include路径为各自对应的/etc/pacman.d下的mirrorlist文件名;(2)分别打开这6个mirrorlist文件,将清华源镜像网址放在第一行,如下图所示。
 |  |
 |  |
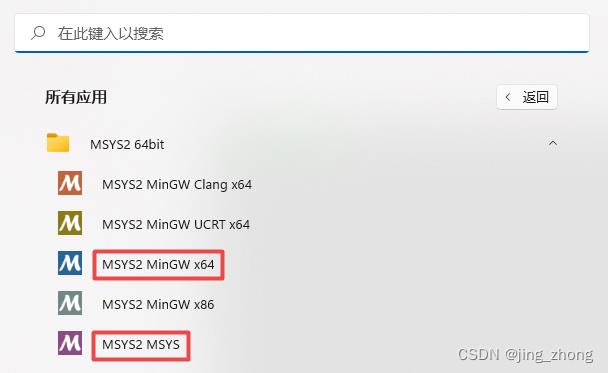
然后为了在MSYS2中安装相关的依赖,打开开始菜单,可以看到MSYS 2 64bit文件夹下有5个快捷方式,运行MSUS2 MSYS后弹出bash窗口,依次输入如下命令:
pacman -help
pacman -Syu
pacman -Syu
pacman -Su
pacman -S mingw-w64-x86_64-gcc
pacman -S make
pacman -S vim
pacman -S git
pacman -S python
pacman -S winpty
which g++
which gcc
which make
which vim
which git
which python
which winpty
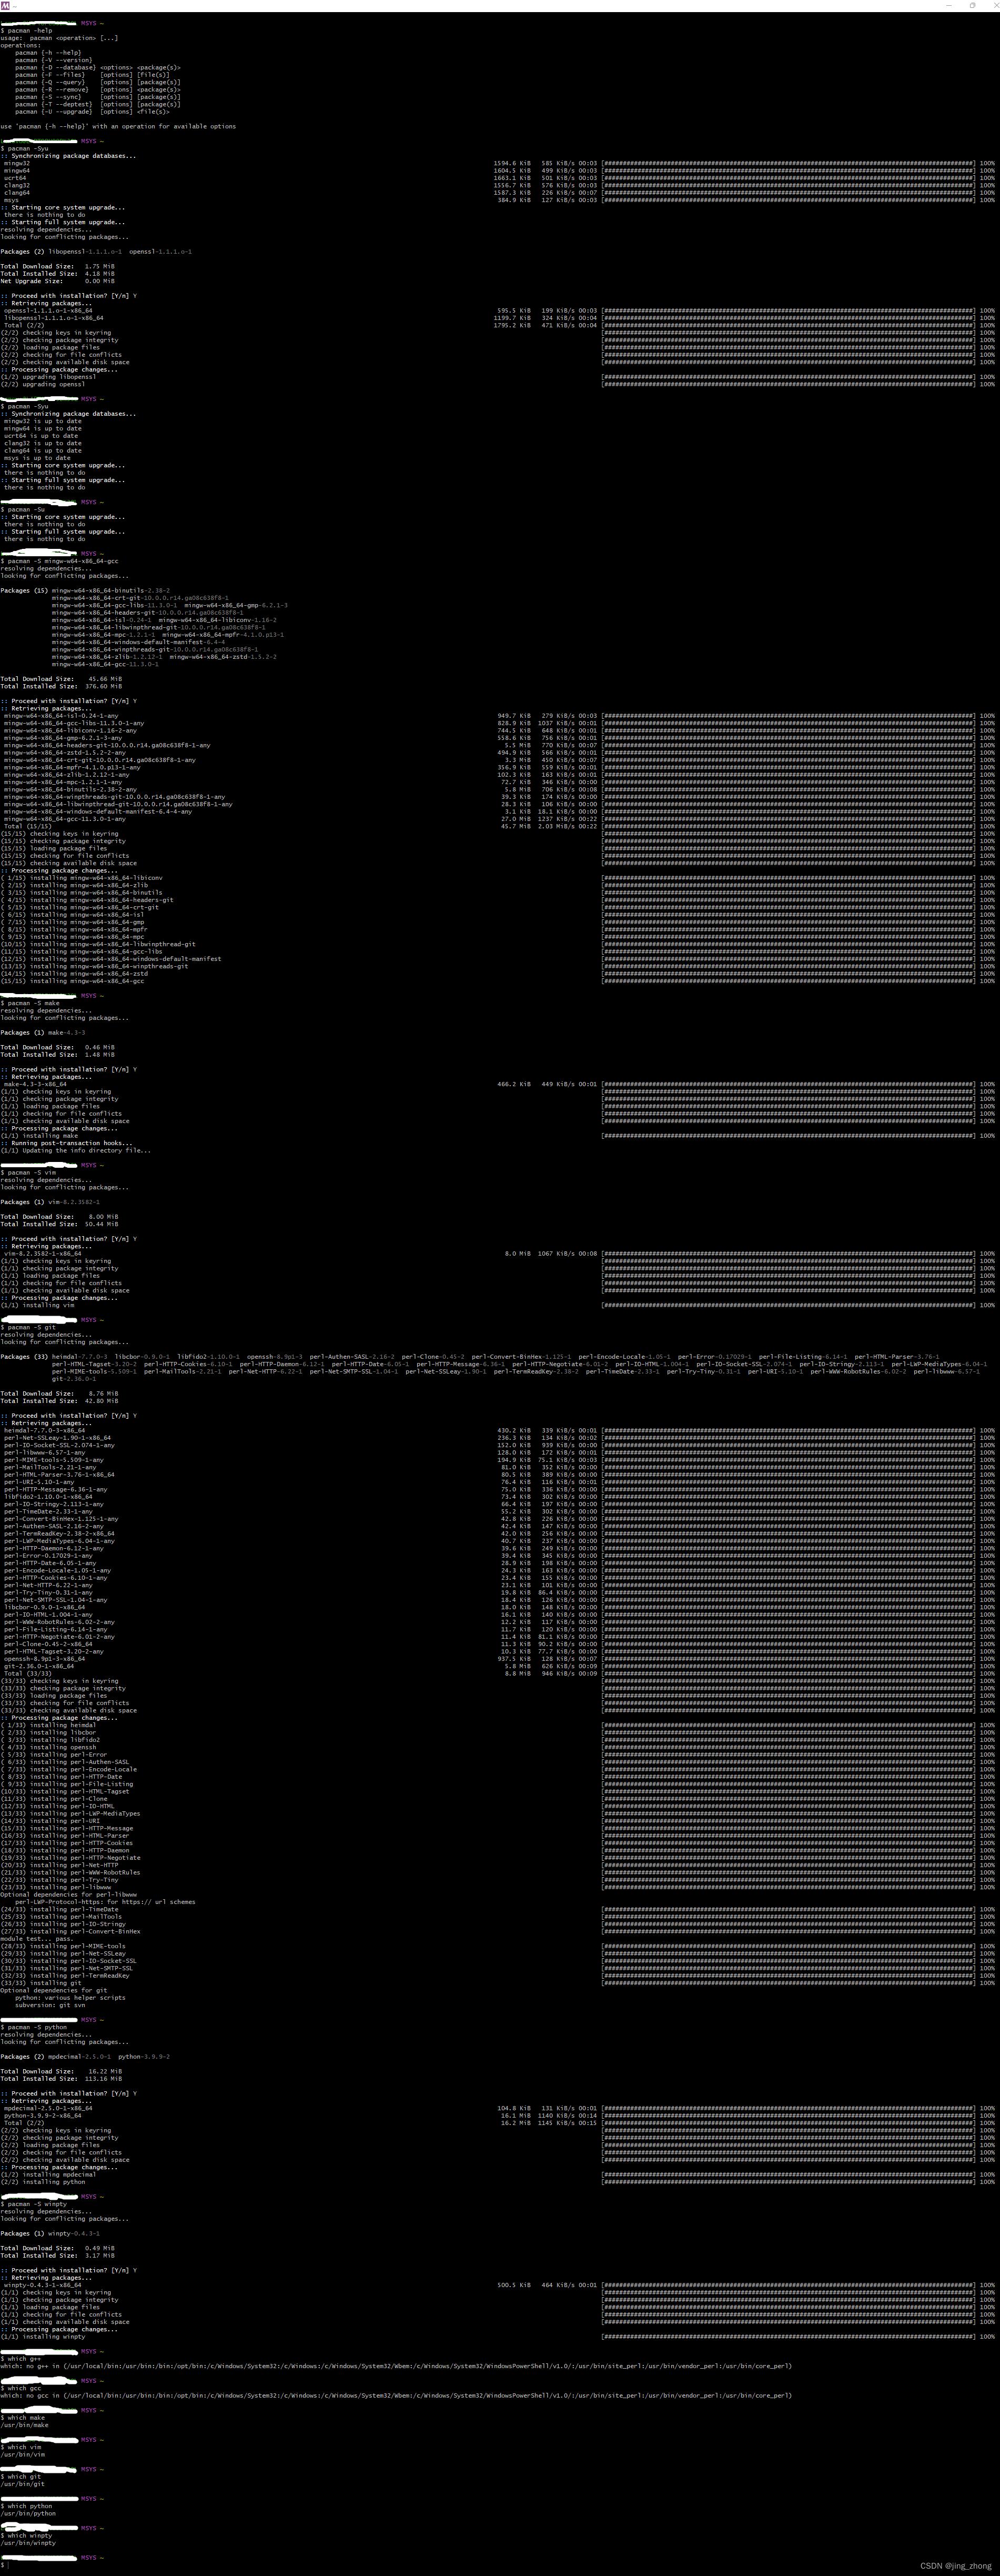
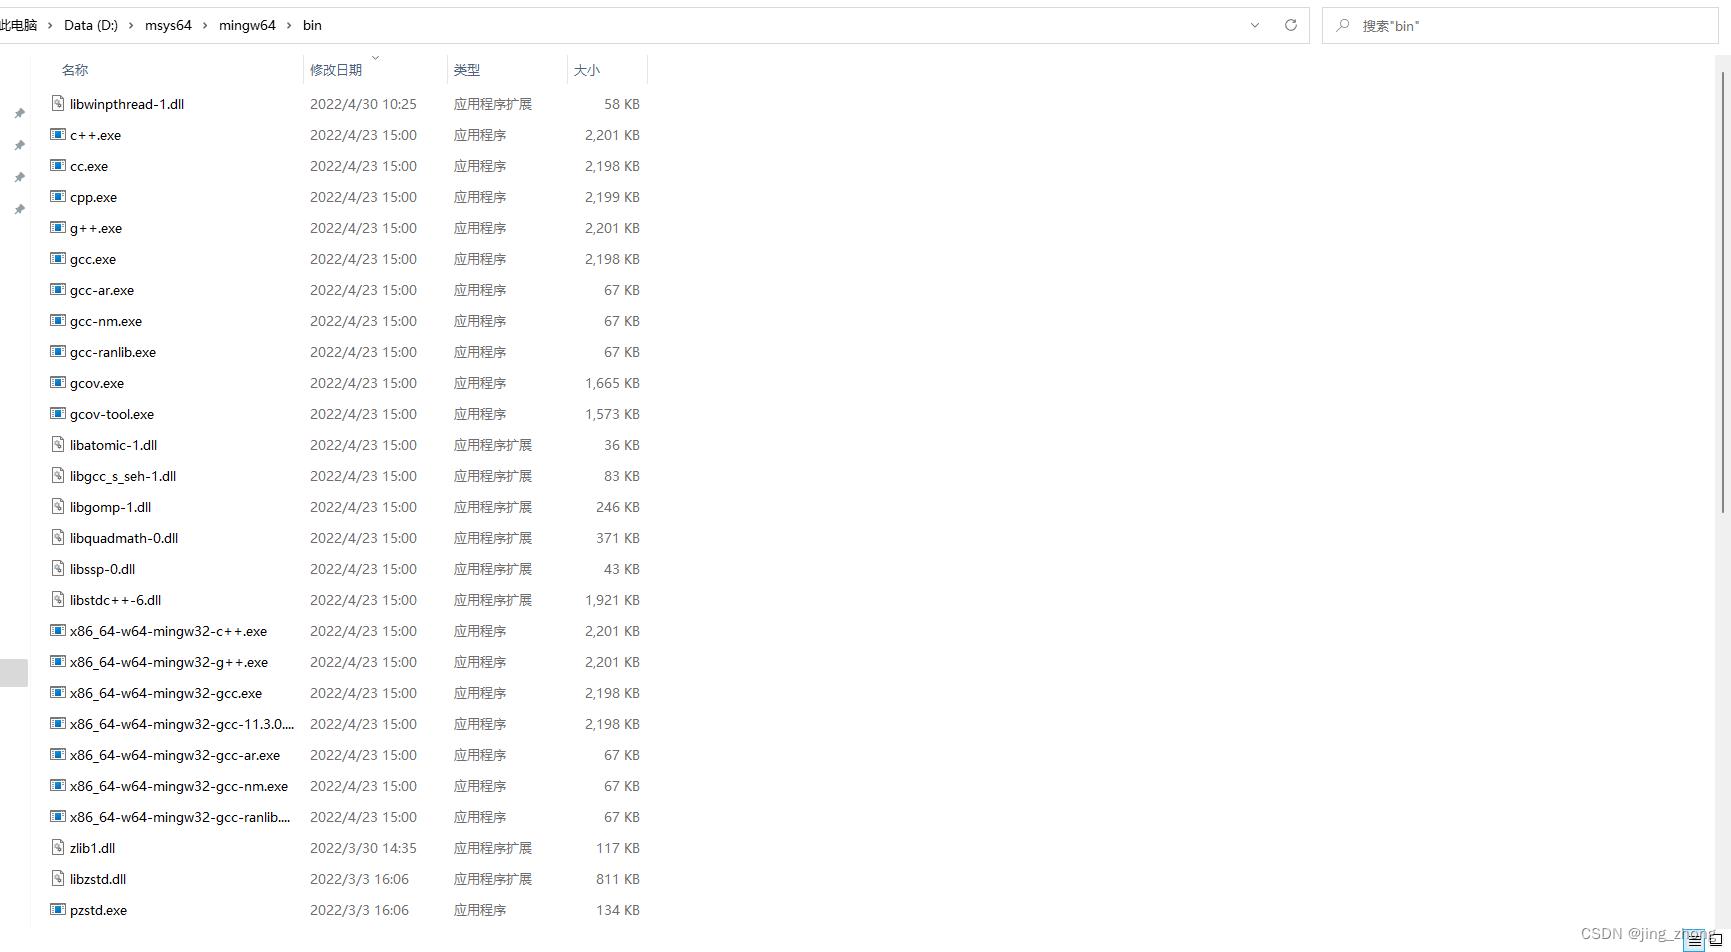
现在MSYS2的基本环境就搭建好了,如下图所示,在D:\\msys64\\mingw64\\bin文件夹下可以看到有c++.exe、g++.exe、gcc.exe和一些dll等文件,这也能表明mingw64下的gcc环境搭建成功。
2.3 下载GSL源码进行编译构建

在MSYS2环境搭建成功后,为了编译GSL源码,首先需要获得GSL较新版本的源码,下载gsl-2.7.tar.gz压缩包并解压,解压后的文件夹为D:\\搜狗高速下载\\gsl-2.7\\gsl-2.7,该文件夹下的文件如图所示,其中需要重点关注两个文件:INSTALL文件和README文件,可以选中文件点击鼠标右键选择用记事本打开查看文件内容。

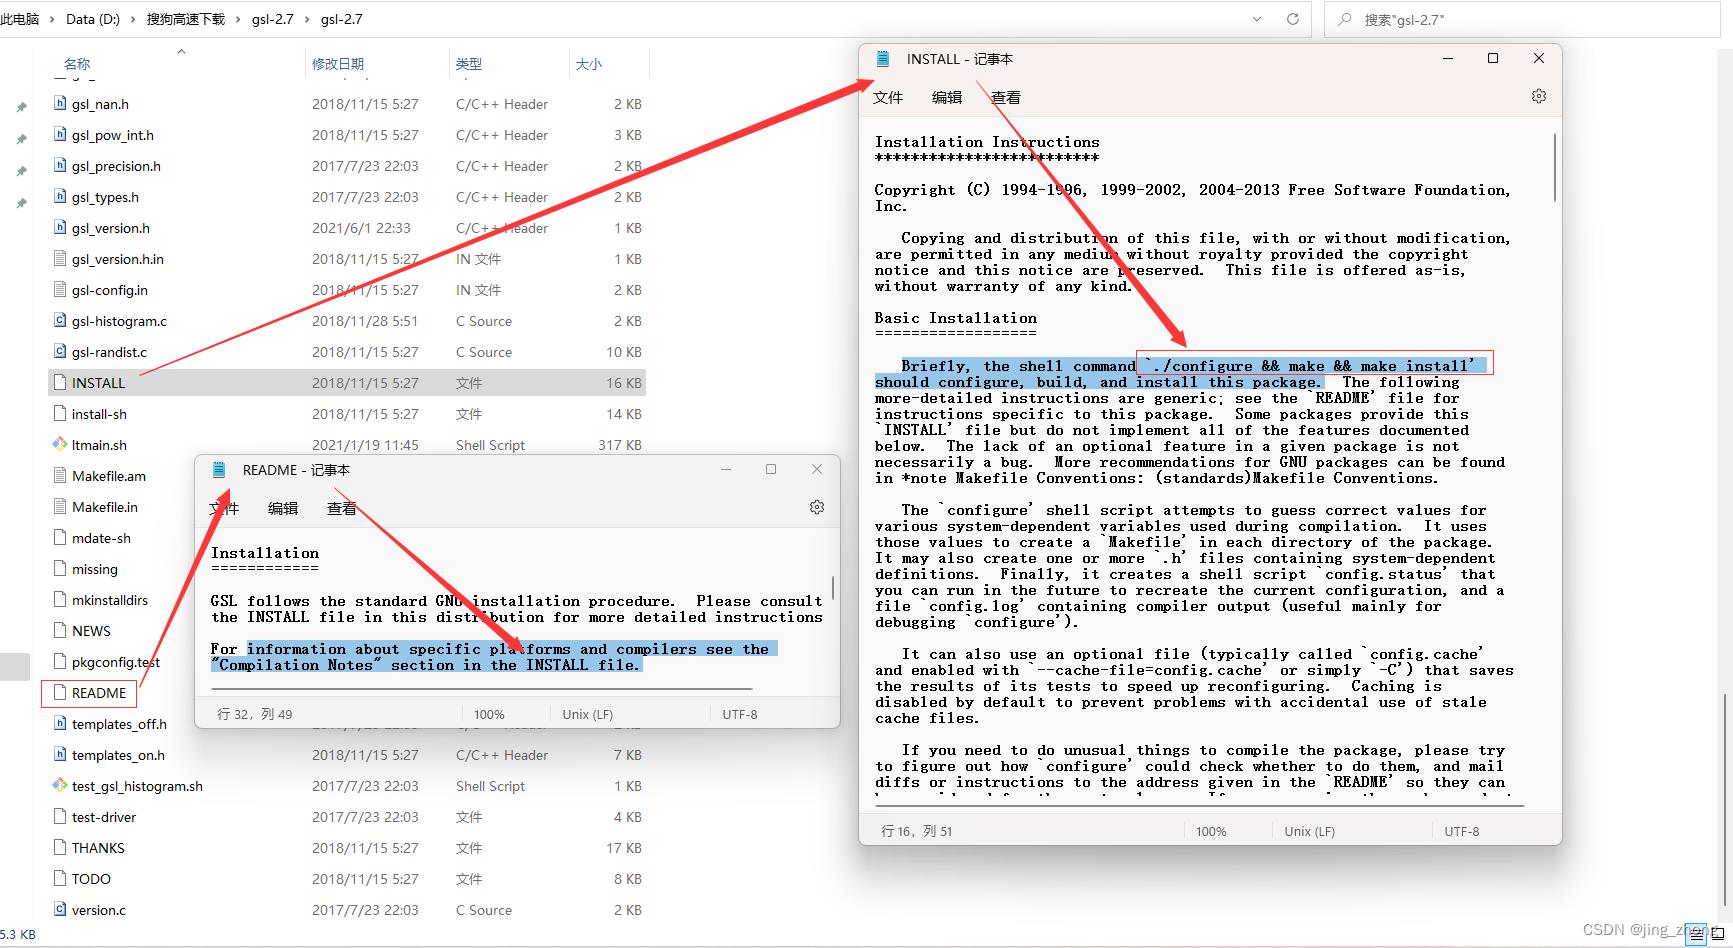 | 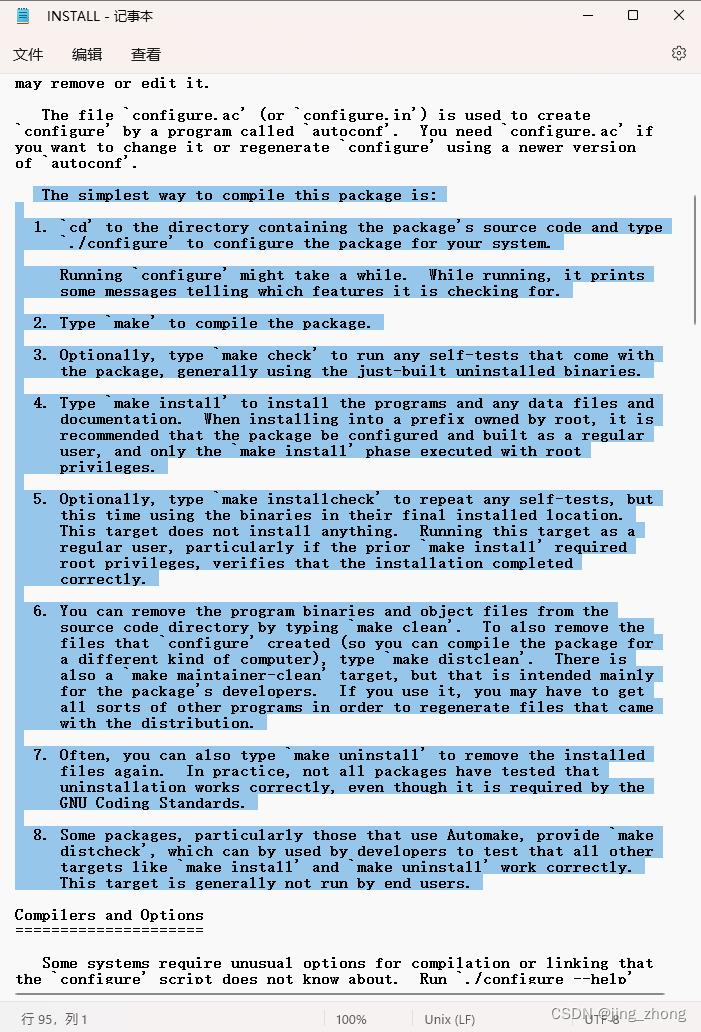 | 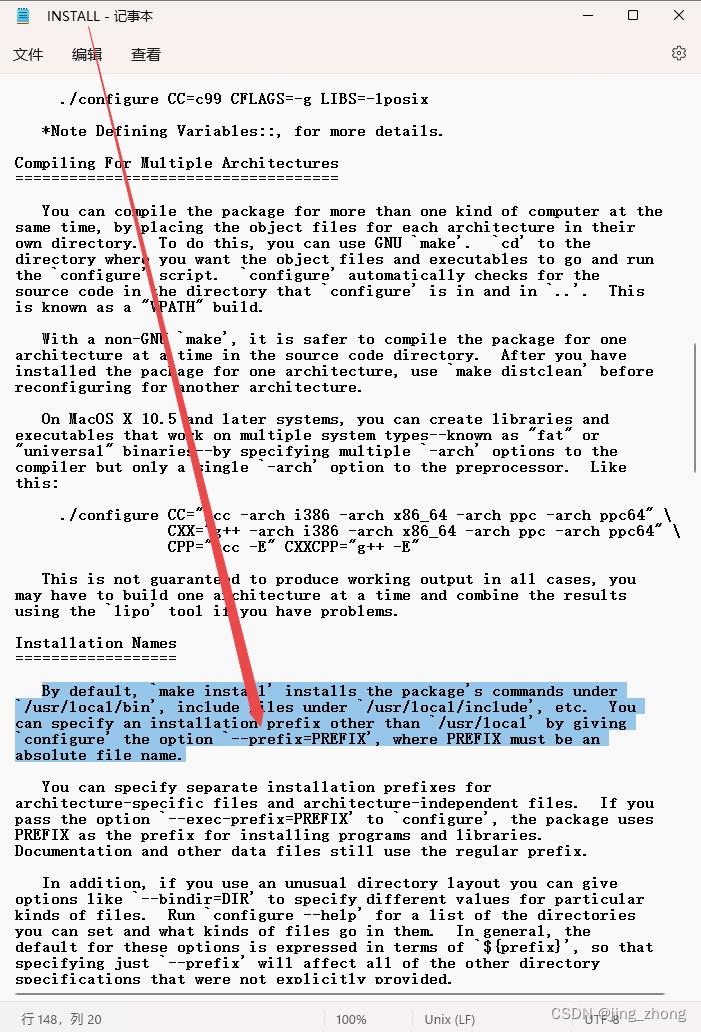 |

通过查看INSTALL和README这两个文件中的说明内容,可知GSL的编译最好使用gcc编译器,需要依次输入./configure、make、make install这三个命令来完成GSL的编译、构建和安装。如果直接使用上述三个命令,那么默认会将GSL编译后的bin、include文件放到/usr/local/bin和/usr/local/include目录下。为了将GSL安装到其他目录,这里新建文件夹D:\\搜狗高速下载\\gsl-2.7\\gsl-2.7-build作为GSL的安装目录,需要利用./configure --prefix=/D/搜狗高速下载/gsl-2.7/gsl-2.7-build命令来进行设置。具体的configure命令帮助如下,可参考:
$ ./configure --help
`configure' configures gsl 2.7 to adapt to many kinds of systems.

Usage: ./configure [OPTION]... [VAR=VALUE]...

To assign environment variables (e.g., CC, CFLAGS...), specify them as
VAR=VALUE.  See below for descriptions of some of the useful variables.

Defaults for the options are specified in brackets.

Configuration:
  -h, --help              display this help and exit
      --help=short        display options specific to this package
      --help=recursive    display the short help of all the included packages
  -V, --version           display version information and exit
  -q, --quiet, --silent   do not print `checking ...' messages
      --cache-file=FILE   cache test results in FILE [disabled]
  -C, --config-cache      alias for `--cache-file=config.cache'
  -n, --no-create         do not create output files
      --srcdir=DIR        find the sources in DIR [configure dir or `..']

Installation directories:
  --prefix=PREFIX         install architecture-independent files in PREFIX
                          [/usr/local]
  --exec-prefix=EPREFIX   install architecture-dependent files in EPREFIX
                          [PREFIX]

By default, `make install' will install all the files in
`/usr/local/bin', `/usr/local/lib' etc.  You can specify
an installation prefix other than `/usr/local' using `--prefix',
for instance `--prefix=$HOME'.

For better control, use the options below.

Fine tuning of the installation directories:
  --bindir=DIR            user executables [EPREFIX/bin]
  --sbindir=DIR           system admin executables [EPREFIX/sbin]
  --libexecdir=DIR        program executables [EPREFIX/libexec]
  --sysconfdir=DIR        read-only single-machine data [PREFIX/etc]
  --sharedstatedir=DIR    modifiable architecture-independent data [PREFIX/com]
  --localstatedir=DIR     modifiable single-machine data [PREFIX/var]
  --runstatedir=DIR       modifiable per-process data [LOCALSTATEDIR/run]
  --libdir=DIR            object code libraries [EPREFIX/lib]
  --includedir=DIR        C header files [PREFIX/include]
  --oldincludedir=DIR     C header files for non-gcc [/usr/include]
  --datarootdir=DIR       read-only arch.-independent data root [PREFIX/share]
  --datadir=DIR           read-only architecture-independent data [DATAROOTDIR]
  --infodir=DIR           info documentation [DATAROOTDIR/info]
  --localedir=DIR         locale-dependent data [DATAROOTDIR/locale]
  --mandir=DIR            man documentation [DATAROOTDIR/man]
  --docdir=DIR            documentation root [DATAROOTDIR/doc/gsl]
  --htmldir=DIR           html documentation [DOCDIR]
  --dvidir=DIR            dvi documentation [DOCDIR]
  --pdfdir=DIR            pdf documentation [DOCDIR]
  --psdir=DIR             ps documentation [DOCDIR]

Program names:
  --program-prefix=PREFIX            prepend PREFIX to installed program names
  --program-suffix=SUFFIX            append SUFFIX to installed program names
  --program-transform-name=PROGRAM   run sed PROGRAM on installed program names

System types:
  --build=BUILD     configure for building on BUILD [guessed]
  --host=HOST       cross-compile to build programs to run on HOST [BUILD]

Optional Features:
  --disable-option-checking  ignore unrecognized --enable/--with options
  --disable-FEATURE       do not include FEATURE (same as --enable-FEATURE=no)
  --enable-FEATURE[=ARG]  include FEATURE [ARG=yes]
  --enable-silent-rules   less verbose build output (undo: "make V=1")
  --disable-silent-rules  verbose build output (undo: "make V=0")
  --enable-maintainer-mode
                          enable make rules and dependencies not useful (and
                          sometimes confusing) to the casual installer
  --enable-dependency-tracking
                          do not reject slow dependency extractors
  --disable-dependency-tracking
                          speeds up one-time build
  --enable-shared[=PKGS]  build shared libraries [default=yes]
  --enable-static[=PKGS]  build static libraries [default=yes]
  --enable-fast-install[=PKGS]
                          optimize for fast installation [default=yes]
  --disable-libtool-lock  avoid locking (might break parallel builds)

Optional Packages:
  --with-PACKAGE[=ARG]    use PACKAGE [ARG=yes]
  --without-PACKAGE       do not use PACKAGE (same as --with-PACKAGE=no)
  --with-pic[=PKGS]       try to use only PIC/non-PIC objects [default=use
                          both]
  --with-aix-soname=aix|svr4|both
                          shared library versioning (aka "SONAME") variant to
                          provide on AIX, [default=aix].
  --with-gnu-ld           assume the C compiler uses GNU ld [default=no]
  --with-sysroot[=DIR]    Search for dependent libraries within DIR (or the
                          compiler's sysroot if not specified).

Some influential environment variables:
  CC          C compiler command
  CFLAGS      C compiler flags
  LDFLAGS     linker flags, e.g. -L<lib dir> if you have libraries in a
              nonstandard directory <lib dir>
  LIBS        libraries to pass to the linker, e.g. -l<library>
  CPPFLAGS    (Objective) C/C++ preprocessor flags, e.g. -I<include dir> if
              you have headers in a nonstandard directory <include dir>
  CPP         C preprocessor
  LT_SYS_LIBRARY_PATH
              User-defined run-time library search path.

Use these variables to override the choices made by `configure' or to help
it to find libraries and programs with nonstandard names/locations.

Report bugs to the package provider.
然后打开MSYS2 MinGW x64窗口,依次输入如下bash命令来编译GSL源码:
which gcc
which g++
gcc -v
g++ -v
cd /D/搜狗高速下载/gsl-2.7/gsl-2.7
./configure --help
./configure --prefix=/D/搜狗高速下载/gsl-2.7/gsl-2.7-build
make
make install
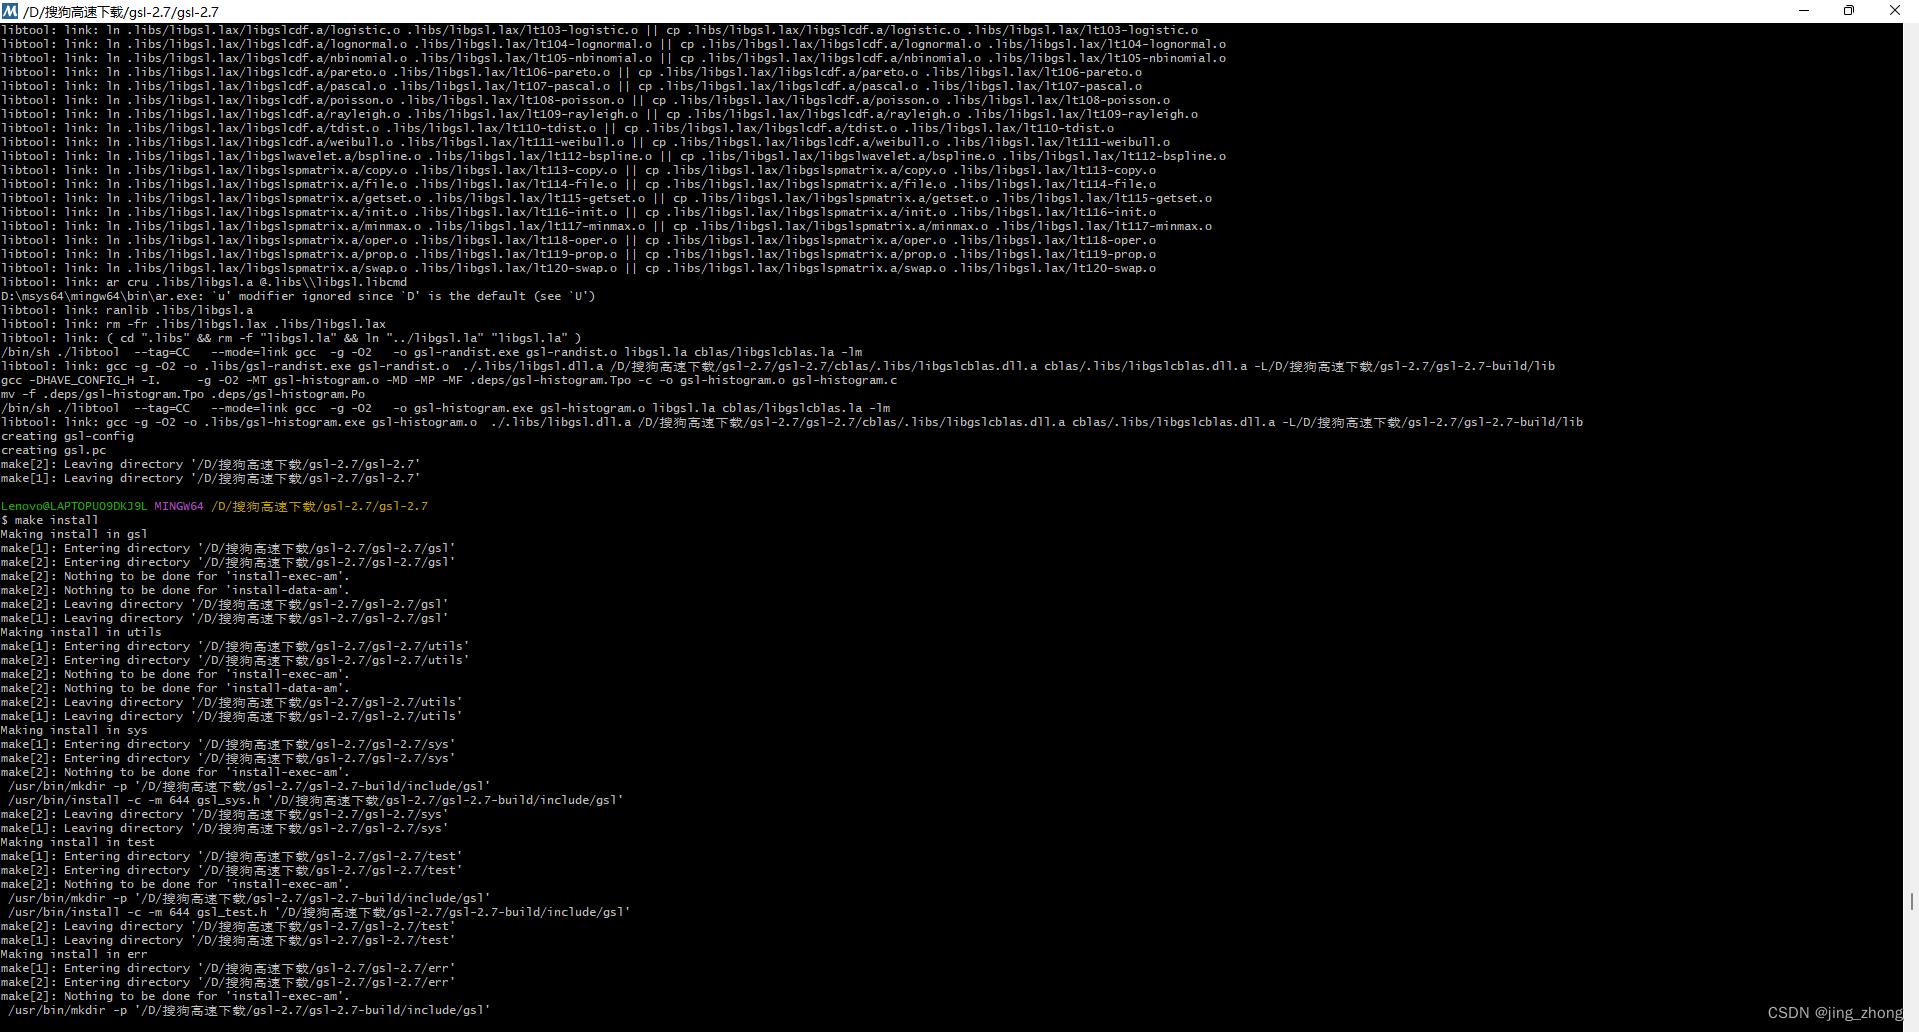
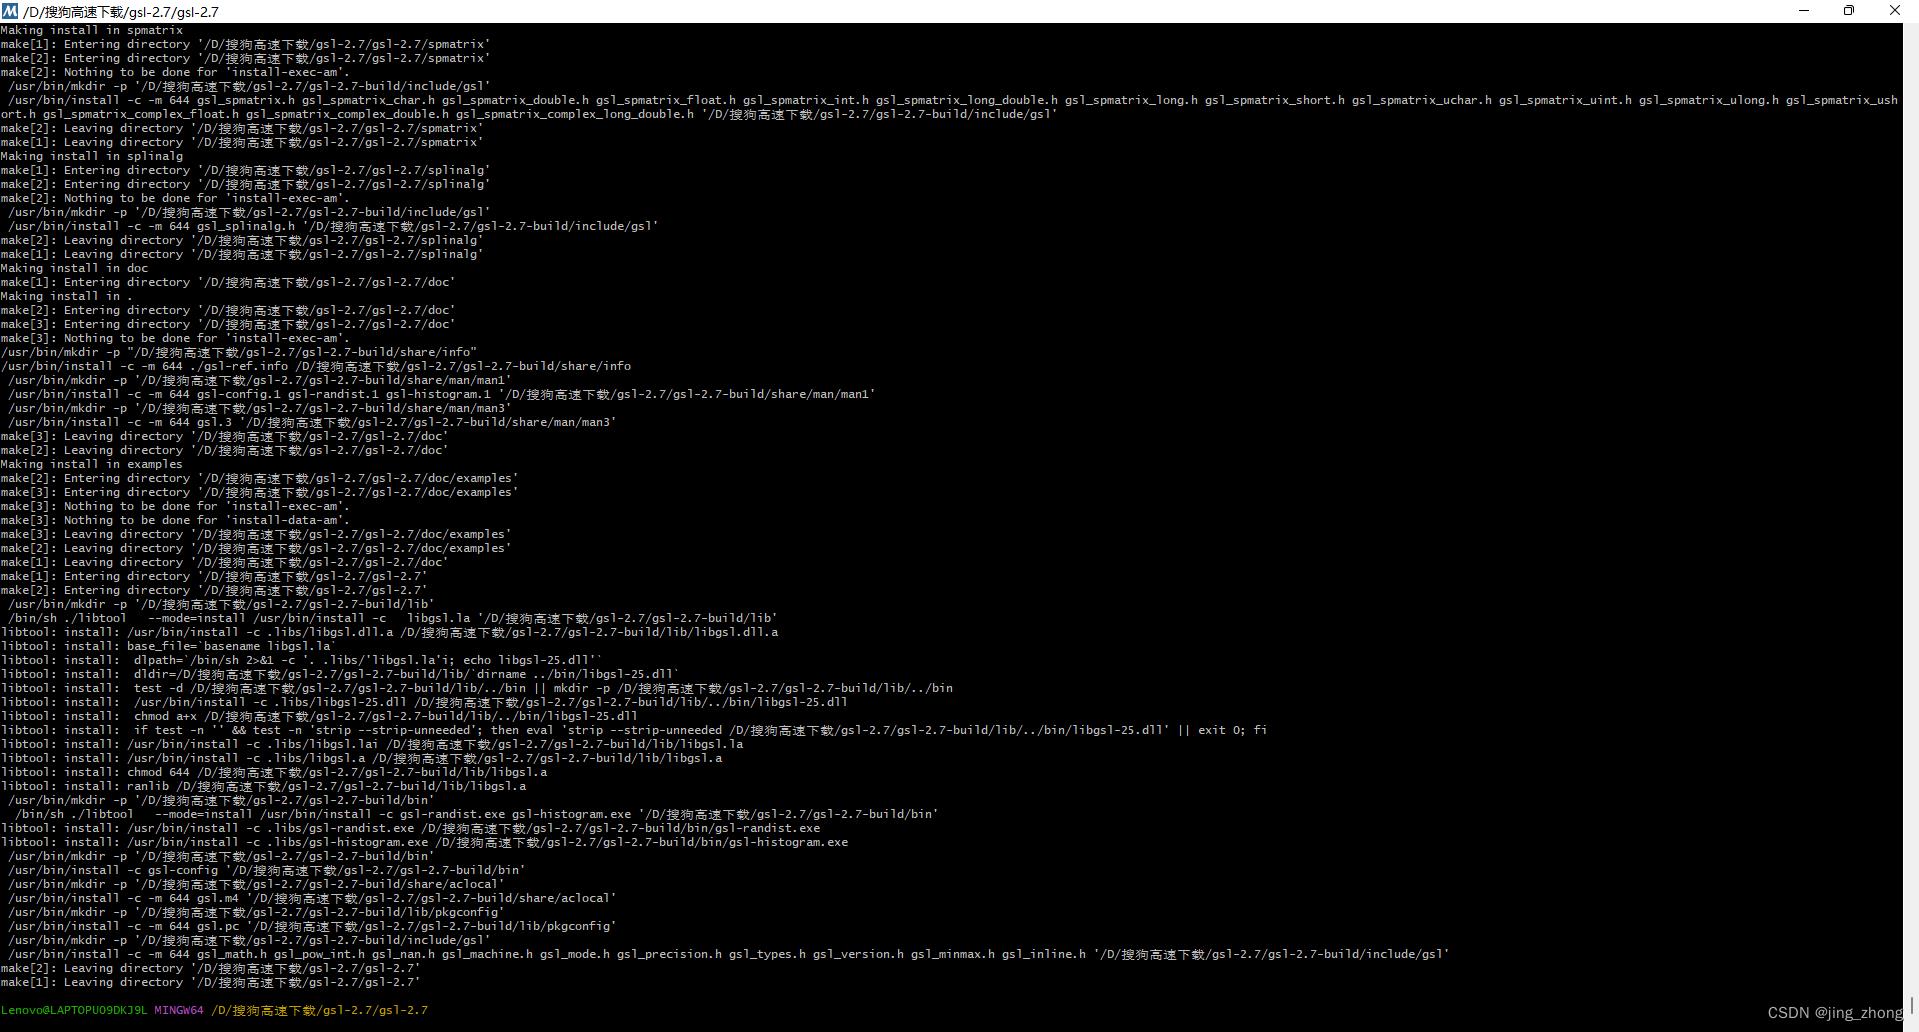
GSL编译过程中的执行界面如下图所示:

 |  |
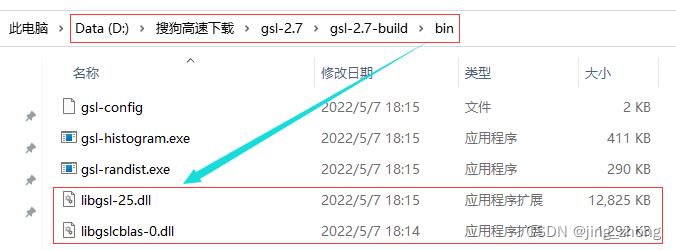
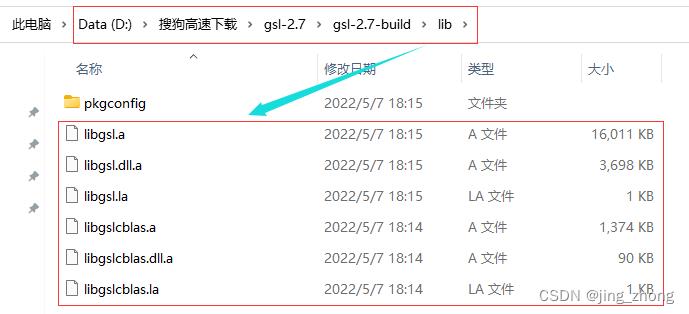
最终GSL编译构建成功后,在安装目录D:\\搜狗高速下载\\gsl-2.7\\gsl-2.7-build下可看到bin、include、lib和share四个文件夹,各个文件夹中的文件如下图所示,至此gsl-2.7编译构建成功。

| 
|
|

3、基于GSL库编写C语言代码(CodeBlocks / Visual Studio)
下面分别采用CodeBlocks和Visual Studio这两种IDE来编写利用GSL库的C项目,主要对GSL库在两种IDE中的配置过程进行简单介绍。
3.1 在CodeBlocks中基于GSL库编写C语言代码
3.1.1 安装CodeBlocks(自带gcc编译器)
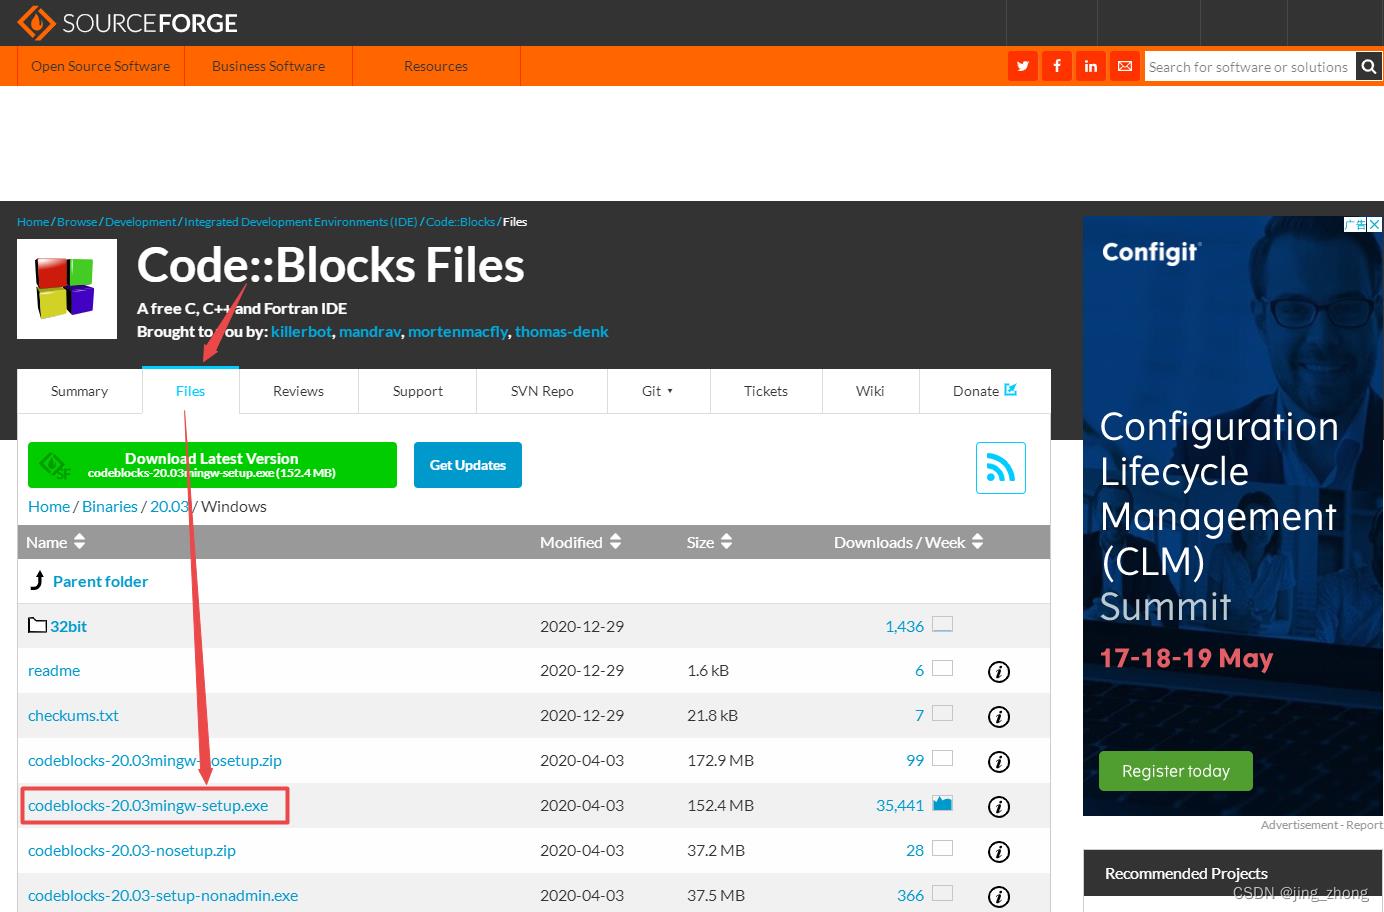
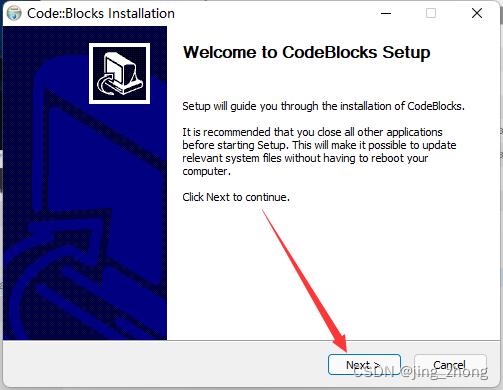
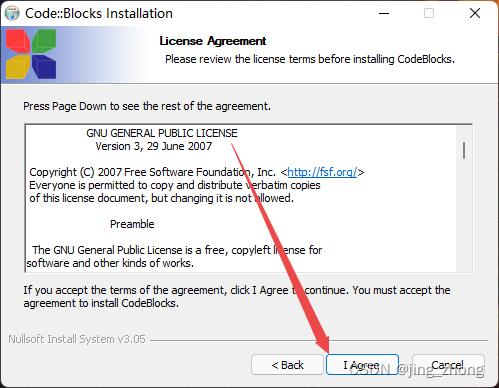
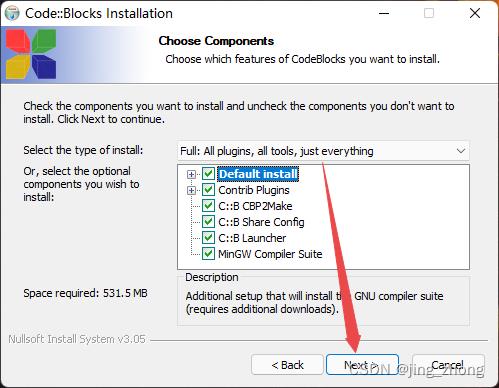
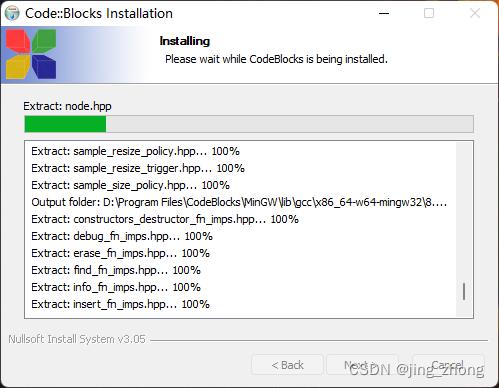
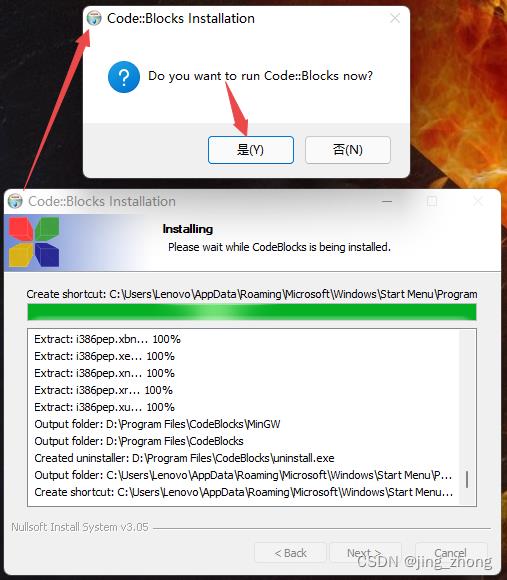
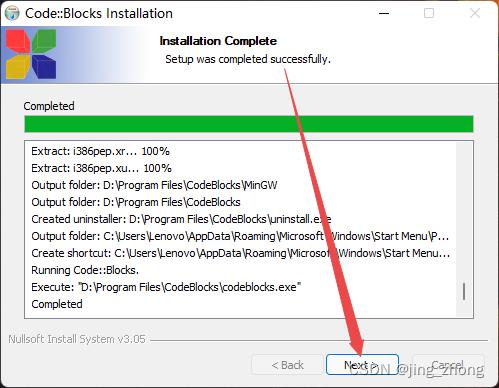
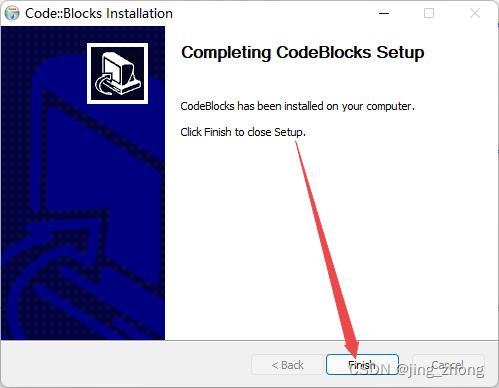
首先CodeBlocks作为一种开源的IDE,可用来编写C、C++和Fortran语言,且跨平台具有良好的扩展性,能安装插件,可满足大多开发者的需求。下载codeblocks-20.03mingw-setup.exe后,双击进行安装,接受GPL许可协议,选择安装目录为D:\\program files\\CodeBlocks,之后一直点击Next默认安装即可,安装过程如下图所示。

 |  |  |
 |  |  |
 |  |  |

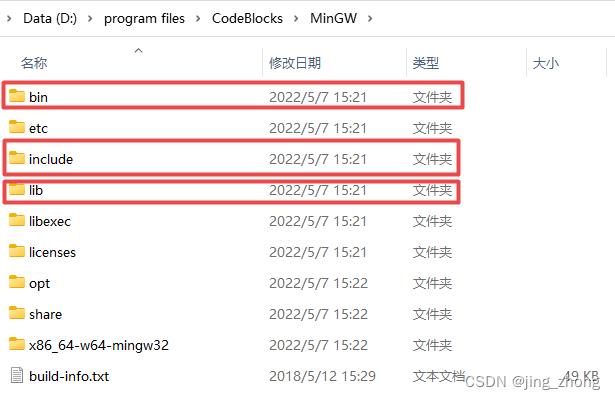
安装结束后,在桌面会看到CodeBlocks快捷方式,同时对应安装目录D:\\program files\\CodeBlocks下的文件包含MinGW文件夹,该文件夹下有bin、include和lib目录,bin目录下g++.exe、gcc.exe和mingw32-make.exe,可见MinGW自带gcc环境。
 |  |
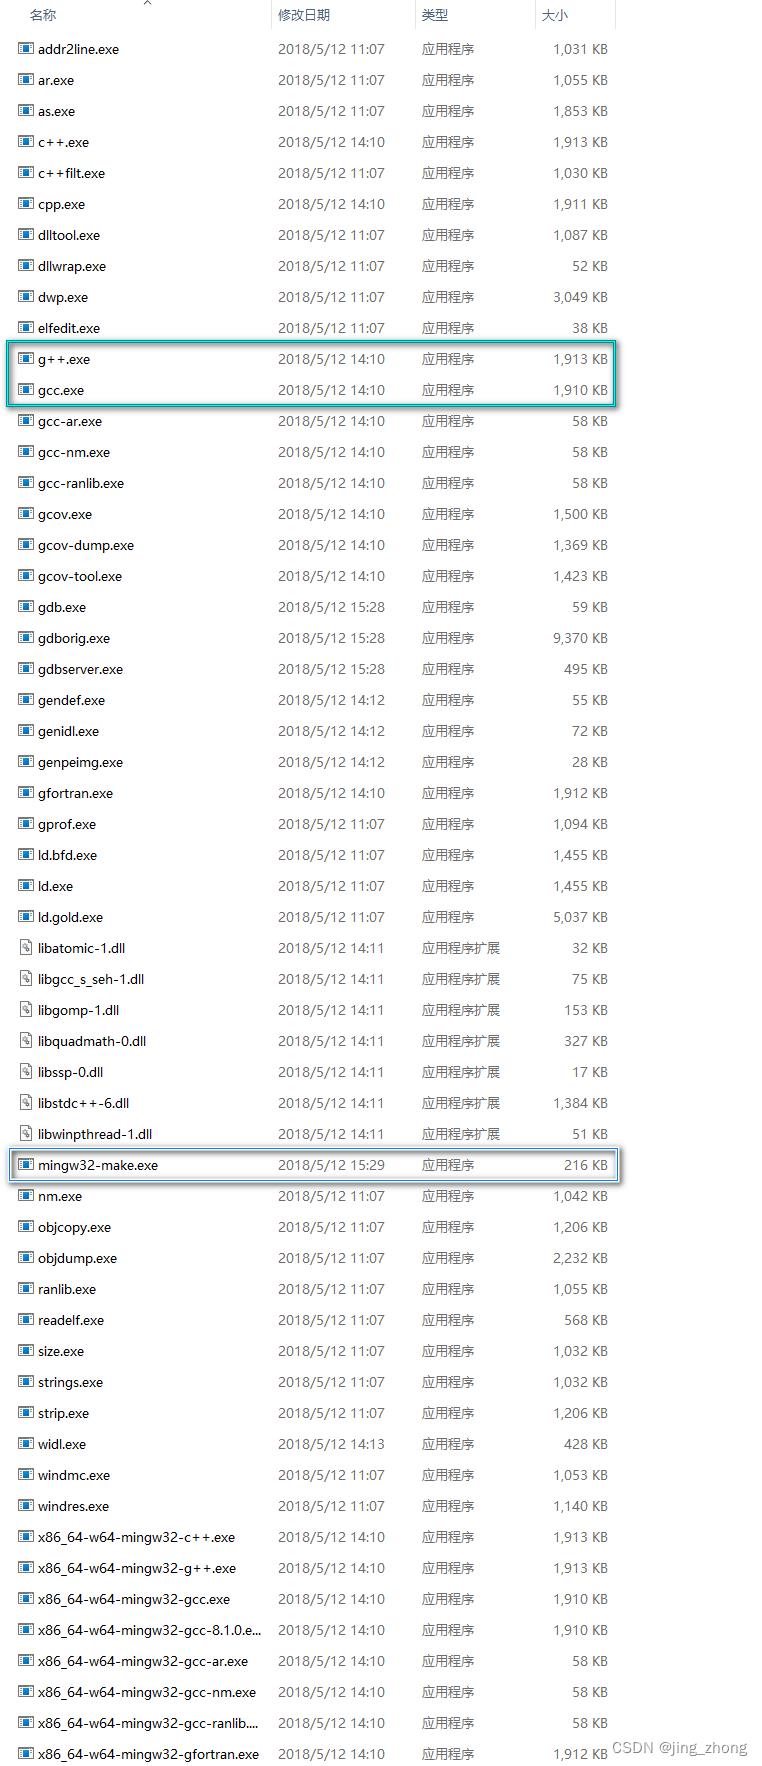
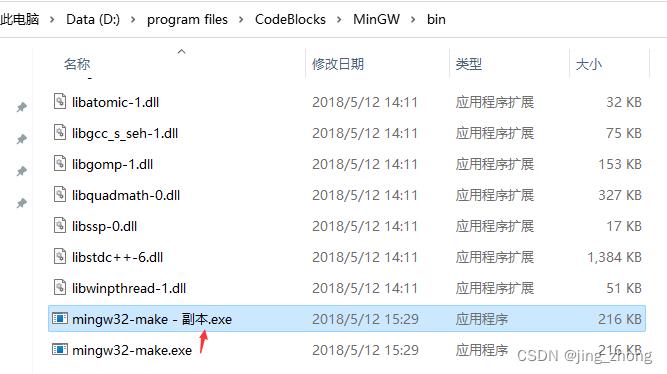
当然,如果想要配置make命令,需要将D:\\program files\\CodeBlocks\\MinGW\\bin文件夹下的mingw32-make.exe复制一份并重命名为make.exe,同时将D:\\program files\\CodeBlocks\\MinGW\\bin添加到系统的环境变量Path中。
| 
|

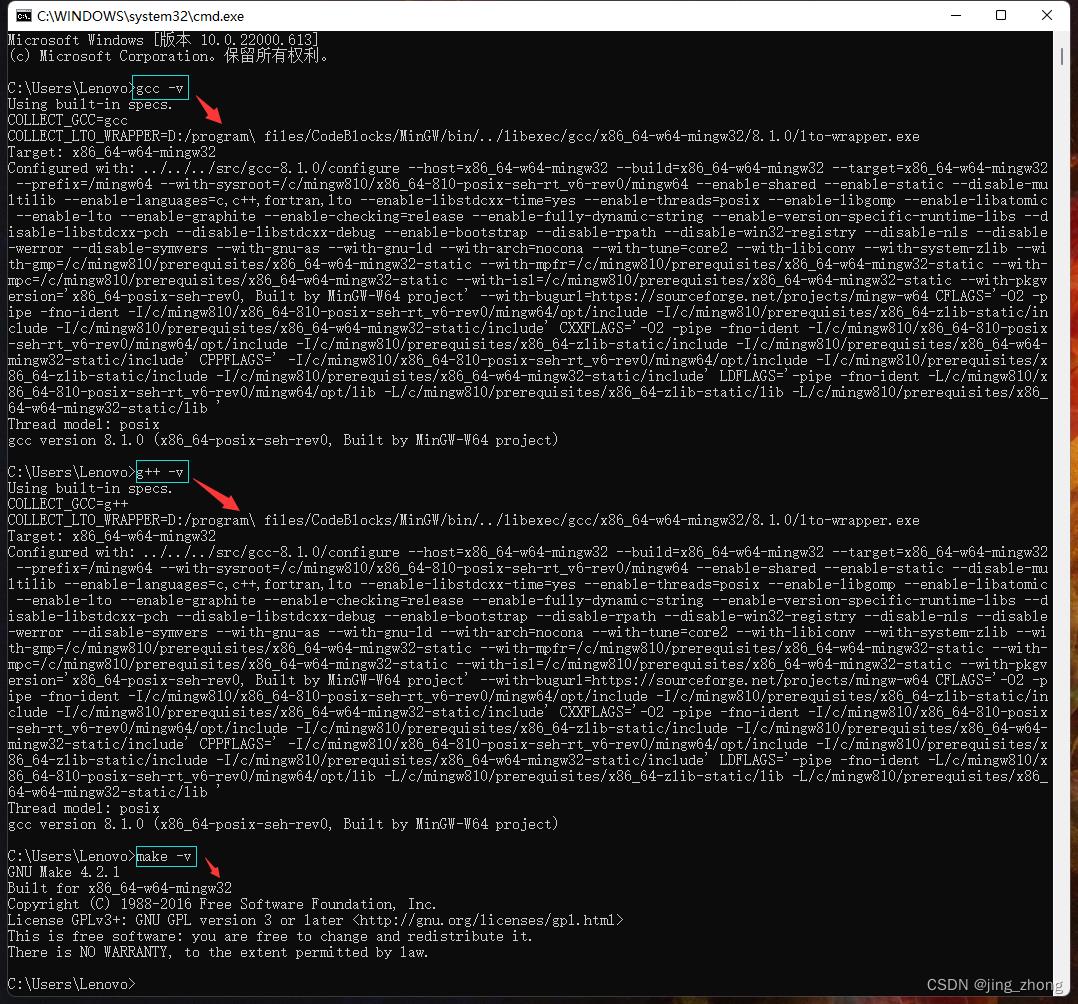
最后Win+R打开cmd命令行窗口,依次输入如下命令检验gcc编译器环境,结果如下图所示则配置成功。
gcc -v
g++ -v
make -v
3.1.2 利用CodeBlocks新建C项目
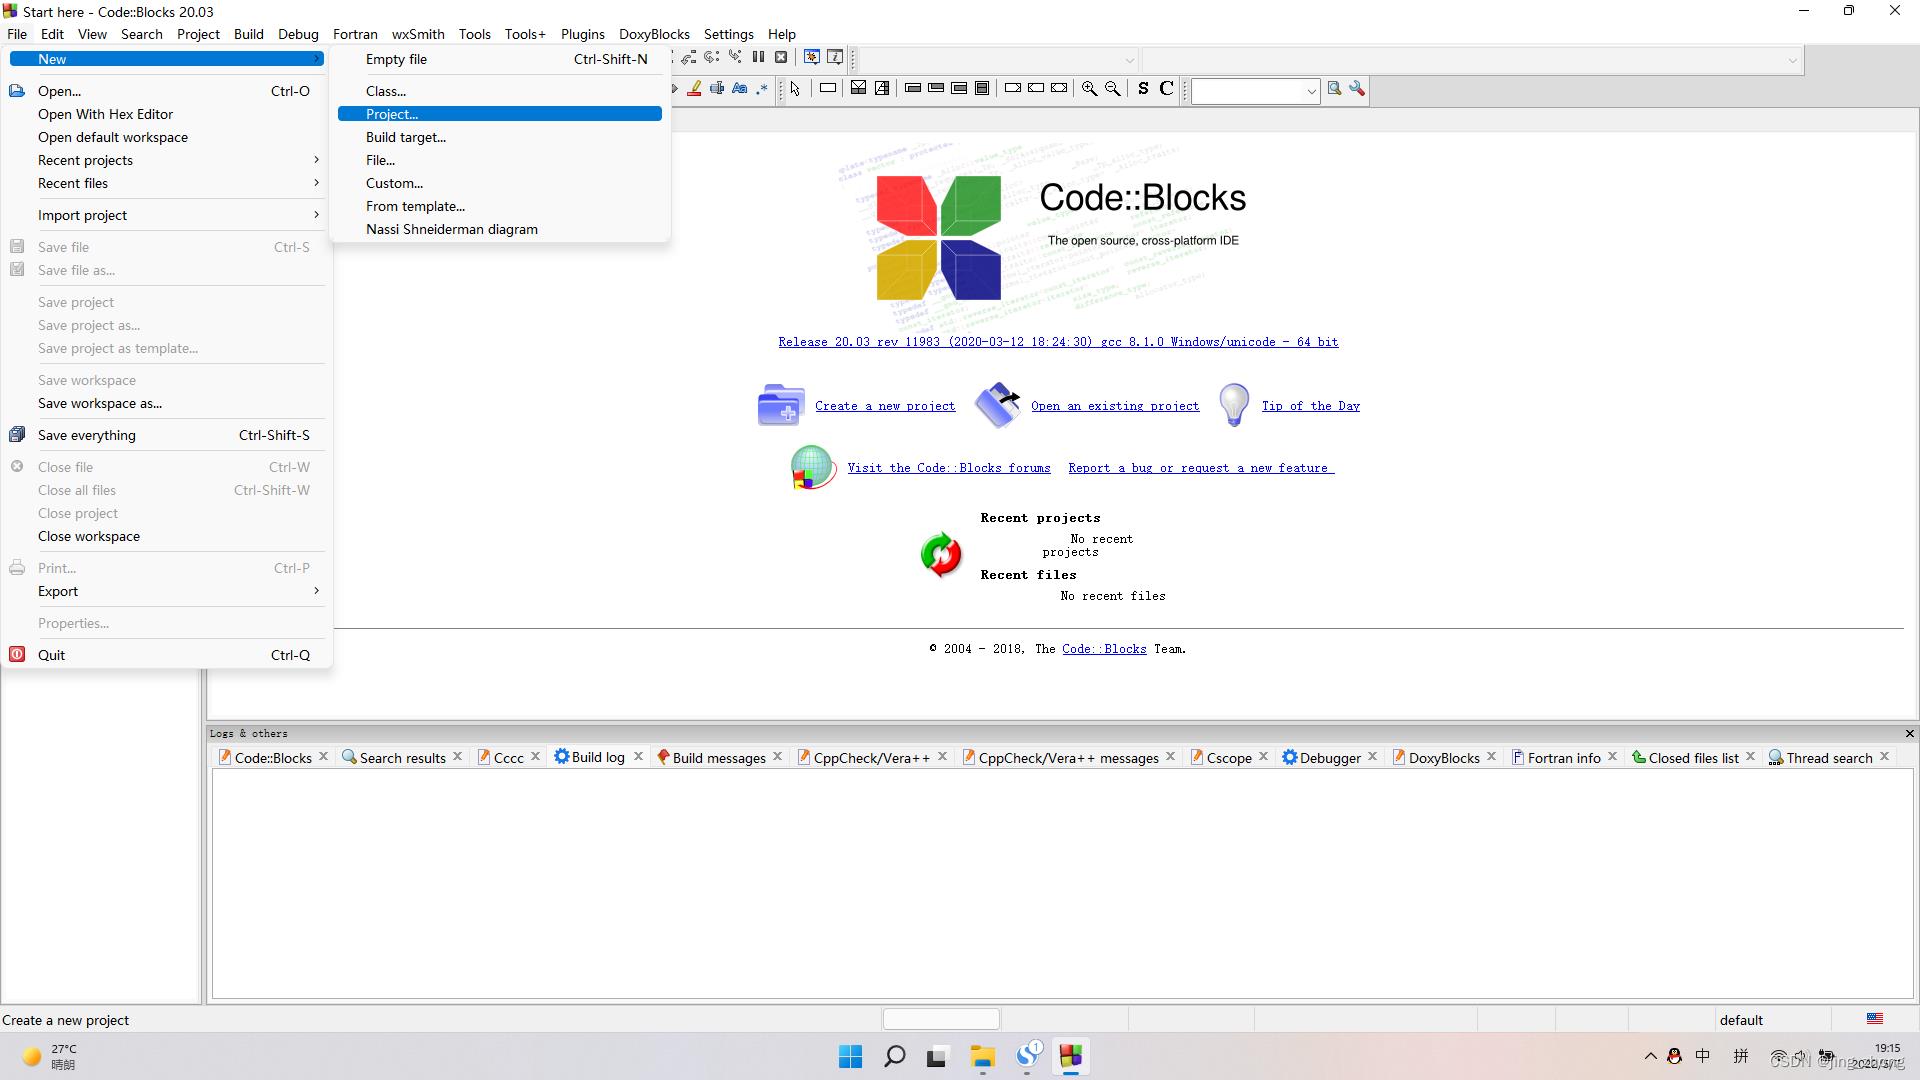
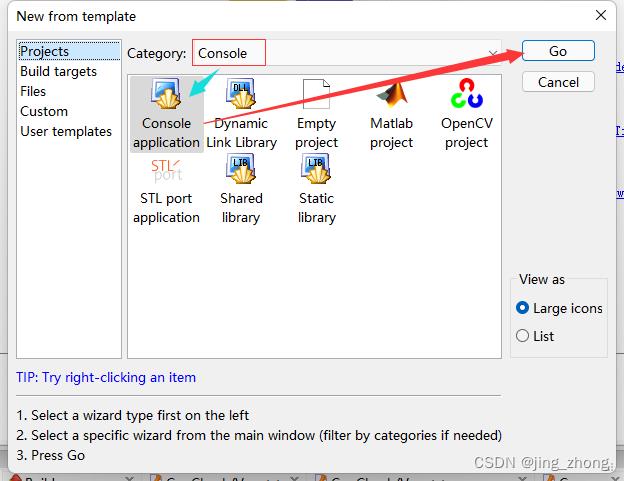
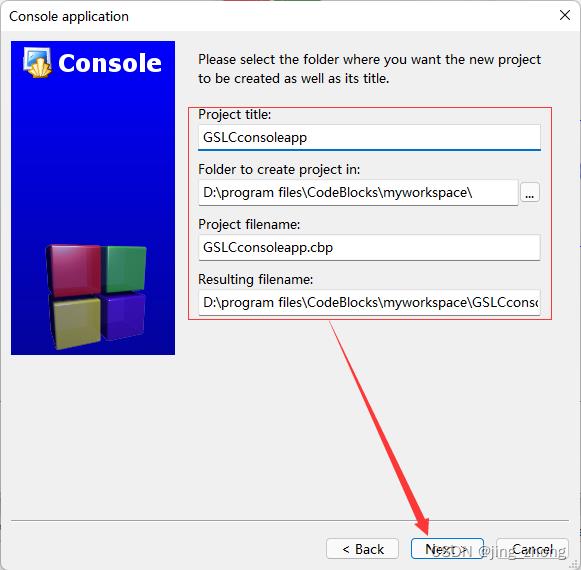
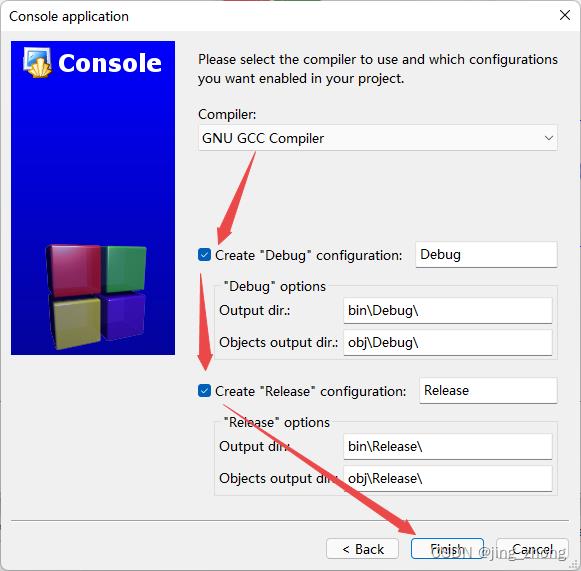
打开CodeBlocks软件,点击File->New->Project,选择Projects->Console->Console application后点击go,编程语言选择C,之后输入项目名称和项目文件夹,编译器选择GNU GCC Compiler后点击Finish,这样就成功创建了一个C项目。
 |  | |
 |  | |
 |
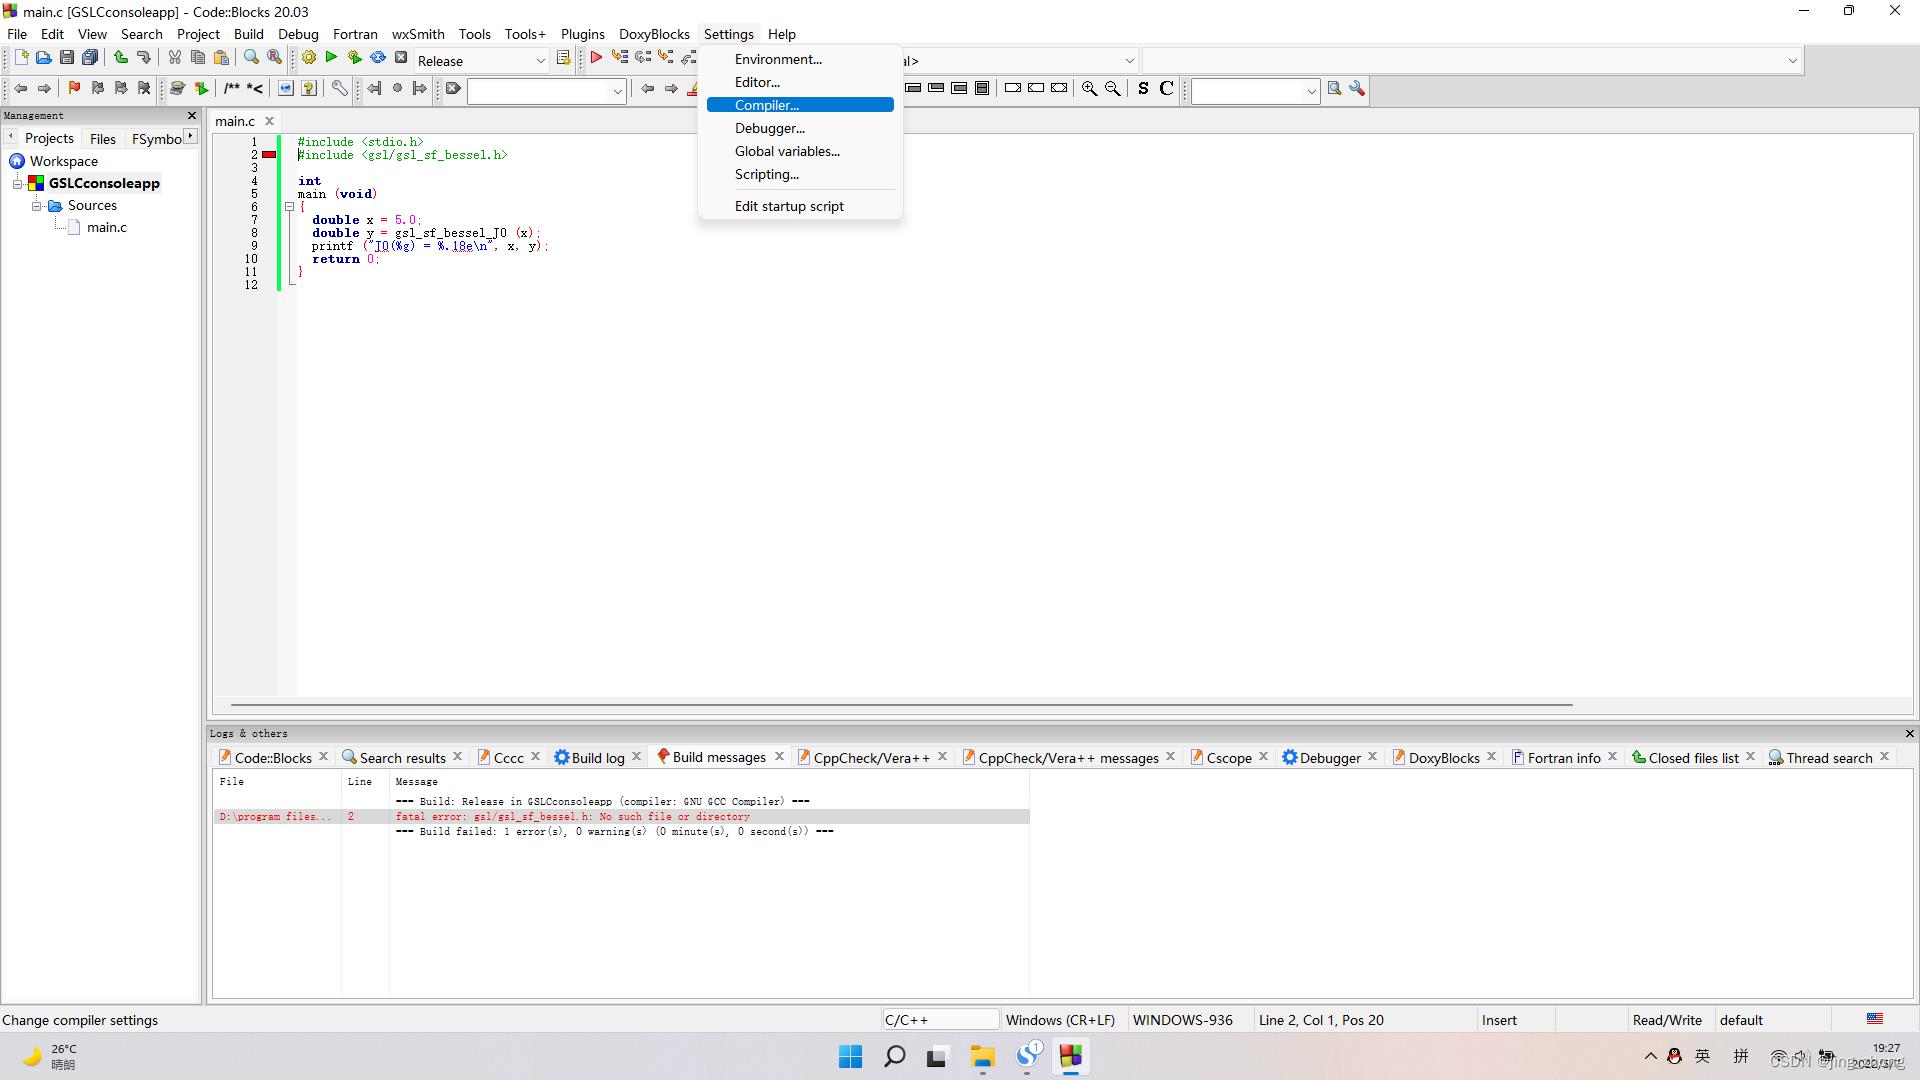
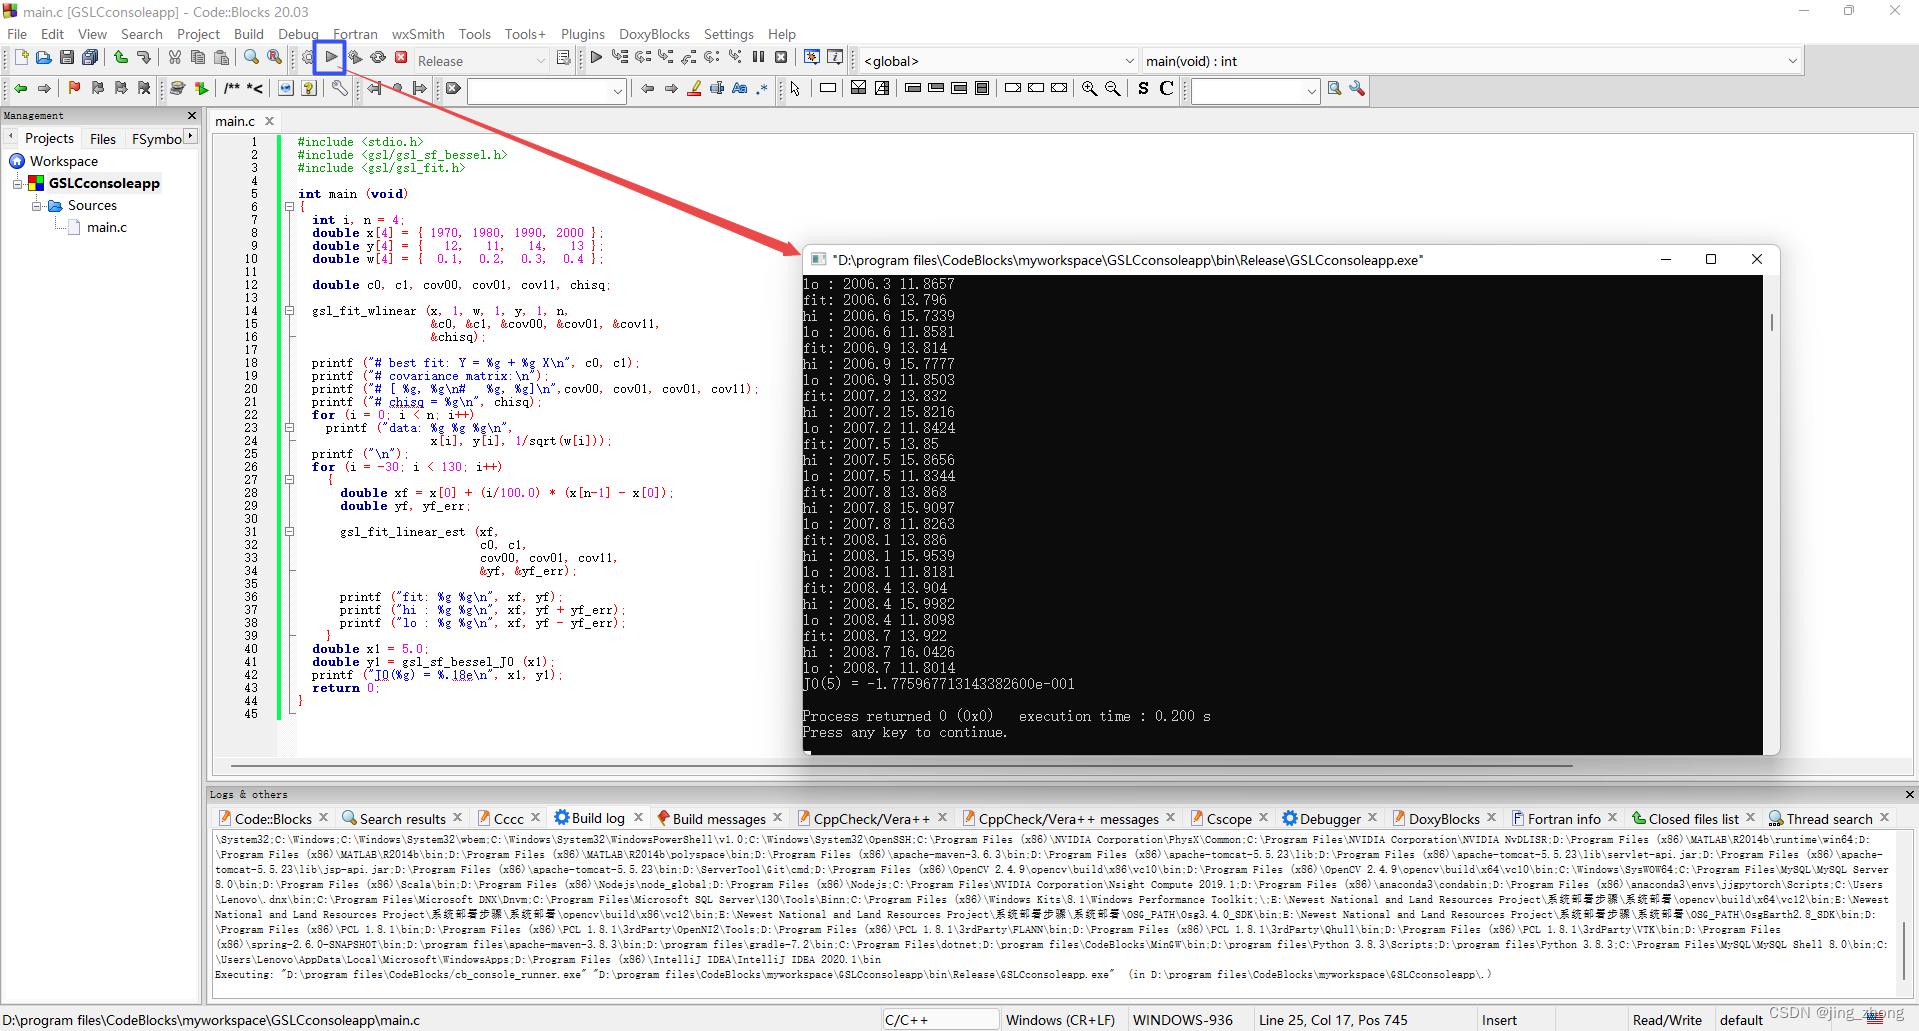
新建的C项目会自动生成main.c文件,将里面的代码替换为GSL相关的代码(注:自己可以到GSL文档中找Examples中的例子代码)。
main.c代码:
#include <stdio.h>
#include <gsl/gsl_sf_bessel.h>
#include <gsl/gsl_fit.h>

int main (void)

  int i, n = 4;
  double x[4] =  1970, 1980, 1990, 2000 ;
  double y[4] =    12,   11,   14,   13 ;
  double w[4] =   0.1,  0.2,  0.3,  0.4 ;

  double c0, c1, cov00, cov01, cov11, chisq;

  gsl_fit_wlinear (x, 1, w, 1, y, 1, n,
                   &c0, &c1, &cov00, &cov01, &cov11,
                   &chisq);

  printf ("# best fit: Y = %g + %g X\\n", c0, c1);
  printf ("# covariance matrix:\\n");
  printf ("# [ %g, %g\\n#   %g, %g]\\n",cov00, cov01, cov01, cov11);
  printf ("# chisq = %g\\n", chisq);
  for (i = 0; i < n; i++)
    printf ("data: %g %g %g\\n",
                   x[i], y[i], 1/sqrt(w[i]));
  printf ("\\n");
  for (i = -30; i < 130; i++)

      double xf = x[0] + (i/100.0) * (x[n-1] - x[0]);
      double yf, yf_err;

      gsl_fit_linear_est (xf,
                          c0, c1,
                          cov00, cov01, cov11,
                          &yf, &yf_err);

      printf ("fit: %g %g\\n", xf, yf);
      printf ("hi : %g %g\\n", xf, yf + yf_err);
      printf ("lo : %g %g\\n", xf, yf - yf_err);

  double x1 = 5.0;
  double y1 = gsl_sf_bessel_J0 (x1);
  printf ("J0(%g) = %.18e\\n", x1, y1);
  return 0;
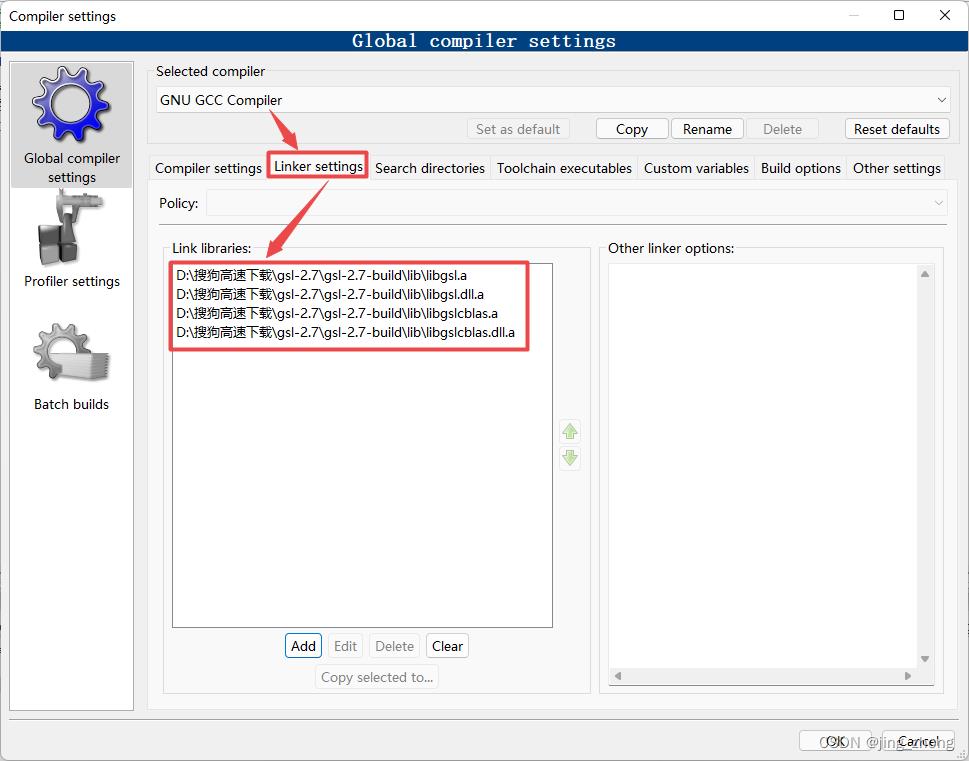
另外,为了让GCC编译器找到GSL相关的头文件和库文件,还需要在CodeBlocks中设置GCC编译器的链接库目录、搜索包含目录,即在Compiler settings窗口设置Linker settings为GSL安装目录下lib文件夹中的所有.a文件,设置Search Directories为GSL安装目录下的include文件夹,检查GCC编译器的位置为CodeBlocks下的MinGW文件夹。
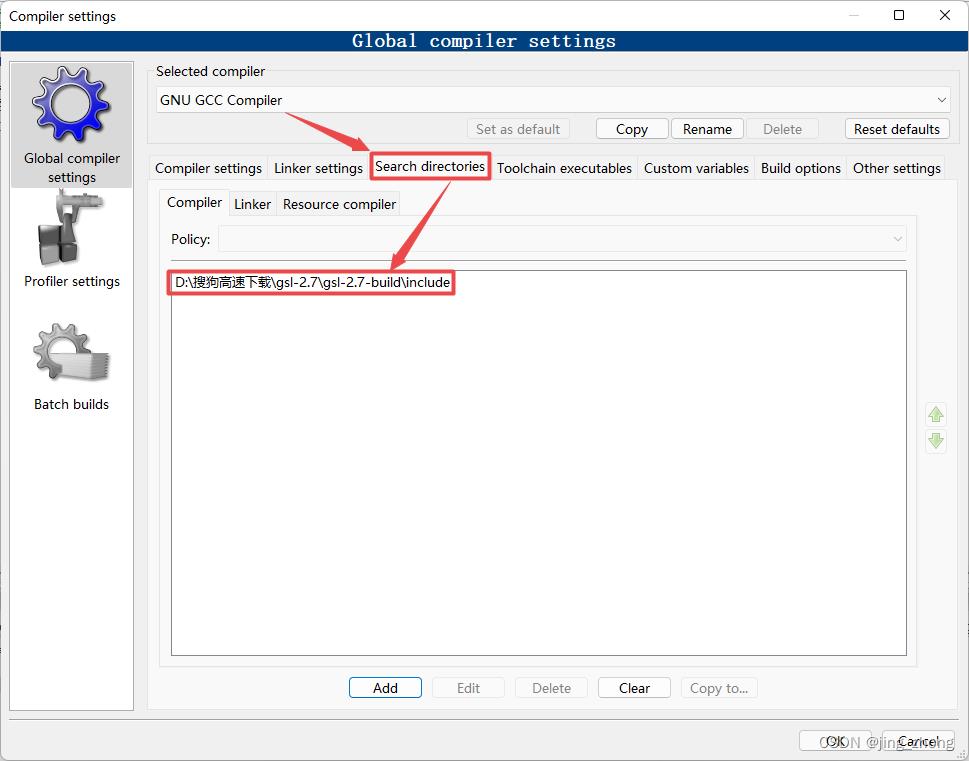
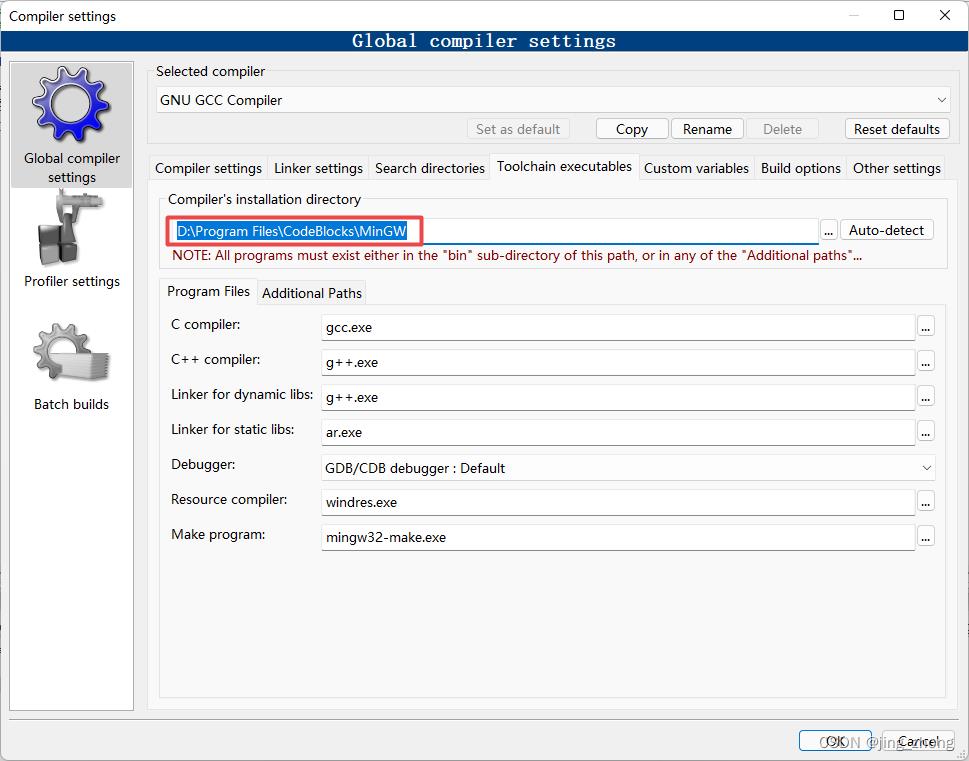
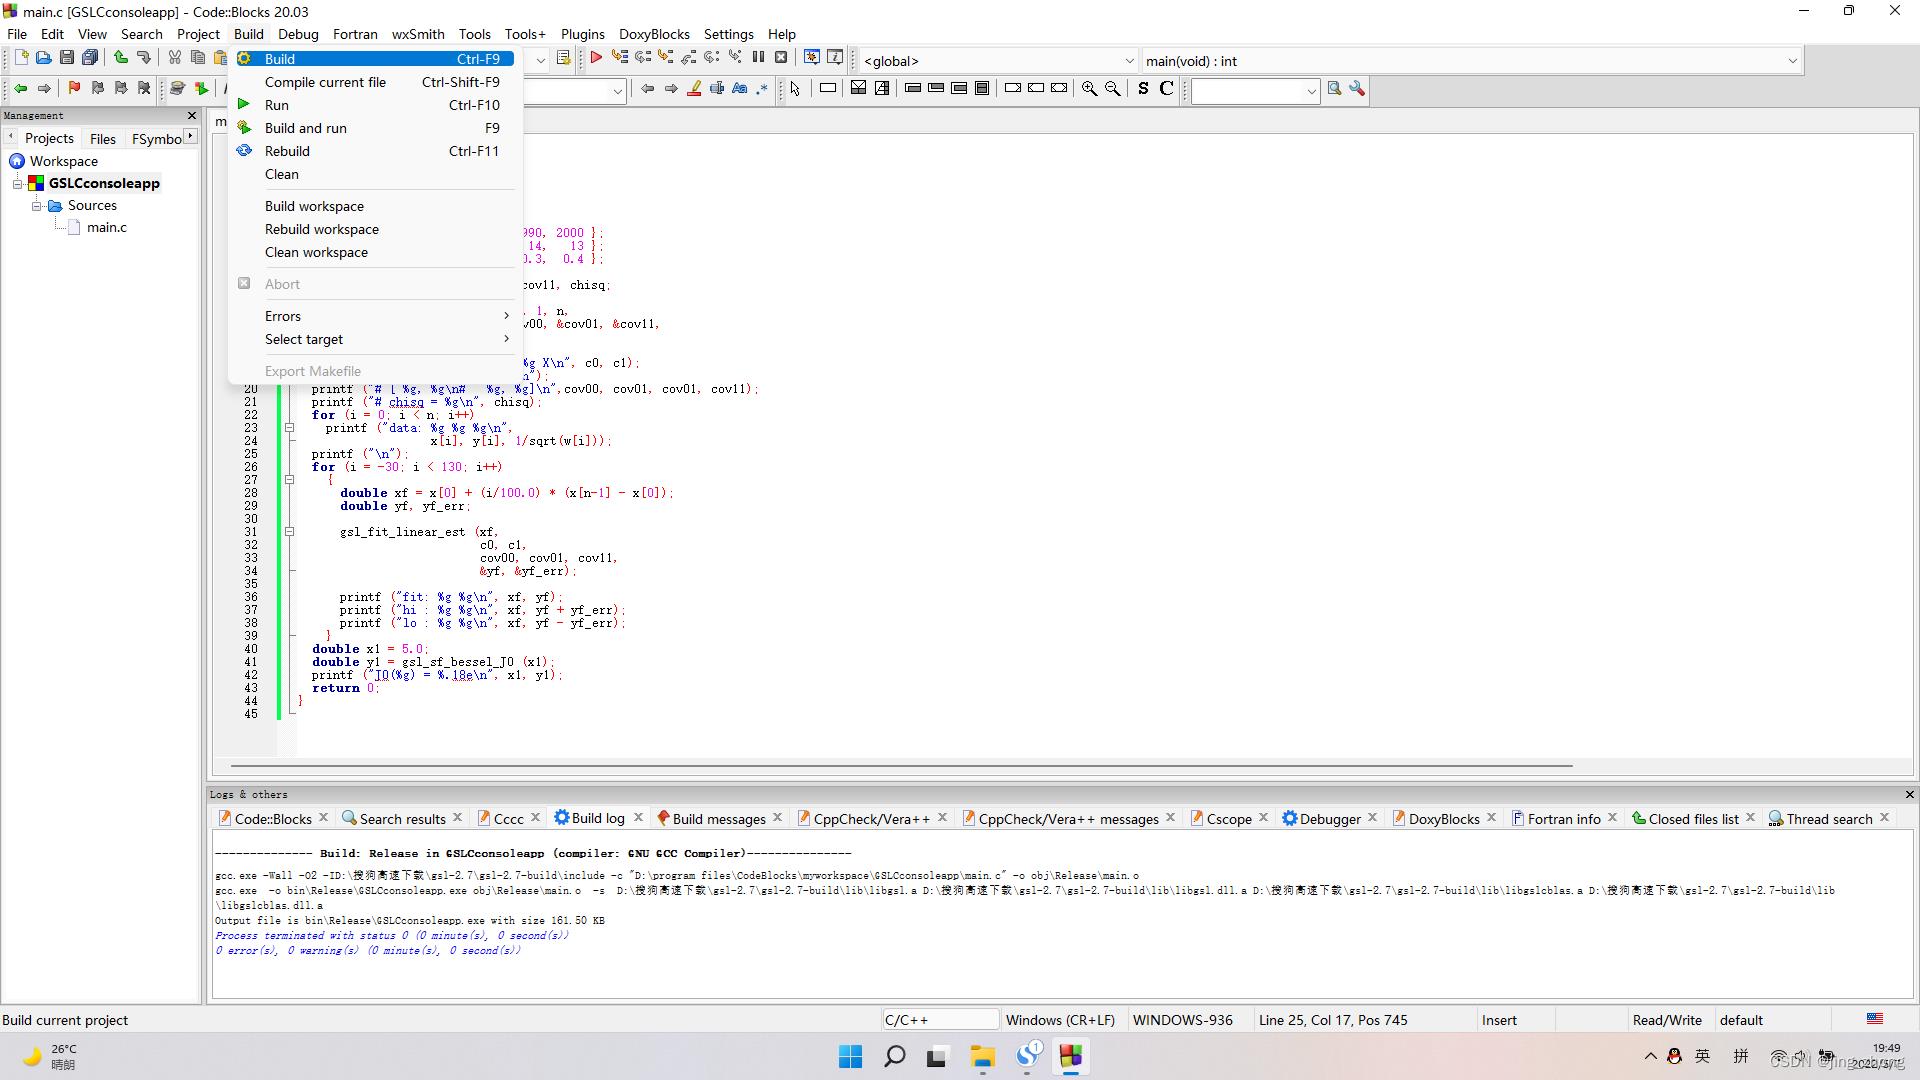
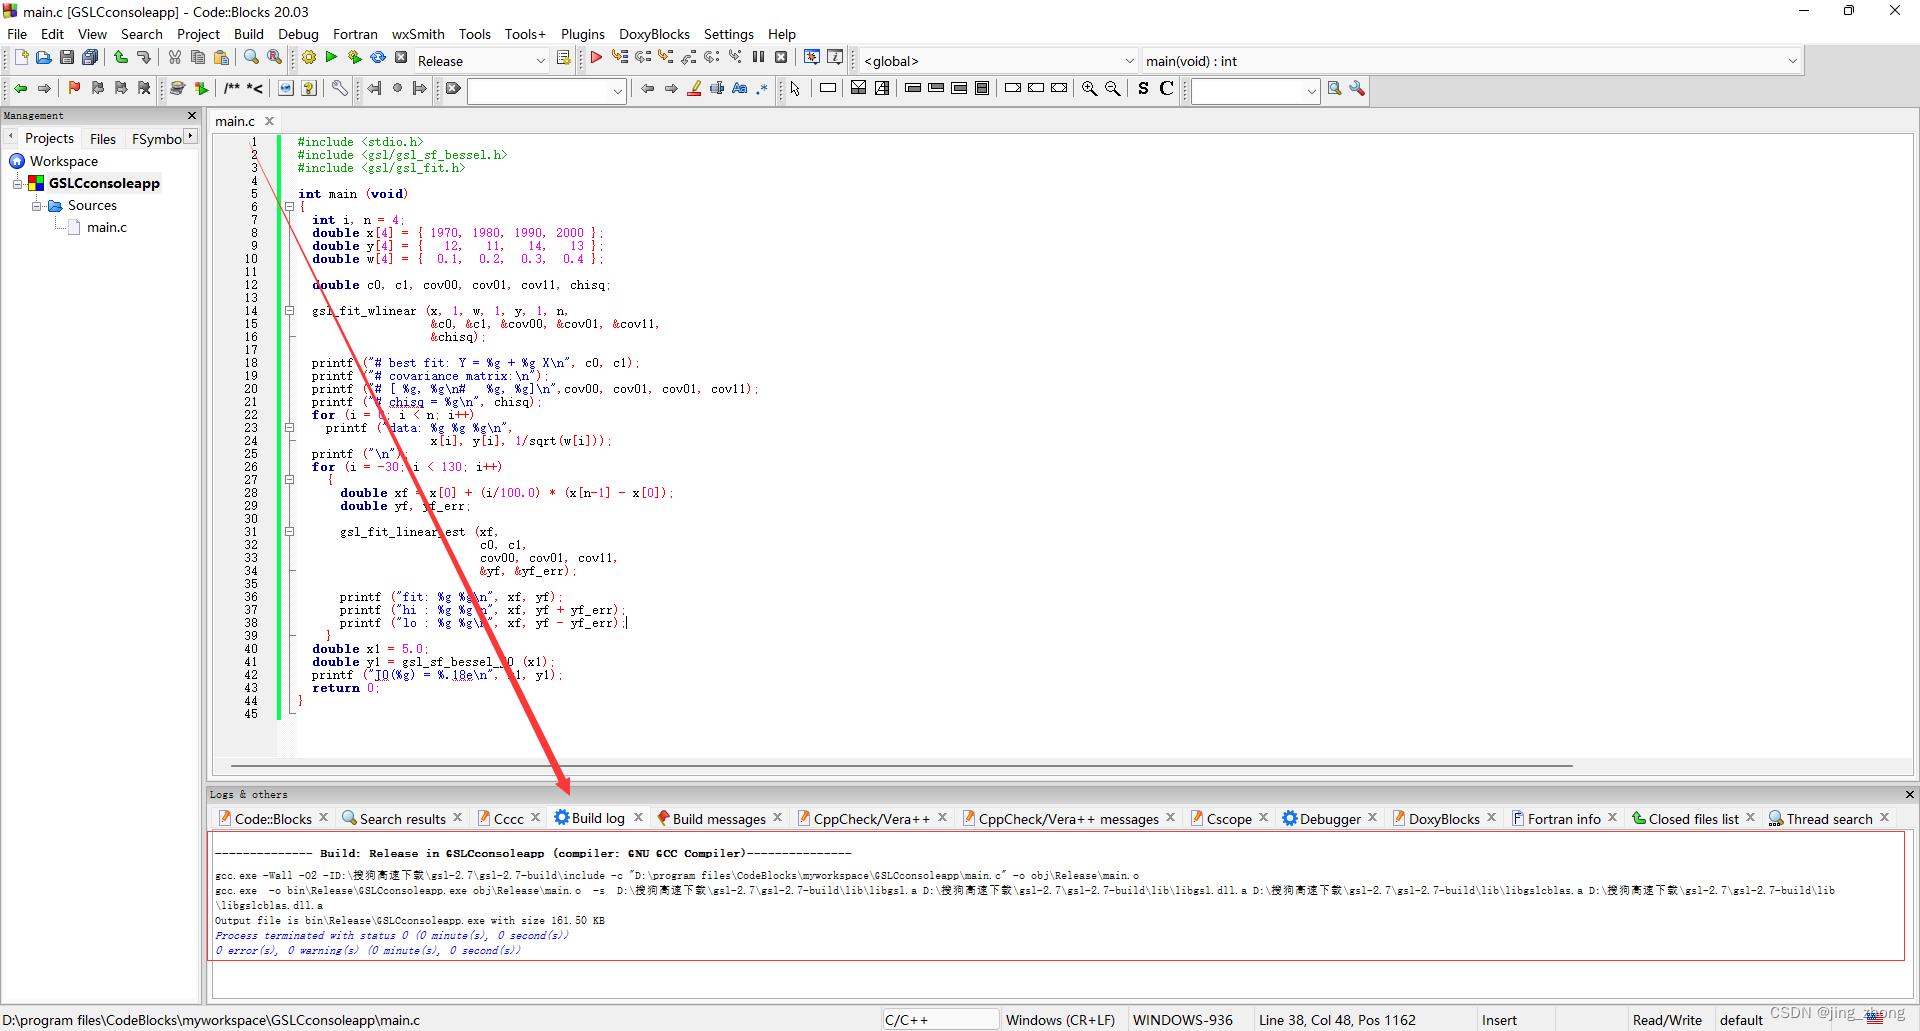
最后,在CodeBlocks的菜单栏中点击Build下的Build来编译生成项目,编译成功后点击Run对应的绿色朝右三角形按钮即可运行,在弹出的控制台窗口中查看运行结果。
3.2 dll转lib用于VS 2015 中编写C项目调用(pexports + dlltool)
为了在Visual Studio中利用编译好的GSL库,则需要GSL安装目录lib文件夹下存在.lib文件,而上述编译的lib文件夹下仅存在.a文件(gcc编译器所用的lib文件),因此需要考虑将GSL安装目录bin文件夹下的.dll文件转换为.lib文件。而目前已知的转换方式主要有两种:(1)pexports.exe + MinGW自带的dlltool.exe;(2)pexports.exe +VS自带的lib.exe。
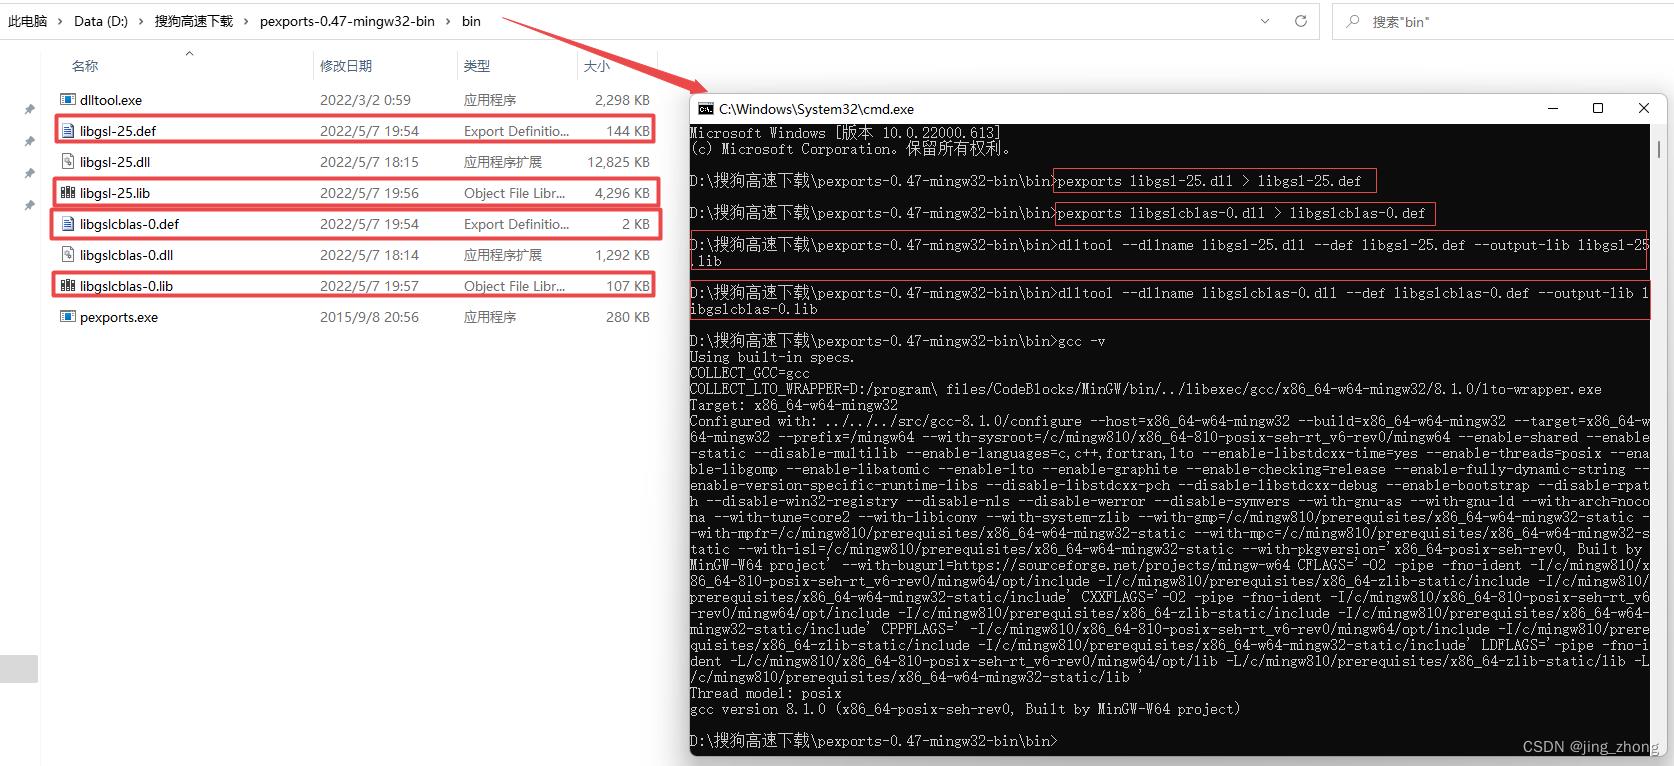
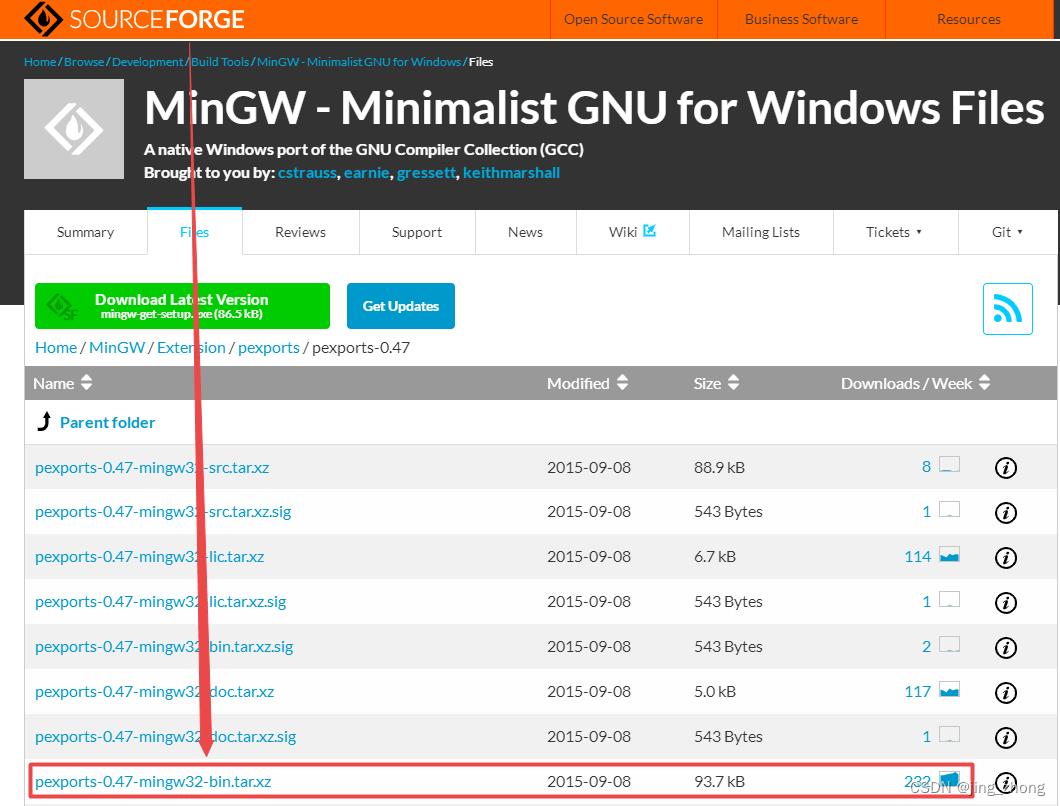
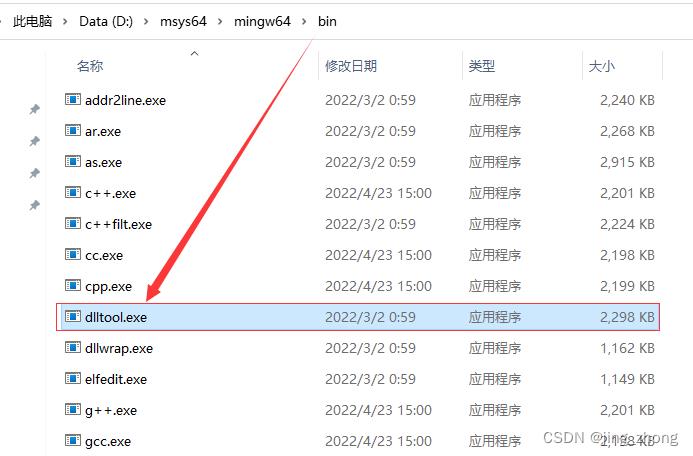
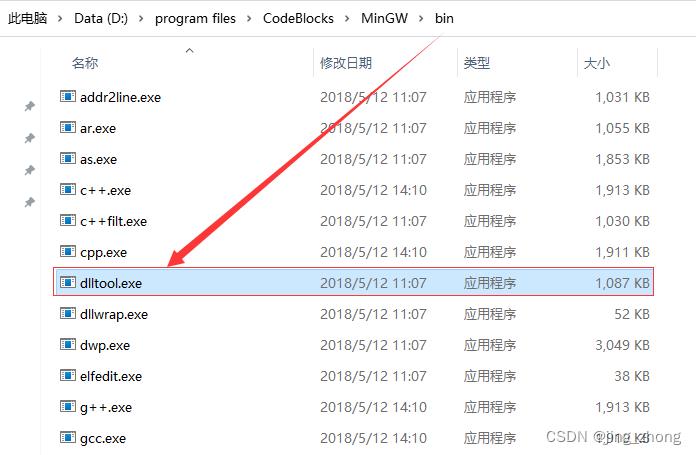
方式一:需要下载pexports.exe,dlltool.exe可在CodeBlocks安装目录下的MinGW\\bin文件夹 或 MSYS2安装目录下的MinGW\\bin文件夹下找到,将这两个exe文件复制到同一个目录下,然后将要转换的dll文件复制到该目录,并执行以下命令进行转换:
pexports libgls-25.dll >libgsl-25.def
pexports libgslcblas-0.dll >libgslcblas-0.def
dlltool --dllname libgsl-25.dll --def libgsl-25.def --output-lib libgsl-25.lib
dlltool --dllname libgslcblas-0.dll --def libgslcblas-0.def --output-lib libgslcblas-0.lib
可见,pexports负责将dll转换为def文件,而dlltool负责将dll和def一起转换为lib文件,具体执行过程如下图所示:
 |
 |
 |
 |  |
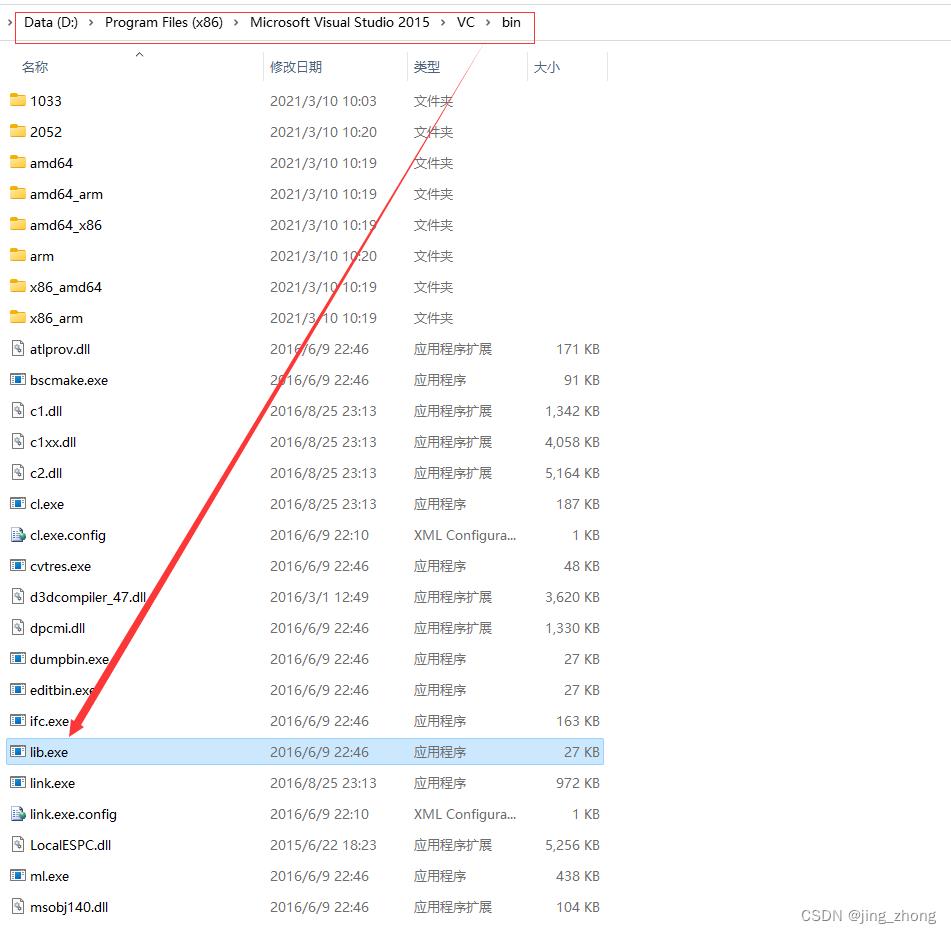
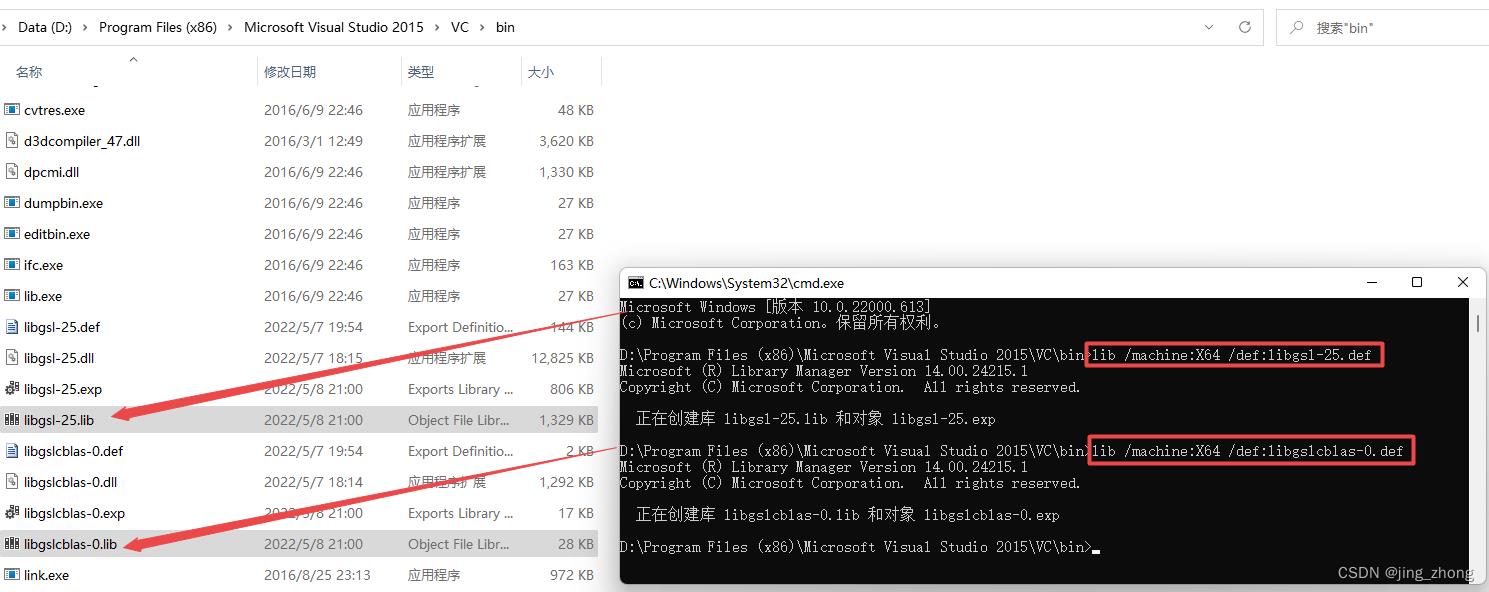
方式二:在VS安装目录下的VC\\bin文件夹下可以找到lib.exe文件(这里以VS 2015为例),将要转换的dll文件复制到此文件夹,然后在此文件夹处打开cmd窗口,输入的具体命令如下(32位和64位自己对应),将生成的两个lib文件放到GSL安装目录下的lib文件夹下。
lib /machine:i386 /def:libgsl-27.def # 32位
lib /machine:i386 /def:libgslcblas-0.def # 32位
# 由于电脑是64位,这里选择64位的进行转换
lib /machine:X64 /def:libgsl-27.def # 64位
lib /machine:X64 /def:libgslcblas-0.def # 64位
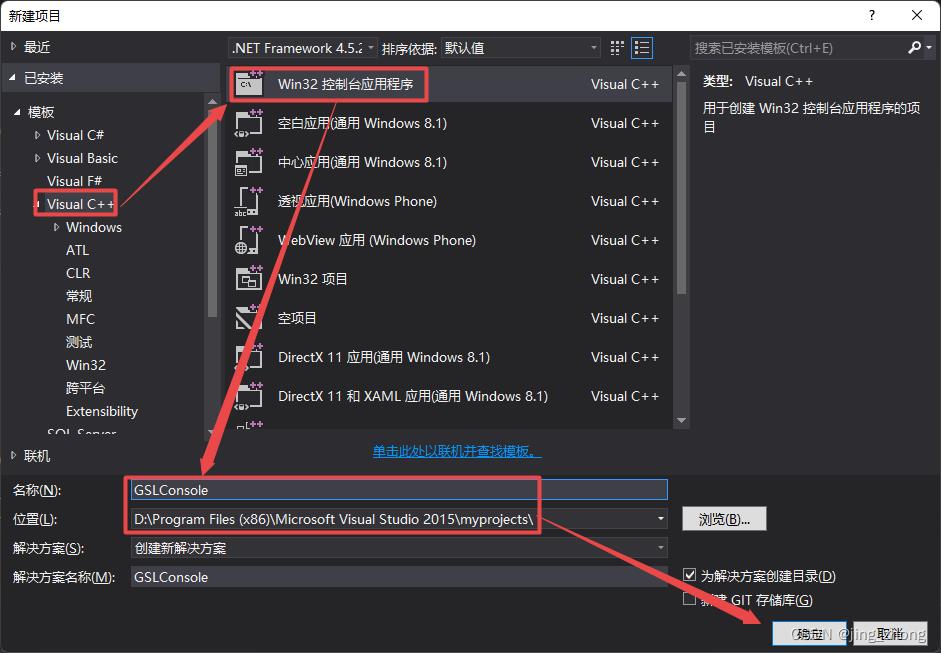
考虑到GSL库的底层实现是基于C语言,这里打开VS 2015,新建C++控制台项目,将项目配置为Release和64位后,在右侧的解决方案资源管理器窗口中,在项目名称上右键选择属性,在弹出的属性窗口中分别对附加包含目录、附加库目录、链接器->输入->附加依赖项进行设置。
 |  |
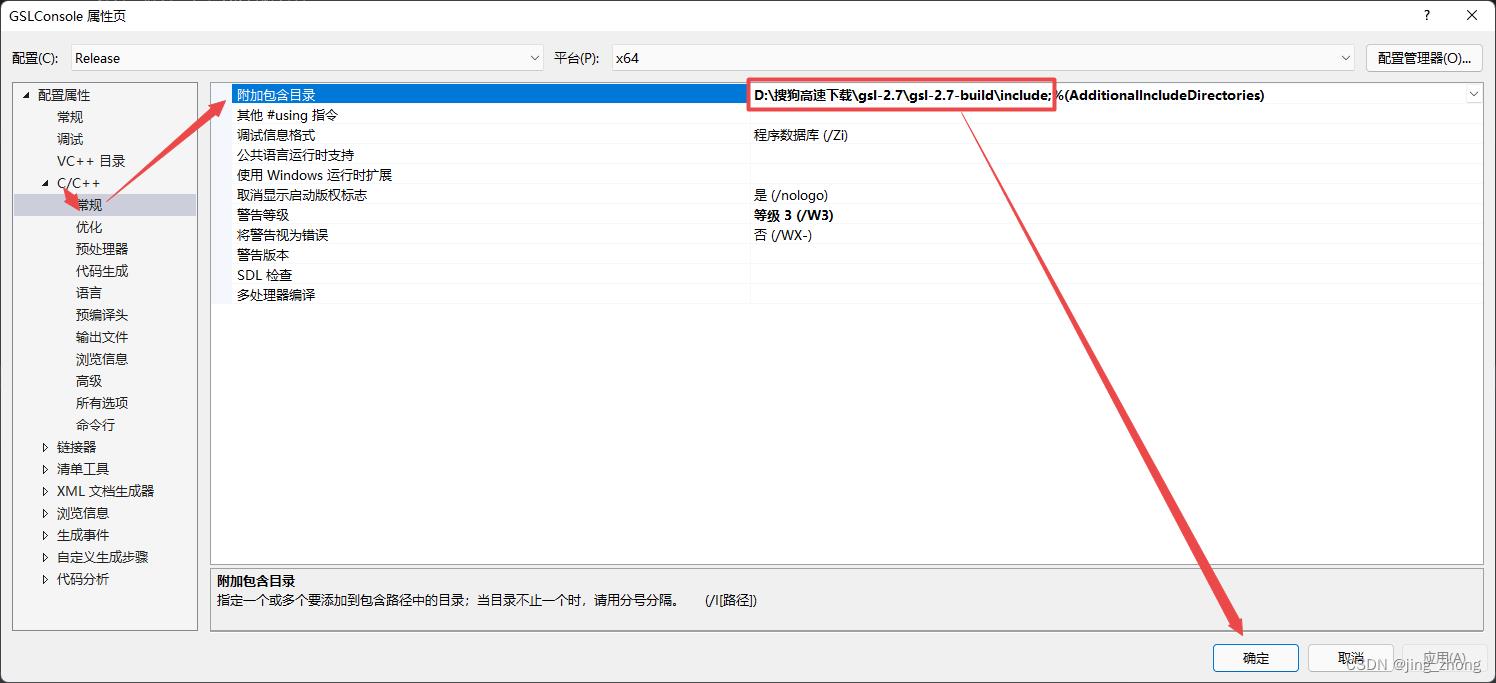
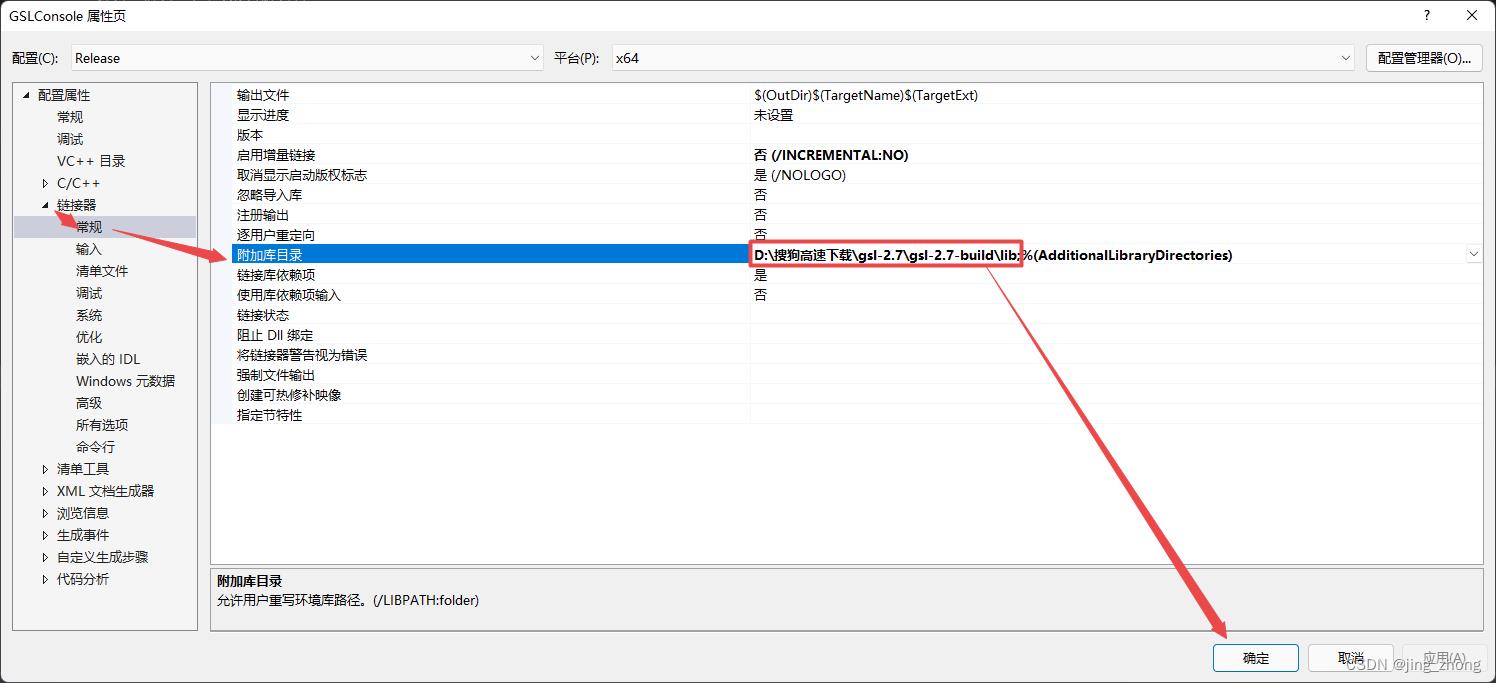
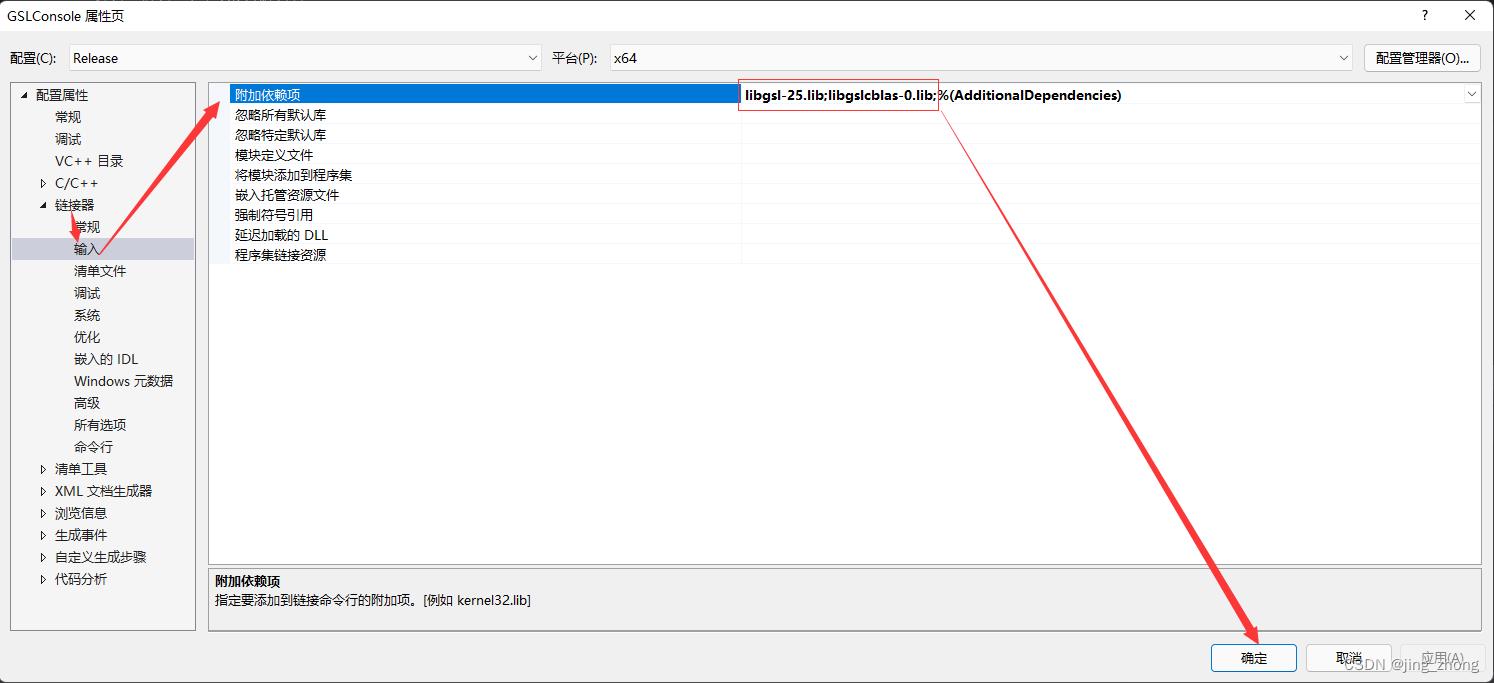
之后在源文件上右键选择添加->新建项,在弹出的添加新项窗口中点击C++文件,在文本框中输入main.c作为文件名后点击添加即可,然后打开main.c文件,输入以下代码:
#include <stdio.h>
#include <gsl/gsl_sf_bessel.h>
#include <gsl/gsl_fit.h>

int main(void)

	int i, n = 4;
	double x[4] =  1970, 1980, 1990, 2000 ;
	double y[4] =  12,   11,   14,   13 ;
	double w[4] =  0.1,  0.2,  0.3,  0.4 ;
	double c0, c1, cov00, cov01, cov11, chisq;
	gsl_fit_wlinear(x, 1, w, 1, y, 1, n,&c0, &c1, &cov00, &cov01, &cov11,&chisq);
	printf("# best fit: Y = %g + %g X\\n", c0, c1);
	printf("# covariance matrix:\\n");
	printf("# [ %g, %g\\n#   %g, %g]\\n", cov00, cov01, cov01, cov11);
	printf("# chisq = %g\\n", chisq);
	for (i = 0; i < n; i++)
		printf("data: %g %g %g\\n",
			x[i], y[i], 1 / sqrt(w[i]));
	printf("\\n");
	for (i = -30; i < 130; i++)

		double xf = x[0] + (i / 100.0) * (x[n - 1] - x[0]);
		double yf, yf_err;
		gsl_fit_linear_est(xf,c0, c1,cov00, cov01, cov11,&yf, &yf_err);
		printf("fit: %g %g\\n", xf, yf);
		printf("hi : %g %g\\n", xf, yf + yf_err);
		printf("lo : %g %g\\n", xf, yf - yf_err);

	double x1 = 5.0;
	double y1 = gsl_sf_bessel_J0(x1);
	以上是关于Windows系统编译GSL2.7用于C语言编程(2022.5.8)的主要内容,如果未能解决你的问题,请参考以下文章