SpringBoot系列之RestTemplate使用示例
Posted smileNicky
tags:
篇首语:本文由小常识网(cha138.com)小编为大家整理,主要介绍了SpringBoot系列之RestTemplate使用示例相关的知识,希望对你有一定的参考价值。
博主之前经常对接一些接口,所以发现写一些http请求比较麻烦,学习springboot的过程知道可以用RestTemplate来做http请求,RestTemplate是Spring Framework框架封装的基于模板方法设计模式的一个工具类,带有同步模板方法 API 的原始 Spring REST 客户端类,下面博主分析一些对接过程的一些经验,RestTemplate基本使用可以参考官网文档:https://docs.spring.io/spring-framework/docs/5.1.6.RELEASE/spring-framework-reference/integration.html#rest-client-access
下面分析一些例子,先要进行环境准备:
-
开发环境
- JDK 1.8
- SpringBoot2.2.1
- Maven 3.2+
-
开发工具
- IntelliJ IDEA
- smartGit
- Navicat15
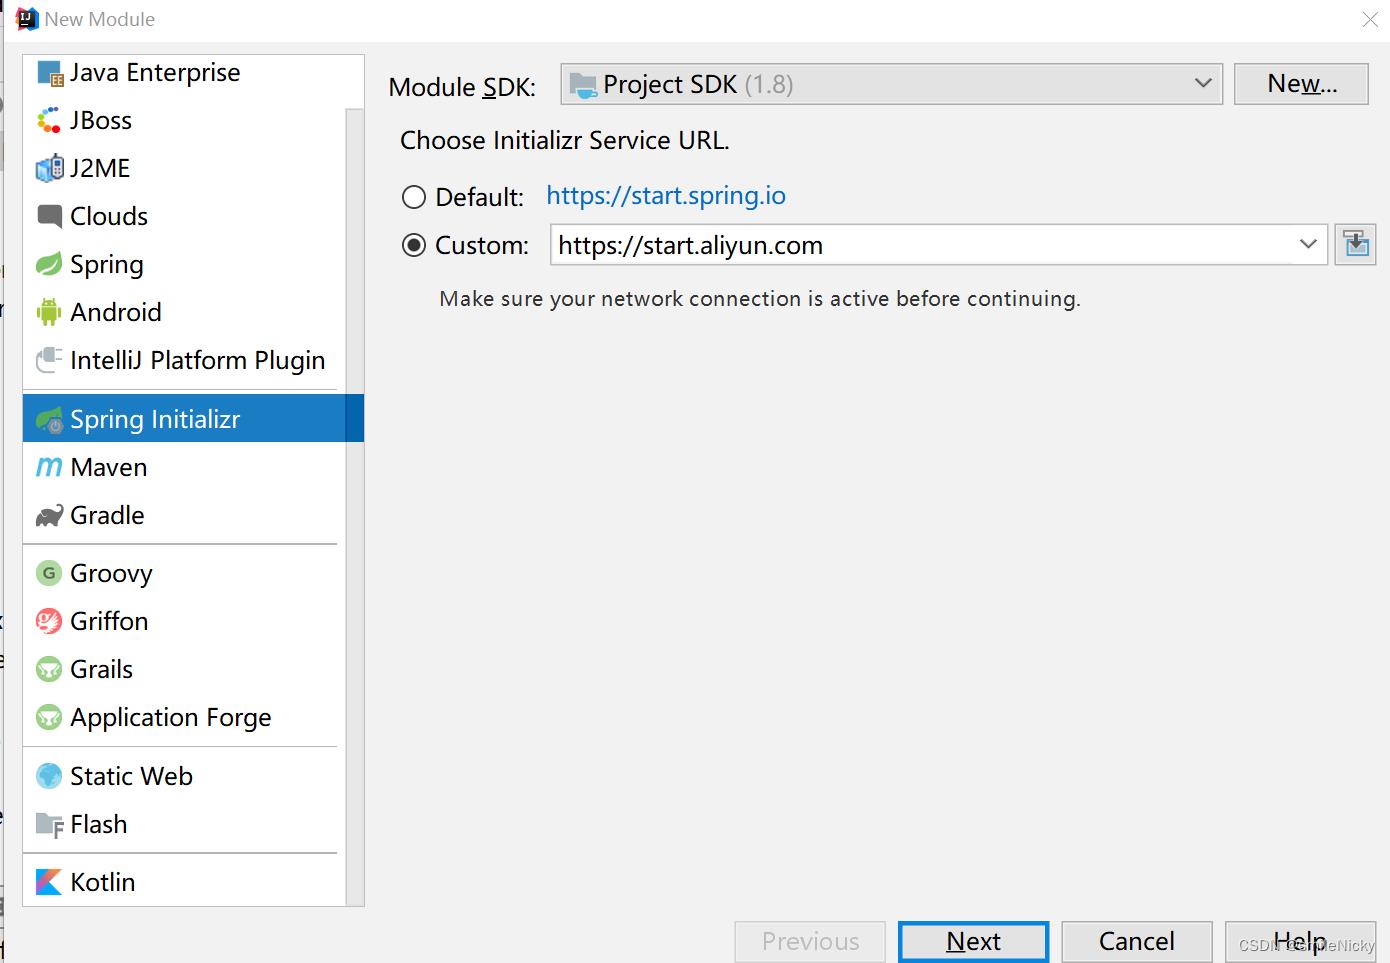
在IDEA里集成阿里的https://start.aliyun.com,创建一个Spring Initializr项目:

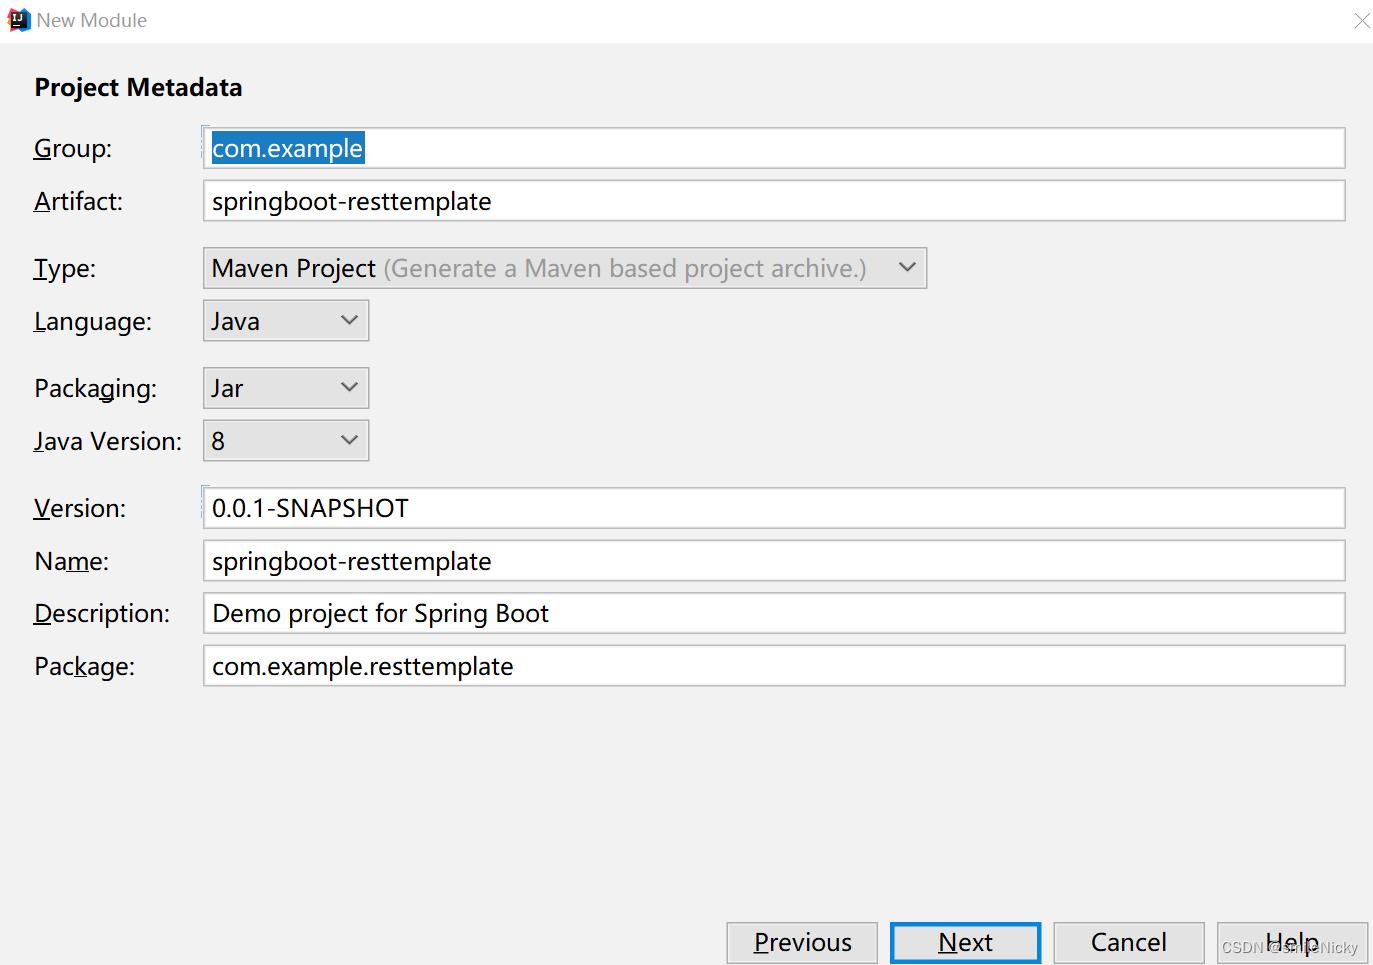
选择jdk版本,和maven打包方式

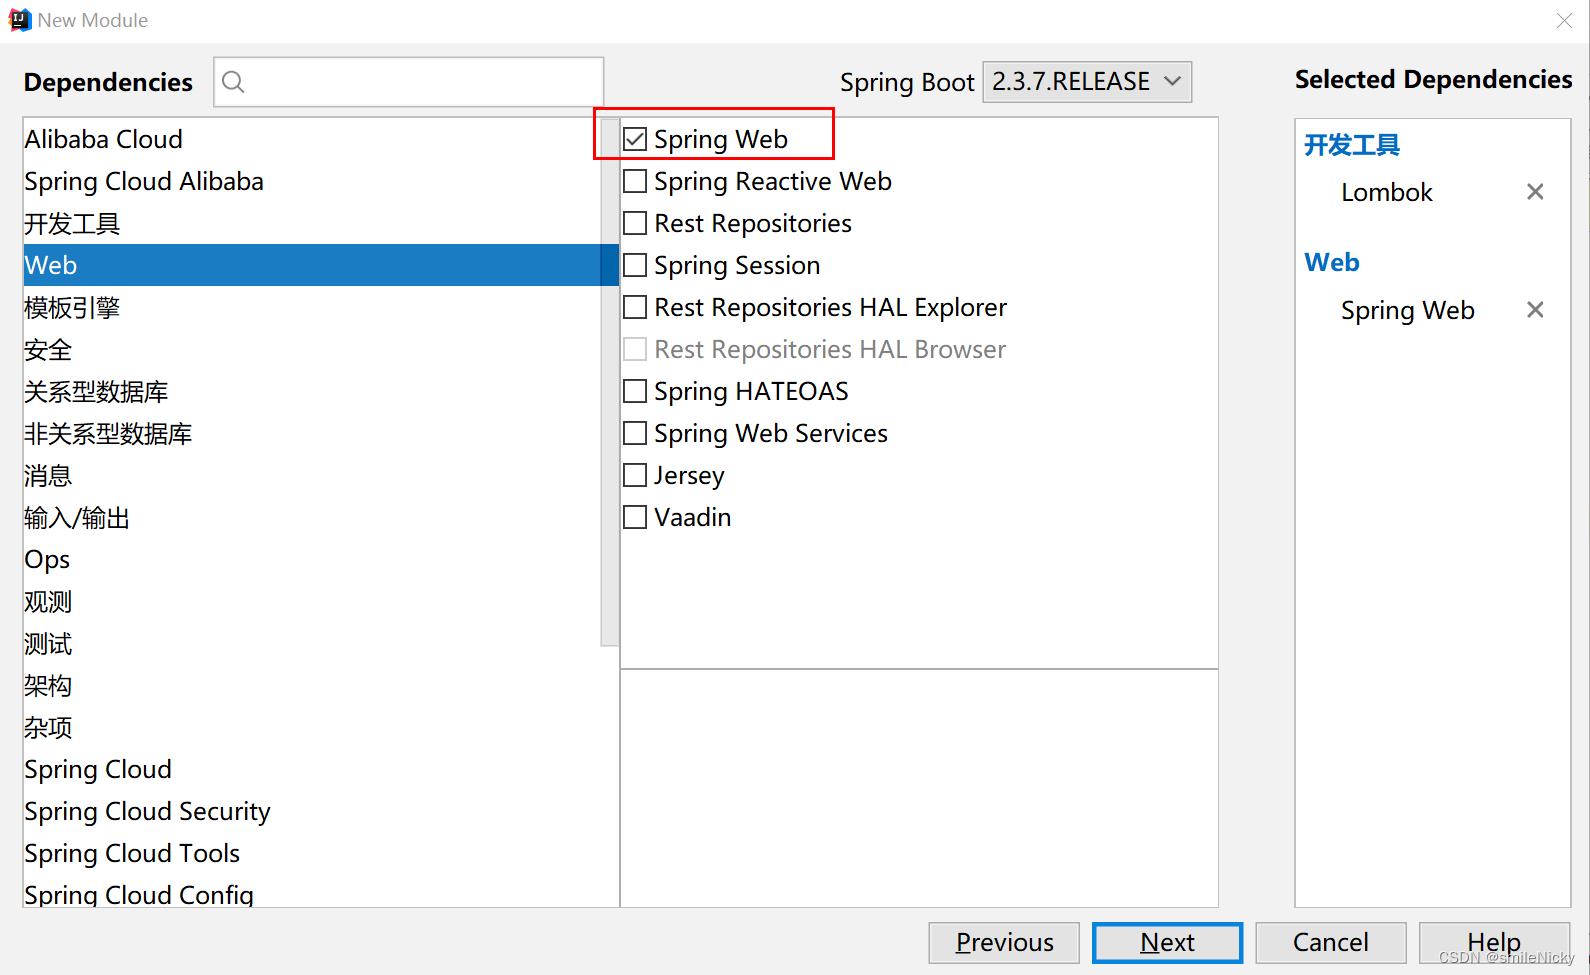
选择需要的dependencies

项目建好之后,可以对RestTemplate进行一些自定义的设置,比如可以拓展一下ClientHttpRequestInterceptor ,做一些自己的拦截,打印一些日志
package com.example.resttemplate.configuration;

import cn.hutool.core.convert.Convert;
import lombok.extern.slf4j.Slf4j;
import org.springframework.http.HttpRequest;
import org.springframework.http.client.ClientHttpRequestExecution;
import org.springframework.http.client.ClientHttpRequestInterceptor;
import org.springframework.http.client.ClientHttpResponse;

import java.io.IOException;

@Slf4j
public class CustomClientHttpRequestInterceptor implements ClientHttpRequestInterceptor


    @Override
    public ClientHttpResponse intercept(HttpRequest httpRequest, byte[] bytes, ClientHttpRequestExecution clientHttpRequestExecution) throws IOException
        trackRequest(httpRequest , bytes);
        ClientHttpResponse httpResponse = clientHttpRequestExecution.execute(httpRequest , bytes);
        trackResponse(httpResponse);
        return httpResponse;


    private void trackRequest(HttpRequest httpRequest, byte[] bytes)
        log.info("=======================request start=================================================");
        log.info("Headers        : ", httpRequest.getHeaders());
        log.info("Request URI    : ", httpRequest.getURI());
        log.info("Request Method : ", httpRequest.getMethod());
        log.info("Request Body   : " , Convert.toStr(bytes));
        log.info("=======================request end=================================================");


    private void trackResponse(ClientHttpResponse httpResponse) throws IOException
        log.info("=======================response start=================================================");
        log.info("Status code  : ", httpResponse.getStatusCode());
        log.info("Status text  : ", httpResponse.getStatusText());
        log.info("Headers      : ", httpResponse.getHeaders());
        log.info("=======================response end=================================================");
自定义RestTemplateCustomizer 类:
package com.example.resttemplate.configuration;


import org.springframework.boot.web.client.RestTemplateCustomizer;
import org.springframework.web.client.RestTemplate;

public class CustomRestTemplateCustomizer implements RestTemplateCustomizer

    @Override
    public void customize(RestTemplate restTemplate)
        restTemplate.getInterceptors().add(new CustomClientHttpRequestInterceptor());
写一个RestTemplate的配置类,注意需要加上RestTemplate 的@Bean ,我们在项目里才能使用@Autowired RestTemplate restTemplate;直接调用,@DependsOn是一个Spring框架底层的注解,会禁用RestTemplate默认的RestTemplateBuilder 类,可以不加上
package com.example.resttemplate.configuration;

import org.springframework.boot.web.client.RestTemplateBuilder;
import org.springframework.context.annotation.Bean;
import org.springframework.context.annotation.Configuration;
import org.springframework.context.annotation.DependsOn;
import org.springframework.http.client.ClientHttpRequestFactory;
import org.springframework.http.client.SimpleClientHttpRequestFactory;
import org.springframework.web.client.RestTemplate;

@Configuration
public class RestTemplateConfiguration

    @Bean
    public CustomRestTemplateCustomizer customRestTemplateCustomizer()
        return new CustomRestTemplateCustomizer();


    @Bean
    @DependsOn(value = "customRestTemplateCustomizer")
    public RestTemplateBuilder restTemplateBuilder()
        return new RestTemplateBuilder(customRestTemplateCustomizer());


    @Bean
    public ClientHttpRequestFactory simpleClientHttpRequestFactory()
        SimpleClientHttpRequestFactory factory = new SimpleClientHttpRequestFactory();
        //单位为ms
        factory.setReadTimeout(5000);
        //单位为ms
        factory.setConnectTimeout(5000);
        return factory;


    @Bean
    public RestTemplate restTemplate(RestTemplateBuilder builder ,ClientHttpRequestFactory factory )
        RestTemplate restTemplate = builder.build();
        restTemplate.setRequestFactory(factory);
        return restTemplate;
下面给出一个简单的例子,先写一个用户dto类:
package com.example.resttemplate.model;

import lombok.Data;

@Data
public class UserDto

    private Integer id;
    private String login;
    private String name;
    private String company;
    private String location;
    private String email;
通过restTemplate直接请求GitHub的用户api接口,写法是不是比自己写http的工具类,简洁很多了?
package com.example.resttemplate.controller;

import com.example.resttemplate.model.UserDto;
import org.springframework.beans.factory.annotation.Autowired;
import org.springframework.web.bind.annotation.GetMapping;
import org.springframework.web.bind.annotation.PathVariable;
import org.springframework.web.bind.annotation.RestController;
import org.springframework.web.client.RestTemplate;

@RestController
public class SampleController

    @Autowired
    RestTemplate restTemplate;

    @GetMapping(value = "/users/login")
    public UserDto getUser(@PathVariable("login")String login)
        String url = new StringBuilder()
                .append("https://api.github.com/users/")
                .append(login)
                .toString();
        UserDto userDto = restTemplate.getForObject(url , UserDto.class , "");
        return userDto;
在Linux里调用接口curl http://127.0.0.1:8080/users/mojombo
getForEntity的例子,返回ResponseEntity
MultiValueMap<String, Object> uriVariables = new LinkedMultiValueMap<String, Object>();
ResponseEntity<String> responseEntity = restTemplate.getForEntity(apprWritUrl, String.class, uriVariables);
logger.info("statusCode:,responBody:", responseEntity.getStatusCode().value(), responseEntity.getBody());
if (responseEntity.getStatusCode().value() == 200)
    logger.info("调用成功!");
    // 业务处理
postForEntity的例子
HttpHeaders headers = new HttpHeaders();
MultiValueMap<String,Object> params = new LinkedMultiValueMap<String, Object>(16) ;
params.set("attachId",attachSeq);
params.set("seq",seq);
HttpEntity<MultiValueMap<String,Object>> requestEntity = new HttpEntity<MultiValueMap<String,Object>>(params, headers);
ResponseEntity<String> entity = restTemplate.postForEntity("", requestEntity, String.class);
也可以使用restTemplate.exchange的方法,这个方法需要指定请求方式,比如HttpMethod.GET
final String reqUrl = "url";
HttpEntity<String> httpEntity = this.getHttpEntity();
ResponseEntity<String> responseEntity = restTemplate.exchange(reqUrl,   HttpMethod.GET , httpEntity, String.class);
logger.info("statusCode:,responseBody:", responseEntity.getStatusCode().value(), responseEntity.getBody());
上传文件的例子,需要使用FileSystemResource封装一下
RestTemplate restTemplate = new RestTemplate();
FileSystemResource resource = new FileSystemResource(new File("D:\\\\test.txt"));
MultiValueMap<String, Object> param = new LinkedMultiValueMap<>();
param.add("file", resource);
param.add("fileName", "test.txt");
Object object = restTemplate.postForObject("http://127.0.0.1:8101/api/attachment/upload", param, Object.class);
对接有时候需要在请求头加很多校验参数,现在比较流行的是在网关里校验,下面是封装的方法,可以参考
 /**
  * 构建HttpEntity
  * @Author nicky
  * @Date 2020/10/21 11:36
  * @Param []
  * @return org.springframework.http.HttpEntity<java.lang.String>
  */
 protected HttpEntity<String> getHttpEntity() throws Exception
     final String passToken = "passToken";
     long now = new Date().getTime();
     String timestamp = Long.toString((long) Math.floor(now / 1000));
     String nonce = Long.toHexString(now) + "-" + Long.toHexString((long) Math.floor(Math.random() * 0xFFFFFF));
     String signature= Signature.toSHA256(timestamp + passToken + nonce + timestamp);

     HttpHeaders headers = new HttpHeaders();
     headers.add("appid", "appid");
     headers.add("serviceId","serviceId");
     headers.add("signature", signature);
     headers.add("timestamp", timestamp);
     headers.add("nonce", nonce);
     headers.add("Content-Type", "application/json");
     headers.add("Cache-Control", "no-cache");

     HttpEntity<String> httpEntity = new HttpEntity<String>(null, headers);
     return httpEntity;
有时候对接,需要在postman里,很多参数都是动态的,我们可以写postman得一些脚本来测试

脚本参考,对接这个时间戳timestamp有时需要注意一些,要确定是毫秒的还是秒的的,参考博客:java时间戳 10位和13位分别是怎么来的?
var timestamp = (Date.now()/1000).toFixed()
var token=''
var nonce= Math.floor(Math.random() * 10000000000)
var appid=''

var signature = CryptoJS.SHA256(timestamp + token + nonce + timestamp).toString(CryptoJS.enc.Hex).toUpperCase()
pm.globals.set("variable_key", "variable_value");
postman.setGlobalVariable("signature", signature);
postman.setGlobalVariable("timestamp", timestamp);
postman.setGlobalVariable("nonce", nonce);
postman.setGlobalVariable("appid", appid);
博主对接过一些接口,需要一些签名加密的,下面给出一些工具类,参考,提高联调速度
import java.security.MessageDigest;

/**
 *	<pre>
 *	    sha256签名算法
 *	</pre>
 */
public class Signature
	public static String toSHA256(String str) throws Exception
		MessageDigest messageDigest;
		String encodeStr = "";
		try
			messageDigest = MessageDigest.getInstance("SHA-256");
			messageDigest.update(str.getBytes("UTF-8"));
			encodeStr = byte2Hex(messageDigest.digest());
		 catch (Exception e)
			throw e;

		return encodeStr;


	// byte转换成16进制
	protected static String byte2Hex(byte[] bytes)
		StringBuffer stringBuffer = new StringBuffer();
		String temp = null;
		for (int i = 0; i < bytes.length; i++)
			temp = Integer.toHexString(bytes[i] & 0xFF);
			if (temp.length() == 1)
				stringBuffer.append("0");

			stringBuffer.append(temp);

		return stringBuffer.toString();
sha1加密,这个是对接企业微信时候用到
/**
* sha1加密 <br>
* @Author nicky
* @Date 2021/04/26 10:22
* @Param [str]
* @return java.lang.String
*/
public static String sha1Digest(String str)
try
// SHA1签名生成
MessageDigest md = MessageDigest.getInstance("SHA-1");
md.update(str.getBytes());
byte[