R语言-limma差异分析与heatmap绘制
Posted
tags:
篇首语:本文由小常识网(cha138.com)小编为大家整理,主要介绍了R语言-limma差异分析与heatmap绘制相关的知识,希望对你有一定的参考价值。
参考技术A #mRNA表达矩阵与GROUP文件样式,heatmap样式见文章最后library(limma)
mRNA <- read.table("表达矩阵.txt",sep = "\t",header = T,comment.char = "!",encoding = "UTF-8")
#mRNA数据框行名为基因名,列命为样本名称
group <- read.table("GROUP.txt",header=T,sep = "\t",encoding = "UTF-8")
group_CP <- group$treat
m_design<- model.matrix(~0+factor(group_CP))
colnames(m_design) = levels(factor(group_CP))
rownames(m_design)= group$ID
contrast.matrix<-makeContrasts("P-C",levels=m_design) #注意P-C顺序,实验组要在前面否则影响上下调结果
m_fit <- lmFit(mRNA,m_design)
m_fit <- contrasts.fit(m_fit, contrast.matrix)
m_fit <- eBayes(m_fit)
m_genlist <- topTable(m_fit, coef = 1, n=Inf) #limma结果
#将表达矩阵与差异分析结果合并
ID_REF <- rownames(m_genlist)
m_genlist <- data.frame(ID_REF,m_genlist)
ID_REF <- rownames(mRNA)
mRNA <- data.frame(ID_REF,mRNA)
test <-merge(mRNA,m_genlist,by = "ID_REF")
result <- subset(test,P.Value<0.05)
row.names(result) <- result[,1]
#绘制热图
heatmap <- result[2:(nrow(group)+1)]
annotation <- data.frame(Factor = factor(group$treat)) #标注样本的分组信息
rownames(annotation) <- colnames(heatmap)
library(pheatmap)
filename <- paste("文件名",".pdf",sep="")
pdf(filename)
pheatmap(heatmap,
annotation=annotation,
annotation_legend = TRUE,
main=filename ,
scale = "row",
show_rownames = F,
color = colorRampPalette(c("green","black","red"))(100))
dev.off()
#表达矩阵与GROUP文件如下所示
R语言热力图综合教程-heatmapd3heatmap和ComplexHeatmap
用于绘制交互式和静态热图的R包和功能很多,包括:
heatmap()[R基本函数,统计数据包]:绘制一个简单的热图
heatmap.2()[ gplots R包]:与R base函数相比,绘制了增强的热图。
pheatmap()[ pheatmap R包]:绘制漂亮的热图,并提供更多控件来更改热图的外观。
d3heatmap()[ d3heatmap R包]:绘制交互式/可单击的热图
ComplexHeatmap R / Bioconductor的包]:绘制,注释和排列复杂热图(用于基因组数据分析是非常有用的)
在这里,我们从描述绘制热图的5 R函数开始。接下来,我们将重点介绍ComplexHeatmap程序包,该程序包提供了一种灵活的解决方案来安排和注释多个热图。它也可以可视化来自不同来源的不同数据之间的关联
我们使用mtcars数据作为演示数据集。我们首先将数据标准化以使变量具有可比性:
df <- scale(mtcars)# Default plot
heatmap(df, scale = "none")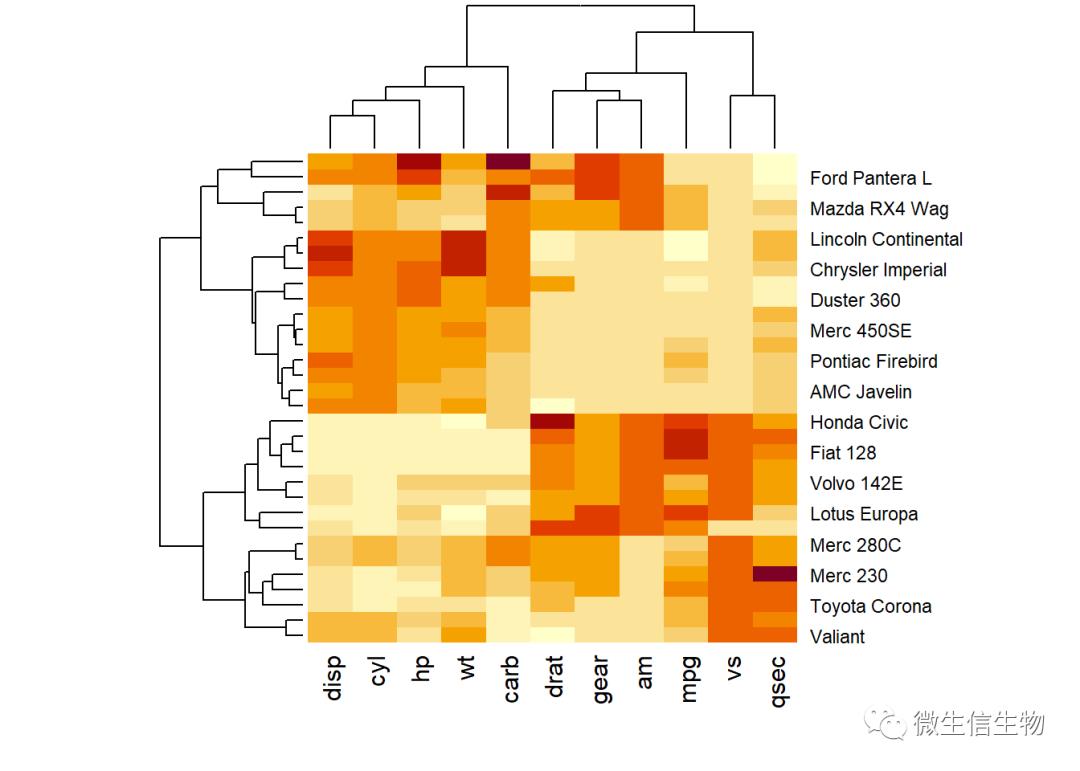
如何指定调色板
col<- colorRampPalette(c("red", "white", "blue"))(256)

heatmap(df, scale = "none", col = col)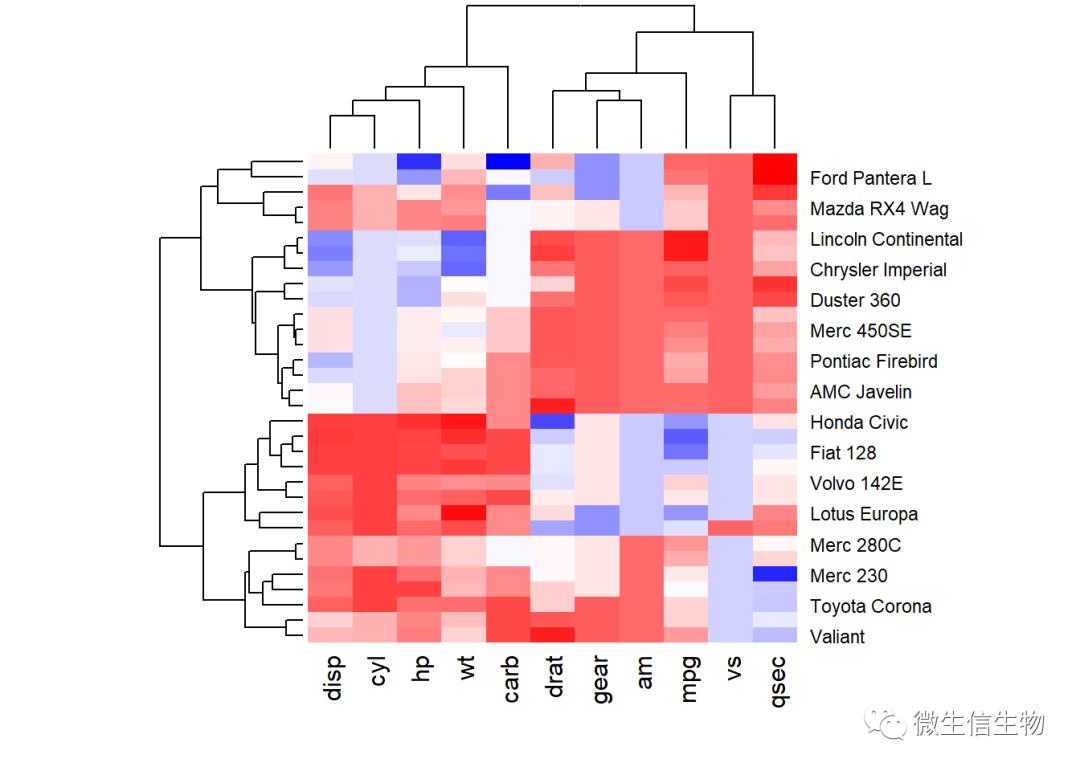
library("RColorBrewer")
col <- colorRampPalette(brewer.pal(10, "RdYlBu"))(256)

heatmap(df, scale = "none", col = col)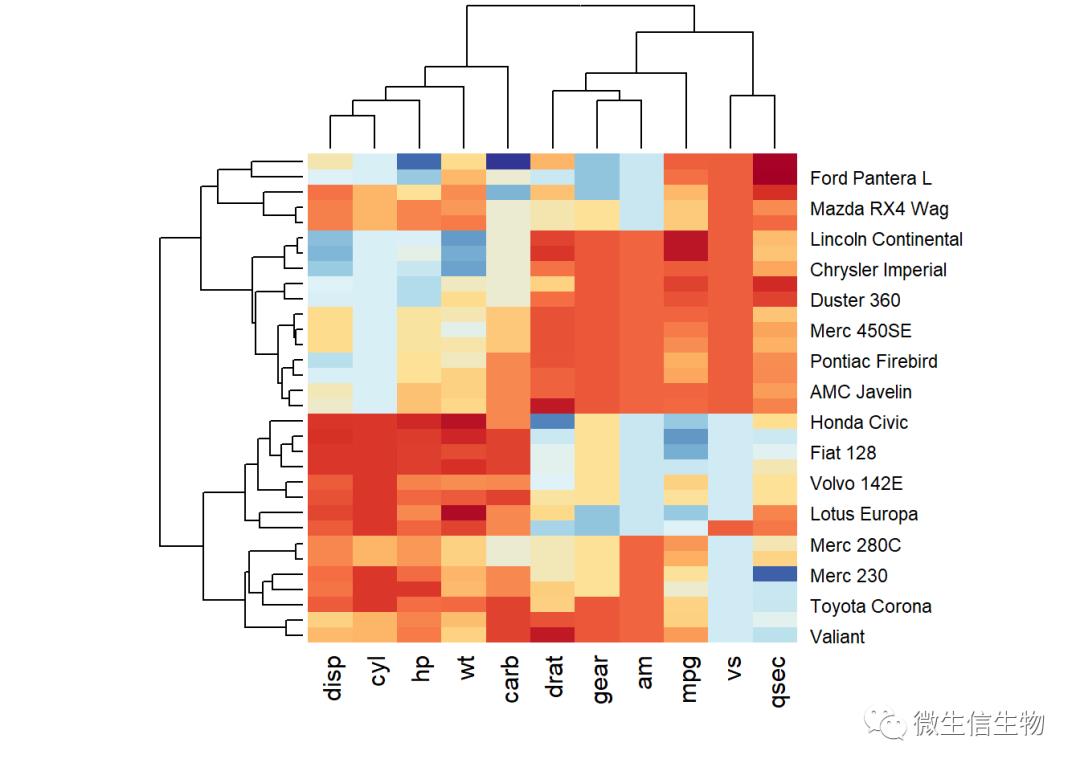
此外,可以使用参数RowSideColors和ColSideColors分别注释行和列。
例如,在下面的R代码中,将自定义热图,如下所示:
RColorBrewer调色板名称用于更改外观
参数RowSideColors和ColSideColors分别用于注释行和列。按照行列顺序指指定颜色
heatmap是按照聚类来重排行列的,会打乱颜色。
# Use RColorBrewer color palette names
library("RColorBrewer")
col <- colorRampPalette(brewer.pal(10, "RdYlBu"))(256)
heatmap(df, scale = "none", col = col,
 RowSideColors = rep(c("blue", "pink"), each = 16),
 ColSideColors = c(rep("purple", 5), rep("orange", 6)))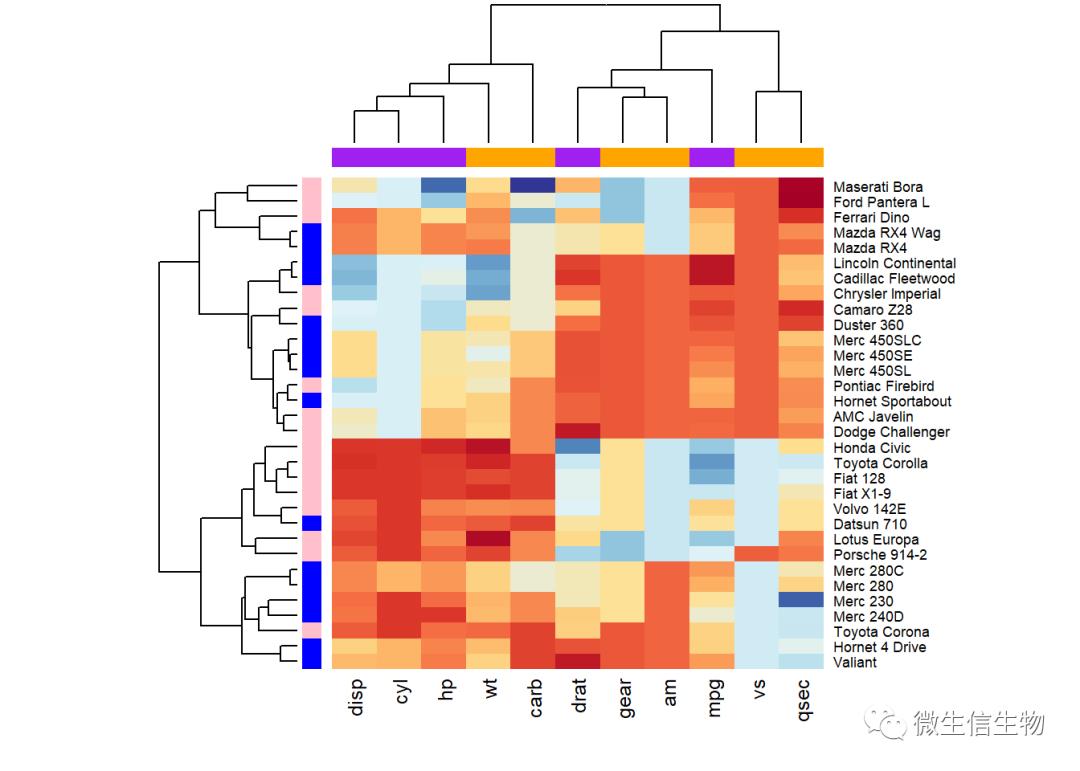
# install.packages("gplots")
library("gplots")
heatmap.2(df, scale = "none", col = bluered(100),
 trace = "none", density.info = "none")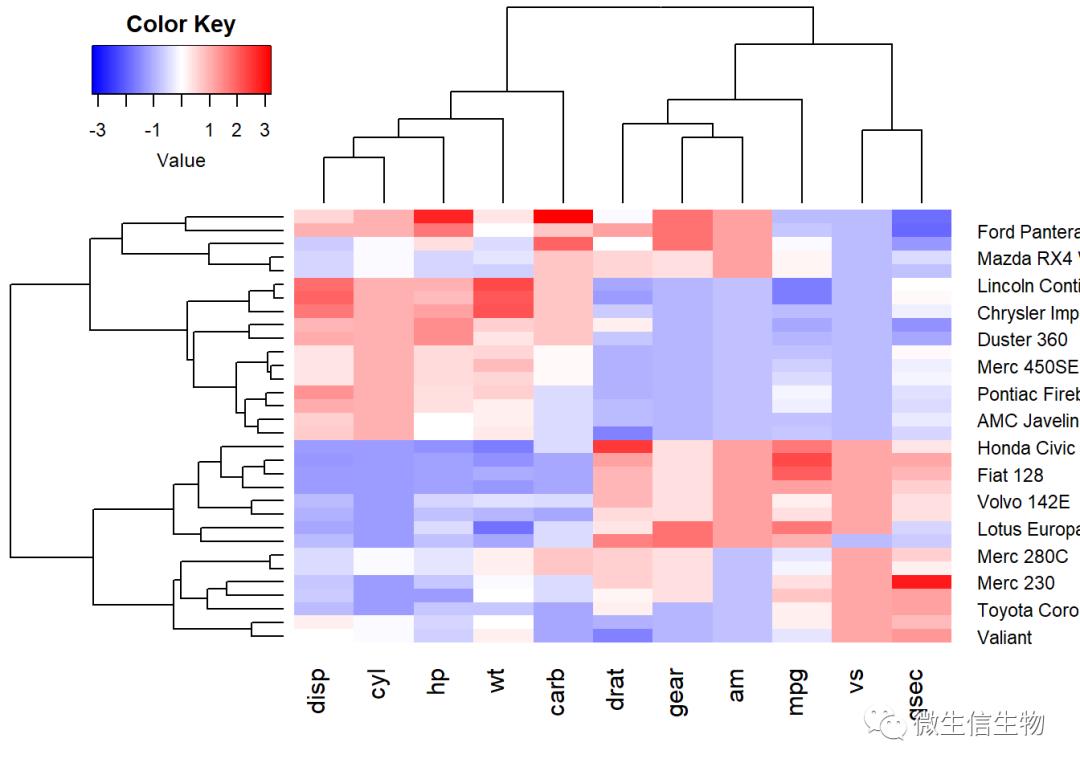
pheatmap
这个功能十分强大,出图我们也经常选用,cutree_rows参数用于按照聚类结果进行切割。
library("pheatmap")
pheatmap(df, cutree_rows = 4)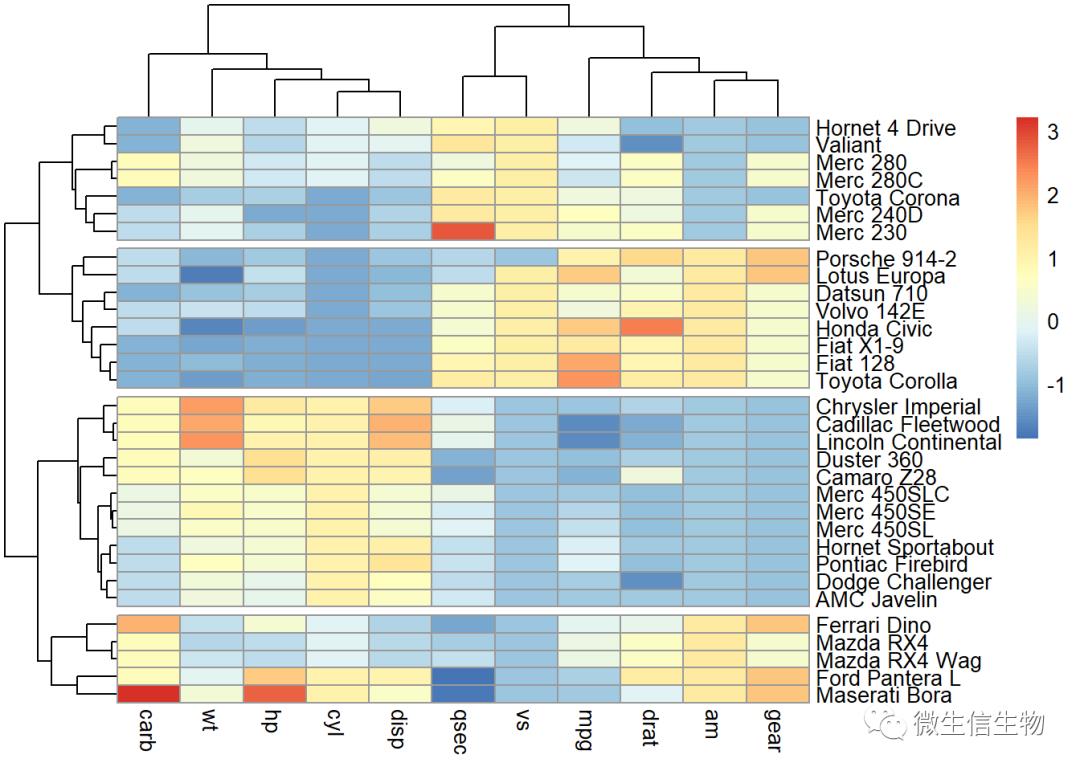
# install.packages("d3heatmap")
library("d3heatmap")
d3heatmap(scale(mtcars), colors = "RdYlBu",
 k_row = 4, # Number of groups in rows
 k_col = 2 # Number of groups in columns
 )
pheatmap不能使用。
ComplexHeatmap 功能十分强大
row_names_gp:设置标签自字体大小
olumn_title:设置行,列名称标签。
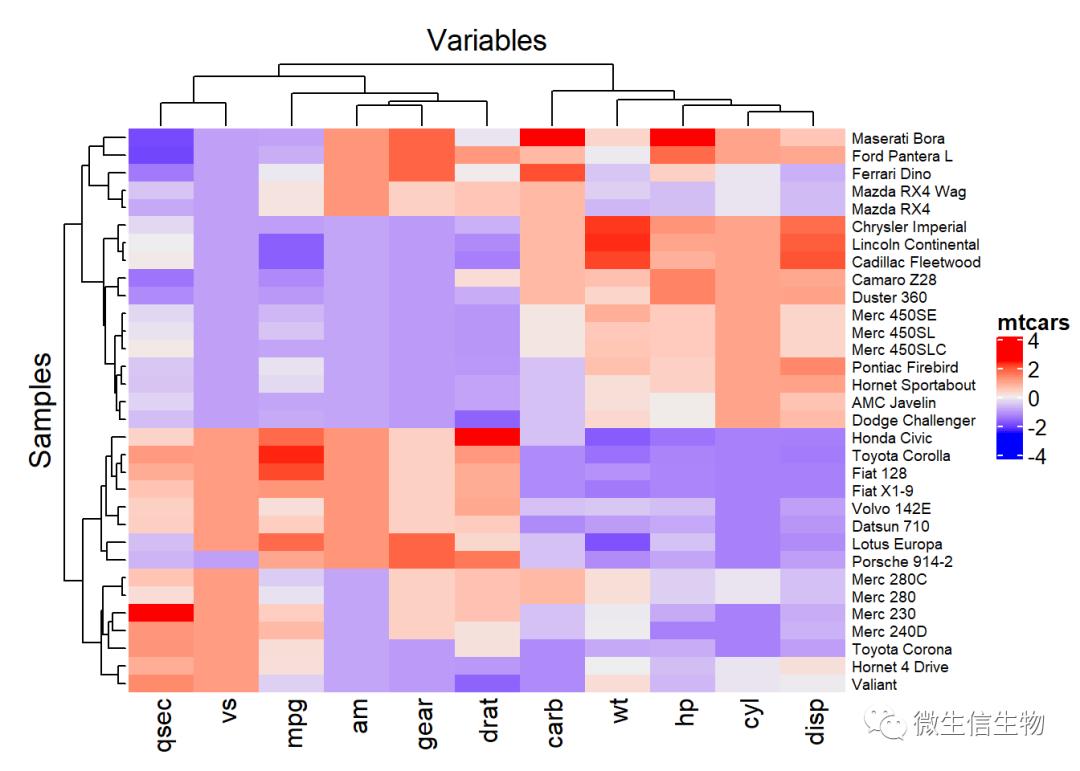
library(ComplexHeatmap)
Heatmap(df,
 name = "mtcars", #title of legend
 column_title = "Variables", row_title = "Samples",
 row_names_gp = gpar(fontsize = 7) # Text size for row names
 )
要指定自定义颜色,必须使用colorRamp2()函数[ circlize package],如下所示:
library(circlize)
mycols <- colorRamp2(breaks = c(-2, 0, 2),
 colors = c("green", "white", "red"))
Heatmap(df, name = "mtcars", col = mycols)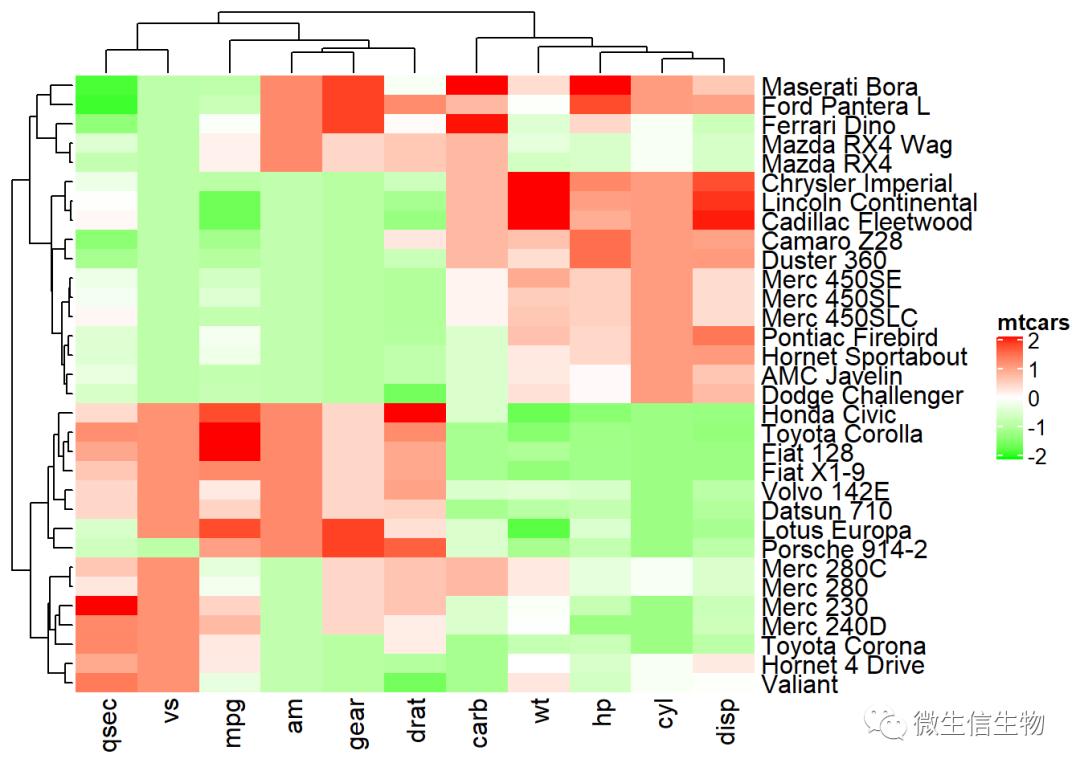
更换调色板,使用RColorBrewer 中的颜色。
library("circlize")
library("RColorBrewer")
Heatmap(df, name = "mtcars",
 col = colorRamp2(c(-2, 0, 2), brewer.pal(n=3, name="RdBu")))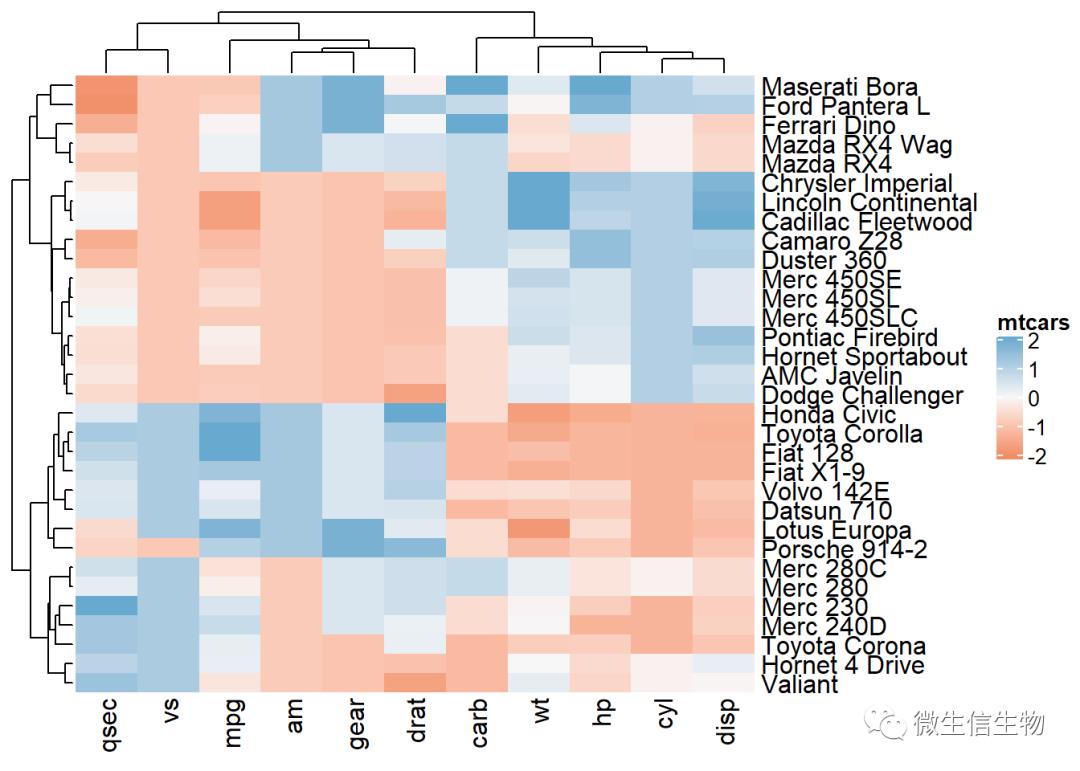
dendextend 同样给复杂热图聚类上色。
library(dendextend)
row_dend = hclust(dist(df)) # row clustering
col_dend = hclust(dist(t(df))) # column clustering
Heatmap(df, name = "mtcars",
 row_names_gp = gpar(fontsize = 6.5),
 cluster_rows = color_branches(row_dend, k = 4),
 cluster_columns = color_branches(col_dend, k = 2))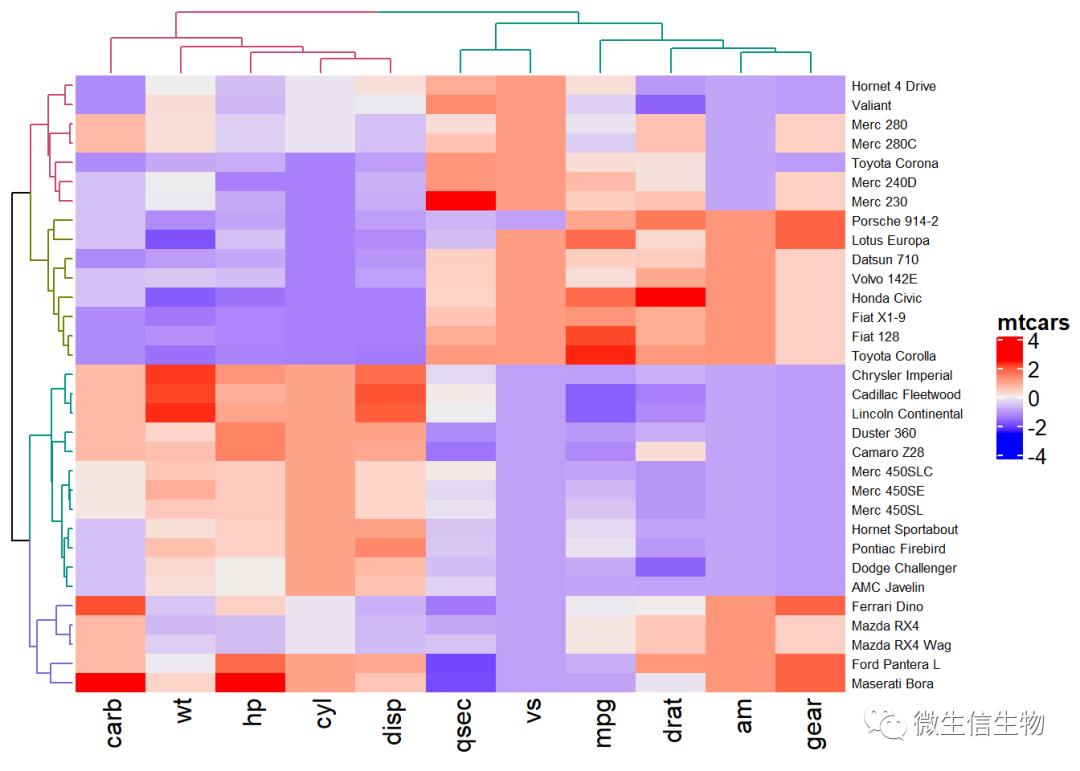
复杂热图按照聚类切割分块
km/row_km:对列进行聚类拆分
# Divide into 2 groups
set.seed(2)
Heatmap(df, name = "mtcars", km = 4)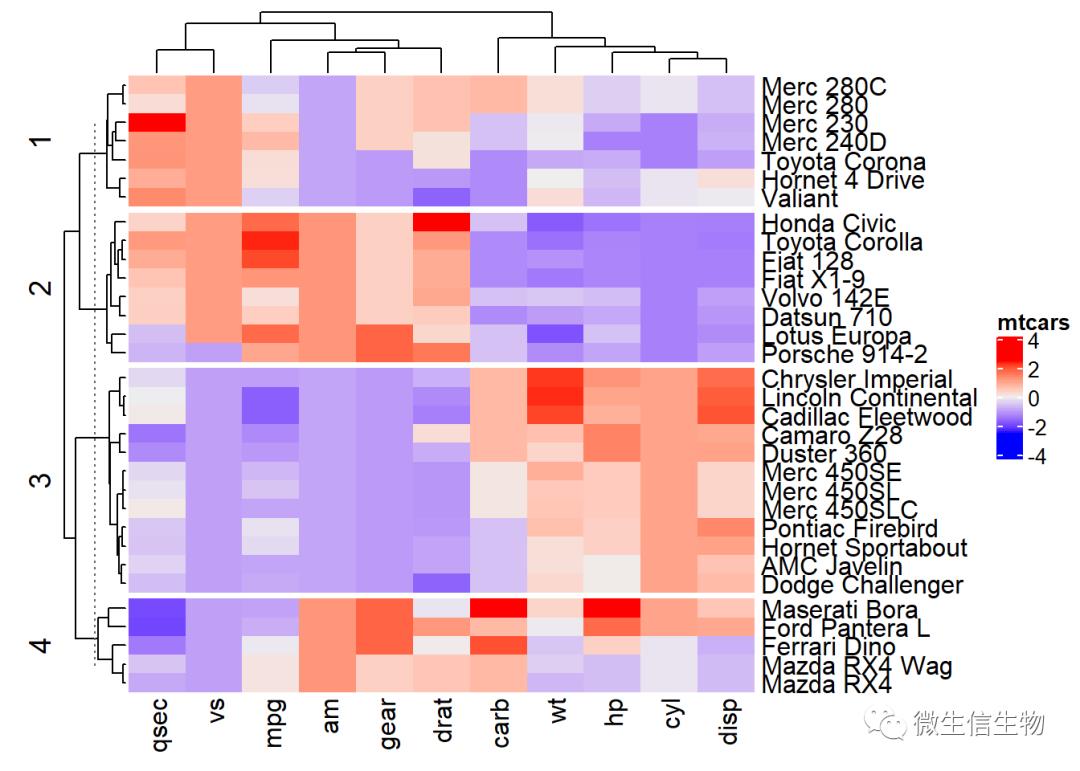
按照行进行分割聚类:column_km
# Divide into 2 groups
set.seed(2)
Heatmap(df, name = "mtcars", column_km = 4)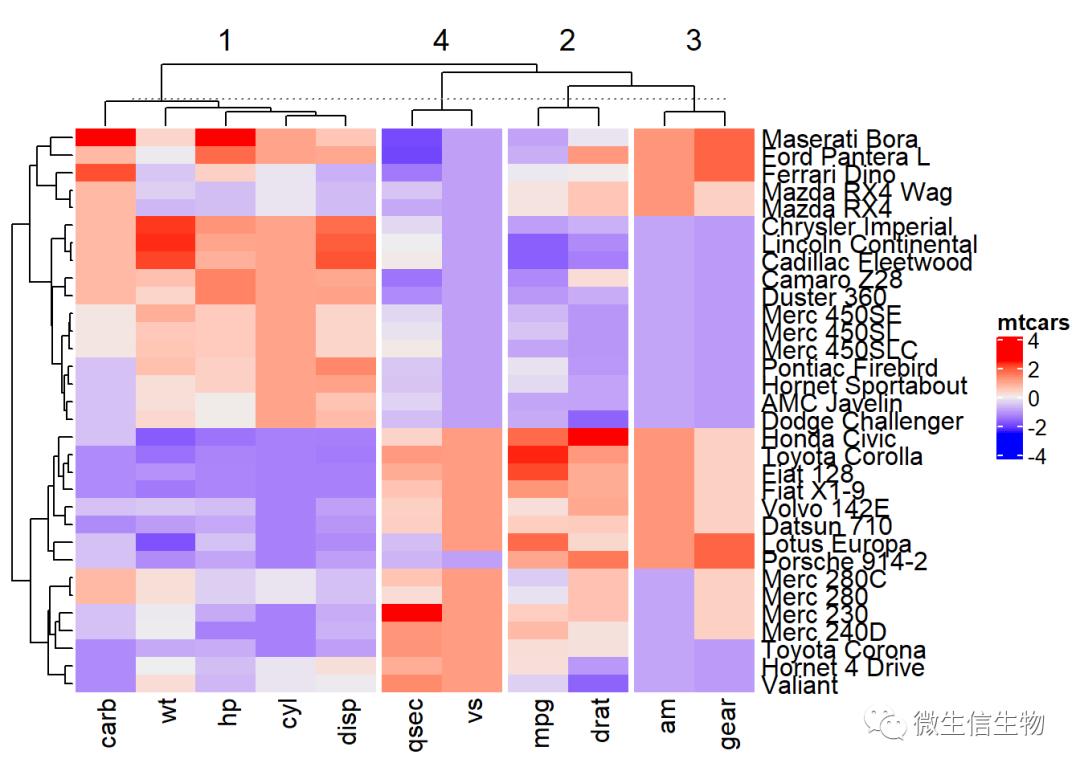
指定行列分隔
split :参数用于指定行的分组,用于分割热图。row_split一样
如果要对行进行聚类,使用column_split,用法一样。
# Split
# data.frame(cyl = rep(1:4,dim(mtcars)[2]))
Heatmap(df, name ="mtcars",
 split = data.frame(cyl = mtcars$cyl),
 column_split = data.frame(cyl = rep(1:2,dim(mtcars)[2])[1:11]),
 row_names_gp = gpar(fontsize = 7))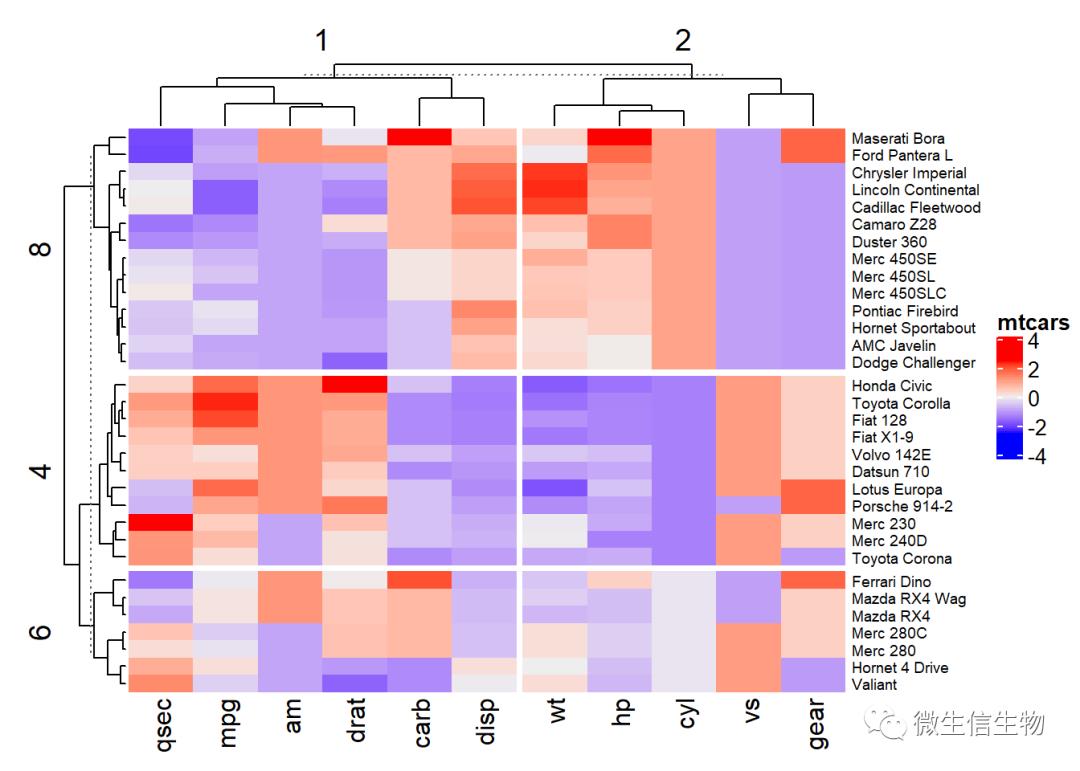
多重分隔
Heatmap(df, name ="mtcars", col = col,
 km = 4, split = mtcars$cyl)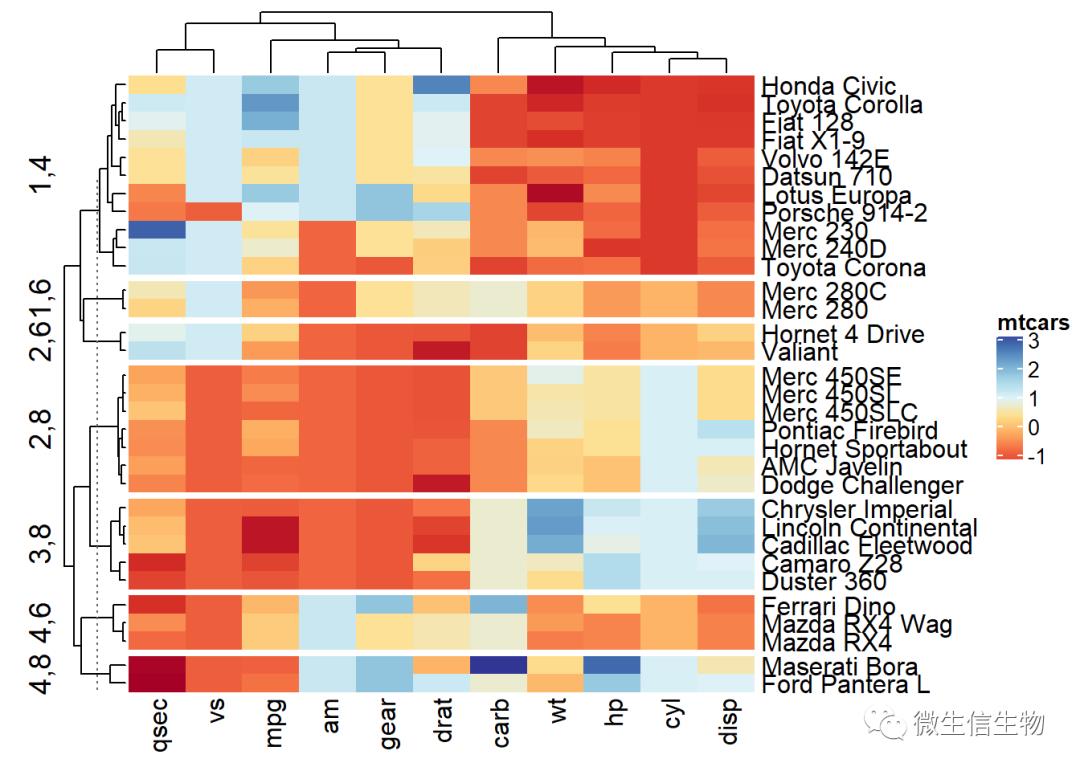
library("cluster")
set.seed(2)
pa = pam(df, k = 3)
Heatmap(df, name = "mtcars", col = col,
 split = paste0("pam", pa$clustering))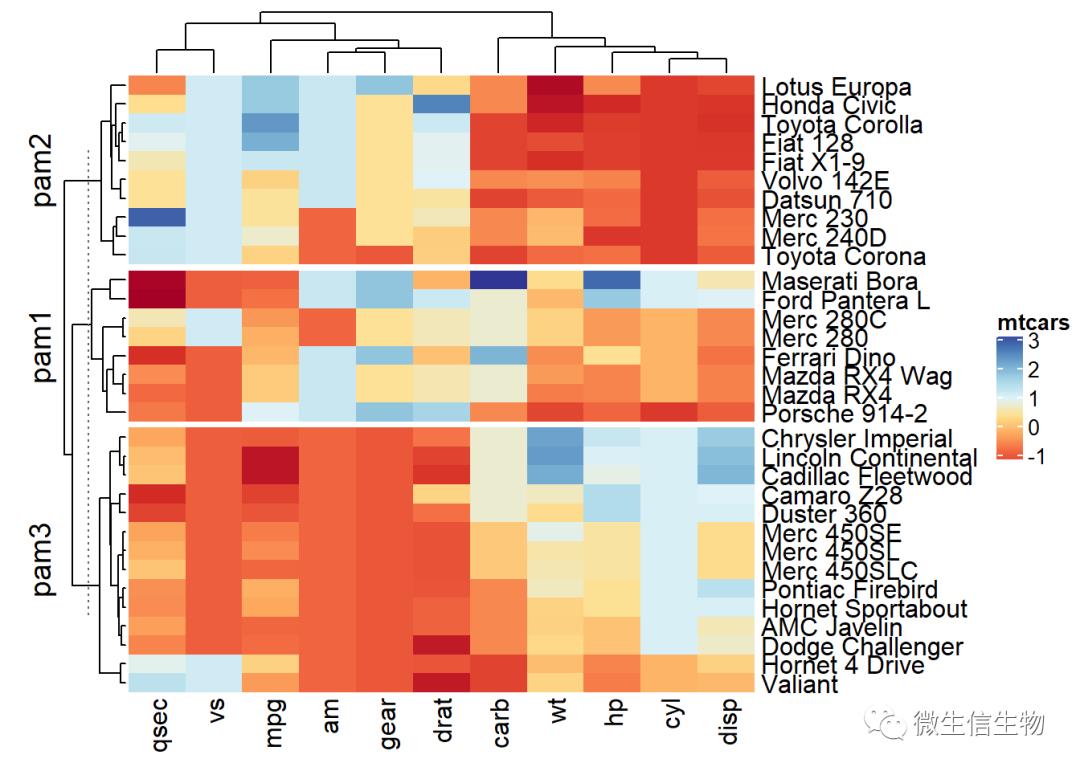
复杂热图为什么复杂
复杂热图最强大的莫过于对于热图的注释
df <- t(df)# Define some graphics to display the distribution of columns
.hist = anno_histogram(df, gp = gpar(fill = "lightblue"))
.density = anno_density(df, type = "line", gp = gpar(col = "blue"))
ha_mix_top = HeatmapAnnotation(hist = .hist, density = .density)
# Define some graphics to display the distribution of rows
.violin = anno_density(df, type = "violin",
gp = gpar(fill = "lightblue"), which = "row")
.boxplot = anno_boxplot(df, which = "row")
ha_mix_right = HeatmapAnnotation(violin = .violin, bxplt = .boxplot,
which = "row", width = unit(4, "cm"))
# Combine annotation with heatmap
Heatmap(df, name = "mtcars",
column_names_gp = gpar(fontsize = 8),
top_annotation = ha_mix_top) + ha_mix_right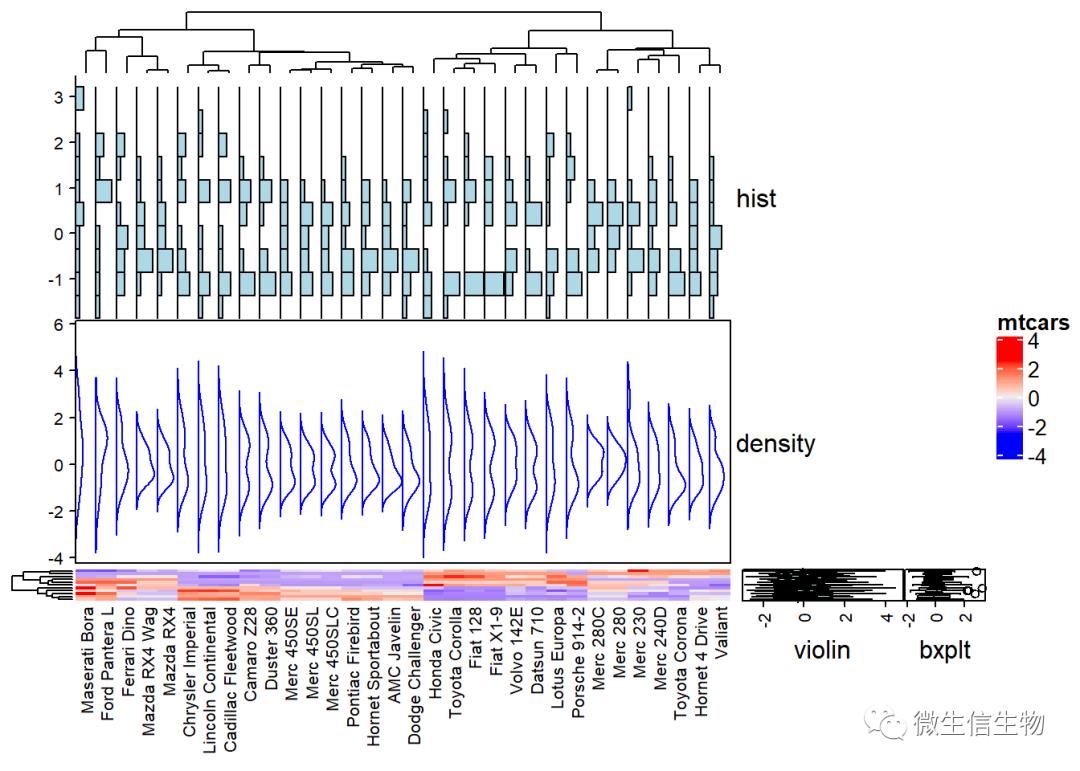
复杂热图的组合
# Heatmap 1
ht1 = Heatmap(df, name = "ht1", km = 2,
 column_names_gp = gpar(fontsize = 9))
# Heatmap 2
ht2 = Heatmap(df, name = "ht2",
 col = circlize::colorRamp2(c(-2, 0, 2), c("green", "white", "red")),
 column_names_gp = gpar(fontsize = 9))
# Combine the two heatmaps
ht1 + ht2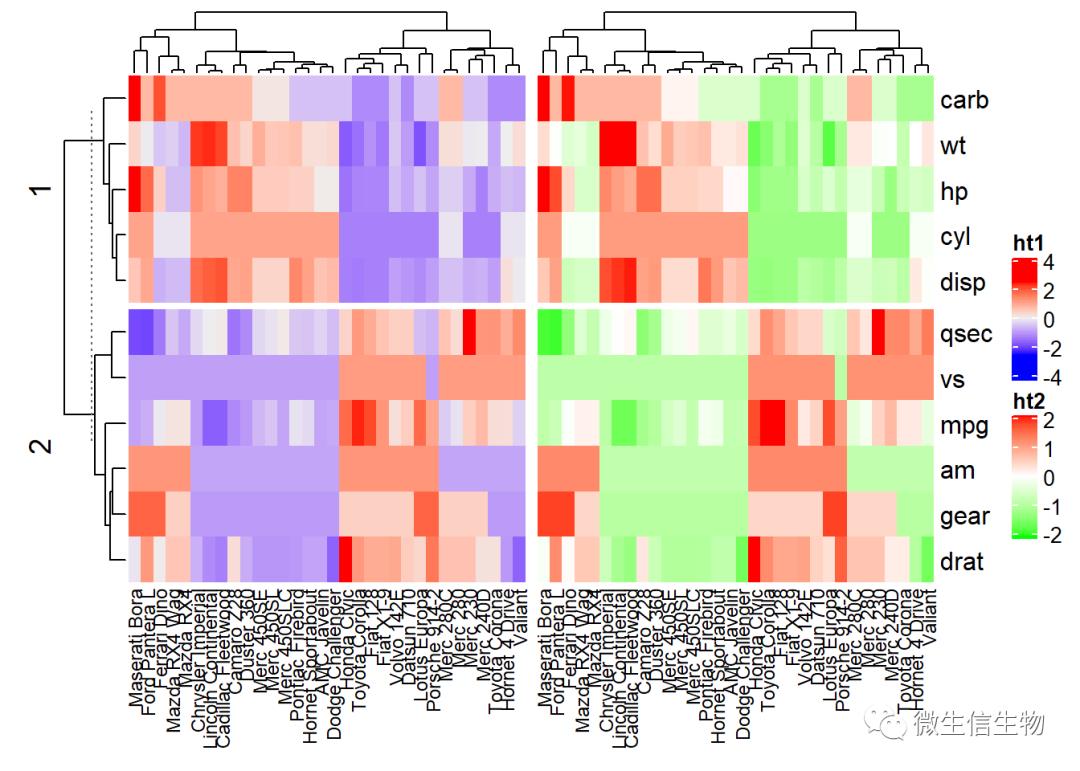
细布控制组合
draw(ht1 + ht2,
 row_title = "Two heatmaps, row title",
 row_title_gp = gpar(col = "red"),
 column_title = "Two heatmaps, column title",
 column_title_side = "bottom",
 # Gap between heatmaps
 gap = unit(0.5, "cm"))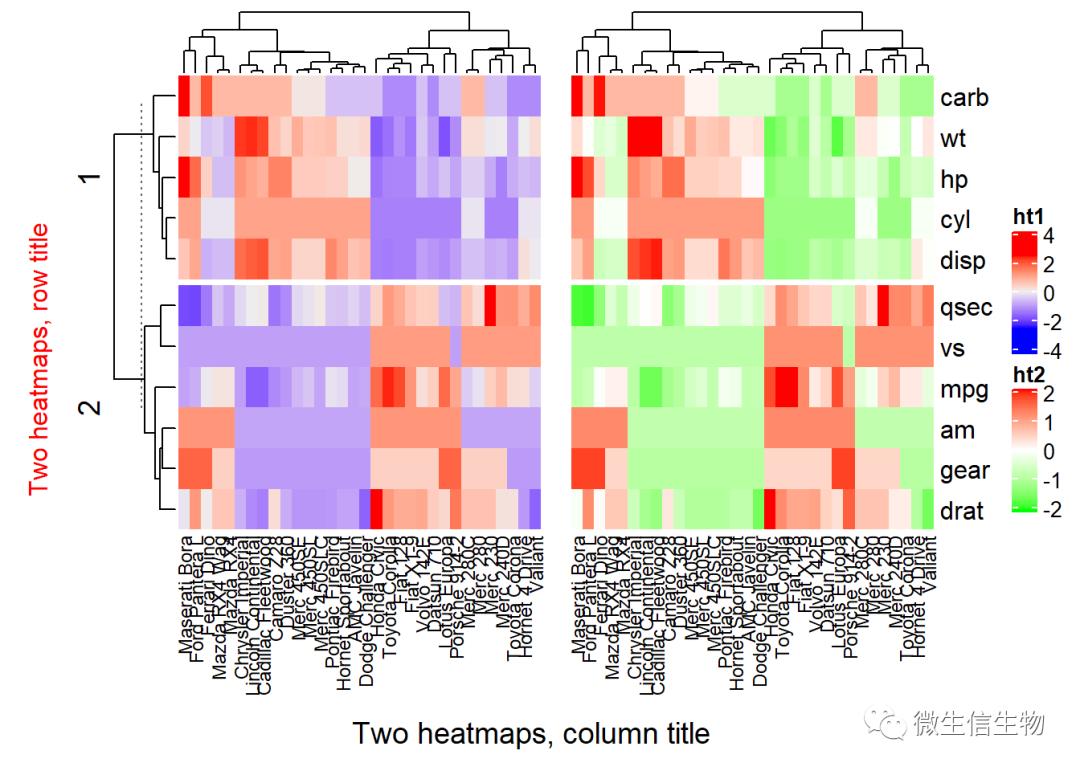
expr <- readRDS(paste0(system.file(package = "ComplexHeatmap"),
 "/extdata/gene_expression.rds"))
mat <- as.matrix(expr[, grep("cell", colnames(expr))])
type <- gsub("s\d+_", "", colnames(mat))
ha = HeatmapAnnotation(df = data.frame(type = type))

ha
## A HeatmapAnnotation object with 1 annotation
## name: heatmap_annotation_2
## position: column
## items: 24
## width: 1npc
## height: 5mm
## this object is subsetable
## 9.001mm extension on the right
##
## name annotation_type color_mapping height
## type discrete vector random 5mmHeatmap(mat, name = "expression", km = 5, top_annotation = ha,
# top_annotation_height = unit(4, "mm"),
show_row_names = FALSE, show_column_names = FALSE) +
Heatmap(expr$length, name = "length", width = unit(5, "mm"),
col = circlize::colorRamp2(c(0, 100000), c("white", "orange"))) +
Heatmap(expr$type, name = "type", width = unit(5, "mm")) +
Heatmap(expr$chr, name = "chr", width = unit(5, "mm"),
col = circlize::rand_color(length(unique(expr$chr))))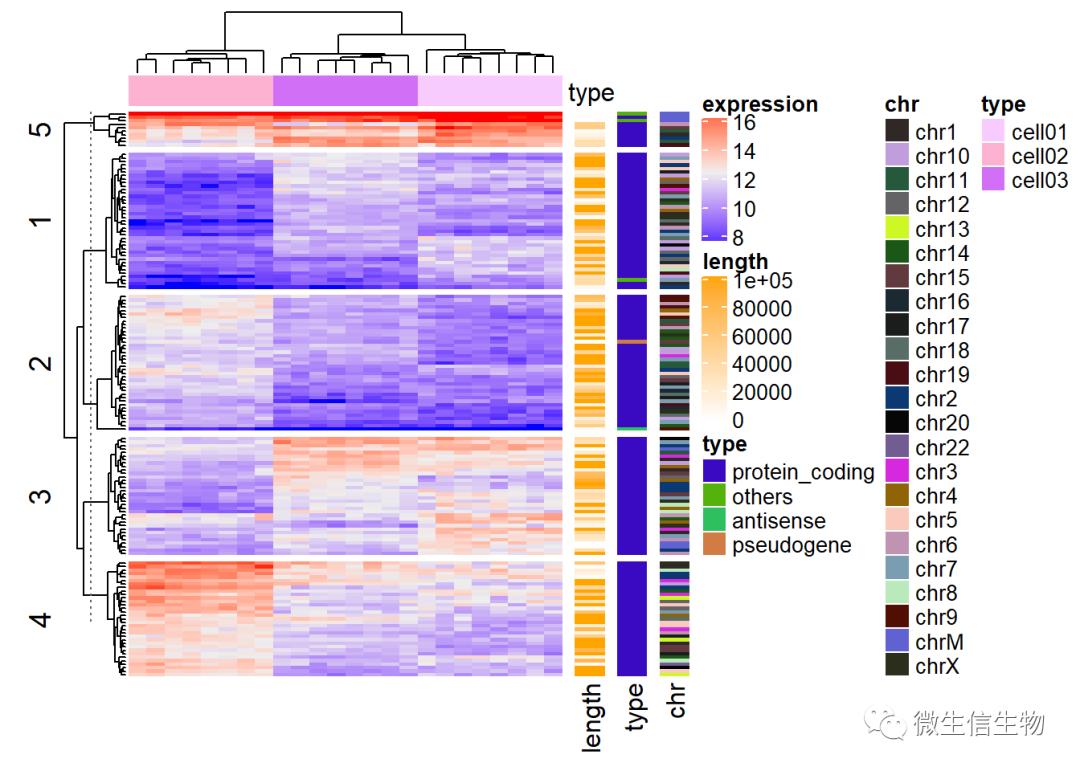
ha = HeatmapAnnotation(df = data.frame(type = type))

ha
## A HeatmapAnnotation object with 1 annotation
## name: heatmap_annotation_3
## position: column
## items: 24
## width: 1npc
## height: 5mm
## this object is subsetable
## 9.001mm extension on the right
##
## name annotation_type color_mapping height
## type discrete vector random 5mmHeatmap(mat, name = "expression", km = 5, top_annotation = ha,
# top_annotation_height = unit(4, "mm"),
show_row_names = FALSE, show_column_names = FALSE) +
Heatmap(expr$type, name = "type", width = unit(5, "mm")) +
Heatmap(expr$type, name = "type", width = unit(5, "mm"))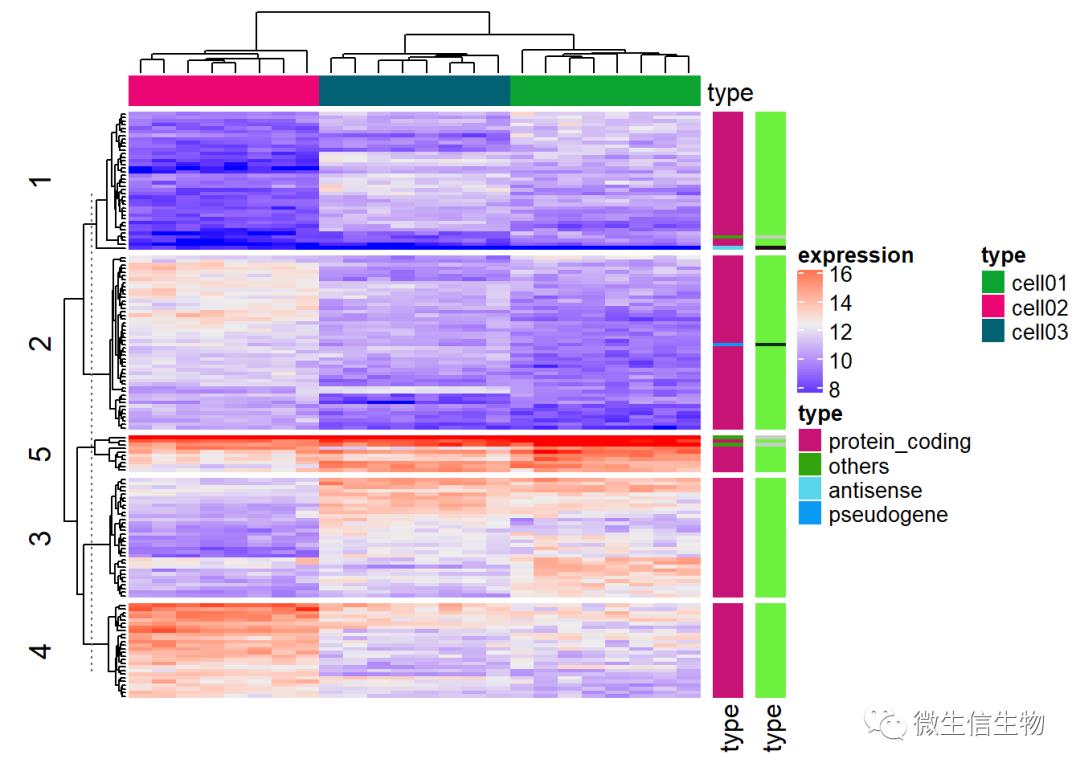
如何添加多个行,或者列
# Annotation data frame

annot_df <- data.frame(cyl = mtcars$cyl, am = mtcars$am,
 mpg = mtcars$mpg)
# row.names(annot_df) = row.names(mtcars)
# Define colors for each levels of qualitative variables
# Define gradient color for continuous variable (mpg)
col = list(cyl = c("4" = "green", "6" = "gray", "8" = "darkred"),
 am = c("0" = "yellow", "1" = "orange"),
 mpg = circlize::colorRamp2(c(17, 25),
 c("lightblue", "purple")) )
# Create the heatmap annotation
ha <- HeatmapAnnotation(df = data.frame(cyl = mtcars$cyl, am = mtcars$am,
 mpg = mtcars$mpg), col = col)

# Combine the heatmap and the annotation
# df = t(df)
Heatmap(df, name = "mtcars",
 top_annotation = ha)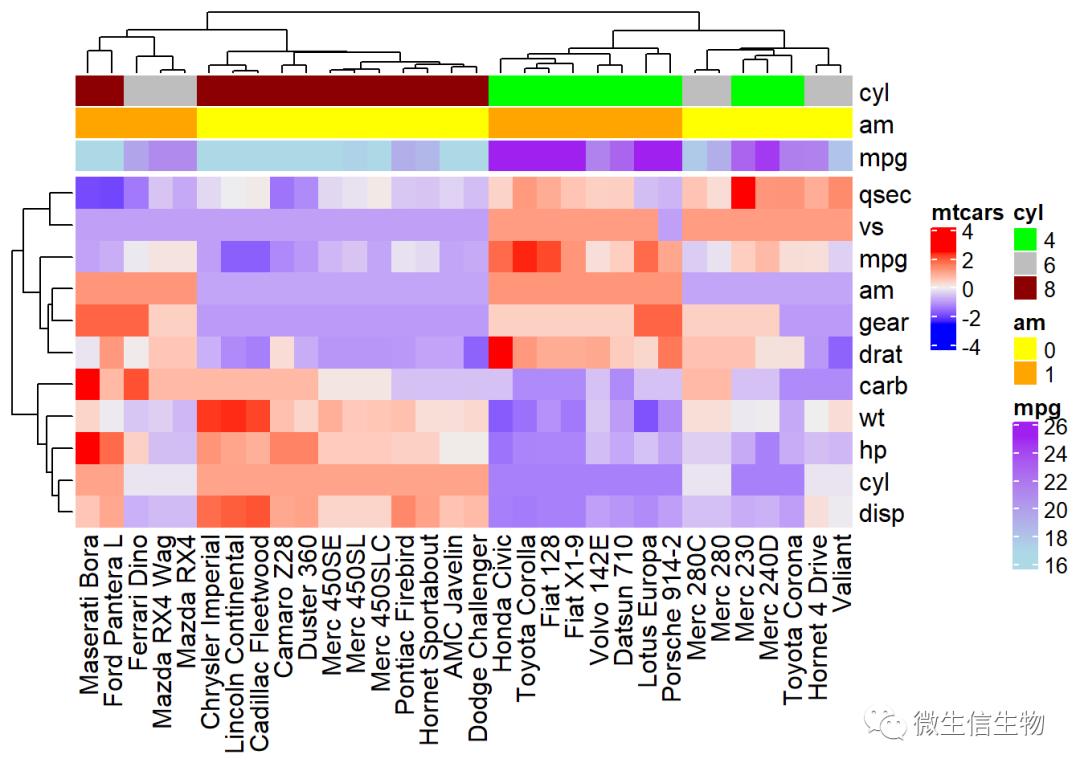
# Annotation data frame

annot_df <- data.frame(cyl = mtcars$cyl, am = mtcars$am,
 mpg = mtcars$mpg)
# row.names(annot_df) = row.names(mtcars)
# Define colors for each levels of qualitative variables
# Define gradient color for continuous variable (mpg)
col = list(cyl = c("4" = "green", "6" = "gray", "8" = "darkred"),
 am = c("0" = "yellow", "1" = "orange"),
 mpg = circlize::colorRamp2(c(17, 25),
 c("lightblue", "purple")) )
# Create the heatmap annotation
ha <- HeatmapAnnotation(df = data.frame(cyl = mtcars$cyl, am = mtcars$am,
 mpg = mtcars$mpg), col = col)

# Combine the heatmap and the annotation
df = t(df)
Heatmap(df, name = "mtcars") +
 Heatmap(mtcars$mpg, name = "type", width = unit(5, "mm")) +
 Heatmap(mtcars$mpg, name = "type", width = unit(5, "mm"))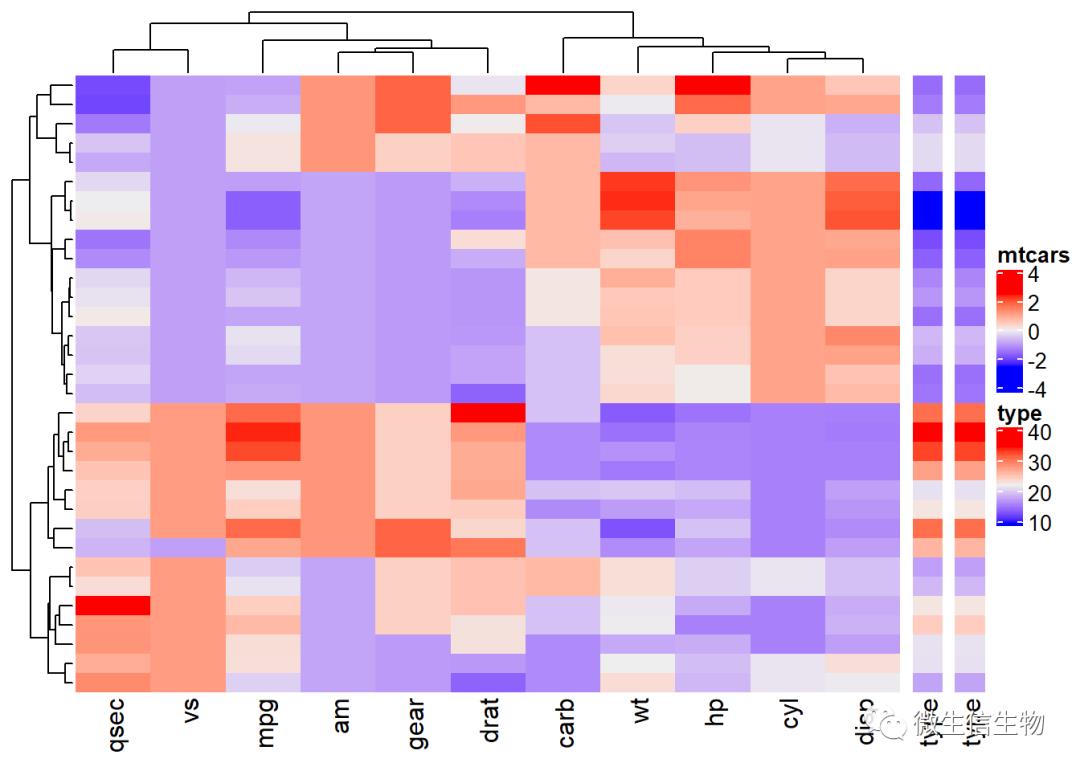
Heatmap(df, name = "mtcars") +
 Heatmap(annot_df , name = "type", width = unit(5, "mm"))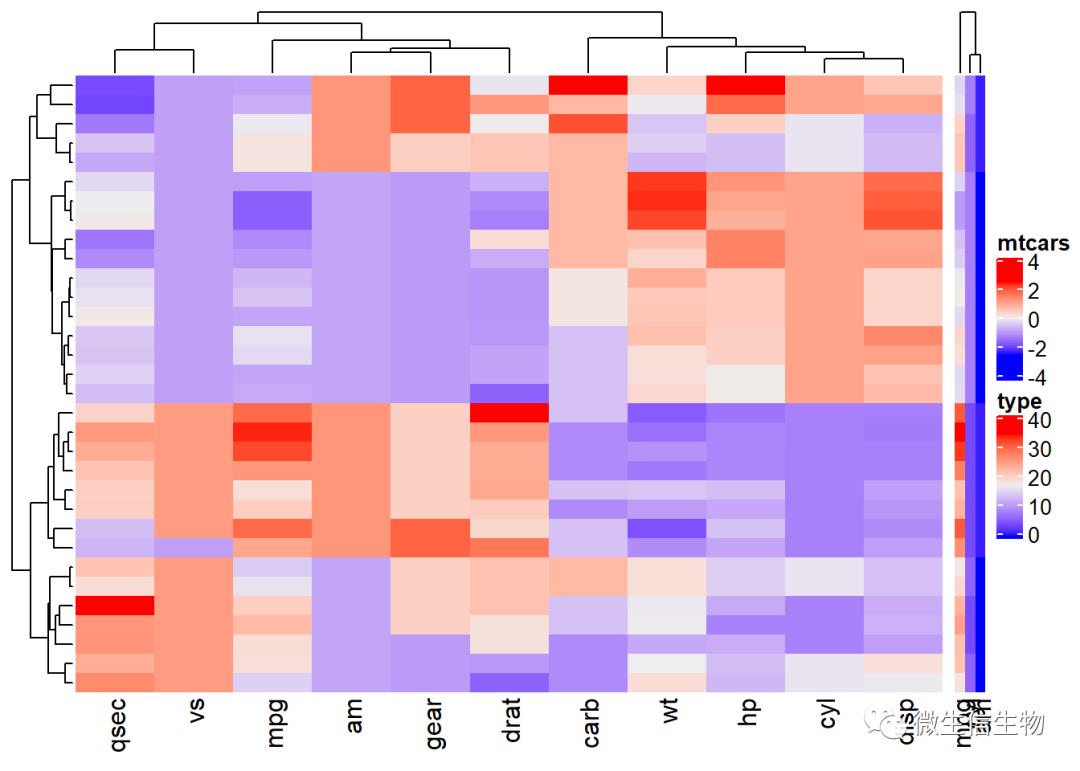
densityHeatmap(scale(mtcars))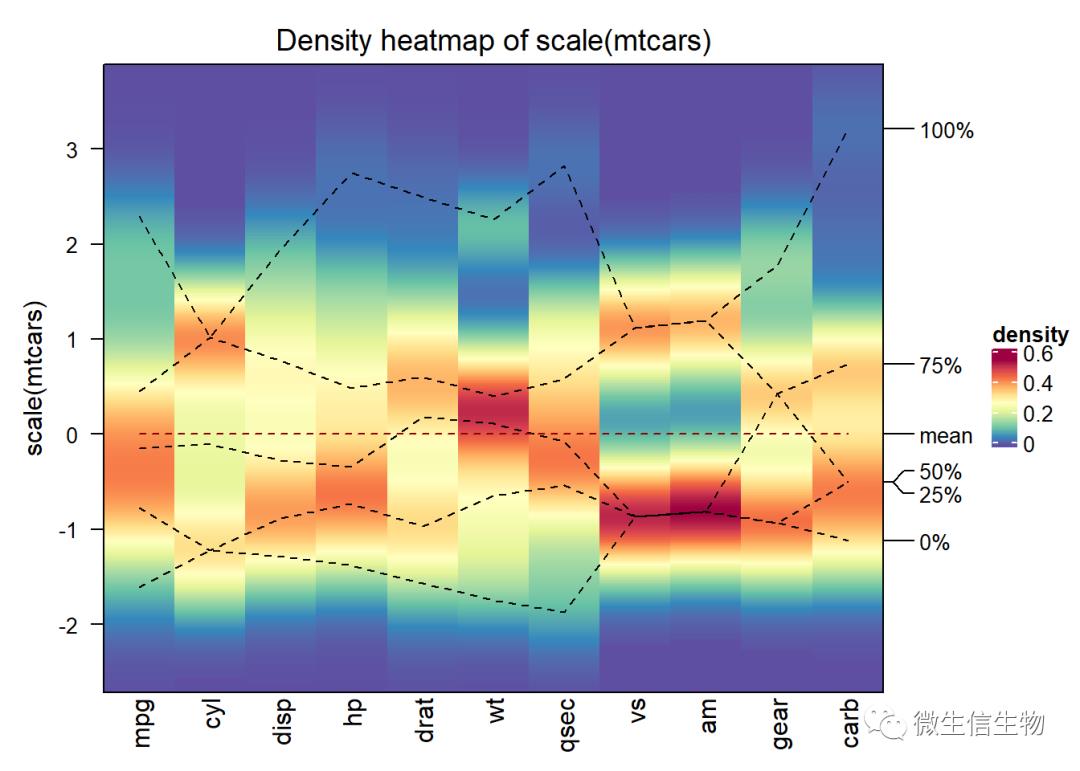
reference
https://www.datanovia.com/en/lessons/heatmap-in-r-static-and-interactive-visualization/

如需联系EasyShu团队
https://github.com/Easy-Shu/EasyShu-WeChat
数据可视化之美系列书籍
Github
https://github.com/Easy-Shu/Beautiful-Visualization-with-python
Github
https://github.com/Easy-Shu/Beautiful-Visualization-with-R
以上是关于R语言-limma差异分析与heatmap绘制的主要内容,如果未能解决你的问题,请参考以下文章