go-mysql-elasticsearch+mysql 同步 ElasticSearch
Posted DataBaker标贝科技
tags:
篇首语:本文由小常识网(cha138.com)小编为大家整理,主要介绍了go-mysql-elasticsearch+mysql 同步 ElasticSearch相关的知识,希望对你有一定的参考价值。
一、Elasticsearch:https://www.elastic.co/downloads/past-releases
1、Elasticsearch无需安装,解压即用。
2、进入elasticsearch/bin目录,执行./elasticsearh即可启动。
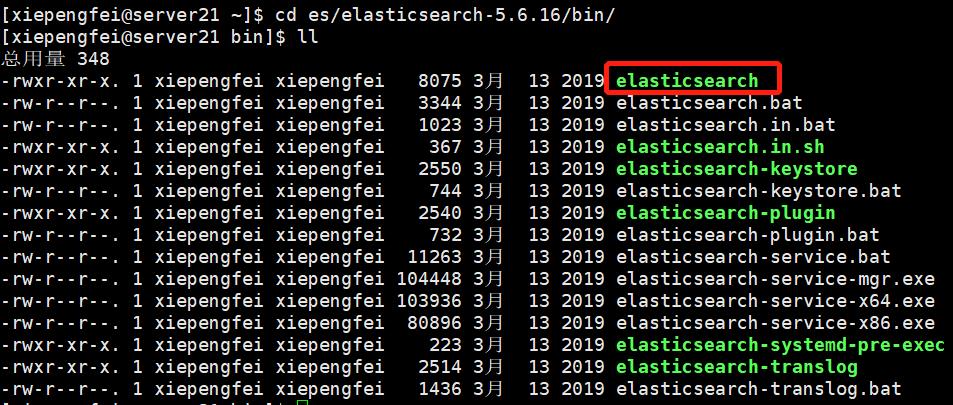
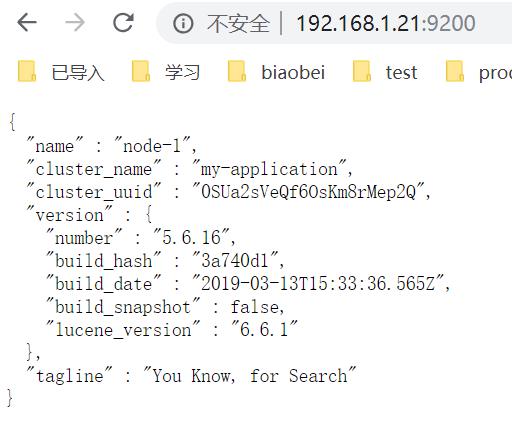
3、es 绑定了两个端口:
9300:Java程序访问的端口
9200:浏览器、postman访问的端口

4、浏览器中访问:http://ip:9200 即可
二、ik(分词) : https://github.com/medcl/elasticsearch-analysis-ik/releases
ElasticSearch 默认采用的分词器, 是单个字分词 ,效果很差 ,所以我们需要安装一个更实用的分词器,这里采用IK分词器,Elasticsearch和IK分词器必须版本统一
1、无需安装,解压即可使用
2、将其改名为ik,并复制到Elasticsearch的解压目录plugins中,重启es即可生效

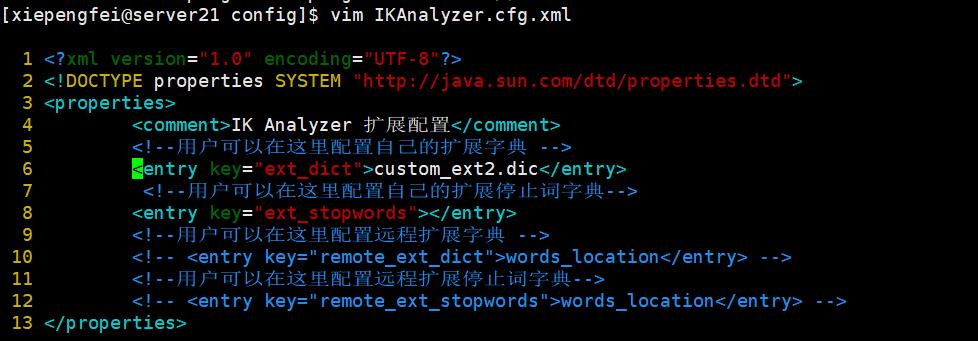
3.config目录下颏自定义扩展词库(.dic) ,编码为UTF-8 with BOM,每一行为自定义的词,ik对其不会进行分词,配置到 IKAnalyzer.cfg.xml。

三、Elasticsearch-head(客户端工具) : https://github.com/mobz/elasticsearch-head
1、es5以上版本安装head需要安装node和grunt
2、进入Elasticsearch安装目录下的config目录,修改elasticsearch.yml文件.在文件的末尾加入

然后去掉network.host: 192.168.0.1的注释并改为network.host: 0.0.0.0,去掉cluster.name;node.name;http.port的注释(也就是去掉#)
3、解压 elasticsearch-head,修改 Gruntfile.js 在对应的位置加上hostname:‘*’,端口号也可修改
4、npm install 安装完成后执行grunt server 或者npm run start 运行head插件,浏览器访问http://ip:9111

四、go-mysql-elasticsearch(mysql同步es工具): https://github.com/siddontang/go-mysql-elasticsearch
go-mysql-elasticsearch是一项将MySQL数据自动同步到Elasticsearch的服务。
它用mysqldump首先获取原始数据,然后与binlog增量同步数据。

1、安装go(目前已验证:v1.13.xx可用,v1.16.xx不可用)
2、go get github.com/siddontang/go-mysql-elasticsearch 或者 git clone https://github.com/siddontang/go-mysql-elasticsearch
3、cd xx/go-mysql-elasticsearch
4、make
5、配置 vim etc/river.toml,详情见github说明
6、执行 ./bin/go-mysql-elasticsearch -config=./etc/river.toml
注意事项及问题
1、go-mysql-elasticsearch对 mysql 和 es 有版本要求
  MySQL supported version < 8.0

  ES supported version < 6.0
2、mysql 配置 my.cnf
 # Binary Logging
 server-id = 1
 log_bin = mysql-bin
 binlog_format = ROW
3、ElasticSearch有保护机制,root启动权限太大,默认不让ElasticSearch使用root权限启动
问题一:
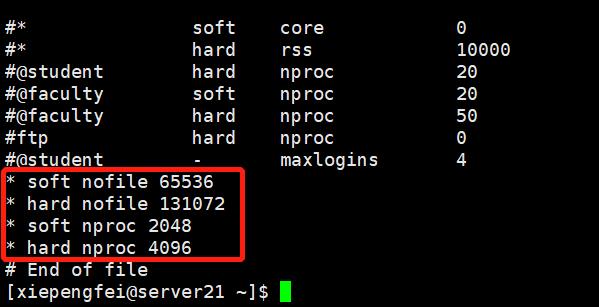
[1]: max file descriptors [4096] for elasticsearch process is too low, increase to at least [65536]
[2]: max virtual memory areas vm.max_map_count [65530] is too low, increase to at least [262144]
解决方法:
vim /etc/security/limits.conf
vim /etc/sysctl.conf
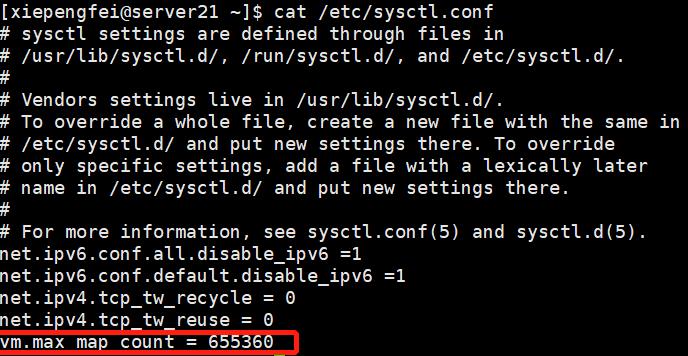
#让配置生效,执行 sysctl -p
问题二:go-mysql-elasticsearch 执行 make
GO111MODULE=on go build -o bin/go-mysql-elasticsearch ./cmd/go-mysql-elasticsearch
go: github.com/siddontang/go-mysql@v0.0.0-20190524062908-de6c3a84bcbe requires
golang.org/x/text@v0.3.2: unrecognized import path “golang.org/x/text” (https fetch: Get https://golang.org/x/text?go-get=1: dial tcp 216.239.37.1:443: i/o timeout)
解决方法:
go get层面增加代理
go 1.11版本新增了 GOPROXY 环境变量,go get会根据这个环境变量来决定去哪里取引入库的代码
$ export GOPROXY=https://goproxy.io
其中,https://goproxy.io 是一个goproxy.io这个开源项目提供的公开代理服务。
问题三:my.cnf 配置后不生效
解决方法:检查my.cnf 文件权限,777会被 mysql 忽略而采用默认配置,所以改动权限编辑后需要改回644。
问题四:删除 binlog 日志后,启动go-mysql-elasticsearch 报 Could not find first log file name in binary log index file
解决方法: 检查 mysql-bin.index 第一行是否有空行,删除。
以上是关于go-mysql-elasticsearch+mysql 同步 ElasticSearch的主要内容,如果未能解决你的问题,请参考以下文章