Web开发粒子插件vue-particles的使用
Posted zstar-_
tags:
篇首语:本文由小常识网(cha138.com)小编为大家整理,主要介绍了Web开发粒子插件vue-particles的使用相关的知识,希望对你有一定的参考价值。
今日在尝试开发一个登录界面时,发现背景是一张图片挺平平无奇,为了让界面更加炫酷,学习使用粒子插件vue-particles
插件安装
npm install vue-particles --save
在main.js内导入
import VueParticles from 'vue-particles'
Vue.use(VueParticles)
在Login.vue内插入代码
        <vue-particles
                color="#409EFF"
                :particleOpacity="0.7"
                :particlesNumber="80"
                shapeType="circle"
                :particleSize="4"
                linesColor="#409EFF"
                :linesWidth="1"
                :lineLinked="true"
                :lineOpacity="0.4"
                :linesDistance="150"
                :moveSpeed="3"
                :hoverEffect="true"
                hoverMode="grab"
                :clickEffect="true"
                clickMode="push"
        >   </vue-particles>
相关属性
- color: String类型。默认’#dedede’。粒子颜色。
- particleOpacity: Number类型。默认0.7。粒子透明度。
- particlesNumber: Number类型。默认80。粒子数量。
-shapeType: String类型。默认’circle’。可用的粒子外观类型有:“circle”,“edge”,“triangle”, “polygon”,“star”。 - particleSize: Number类型。默认80。单个粒子大小。
- linesColor: String类型。默认’#dedede’。线条颜色。
- linesWidth: Number类型。默认1。线条宽度。
- lineLinked: 布尔类型。默认true。连接线是否可用。
- lineOpacity: Number类型。默认0.4。线条透明度。
- linesDistance: Number类型。默认150。线条距离。
- moveSpeed: Number类型。默认3。粒子运动速度。
- hoverEffect: 布尔类型。默认true。是否有hover特效。
- hoverMode: String类型。默认true。可用的hover模式有: “grab”, “repulse”, “bubble”。
- clickEffect: 布尔类型。默认true。是否有click特效。
- clickMode: String类型。默认true。可用的click模式有: “push”, “remove”, “repulse”, “bubble”。
界面展示
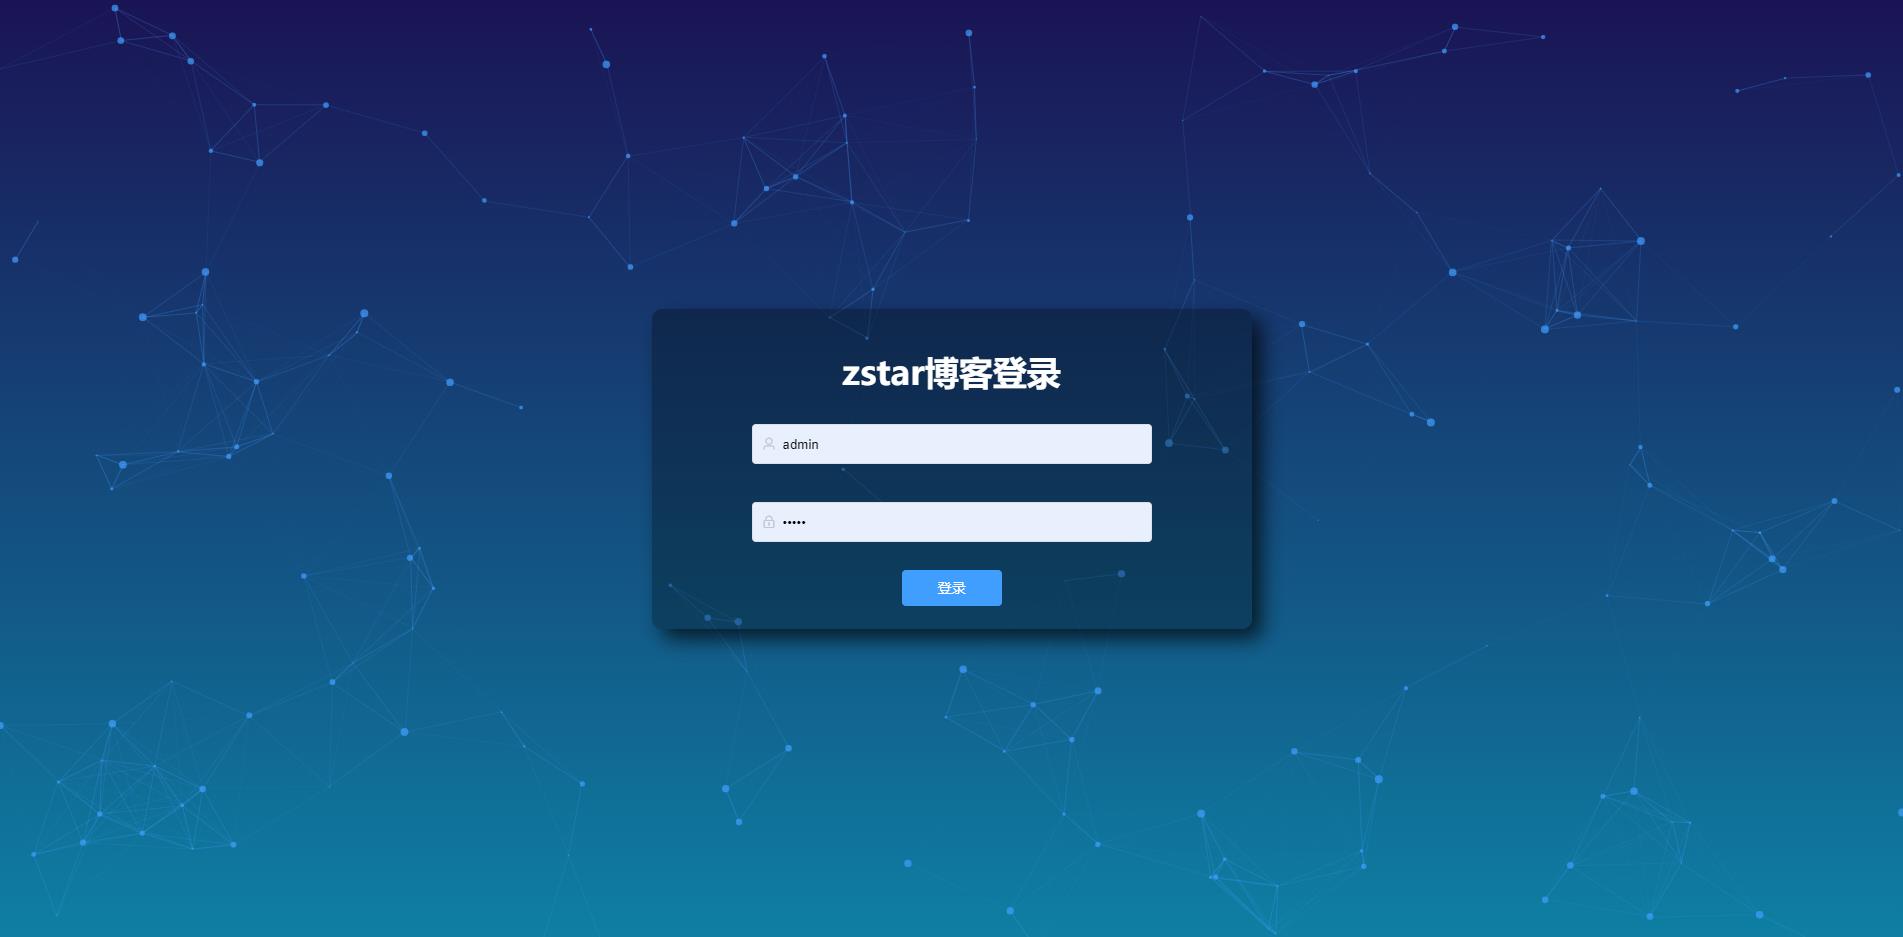
注:粒子是动态的,可以和鼠标发生交互。
完整源码
Login.vue
<template>
    <div class="login_container">
        <div class="login_box">
          <div class="login_form">
              <div style="margin: 20px 0; text-align: center; font-size: 34px; color:white;"><b>zstar博客登录</b></div>
              <el-form :model="user" :rules="rules" ref="userForm">
                  <el-form-item prop="username">
                      <el-input size="large" style="margin: 10px 0; width: 400px" prefix-icon="el-icon-user" v-model="user.username"></el-input>
                  </el-form-item>
                  <el-form-item prop="password">
                      <el-input size="large" style="margin: 10px 0; width: 400px" prefix-icon="el-icon-lock" show-password v-model="user.password"></el-input>
                  </el-form-item>
                  <el-form-item style="margin: 10px 0; text-align: center">
                      <!--          <el-button type="warning" size="small"  autocomplete="off" @click="$router.push('/register')">注册</el-button>-->
                      <el-button type="primary" size="medium"  autocomplete="off" @click="login" style="width:100px" >登录</el-button>
                  </el-form-item>
              </el-form>
          </div>
        </div>
        <vue-particles
                color="#409EFF"
                :particleOpacity="0.7"
                :particlesNumber="80"
                shapeType="circle"
                :particleSize="4"
                linesColor="#409EFF"
                :linesWidth="1"
                :lineLinked="true"
                :lineOpacity="0.4"
                :linesDistance="150"
                :moveSpeed="3"
                :hoverEffect="true"
                hoverMode="grab"
                :clickEffect="true"
                clickMode="push"
        >   </vue-particles>

      </div>
</template>

<script>
import setRoutes from "@/router";

export default
  name: "Login",
  data()
    return
      user: ,
      rules:
        username: [
           required: true, message: '请输入用户名', trigger: 'blur' ,
           min: 3, max: 10, message: '长度在 3 到 5 个字符', trigger: 'blur'
        ],
        password: [
           required: true, message: '请输入密码', trigger: 'blur' ,
           min: 1, max: 20, message: '长度在 1 到 20 个字符', trigger: 'blur'
        ],


  ,
  methods:
    login()
      this.$refs['userForm'].validate((valid) =>
        if (valid)   // 表单校验合法
          this.request.post("/user/login", this.user).then(res =>
            if(res.code === '200')
              localStorage.setItem("user", JSON.stringify(res.data))  // 存储用户信息到浏览器
              localStorage.setItem("menus", JSON.stringify(res.data.menus))  // 存储用户信息到浏览器

              // 动态设置当前用户的路由
              setRoutes()
              this.$router.push("/")
              this.$message.success("登录成功")
             else
              this.$message.error(res.msg)

          )

      );


</script>

<style scoped>
    .login_container
        background-image: linear-gradient(-180deg, #1a1454 0%, #0e81a5 100%);
        /*background-image: url("../images/bg_login.png");*/
        background-repeat: no-repeat;
        background-size: cover;
        height: 100%;

    .login_box
        position: absolute;
        left: 50%;
        top: 50%;
        transform: translate(-50%, -50%);

    .login_form
        background-color: #fff;
        width: 600px;
        height: 320px;
        padding: 20px;
        border-radius: 10px;
        position: absolute;
        background-color: rgba(0, 0, 0, 0.3);
        left: 50%;
        transform: translate(-50%, -50%);
        z-index: 2;
        box-shadow: 10px 10px 20px 0px rgba(0, 0, 0, 0.7);
        text-align: center;

</style>
注意要点
直接引入会发现登录框和背景被挤开来,此时需设置position: absolute
以上是关于Web开发粒子插件vue-particles的使用的主要内容,如果未能解决你的问题,请参考以下文章