如何来实现IM?~webScoket 服务端开发
Posted 张子行的博客
tags:
篇首语:本文由小常识网(cha138.com)小编为大家整理,主要介绍了如何来实现IM?~webScoket 服务端开发相关的知识,希望对你有一定的参考价值。
本文目录
前言
由于最近的开发任务都是一些关于通过 fegin 或者httpClient 调用第三方接口的任务,其中遇到了一些数据实时性传输的问题,由于这方面的开发经验比较少,于是花了点时间来研究市面上主流的 scoket 技术,这也是我为什么写下本文的原因
长话短说先来介绍几个概念
- 长连接:一次握手 “终身” 使用
- 短连接:一次性用品
- TCP协议:保证数据可靠性传输的一种协议,想具体了解的可以阅读
对于tcp的一点点解读,不止是三次握手、四次挥手
在计算机网络模型中采用一种比较清楚的五层协议结构就可以很方便的阐述。
- 应用层
- 运输层
- 网路层
- 数据链路层
- 物理层
其中应用层比较典型的协议有TCP协议,而TCP中比较典型的是HTTP(超文本传输协议),而我们的webScoket是基于HTTP协议衍生出来的一种协议。(就是升级了一下http的请求头而已),除此之外还有 wss协议可以比做是https协议
HTTP请求
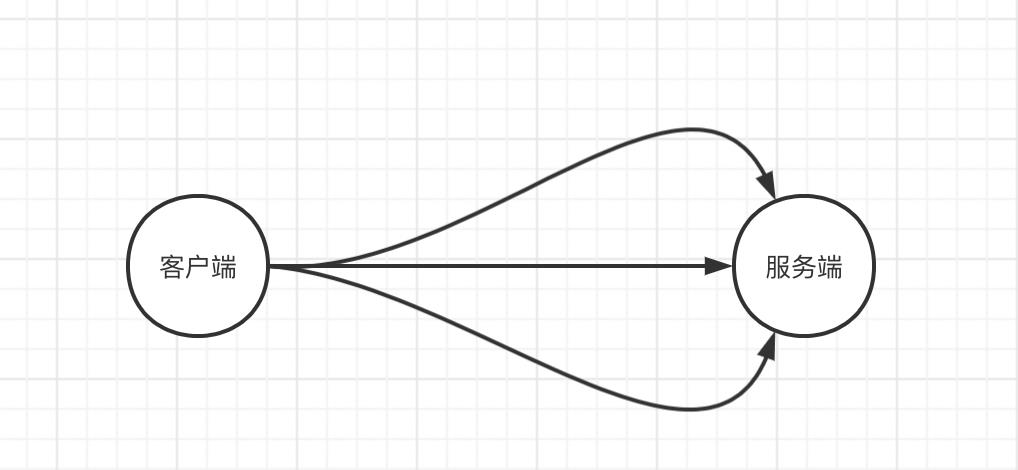
一般来说我们如果要获取天气信息,常规流程是浏览器端发送一个HTTP请求给服务器端,然后服务器写入数据到响应返回给浏览器端。如果我们要获取实时的天气信息,只能通过轮询发起请求、不断重复刷新页面来达到这种效果。而这种方式是浏览器端主动来询问获取数据的,是单向的,那如果我想服务端实时的去推送这种消息实现全双工通信,那么就要用到我们的webscoket了

javaxWebScoket(套接字)使用
webScoket的存在意在把服务器模拟成前端。下面这个小例子是总结工作中的技术整合出来的一个小的demo。通过这个demo实现一个在线聊天室没有一点压力
import com.baomidou.mybatisplus.extension.api.R;
import com.zzh.mywebsocket.compent.ChatServer;
import com.zzh.mywebsocket.entity.User;
import lombok.SneakyThrows;
import org.springframework.beans.factory.annotation.Autowired;
import org.springframework.web.bind.annotation.*;

@RequestMapping("chat")
@RestController
public class WebScoketaController
    @Autowired
    private ChatServer chatServer;

    /**
     * 消息单播接口
     * @param user
     * @return
     */
    @SneakyThrows
    @PostMapping("/singleChat")
    public R singleChat(@RequestBody User user)
        chatServer.singleChat(user.getUser(), user.getToUser(), user.getMsg());
        return R.ok("success");


    /**
     * 消息广播接口
     * @param user
     * @return
     */
    @SneakyThrows
    @PostMapping("/wideChat")
    public R wideChat(@RequestBody User user)
        chatServer.wideChat(user.getUser(), user.getExcludeUser(), user.getMsg());
        return R.ok("success");
dto对象
import lombok.Data;

import java.util.List;

/**
 * 张三在班上偷偷对李四说:我爱你
 */
@Data
public class User
    /**
     * 张三
     */
    private Integer user;
    /**
     * 李四
     */
    private Integer toUser;
    /**
     * 我爱你
     */
    private String msg;
    /**
     * 除了张三、李四外班上的其他人
     */
    private List<Integer> excludeUser;
scoket服务
实现了单播、广播的功能,所有用户的连接都由userPool管理,通过操纵userPool即可实现聊天室绝大多数部分的功能。并且实现抢登、被踢下线、用户上下线通知功能
package com.zzh.mywebsocket.compent;

import lombok.Data;
import lombok.SneakyThrows;
import lombok.extern.slf4j.Slf4j;
import org.springframework.stereotype.Component;

import javax.websocket.*;
import javax.websocket.server.PathParam;
import javax.websocket.server.ServerEndpoint;
import java.io.IOException;
import java.util.List;
import java.util.Map;
import java.util.concurrent.ConcurrentHashMap;

/**
 * 世界聊天窗口
 */
@Data
@Slf4j
@Component
@ServerEndpoint(value = "/chat/userId")
public class ChatServer
    /**
     * key:userId、value:session
     */
    private static ConcurrentHashMap<Integer, ChatServer> usersPool = new ConcurrentHashMap();

    private Session session = null;

    @SneakyThrows
    public Integer singleChat(Integer user, Integer toUser, String msg)
        try
            usersPool.get(user).session.getBasicRemote().sendText("【成功发送消息】:" + msg);
            usersPool.get(toUser).session.getBasicRemote().sendText("【来自" + user + "的消息】" + msg);
            return 1;
         catch (Exception e)
            e.printStackTrace();
            return null;


    @SneakyThrows
    public Integer wideChat(Integer user, List<Integer> excludeUser, String msg)
        try
            out:
            for (Map.Entry<Integer, ChatServer> entry : usersPool.entrySet())
                ChatServer chatServer = entry.getValue();
                if (null != excludeUser && 0 != excludeUser.size())
                    for (int i : excludeUser)
                        if (chatServer == usersPool.get(i)) continue out;


                if (chatServer == usersPool.get(user)) continue;
                chatServer.session.getBasicRemote().sendText("【来自" + user + "的消息】" + msg);

            return 1;
         catch (Exception e)
            e.printStackTrace();
            return null;


    /**
     * 1.建立用户、通道的绑定关系
     * 2.判断用户抢登逻辑功能
     * 3.用户上、下线通知逻辑
     * 触发时机:
     * @param session
     * @param userId
     */
    @SneakyThrows
    @OnOpen
    public void handleOpen(Session session,
                           @PathParam("userId") Integer userId)
        this.session = session;
        log.info("用户:" + userId + " 建立了一个连接,ID为:" + session.getId());
        if (null != usersPool.get(userId))
            Session onlineSession = usersPool.get(userId).session;
            onlineSession.getBasicRemote().sendText("您的账号在别处登录,你已经被踢下线");
            onlineSession.close();

        usersPool.put(userId, this);
        this.wideChat(userId, null, "用户:【" + userId + "】已经上线 ~~~");


    /**
     * 1.用户的上线通知
     *
     * @param message
     * @param session
     * @throws IOException
     */
    @SneakyThrows
    @OnMessage
    public void handleMessage(String message, Session session, @PathParam("userId") Integer userId)
        log.info(("OnMessage(收到消息): " + message));


    /**
     * 1.webscoket使用过程中的异常处理
     *
     * @param throwable
     */
    @SneakyThrows
    @OnError
    public void handleError(Throwable throwable, @PathParam("userId") Integer userId)
        throwable.printStackTrace();
        log.error("handleError!" + throwable.getMessage() + "----" + userId);


    /**
     * 1.释放资源(关闭session)
     * 2.用户下线通知
     *
     * @param session
     */
    @SneakyThrows
    @OnClose
    public void handleClose(Session session, @PathParam("userId") Integer userId)
        log.info("OnClose 关闭连接ID : " + session.getId() + "---" + userId);
        this.wideChat(userId, null, "用户:【" + userId + "】已经下线 ~~~");
        usersPool.get(userId).session.close();
        usersPool.remove(userId);
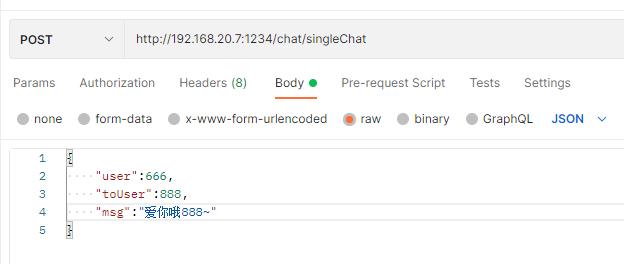
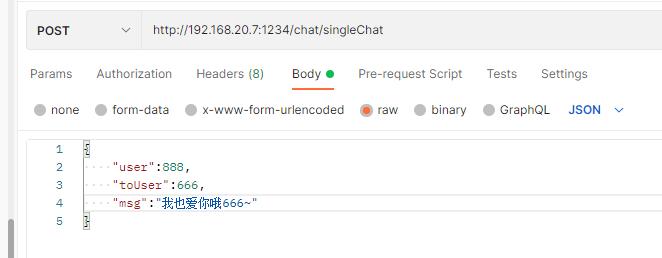
调用单播接口


演示效果
888的用户聊天界面

666用户的聊天界面

小结javaxWebScoket
使用起来没啥难度,在 javaxWebScoket 的生命周期方法中添加我们自己的业务逻辑就好,大致的架子和我上文的demo差不多,带入开发中也很轻松,唯一需要注意的是,连接的如果断开了切记要释放连接,否则容易oom
scoket服务端(netty版本)
接下来介绍,使用偏难一点的技术(netty)来实现在线聊天室的功能。烂大街的初始化服务端的代码,不多bb
import io.netty.bootstrap.ServerBootstrap;
import io.netty.channel.ChannelFuture;
import io.netty.channel.ChannelInitializer;
import io.netty.channel.EventLoopGroup;
import io.netty.channel.nio.NioEventLoopGroup;
import io.netty.channel.socket.SocketChannel;
import io.netty.channel.socket.nio.NioserverSocketChannel;
import io.netty.handler.codec.http.HttpObjectAggregator;
import io.netty.handler.codec.http.HttpServerCodec;
import io.netty.handler.codec.http.websocketx.WebSocketServerProtocolHandler;
import io.netty.handler.logging.LogLevel;
import io.netty.handler.logging.LoggingHandler;
import io.netty.handler.stream.ChunkedWriteHandler;
import io.netty.handler.timeout.IdleStateHandler;
import lombok.SneakyThrows;
import org.springframework.boot.CommandLineRunner;

/**
 * ws服务端
 */
public class MyServer implements CommandLineRunner
    @Override
    public void run(String... args) throws Exception
        System.err.println("nettyServer start..");
        start();
        System.err.println("nettyServer over..");

    public static void main(String[] args)
        start();


    @SneakyThrows
    public static void start()
        EventLoopGroup bossGroup = new NioEventLoopGroup(1);
        EventLoopGroup workerGroup = new NioEventLoopGroup(); //8个NioEventLoop
        try
            ServerBootstrap serverBootstrap = new ServerBootstrap();
            /**
             * netty服务端绑定端口号为:8080
             */
            serverBootstrap.group(bossGroup, workerGroup).localAddress(8080);
            serverBootstrap.channel(NioServerSocketChannel.class);
            serverBootstrap.handler(new LoggingHandler(LogLevel.INFO));
            serverBootstrap.childHandler(new ChannelInitializer<SocketChannel>()
                @Override
                protected void initChannel(SocketChannel ch) throws Exception
                    //http 相关编解码器
                    ch.pipeline().addLast(new HttpServerCodec());
                    ch.pipeline().addLast(new ChunkedWriteHandler());
                    ch.pipeline().addLast(new HttpObjectAggregator(8192));
                    //服务端 handler 处理器
                    ch.pipeline().addLast(new MyTextWebSocketFrameHandler());
                    //标明是 ws 服务,并且指定路劲~chat
                    ch.pipeline().addLast(new WebSocketServerProtocolHandler("/chat", null, true, 65536 * 10));

            );
            /**
             * 异步启动netty服务
             */
            ChannelFuture channelFuture = serverBootstrap.bind().sync();
            channelFuture.channel().closeFuture().sync();
         finally
            bossGroup.shutdownGracefully();
            workerGroup.shutdownGracefully();
handler处理器(支持带参url)
值得一提的是,我写的这个demo可以解析请求路劲中的参数
@Slf4j
public class MyTextWebSocketFrameHandler extends SimpleChannelInboundHandler<TextWebSocketFrame>
    private final String USER = "channel_user";
    private final AttributeKey<String> USER_GROUP = AttributeKey.valueOf(USER);

    @Override
    protected void channelRead0(ChannelHandlerContext ctx, TextWebSocketFrame msg) throws Exception
        System.err.println(("msg0 from client:" + msg.text()));
        //踩坑:这里别这样写会爆错,具体原因和netty源码有关系
        //ctx.channel().writeAndFlush(new TextWebSocketFrame("hello"));

    /**
     * 可以解析请求路劲中的参数
     */
    @Override
    public void channelRead(ChannelHandlerContext ctx, Object msg) throws Exception
        Channel channel = ctx.channel();
        if (null != msg && msg instanceof FullHttpRequest)
            FullHttpRequest request = (FullHttpRequest) msg;
            String uri = request.uri();
            Map<String, String> params = getParams(uri);
            log.info("urlPath uid:" + params.get("uid"));
            userOnline(params.get("uid"), channel);
            if (uri.contains("?"))
                String newUri = uri.substring(0, uri.indexOf("?"));
                request.setUri(newUri);


        super.channelRead(ctx, msg);


    @Override
    public void exceptionCaught(ChannelHandlerContext ctx, Throwable cause) throws Exception
        cause.printStackTrace();
        super.exceptionCaught(ctx, cause);


    /**
     * 绑定用户与通道的关系
     *
     * @param userId
     * @param channel
     */
    private void userOnline(String userId, Channel channel)
        channel.attr(USER_GROUP).set(userId);
        MyChannelHandlerPool.channelGroup.add(channel);


    public static Map<String, String> getParams(String uri)
        Map<String, String> params = new HashMap<>(10);
        int idx = uri.indexOf("?");
        if (idx != -1)
            String[] paramsArr = uri.substring(idx + 1).split("&");
            for (String param : paramsArr)
                idx = param.indexOf("=");
                params.put(param.substring(0, idx), param.substring(idx + 1));


        return params;


    @Override
    public void channelInactive(ChannelHandlerContext ctx)
        log.error("通道关闭!");
        ctx.channel().close();
        MyChannelHandlerPool.channelGroup.remove(ctx.channel());


    @Override
    public void channelActive(ChannelHandlerContext ctx以上是关于如何来实现IM?~webScoket 服务端开发的主要内容,如果未能解决你的问题,请参考以下文章