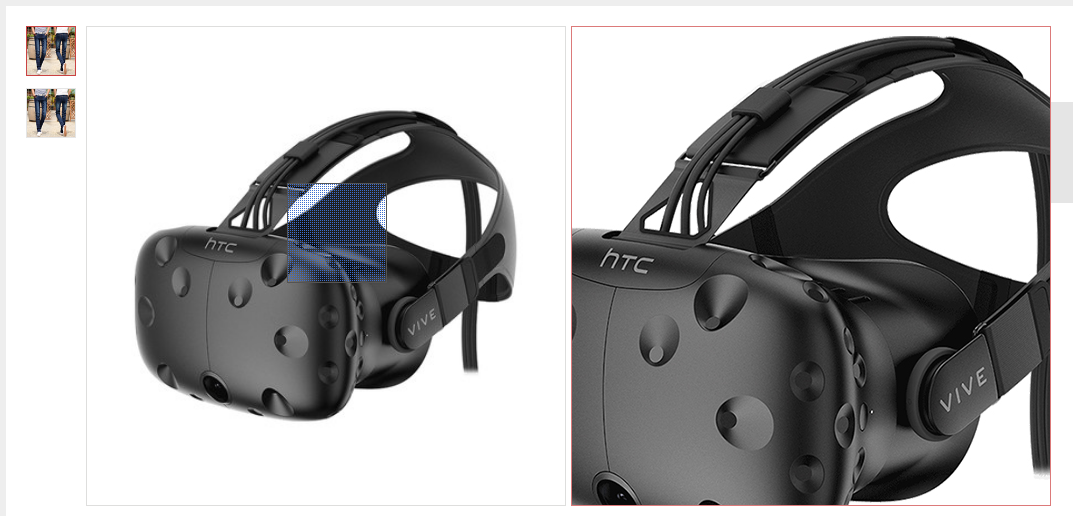
原作者地址:https://github.com/lemontree2...
经测试,原插件在使用时有bug,即在预览时进行鼠标滚动,导致遮罩层计算错误。我已修复该bug,特分享出来。
组件核心代码:
<template>
  <div class="magnify">
    <div class="preview-box" @mousemove="move($event)"  @mouseout="out" ref="previewBox">
      <img width="100%" :src="previewImg" >
      <div class="hover-box" ref="hoverBox"></div>
    </div>
    <div class="zoom-box" v-show="zoomVisiable" ref="zoomBox">
      <img :src="zoomImg"  ref="bigImg">
    </div>
  </div>
</template>

<script>
function offset(el) {
  let top = el.offsetTop;
  let left = el.offsetLeft;
  while (el.offsetParent) {
    el = el.offsetParent;
    top += el.offsetTop;
    left += el.offsetLeft;
  }
  return {
    left: left,
    top: top
  }
}
export default {
  name: ‘magnify‘,
  props: {
    previewImg: {
      type: String,
      default: ‘‘
    },
    zoomImg: {
      type: String,
      default: ‘‘
    }
  },
  data() {
    return {
      zoomVisiable: false,
      hoverVisiable: false
    };
  },
  methods: {
    out() {
      this.zoomVisiable = false;
    },
    move(ev) {
      this.init();
      // 鼠标距离屏幕距离
      let moveX = ev.clientX;
      let moveY = ev.clientY;
      // 大盒子距离顶部的距离
      let offsetLeft = offset(this.oPreviewBox).left;

      let offsetTop = offset(this.oPreviewBox).top;
      let left = moveX - offsetLeft - this.houverWidth / 2;
      let top
      if(this.scroll > 0) {
        top = moveY - offsetTop + this.scroll - this.houverHeight / 2;
      }else {
        top = moveY - offsetTop - this.houverHeight / 2;
      }
      let maxWidth = this.pWidth - this.houverWidth;
      let maxHeight = this.pWidth - this.houverHeight;
      left = left < 0 ? 0 : left > maxWidth ? maxWidth : left;
      top = top < 0 ? 0 : top > maxHeight ? maxHeight : top;
      let percentX = left / (maxWidth);
      let percentY = top / (maxHeight);
      this.oHoverBox.style.left = left + ‘px‘;
      this.oHoverBox.style.top = top  + ‘px‘;
      this.oBigImg.style.left = percentX * (this.bWidth - this.imgWidth) + ‘px‘;
      this.oBigImg.style.top = percentY * (this.bHeight - this.imgHeight) + ‘px‘;
      this.$emit(‘move‘, ev);
      this.zoomVisiable = true;
    },
    init() {
      this.oHoverBox = this.$refs.hoverBox;
      this.oPreviewBox = this.$refs.previewBox;
      this.oBigImg = this.$refs.bigImg;
      this.imgBox = this.$refs.zoomBox;
      this.houverWidth = this.oHoverBox.offsetWidth;
      this.houverHeight = this.oHoverBox.offsetHeight;
      this.pWidth = this.oPreviewBox.offsetWidth;
      this.pHeight = this.oPreviewBox.offsetHeight;
      this.imgWidth = this.oBigImg.offsetWidth;
      this.imgHeight = this.oBigImg.offsetHeight;
      this.bWidth = this.imgBox.offsetWidth;
      this.bHeight = this.imgBox.offsetHeight;
      this.scroll = document.documentElement.scrollTop || document.body.scrollTop;
    }
  }
};
</script>

<!-- Add "scoped" attribute to limit CSS to this component only -->
<style lang="scss" scoped>
  .magnify {
    position: relative;
    .preview-box {
      width: 480px;
      height: 480px;
      border: 1px solid #dededd;
      position: relative;
      &:hover .hover-box{
        display: block;
      }
      .hover-box {
        position: absolute;
        display: none;
        left: 0;
        top: 0;
        width: 100px;
        height: 100px;
        border: 1px solid #545454;
        background: url(‘https://img-tmdetail.alicdn.com/tps/i4/T12pdtXaldXXXXXXXX-2-2.png‘) repeat 0 0;
        cursor: move;
        user-select: none;
      }
    }
    .zoom-box {
      width: 480px;
      height: 480px;
      overflow: hidden;
      position: absolute;
      left: 485px;
      border: 1px solid #dc7a7a;;
      top: 0;
      img {
        position: absolute;
        top: 0;
        left: 0;
      }
    }
  }
</style>
使用:
<template>
<div>
<my-magnify :previewImg="data.min" :zoomImg="data.max"></my-magnify>
</div>
</template>
<script>
import MyMagnify from "~/components/Magnify.vue";
export default {
  data() {
    return {
      data: {
        min:
          "https://img.alicdn.com/imgextra/i3/2857774462/TB21fgcwwNlpuFjy0FfXXX3CpXa_!!2857774462.jpg_430x430q90.jpg",
        max:
          "https://img.alicdn.com/imgextra/i3/2857774462/TB21fgcwwNlpuFjy0FfXXX3CpXa_!!2857774462.jpg"
      }
    };
  },
  components: {
    MyMagnify
  }
}
</script>
效果图:
