线程池EterfreeA/ThreadPool的使用
Posted fengbingchun
tags:
篇首语:本文由小常识网(cha138.com)小编为大家整理,主要介绍了线程池EterfreeA/ThreadPool的使用相关的知识,希望对你有一定的参考价值。
在GitHub上有个线程池项目,地址为 https://github.com/EterfreeA/ThreadPool ,开源,它的License为AFL-3.0,这里了解学习下,code中有较多的中文说明:
(1).Core.hpp: 一些define和size函数
(2).DoubleQueue.hpp: 双缓冲队列模板类DoubleQueue
(3).Condition.hpp: 条件变量模板类Condition
(4).Thread.h/Thread.cpp: 线程类Thread
(5).ThreadPool.h/ThreadPool.cpp: 线程池类ThreadPool
更多介绍参考作者CSDN文章:https://blog.csdn.net/xucongyoushan/category_9284608.html
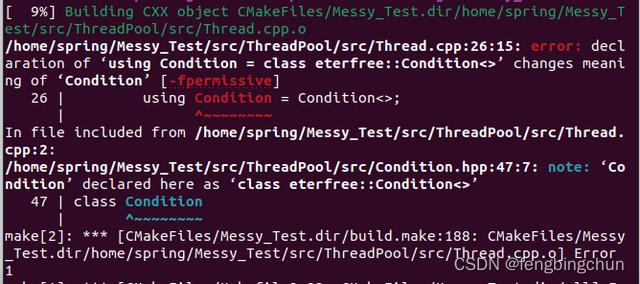
在Linux下编译需做点调整,在Thread.cpp和ThreadPool.cpp中原语句using Condition = Condition<>;报错如下:

临时调整为:using CONDITION = Condition<>;并将两个文件的中的相关Condition调整为CONDITION即可
以下为原test中的code,做了点改动:
int test_threadpool_1()

	eterfree::Thread thread;
	std::cout << thread.getID() << std::endl;

	thread.configure([]  std::cout << "Eterfree" << std::endl; , nullptr);
	std::cout << std::boolalpha << thread.notify() << std::endl;
	thread.destroy();

	thread.create();
	std::cout << thread.getID() << std::endl;

	thread.configure([]  std::cout << "solifree" << std::endl; , nullptr);
	std::cout << std::boolalpha << thread.notify() << std::endl;
	thread.destroy();

	return 0;
执行结果如下:

namespace

std::atomic<bool> valid = true;
eterfree::Condition condition;

void task()

	condition.wait([]
		std::this_thread::sleep_for(std::chrono::seconds(1));
		std::cout << "this thread id: " << std::this_thread::get_id() << std::endl;
		return !valid.load(std::memory_order_relaxed);
	);


void print(const eterfree::ThreadPool& threadPool)

	auto proxy = threadPool.getProxy();
	std::cout << proxy.getCapacity() << ' ' \\
		<< proxy.getTotalSize() << ' ' \\
		<< proxy.getIdleSize() << ' ' \\
		<< proxy.getTaskSize() << std::endl;


 // namespace

int test_threadpool_2()

	eterfree::ThreadPool threadPool;
	auto proxy = threadPool.getProxy();
	auto capacity = proxy.getCapacity();
	for (decltype(capacity) index = 0; index < capacity; ++index)
		proxy.pushTask(task);

	std::this_thread::sleep_for(std::chrono::seconds(2));
	print(threadPool);

	proxy.pushTask([]
		std::this_thread::sleep_for(std::chrono::seconds(1));
		std::cout << "this thread id: " << std::this_thread::get_id() << std::endl;
		std::cout << "eterfree::ThreadPool" << std::endl;
	);

	std::this_thread::sleep_for(std::chrono::seconds(1));
	print(threadPool);

	proxy.setCapacity(capacity + 1);

	std::this_thread::sleep_for(std::chrono::seconds(2));
	print(threadPool);

	valid.store(false, std::memory_order_relaxed);
	condition.exit();

	return 0;
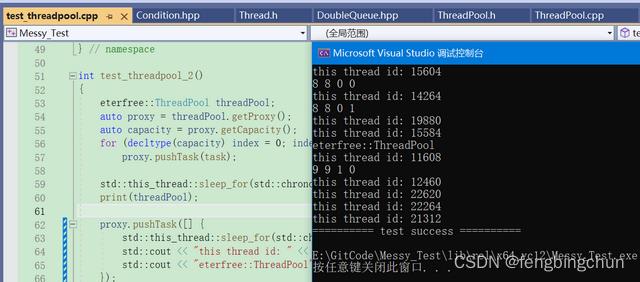
执行结果如下:

GitHub:https://github.com/fengbingchun/Messy_Test
以上是关于线程池EterfreeA/ThreadPool的使用的主要内容,如果未能解决你的问题,请参考以下文章