用angularjs进行文件上传
Posted o_osky
tags:
篇首语:本文由小常识网(cha138.com)小编为大家整理,主要介绍了用angularjs进行文件上传相关的知识,希望对你有一定的参考价值。
文件上传页面三要素:
1、 form表单提交方式一定是post
2、 form表单的enctype一定是multipart/form-data
3、 form表单中一定要有一个input的type是 file
文件上传一定要有的jar
Commons-io和commons-fileupload
Springmvc文件上传:
1、 springmvc.xml中一定要有 多媒体解析器
<bean id="multipartResolver"
class="org.springframework.web.multipart.commons.CommonsMultipartResolver">
<property name="defaultEncoding" value="UTF-8"></property>
<!-- 设定文件上传的最大值 5MB,5*1024*1024 -->
<property name="maxUploadSize" value="5242880"></property>
</bean>
2、 后台Controller中的方法中形参使用MultipartFile类型接收文件,参数的名称一定要和页面上的参数名称保持一致

自己编写的上传文件demo,上传文件至FastDFS服务器,代码如下:
package demo;

import org.csource.fastdfs.*;

public class FastfsDemo {
    public static void main(String[] args) throws Exception {
        ClientGlobal.init("G:\\\\pyg_parent\\\\pyg_shop_web\\\\src\\\\main\\\\resources\\\\fastdfs_client.conf");
//        2、创建一个 TrackerClient 对象。直接 new 一个
        TrackerClient trackerClient = new TrackerClient();
//        3、使用 TrackerClient 对象获取连接,获得一个 TrackerServer 对象
        TrackerServer trackerServer = trackerClient.getConnection();
//        4、创建一个 StorageServer 的引用,值为 null
        StorageServer storageServer = null;
//        5、创建一个 StorageClient 对象,需要两个参数 TrackerServer 对象、StorageServer 的引用
        StorageClient storageClient = new StorageClient(trackerServer,storageServer);
//        6、使用 StorageClient 对象上传图片
        String[] strings = storageClient.upload_file("C:\\\\Users\\\\o_Osky\\\\Desktop\\\\1.png", "png", null);
//        7、返回数组。包含组名和图片的路径
        for (String string : strings) {
            System.out.println(string);
        }
// storageClient.delete_file("group1", "M00/00/00/wKgRcFV_08OAK_KCAAAA5fm_sy874.conf") 删除文件
} }
需要注意的是:上传文件的路径为绝对路径,在实际应用中,应用相对路径,且demo中new 对象过多,所以封装了工具类,代码如下:
package utils;

import org.csource.common.NameValuePair;
import org.csource.fastdfs.ClientGlobal;
import org.csource.fastdfs.StorageClient1;
import org.csource.fastdfs.StorageServer;
import org.csource.fastdfs.TrackerClient;
import org.csource.fastdfs.TrackerServer;

public class FastDFSClient {

    private TrackerClient trackerClient = null;
    private TrackerServer trackerServer = null;
    private StorageServer storageServer = null;
    private StorageClient1 storageClient = null;

    public FastDFSClient(String conf) throws Exception {
        if (conf.contains("classpath:")) {
            conf = conf.replace("classpath:", this.getClass().getResource("/").getPath());
        }
        ClientGlobal.init(conf);
        trackerClient = new TrackerClient();
        trackerServer = trackerClient.getConnection();
        storageServer = null;
        storageClient = new StorageClient1(trackerServer, storageServer);
    }

    /**
     * 上传文件方法
     * <p>Title: uploadFile</p>
     * <p>Description: </p>
     * @param fileName 文件全路径
     * @param extName 文件扩展名,不包含(.)
     * @param metas 文件扩展信息
     * @return
     * @throws Exception
     */
    public String uploadFile(String fileName, String extName, NameValuePair[] metas) throws Exception {
        String result = storageClient.upload_file1(fileName, extName, metas);
        return result;
    }

    public String uploadFile(String fileName) throws Exception {
        return uploadFile(fileName, null, null);
    }

    public String uploadFile(String fileName, String extName) throws Exception {
        return uploadFile(fileName, extName, null);
    }

    /**
     * 上传文件方法
     * <p>Title: uploadFile</p>
     * <p>Description: </p>
     * @param fileContent 文件的内容,字节数组
     * @param extName 文件扩展名
     * @param metas 文件扩展信息
     * @return
     * @throws Exception
     */
    public String uploadFile(byte[] fileContent, String extName, NameValuePair[] metas) throws Exception {

        String result = storageClient.upload_file1(fileContent, extName, metas);
        return result;
    }

    public String uploadFile(byte[] fileContent) throws Exception {
        return uploadFile(fileContent, null, null);
    }

    public String uploadFile(byte[] fileContent, String extName) throws Exception {
        return uploadFile(fileContent, extName, null);
    }
}
配置spingmvc文件,配置解析器:
<?xml version="1.0" encoding="UTF-8"?>
<beans xmlns="http://www.springframework.org/schema/beans"
       xmlns:xsi="http://www.w3.org/2001/XMLSchema-instance"
       xmlns:context="http://www.springframework.org/schema/context"
       xmlns:mvc="http://www.springframework.org/schema/mvc" xmlns:dubbo="http://code.alibabatech.com/schema/dubbo"
       xsi:schemaLocation="http://www.springframework.org/schema/beans
        http://www.springframework.org/schema/beans/spring-beans.xsd
        http://www.springframework.org/schema/context
        http://www.springframework.org/schema/context/spring-context.xsd
        http://www.springframework.org/schema/mvc
        http://www.springframework.org/schema/mvc/spring-mvc.xsd http://code.alibabatech.com/schema/dubbo http://code.alibabatech.com/schema/dubbo/dubbo.xsd">
    <!--引用外部资源文件-->
    <context:property-placeholder location="classpath:config/application.properties"/>
    <mvc:annotation-driven>
        <mvc:message-converters>
            <bean class="com.alibaba.fastjson.support.spring.FastJsonHttpMessageConverter">
                <property name="supportedMediaTypes" value="application/json"/>
                <property name="features">
                    <array>
                        <value>WriteMapNullValue</value>
                        <value>WriteDateUseDateFormat</value>
                    </array>
                </property>
            </bean>
        </mvc:message-converters>
    </mvc:annotation-driven>
    <!--引用douub服务-->
    <dubbo:application name="pyg-shop-web"/>
    <dubbo:registry address="zookeeper://192.168.25.61:2181"/>
    <dubbo:annotation package="com.pyg.shop"/>
    <mvc:default-servlet-handler/>
    <!--配置多媒体解析器-->
    <bean id="multipartResolver"
          class="org.springframework.web.multipart.commons.CommonsMultipartResolver">
        <property name="defaultEncoding" value="UTF-8"></property>
        <!-- 设定文件上传的最大值 5MB,5*1024*1024 -->
        <property name="maxUploadSize" value="5242880"></property>
    </bean>

</beans>
angularjsServer层代码:
app.service("uploadService",function($http){
//    angularJS的文件上传
    this.upload=function(){
//        html5的对象
        var formData = new FormData();
        formData.append("file",file.files[0]); //file.files[0] js的取值方式  取到页面的第一个type=”file“  "file"与MultipartFile file 名字一致
        return $http({
            method:\'post\',
            url:\'../upload/uploadFile\',
            data:formData,
            headers: {\'Content-Type\':undefined},  //写了这一行即声明enctype类型一定是 multipart/form-data
            transformRequest: angular.identity  //序列化上传的文件
        });
    }
})
angularController层代码:
  $scope.uploadFile = function () {
        uploadService.upload().success(function (result) {
            if (result.flag) {
                $scope.imgUrl = result.message;
            } else {
                alert(result.message);
            }
        })
    }
调用工具类实现文件上传:
package com.pyg.shop.controller;

import bean.ResultInfo;
import org.springframework.beans.factory.annotation.Value;
import org.springframework.web.bind.annotation.RequestMapping;
import org.springframework.web.bind.annotation.RequestParam;
import org.springframework.web.bind.annotation.RestController;
import org.springframework.web.multipart.MultipartFile;
import utils.FastDFSClient;


@RestController
@RequestMapping("/upload")
public class UploadController {
    /*
     * springmvc从properties中获取变量的方式
     * application.properties==>upload_server=http://192.168.25.133/
     * */
    @Value("${upload_server}")
    private String uploadServer;

    @RequestMapping("/uploadFile")
    public ResultInfo uploadFile(MultipartFile file) {
        try {
            /*
            * tracker_server=192.168.25.133:22122
            * */
            FastDFSClient fastDFSClient = new FastDFSClient("classpath:fastdfs_client.conf");
            String fileName = file.getOriginalFilename();//获取上传文件的相对路径
            /*
            * 获取上传文件的扩展名
            * png 不带“.” 所以+1
            * */
            String extName = fileName.substring(fileName.lastIndexOf(".") + 1);
            /*
            * 文件上传成功后,返回文件在服务器中位置
            * 为了准确的url需要拼接上服务器ip,ip可能会变动,所以用配置文件加载服务器ip
            * */
            String fileUrl = fastDFSClient.uploadFile(file.getBytes(), extName);
            return new ResultInfo(true, uploadServer + fileUrl);
        } catch (Exception e) {
            e.printStackTrace();
            return new ResultInfo(false, "上传失败");
        }
    }
}
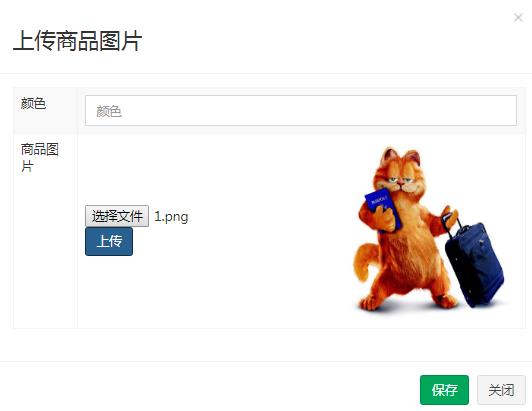
实现效果如下:

以上是关于用angularjs进行文件上传的主要内容,如果未能解决你的问题,请参考以下文章