微信小程序开发入门,Nodejs搭建本地服务器
Posted 筱风能动浪,岸树不遮山
tags:
篇首语:本文由小常识网(cha138.com)小编为大家整理,主要介绍了微信小程序开发入门,Nodejs搭建本地服务器相关的知识,希望对你有一定的参考价值。
1. 如何模拟真实环境中,读取服务端数据,首先需要使用Nodejs搭建一个本地服务器的环境。
在搭建web服务器之前,需要先安装node.js(安装版本最好为6.9.x)
安装后node.js,接下来就需要安装http的镜像文件
npm install http-server -g(windows下)
sudo npm install http-server -g(linux和mac下)
接下来在桌面创建一个文件夹
cd 文件夹名字
http-server
这时候,就会显示在8080端口下运行的一个本地服务器
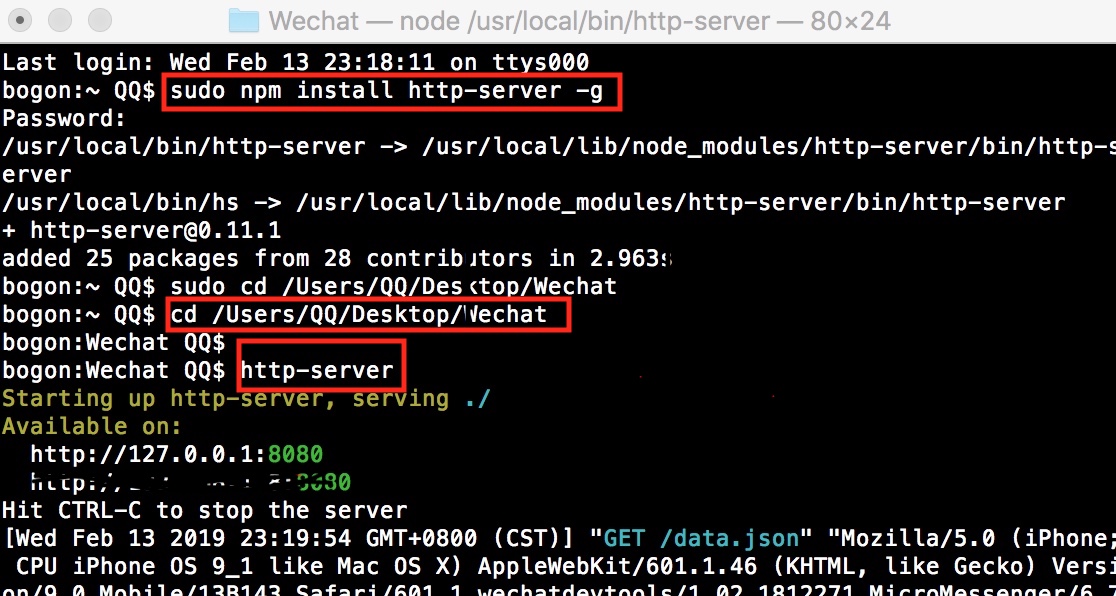
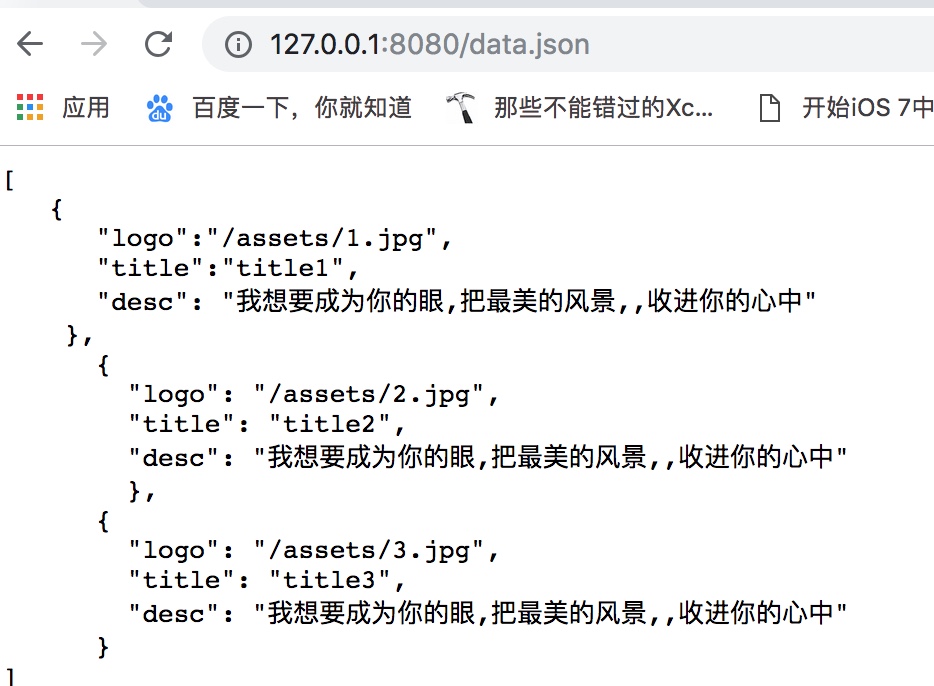
在wechat文件夹下创建data.json文件作为服务端数据
2.下载微信开发者工具
第一步:安装
首先下载微信开发者工具,直接下载安装,点击下一步
https://mp.weixin.qq.com/debug/wxadoc/dev/devtools/download.html?t=201716

2.1 创建项目应用:安装完成后,打开并扫码登录。小程序发布需要企业级的认证公众号,所以个人订阅号是不能发布的。所以我这里选择无AppID,创建项目选择一个本地空文件夹,勾选创建quick start 项目生成一个demo。
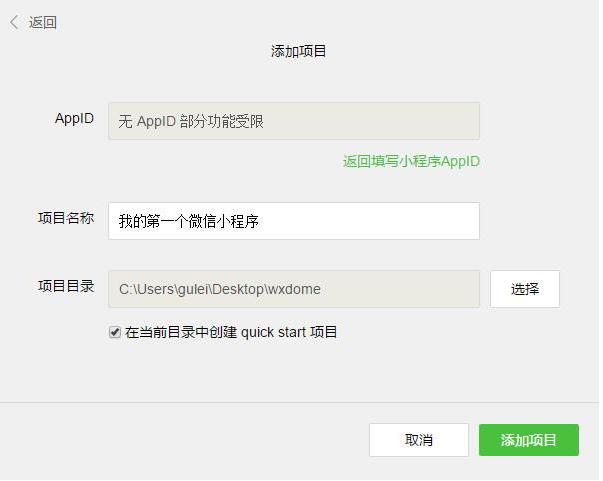
3、编写小程序:demo初始化并包含了一些简单的代码文件,其中app.js、app.json、app.wxss 这三个是必不可少的,小程序会读取这些文件初始化实例。
app.js是小程序的初始化脚本,可以在这个文件中监听小程序的生命周期,申请全局变量和调用API等
app.json是对小程序的全局配置,pages设置页面路径组成(默认第一条为首页),window设置默认页面的窗口表现等
app.wxss 是整个小程序的公共样式表。类似网站开发中的common.css
二、小程序的框架
1、小程序的配置
app.json主要分为五个部分:pages:页面组,window:框架样式(状态栏、导航条、标题、窗口背景色),tabBar:底部菜单,networkTimeout:网络超时设置,debug:开启debug模式
page.json针对页面单独设置,层叠掉app.json的全局设置
//app.json
{
  "pages":[
    "pages/index/index",
    "pages/logs/logs"
  ],
  "window":{
    "backgroundTextStyle":"light",
    "navigationBarBackgroundColor": "#000",
    "navigationBarTitleText": "WeChat",
    "navigationBarTextStyle":"white"
  }
}
注意:如果想新建一个页面组,在“pages”添加一个路径,例如:"pages/join/join",系统可自动创建一组join页面组
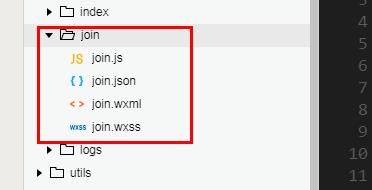
2、小程序的逻辑
使用App()来注册一个小程序,必须在app.js中注册,且不能注册多个
App({//如下为小程序的生命周期
  onLaunch: function() { },//监听初始化
  onShow: function() {  },//监听显示(进入前台)
  onHide: function() {  },//监听隐藏(进入后台:按home离开微信)
  onError: function(msg) {  },//监听错误
  //如下为自定义的全局方法和全局变量
  globalFun:function(){},
  globalData: \'I am global data\'
})
使用Page()注册一个页面,在每个页面的js文件中注册
Page({
  data: {text: "This is page data."},//页面数据,用来维护视图,json格式
  onLoad: function(options) {  },//监听加载
  onReady: function() {  },//监听初次渲染完成
  onShow: function() {  },//监听显示
  onHide: function() {  },//监听隐藏
  onUnload: function() {  },//监听卸载
  onPullDownRefresh: function() {  },//监听下拉
  onReachBottom: function() {  },//监听上拉触底
  onShareAppMessage: function () {  },//监听右上角分享
  //如下为自定义的事件处理函数(视图中绑定的)
  viewTap: function() {//setData设置data值,同时将更新视图
    this.setData({text: \'Set some data for updating view.\'})
  }
})
3、小程序的视图与事件绑定
在每个页面中的wxml文件中,对页面js中data进行数据绑定,以及自定义事件绑定
<!--{{}}绑定data中的指定数据并渲染到视图-->
<view class="title">{{text}}</view>

<!--wx:for获取数组数据进行循环渲染,item为数组的每项-->
<view wx:for="{{array}}"> {{item}} </view>

<!--wx:if条件渲染-->
<view wx:if="{{view == \'WEBVIEW\'}}"> WEBVIEW </view>
<view wx:elif="{{view == \'APP\'}}"> APP </view>
<view wx:else="{{view == \'MINA\'}}"> MINA </view>

<!--模板-->
<template name="staffName">
  <view>FirstName: {{firstName}}, LastName: {{lastName}}</view>
</template>
<template is="staffName" data="{{...template.staffA}}"></template>
<template is="staffName" data="{{...template.staffB}}"></template>

<!--bindtap指定tap事件处理函数为ViewTap-->
<view bindtap="ViewTap"> 点我点我 </view>
Page({
  data: {//data数据主要用于视图绑定
    text:"我是一条测试",
    array:[0,1,2,3,4],
    view:"APP",
    template:{
        staffA: {firstName: \'Hulk\', lastName: \'Hu\'},
        staffB: {firstName: \'Shang\', lastName: \'You\'}
    }
  },
  ViewTap:function(){console.log(\'额,点到我了了~\')}//自定义事件,主要用于事件绑定
})
4、小程序的样式
在每个页面中的wxss文件中,对wxml中的结构进行样式设置,等同于css,扩展了rpx单位。其中app.wxss默认为全局样式,作用所有页面。
三, 开发如下图所示的demo
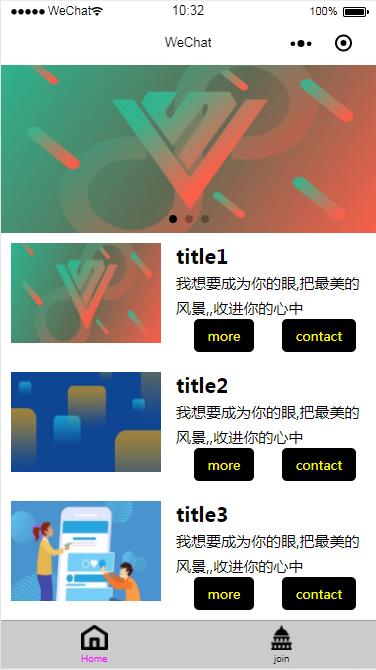
1.轮播图效果:
查看微信小程序开发官方文档:https://developers.weixin.qq.com/miniprogram/dev/component/swiper.html
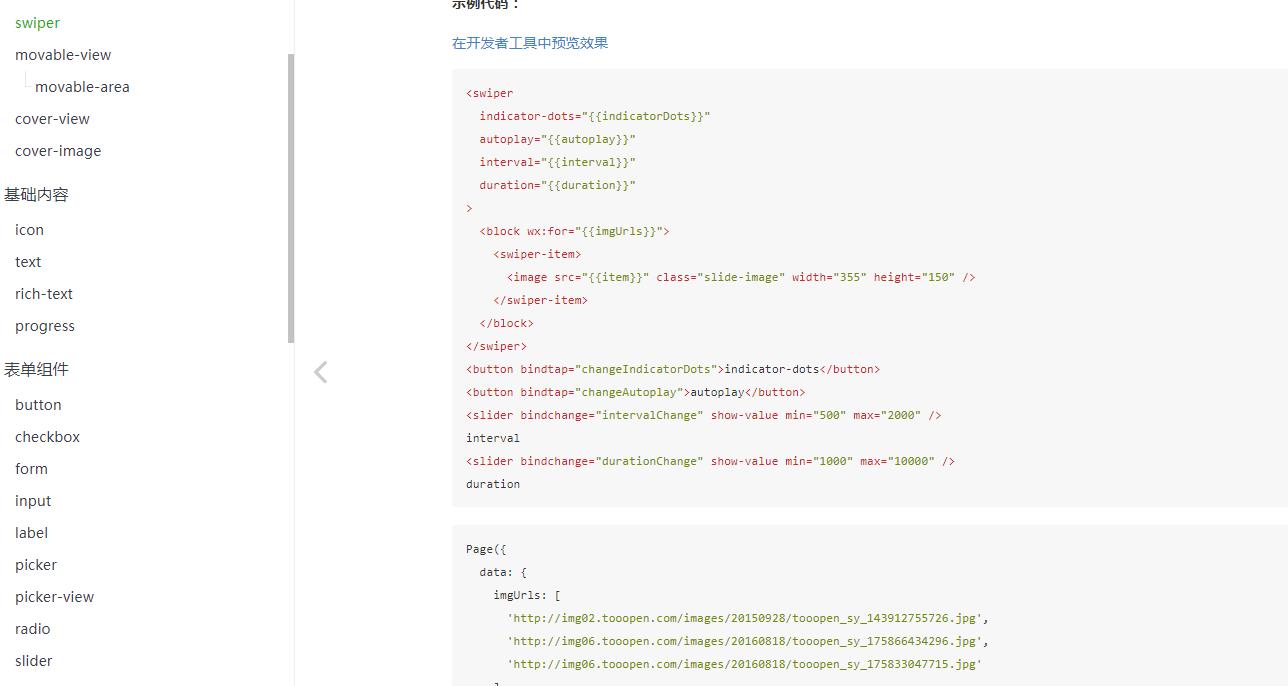
注意:此时的图片最好不要使用在线图片,需要下载到本地在调用,不然会读不到图片
index.wxml:视图层
<!--index.wxml-->
/** swiper html **/
  <swiper
  indicator-dots="{{indicatorDots}}"
  autoplay="{{autoplay}}"
  interval="{{interval}}"
  duration="{{duration}}"
  indicator-dots=\'true\'
>
  <block wx:for="{{imgUrls}}">
    <swiper-item>
      <image src="{{item}}" class="slide-image" width="355" height="150" />
    </swiper-item>
  </block>
</swiper>
/** 第二板块列表 **/
<view class=\'item-list\'>
<view class=\'pro-list\' wx:for="{{proLists}}" bindtap=\'toDetail\' data-index="{{index}}">
<view class=\'pro-logo\'><image width="150" height="100" src=\'{{item.logo}}\'></image></view>
<view class=\'pro-right\'>
  <view class=\'pro-title\'>{{item.title}}
  </view>
  <text class=\'pro-desc\'>{{item.desc}}</text>
  <view class=\'pro-button\'><button>more</button><button open-type="contact">contact</button></view>
</view>
</view>
</view>
index.js:数据层
//index.js
//获取应用实例
const app = getApp()
Page({
  data: {
    imgUrls: [
      \'/assets/1.jpg\',
      \'/assets/2.jpg\',
      \'/assets/3.jpg\'
    ],
    indicatorDots: false,
    autoplay: false,
    interval: 5000,
    duration: 1000,
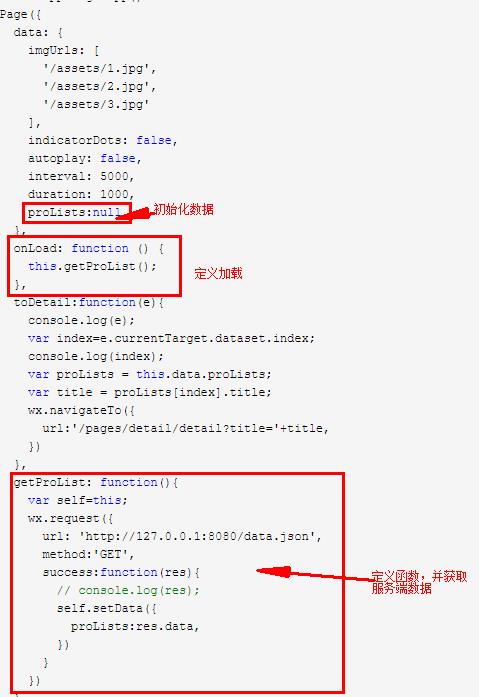
    proLists:null
  },
  onLoad: function () {
    this.getProList();
  },
  toDetail:function(e){
    console.log(e);
    var index=e.currentTarget.dataset.index;
    console.log(index);
    var proLists = this.data.proLists;
    var title = proLists[index].title;
    wx.navigateTo({
      url:\'/pages/detail/detail?title=\'+title,
    })
  },
  getProList: function(){
    var self=this;
    wx.request({
      url: \'http://127.0.0.1:8080/data.json\',
      method:\'GET\',
      success:function(res){
        // console.log(res);
        self.setData({
          proLists:res.data,
        })
      }
    })
  }
})
1.Swiper代码实现:
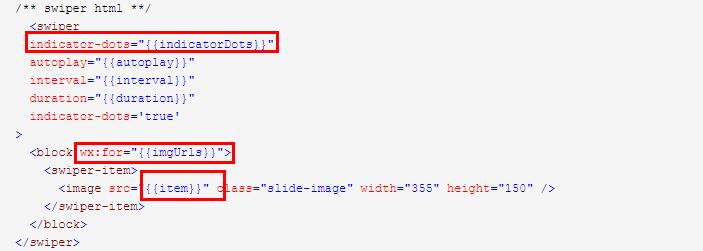
解释:indicator-dots="true",显示轮播图下面的小圆点,wx:for="{{imgUrls}}",遍历data里的数组imgUrls,并使图片展示到页面中
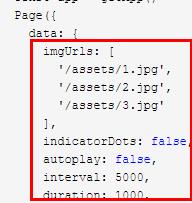
2. 第二板块列表实现:

解释:wx:for="{{proLists}}",遍历数组读取数据层的数据,展示列表信息。
此时模拟真实环境下,获取存储在服务端的数据。在wechat文件夹下创建data.json文件作为服务端数据。
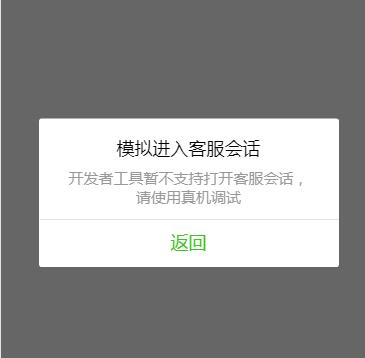
3. 使用小程序button组件--客服会话

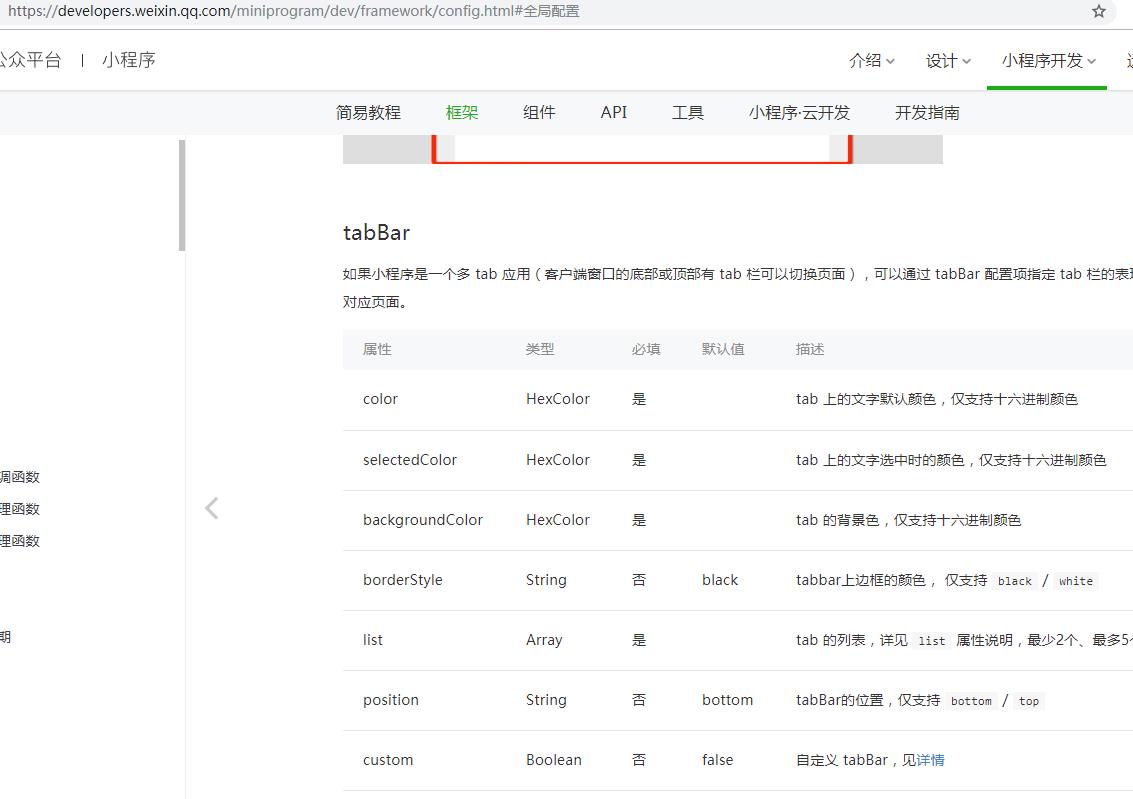
4.底部菜单实现:tabBar组件
在app.json中加入"tabBar"
官方文档: https://developers.weixin.qq.com/miniprogram/dev/framework/config.html#%E5%85%A8%E5%B1%80%E9%85%8D%E7%BD%AE
{
  "pages":[
    "pages/index/index",
    "pages/join/join",
    "pages/detail/detail",
    "pages/logs/logs"
  ],
  "window":{
    "backgroundTextStyle":"light",
    "navigationBarBackgroundColor": "#fff",
    "navigationBarTitleText": "WeChat",
    "navigationBarTextStyle":"black"
  },
  "tabBar":{
    "color":"#000",
    "selectedColor":"#f0f",
    "backgroundColor": "#ccc",
    "list":[{
      "pagePath":"pages/index/index",
      "text":"Home",
      "iconPath":"assets/h.png",
      "selectedIconPath":"assets/h.png"
    },
    {
      "pagePath":"pages/join/join",
      "text":"join",
      "iconPath":"assets/j.png",
      "selectedIconPath":"assets/j.png"
    }]
  }
}
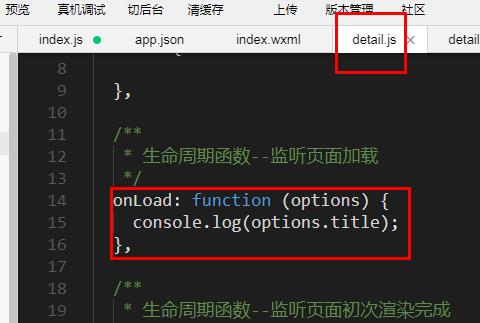
点击列表进入详情页,此时需要设定 bindtap=\'toDetail\',相当于js的onclick。
在数据层定义“toDetail”函数:
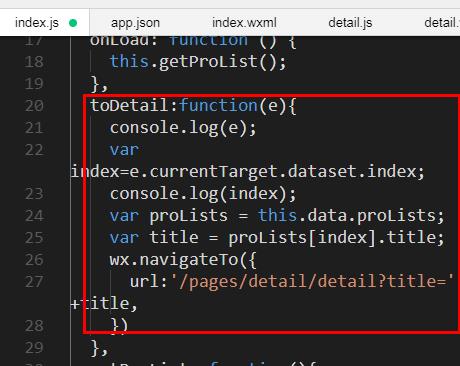
此时可以设定不同页面之间的传值:

以上是关于微信小程序开发入门,Nodejs搭建本地服务器的主要内容,如果未能解决你的问题,请参考以下文章
