Vue3+vite2 博客前端开发
Posted 程序员阿诺斯
tags:
篇首语:本文由小常识网(cha138.com)小编为大家整理,主要介绍了Vue3+vite2 博客前端开发相关的知识,希望对你有一定的参考价值。
Vue3+vite2 博客前端开发
文章目录
前言
大家是否也想拥有一个属于自己的博客?但是如何去开发博客,怎样去开发一个好看的博客,这应该就是大家思考的问题!下面,我为大家带来了我的博客前端项目,CYBlogView|德尔佐盖特
页面展示
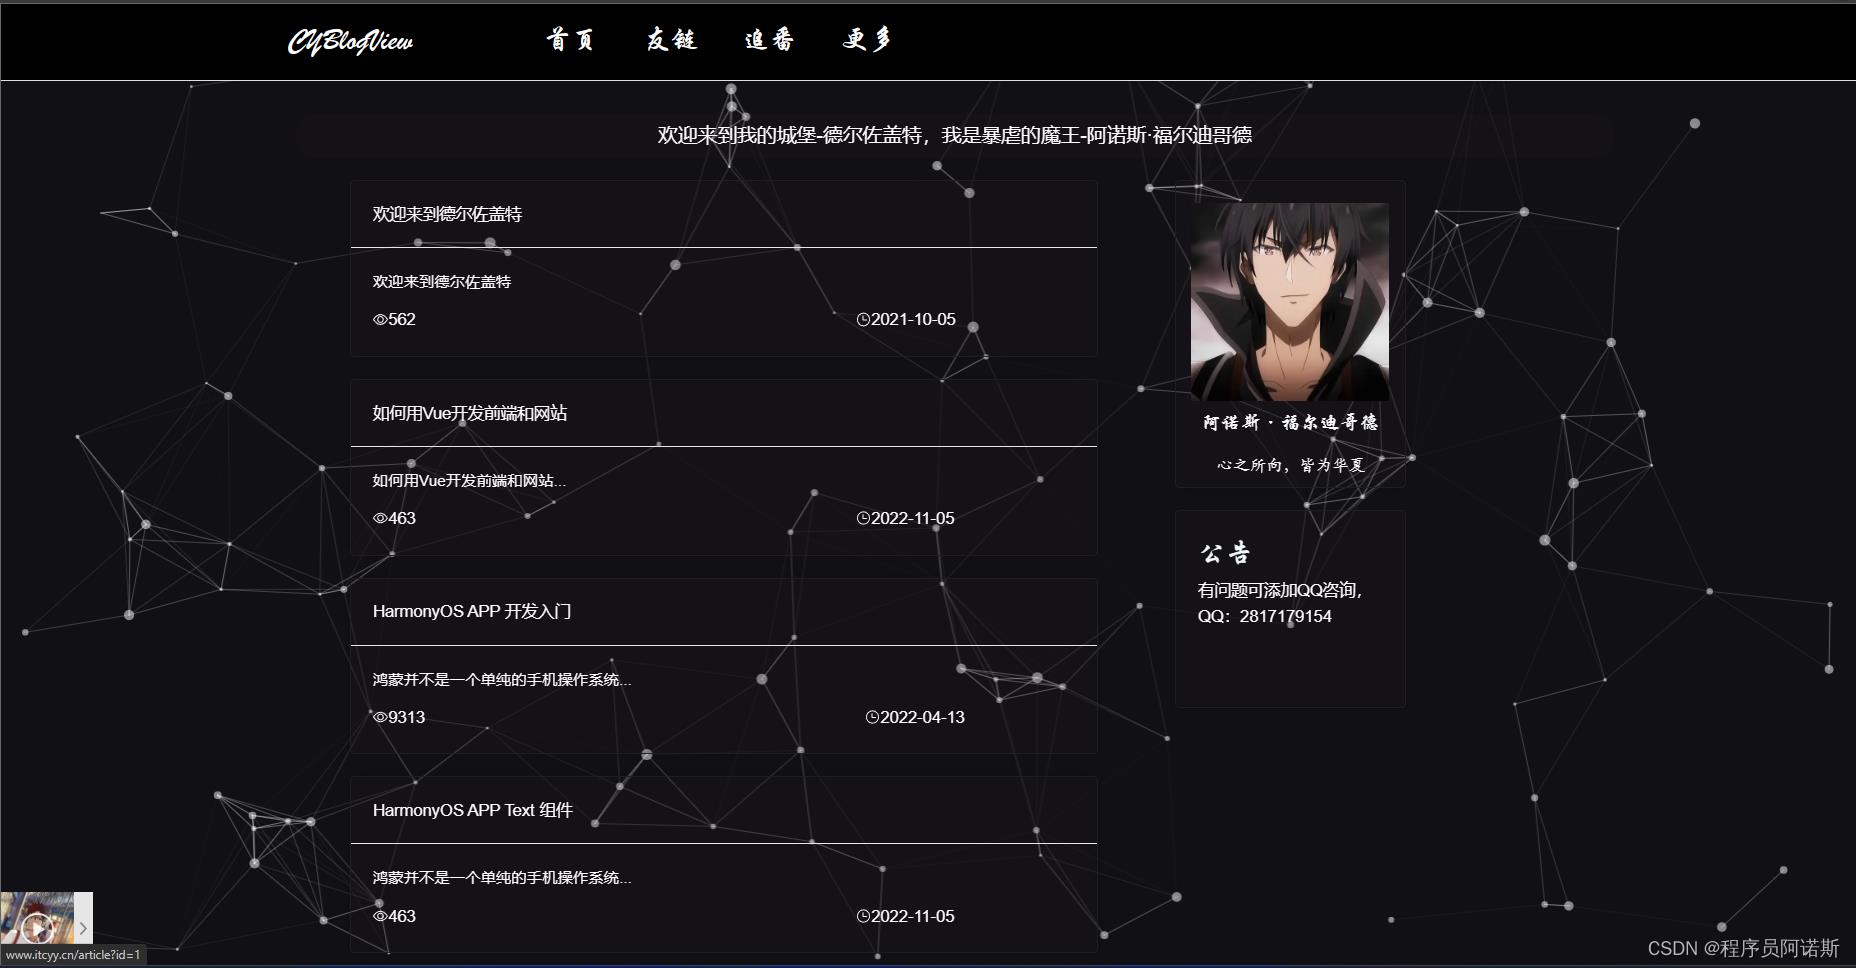
主页
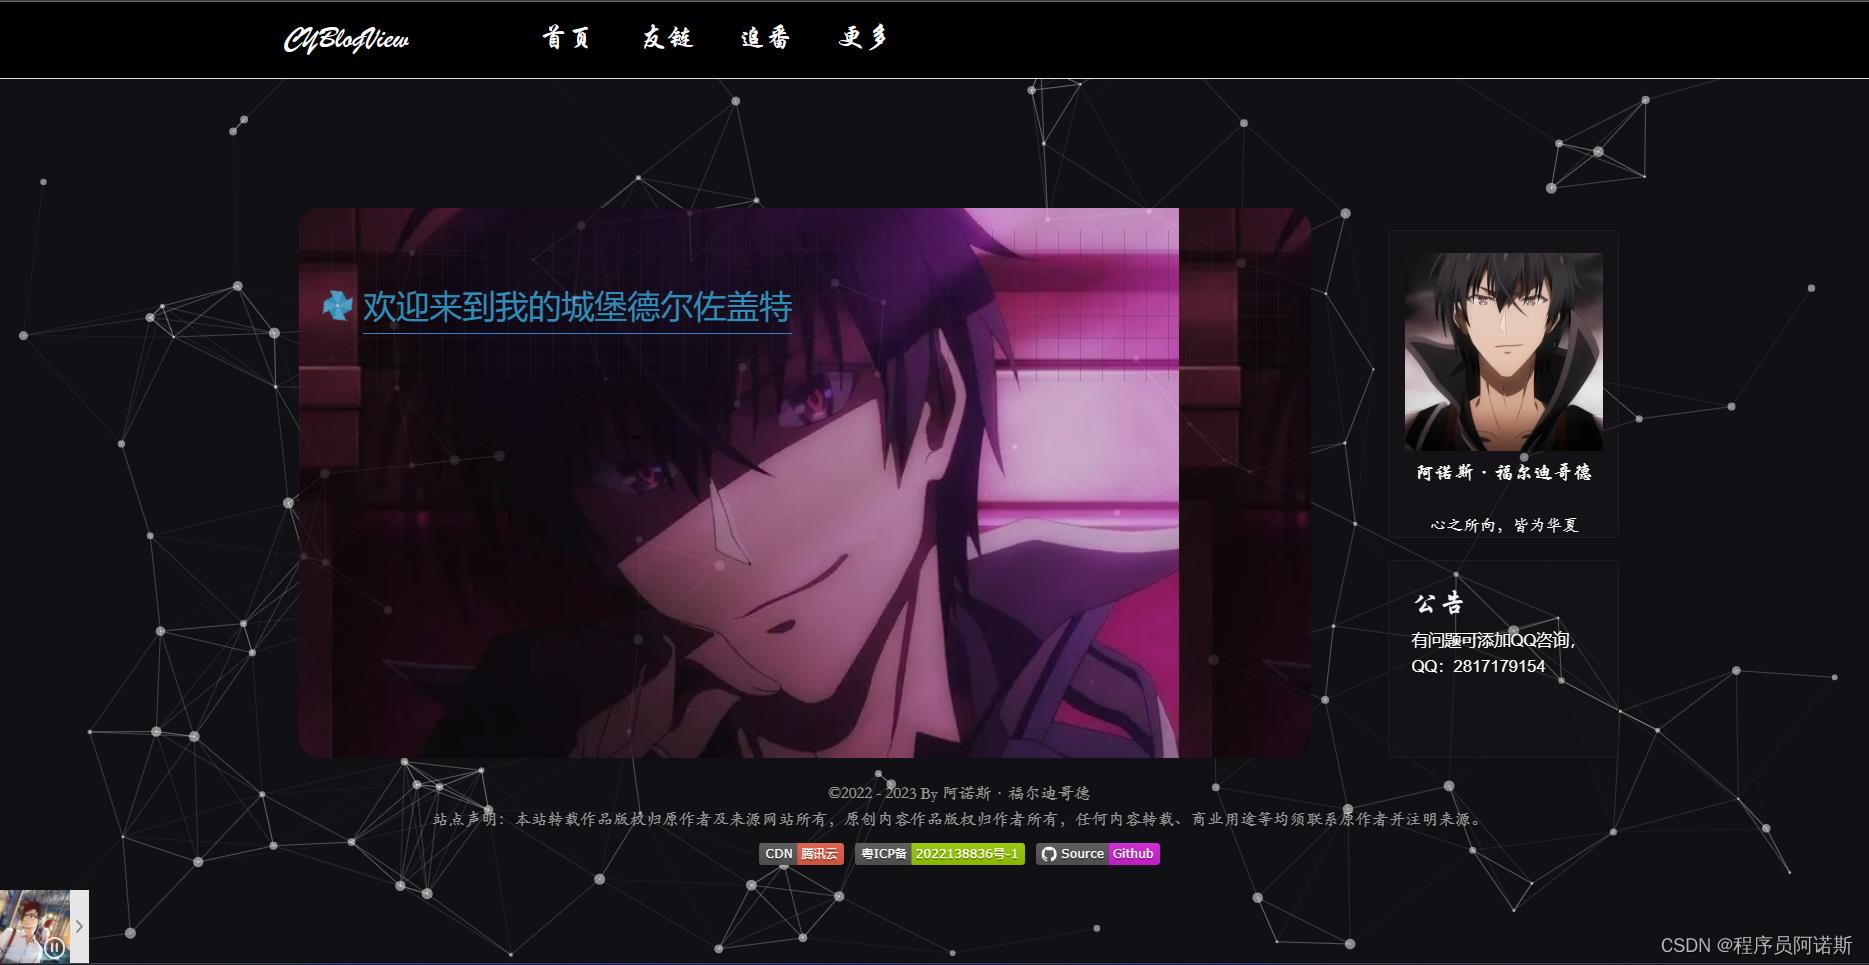
内容页
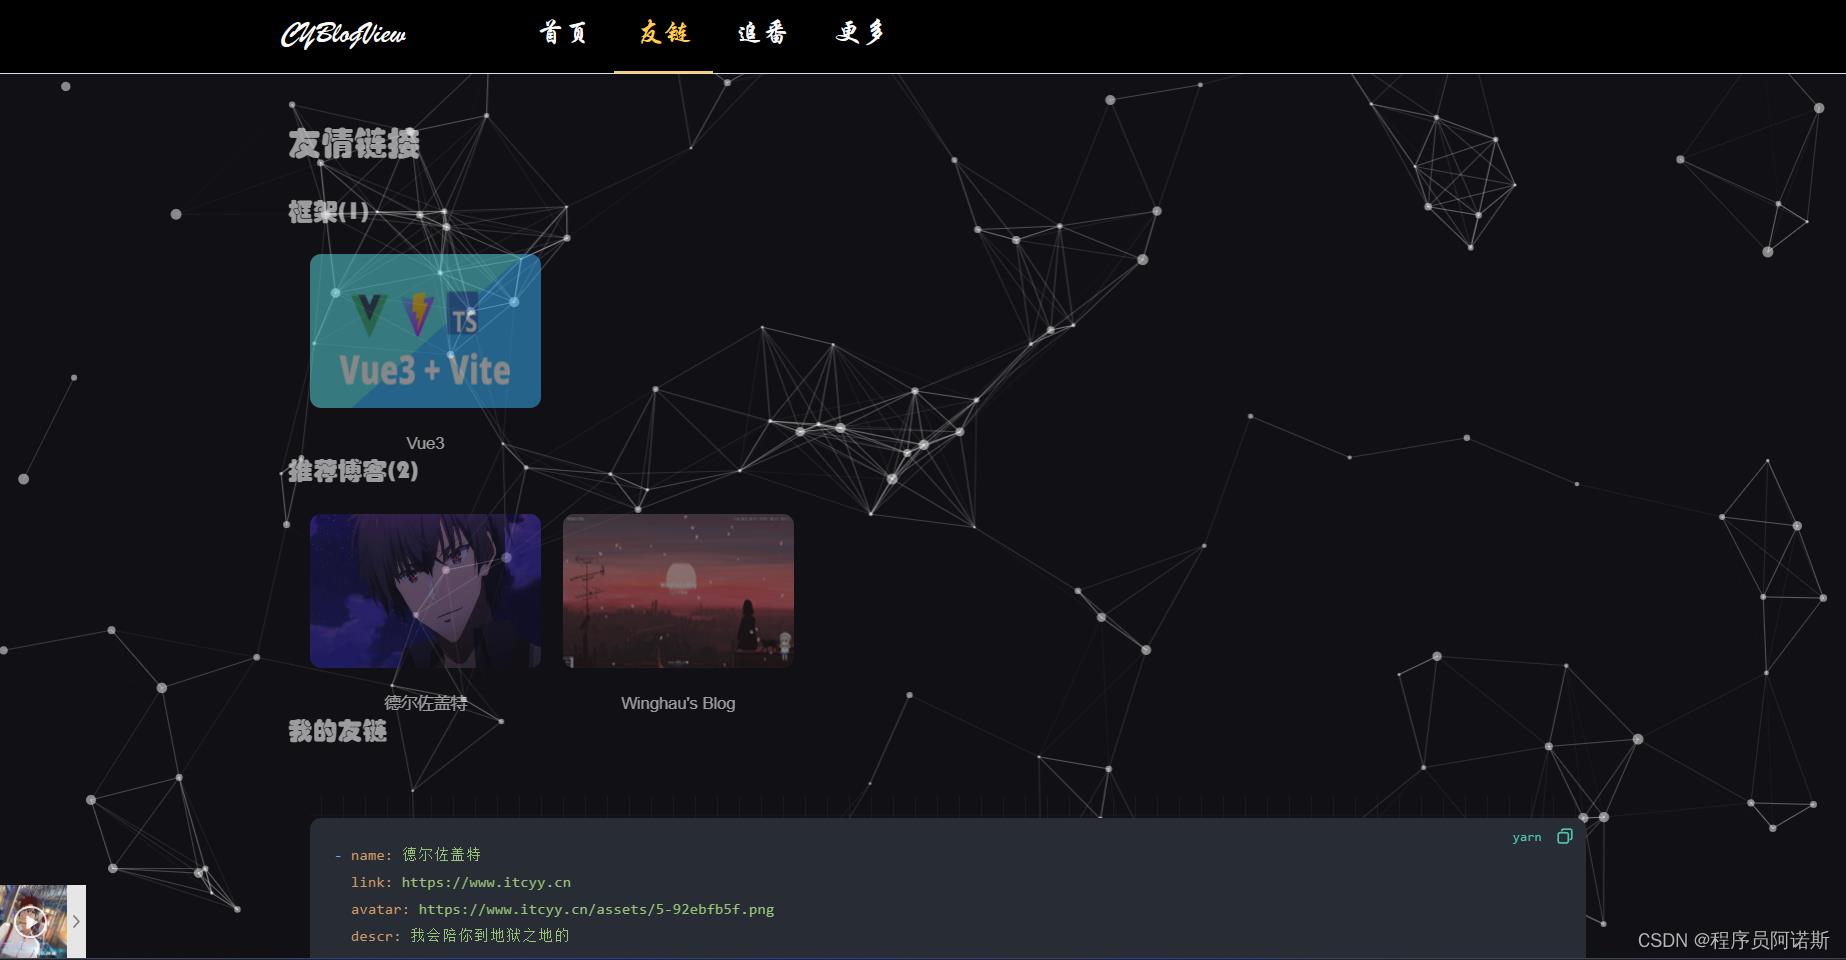
友链页
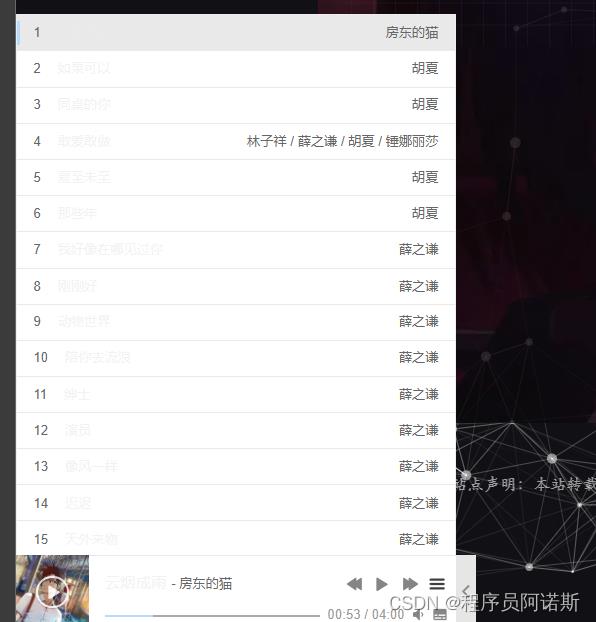
音乐挂件
代码设计
卡片设计
<template>
<div>
  <div v-for="(item, index) in Data" :key="index" @select="toCardbog(item.url)" style="margin-left: 50px;">
    <RouterLink :to="item.url" target="_blank">
     <el-card class="box-card" shadow="always" >
                    <template #header>
                      <div class="card-header">
                        <span style="color: white;">item.title</span>
                      </div>
                    </template>
                    <div class="text item"> item.data </div>
                    <div class="r">
                        <div class="r">
                            <div class="text "><el-icon><View style="width: 24px;height: 24px;"/></el-icon></div>
                             <div class="num"> item.number </div>
                        </div>
                        <div class="r" style="margin-left: 400px;">
                                <div class="text"><el-icon><Clock style="width: 24px;height: 24px;"/></el-icon></div>
                                 <div class="num"> item.time </div>
                        </div>
                    </div>
                  </el-card>
    </RouterLink>
                   </div>
                    <el-pagination background layout="prev, pager, next" :total="7" style="margin-top: 20px;margin-left: 45%;"/>
</div>
</template>
js
const toCardbog = (url : string) =>


const Data = [
  title: "欢迎来到德尔佐盖特",
  data: "欢迎来到德尔佐盖特",
  number: "562",
  time: "2021-10-05",
  url: "/gdufe?id=4"
,

    title: "如何用Vue开发前端和网站",
    data: "如何用Vue开发前端和网站...",
    number: "463",
    time: "2022-11-05",
    url:"/article?id=1"
,
  title: "HarmonyOS APP 开发入门",
  data: "鸿蒙并不是一个单纯的手机操作系统...",
  number: "9313",
  time: "2022-04-13",
  url: "/article?id=2",
,
  title: "HarmonyOS APP Text 组件",
  data: "鸿蒙并不是一个单纯的手机操作系统...",
  number: "463",
  time: "2022-11-05",
  url: "/article?id=3"
]
css
.c
    display: flex;
    flex-direction: column;

.card-header
  display: flex;
  justify-content: space-between;
  align-items: center;
  z-index: 1;
  user-select: none;


.text
  font-size: 14px;
  height: 20px;
  color: white;
  user-select: none;


.item
  margin-bottom: 18px;


.box-card
  width: 680px;
  margin-top: 20px;
  background-color: #3021211d;
  border-color: #1f1f1f;
  z-index: 33;

.eye-box
    display: flex;
    flex-direction: row;
    user-select: none;

.num
    margin-top: -5px;
  color: white;
  user-select: none;

.r
    display: flex;
    flex-direction: row;
背景(Particles.js粒子效果)
html
<div>
        <Particles id="tsparticles"
        :particlesInit="particlesInit"
        :particlesLoaded="particlesLoaded"
        :options="options"
        style="z-index: -1;" />
    </div>
js
import  reactive  from 'vue'
import  loadFull  from "tsparticles"
import type  Engine  from 'tsparticles-engine'

const particlesInit = async (engine: Engine) =>
    await loadFull(engine)


const particlesLoaded = async (container: any) =>
    console.log('Particles container loaded', container)


const options = reactive(
    background:
        color:
            value: '#111014' // 粒子颜色

    ,
    fpsLimit: 60,
    interactivity:
        events:
            onClick:
                enable: true,
                mode: 'push' // 可用的click模式有: "push", "remove", "repulse", "bubble"。
            ,
            onHover:
                enable: true,
                mode: 'grab' // 可用的hover模式有: "grab", "repulse", "bubble"。
            ,
            resize: true
        ,
        modes:
            bubble:
                distance: 400,
                duration: 2,
                opacity: 0.8,
                size: 40
            ,
            push:
                quantity: 4
            ,
            repulse:
                distance: 200,
                duration: 0.4


    ,
    particles:
        color:
            value: '#ffffff'
        ,
        links:
            color: '#ffffff', // '#dedede'。线条颜色。
            distance: 150, // 线条长度
            enable: true, // 是否有线条
            opacity: 0.5, // 线条透明度。
            width: 1 // 线条宽度。
        ,
        collisions:
            enable: false
        ,
        move:
            direction: 'none',
            enable: true,
            outMode: 'bounce',
            random: false,
            speed: 4, // 粒子运动速度。
            straight: false
        ,
        number:
            density:
                enable: true,
                area: 800
            ,
            value: 80 // 粒子数量。
        ,
        opacity:
            value: 0.5 // 粒子透明度。
        ,
        shape:
            type: 'circle' // 可用的粒子外观类型有:"circle","edge","triangle", "polygon","star"
        ,
        size:
            random: true,
            value: 5

    ,
    detectRetina: true
)
右侧个人信息与公告
html
<div class="app">
    <el-card class="box-card" shadow="always">
            <div><img style="width:180px;height: 180px;" src="./../assets/img/5.png"></div>
            <div><p class="text">阿诺斯·福尔迪哥德</p></div>
            <div>
            <p class="bar_text">心之所向,皆为华夏</p>
            </div>
        </el-card>
        <el-card class="box-card" shadow="always" style="height: 180px;">
                <div><p style="color: aliceblue;font-family: 华文行楷;font-size: 25px;">公告</p></div>
                <div><p style="color: white;">有问题可添加QQ咨询,QQ:2817179154</p></div>
            </el-card>
    </div>
css
.app
   display: flex;
   flex-direction: column;
   margin-left: 50px;

.text
   font-size: 14px;


.item
   padding: 18px 0;


.box-card
   width: 210px;
   margin-left: 20px;
   background-color: #3021211d;
   margin-top: 20px;
   height: 280px;
   display: flex;
   border-color:#1f1f1f;
   justify-content: space-around;

.text
   font-size: 18px;
   font-family:华文行楷;
   text-align: center;
   color: white;

.textpo
   font-family: 楷体;
   text-align: center;

.bar_text
   font-family: 华文楷体;
   text-align: center;
   margin-top: 20px;
   color: white;
   user-select: none;
内容页
html
    <div id="md">

        <div class="tarmd">
            <MdEditor v-model="text" previewOnly :previewTheme="theme"
                style="padding: 20px 20px 20px 20px;background-color: #55000000;border-radius: 20px;" />
                <UserView></UserView>
        </div>

    </div>
js
import  onMounted  from 'vue';
import  useRouter  from 'vue-router';
import UserView from '../../tool/UserView.vue'
import MdEditor from 'md-editor-v3';
import 'md-editor-v3/lib/style.css';
import setmd from "../../static/index.ts"
const router = useRouter();
let fileid = router.currentRoute.value.query.id
console.log(fileid)
const File = ''
const theme = "mk-cute"
const text = setmd(fileid)
</script>
<style>
#md
    width: 1200px;
    position: relative;
    top: 80px;

.tarmd
    display: flex;
    flex-direction: row;


img > p
    width: 200%;
    height: 200%;
友链
html
<div class="top_1">
<div class="row_f">
<div class="card_g">
<h1 style="font-family: 华文琥珀;">友情链接</h1>
<h2 style="font-family: 华文琥珀;margin-top: 20px;margin-bottom: 20px;">框架(1)</h2>
<div class="boxv">
<div class="box1 v2"><a href="https://cn.vuejs.org/" target="_blank"><img style="opacity: 0.5;width: 210px;height: 140px;border-radius: 10px;z-index: 1;" src="https://img2.baidu.com/it/u=2167395474,3773933499&fm=253&fmt=auto&app=138&f=PNG?w=1018&h=500" ></a>
</div>
<p style="text-align: center;font-size: 15px;">Vue3</p>
</div>
<h2 style="font-family: 华文琥珀;margin-top: 20px;margin-bottom: 20px;背景环境准备
Vite打包 webpack打包 总结
背景
大家好,我是杜晓帅~,一名Java开发程序员;最近想总结一下前端开发的一些东西,包括项目的打包和如何将后端处理的数据在前端进行一个展示,相信大家学习了这个之后就能自己写一套前后端分离的系统了。而后端我们一般会使用SpringBoot进行开发,直接在IDEA新建SpringBoot项目即可,但是前端的话就需要用到一些工具了,本文我们用Vite和webpack进行前端Vue项目的一个打包,因为目前为止博主也只使用过这两个打包工具,话不多说,让我们开始吧!!!

环境准备
准备Node.js和npm即可
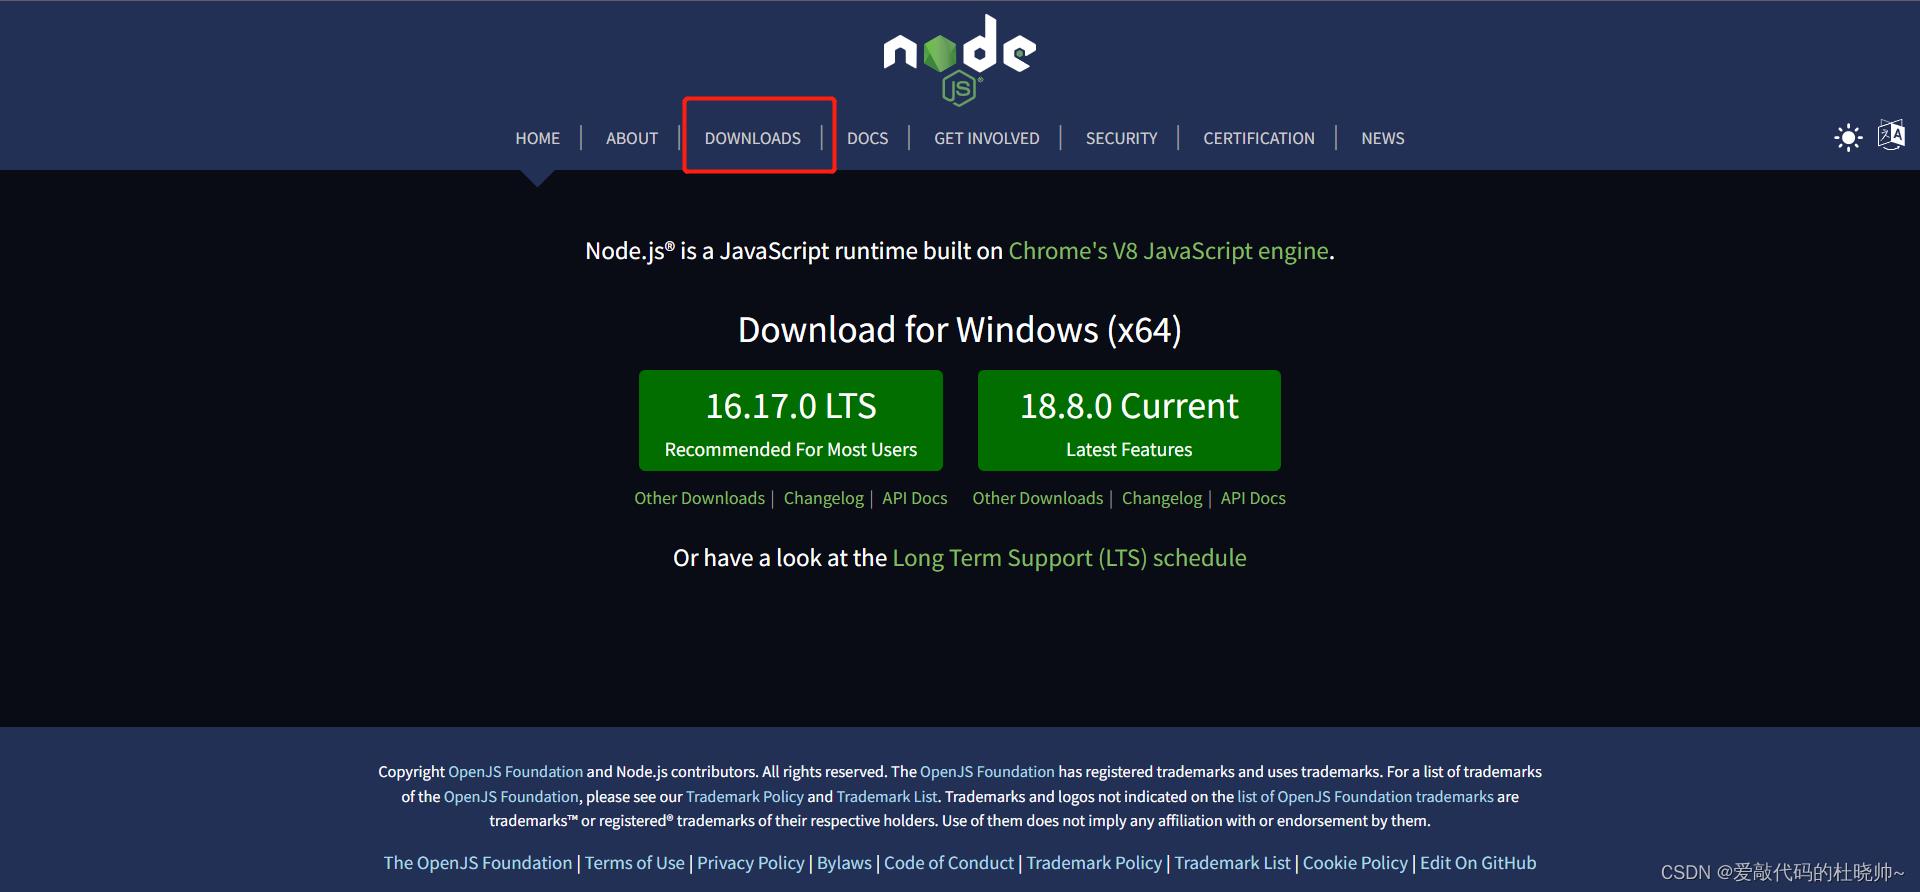
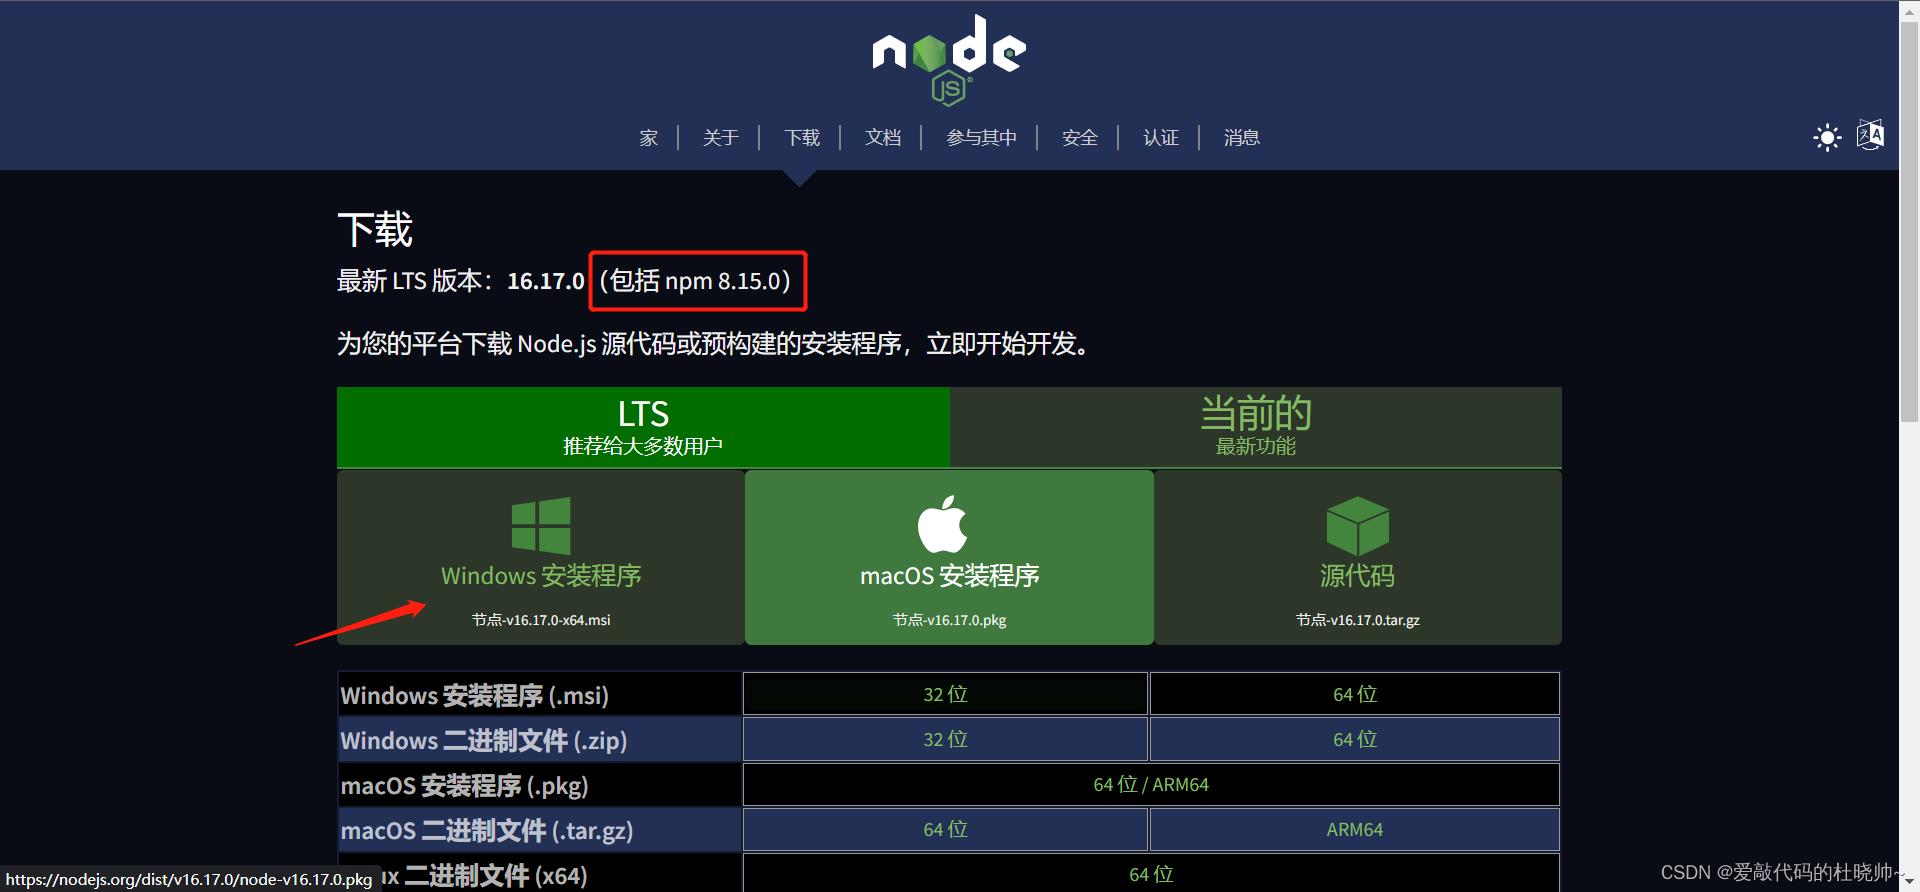
首先这两个东西是打包需要用到的东西,node.js下载官网是:点击跳转 ,因为现在下载的node.js包括了npm,所以算一举两得,一次性就把两个东西全部下载完成了。下载完成之后我们按Win+R打开cmd窗口,输入node -v和npm -v,就能看到我们安装的node.js和npm的版本号了,如果没有版本号,可能是没安装成功,看看有什么文件冲突的地方,要解决一下
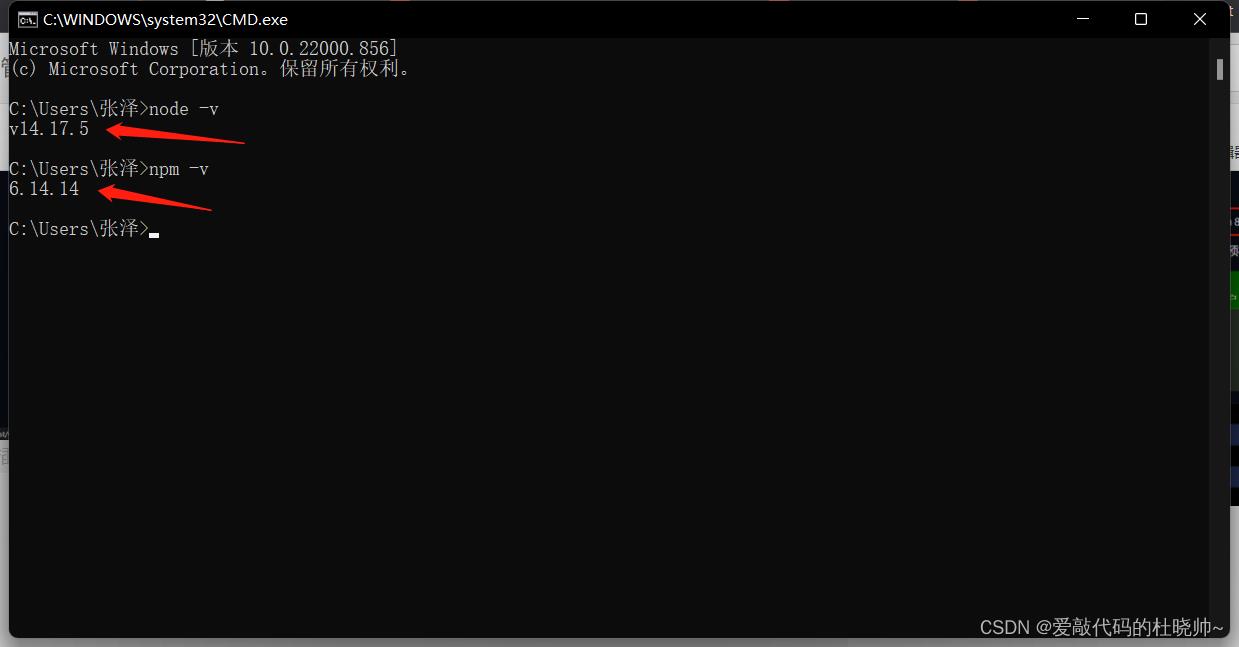
因为博主是很久之前就安装了,所以版本可能和大家不一样,不过这并不影响后续的打包,按自己的版本来就好了😁😁😁
Vite打包
首先我们打开cmd窗口,在d盘新建一个文件夹用于存放打包的Vue项目,然后:
d:
cd vue_project
因为我是在d盘创建的vue_project文件夹,所以我先切换为d盘在cd到指定文件夹就好了
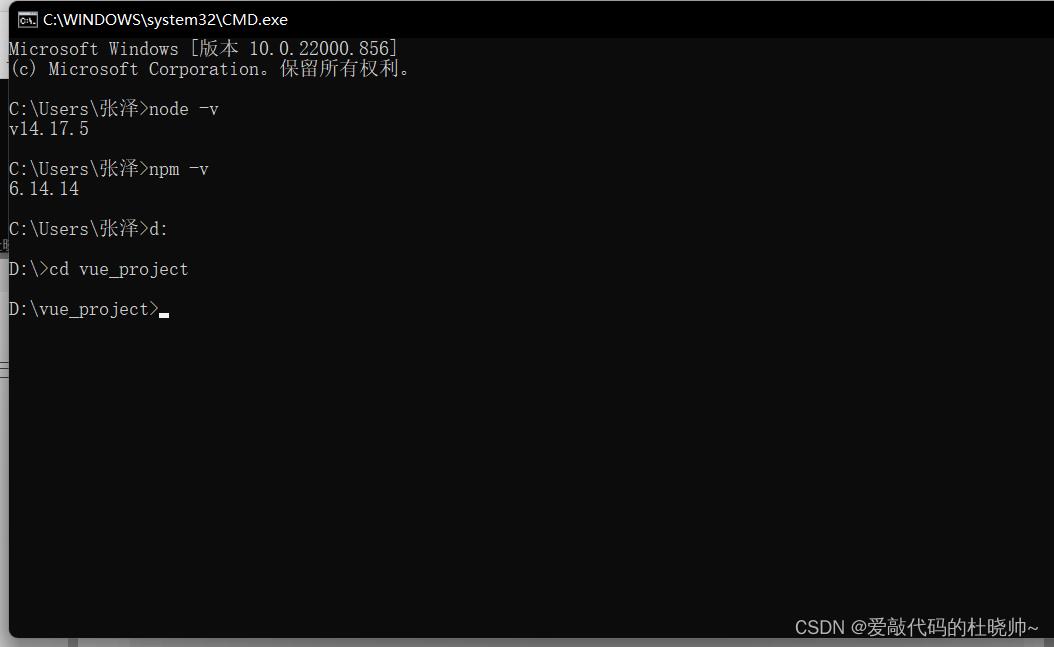
现在就可以利用Vite进行打包工作了,代码已经贴在下面了,大家可以一步一步运行,最后启动项目之后根据给出的地址进行访问即可
npm init vite-app npm_project(这个是你项目的名字,可以自己命名)
cd npm_project (cd到你刚刚创建的项目文件夹下)
npm install
npm run dev (启动项目)
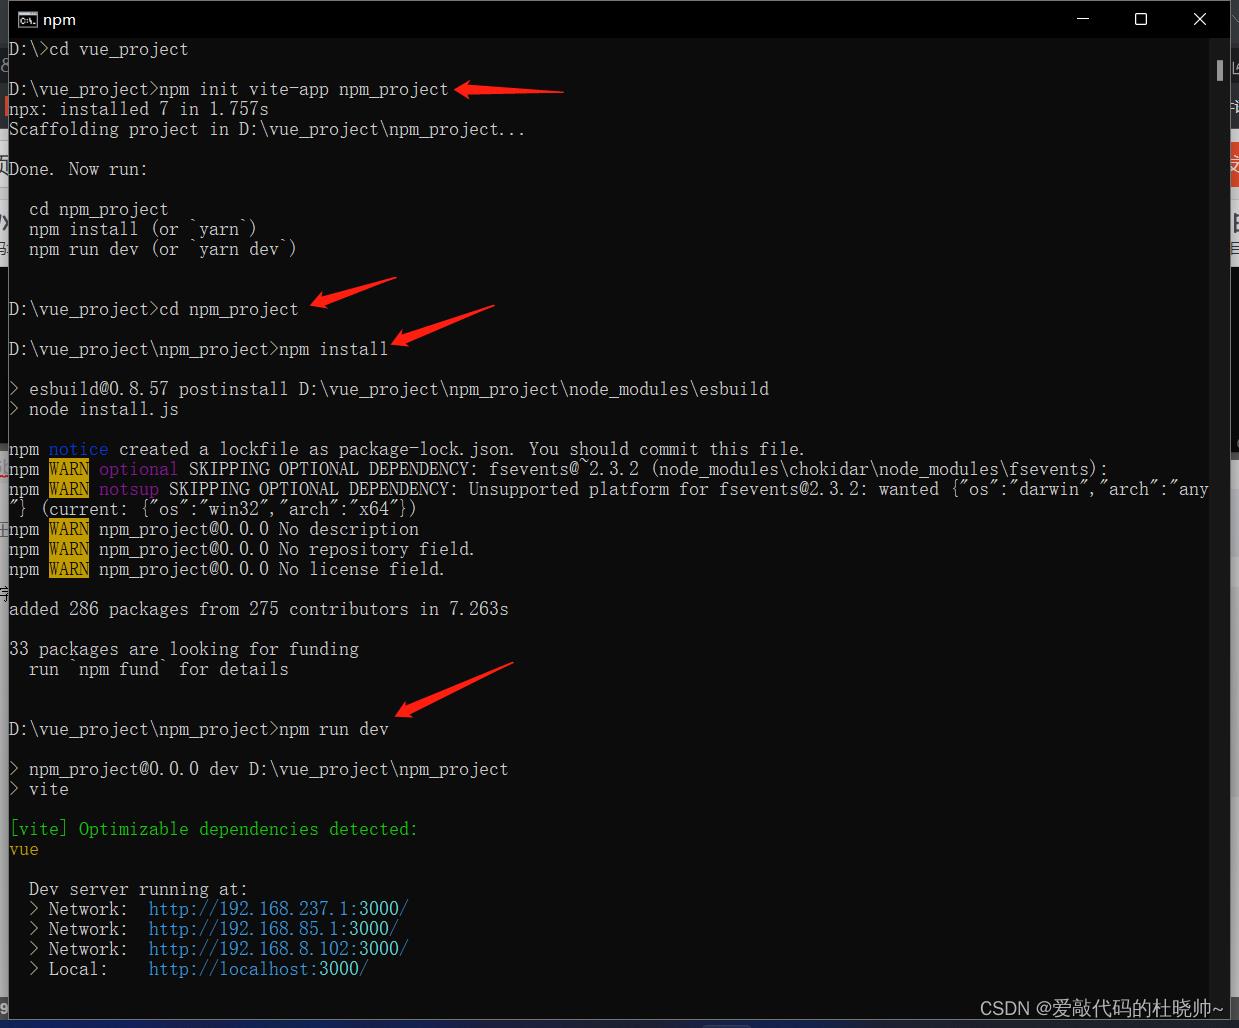
补充一下如果用yarn打包的话也是差不多的命令,如下:
yarn create vite-app yarn_project (你定义的项目名)
cd yarn_project (刚刚创建的项目名)
yarn
yarn dev
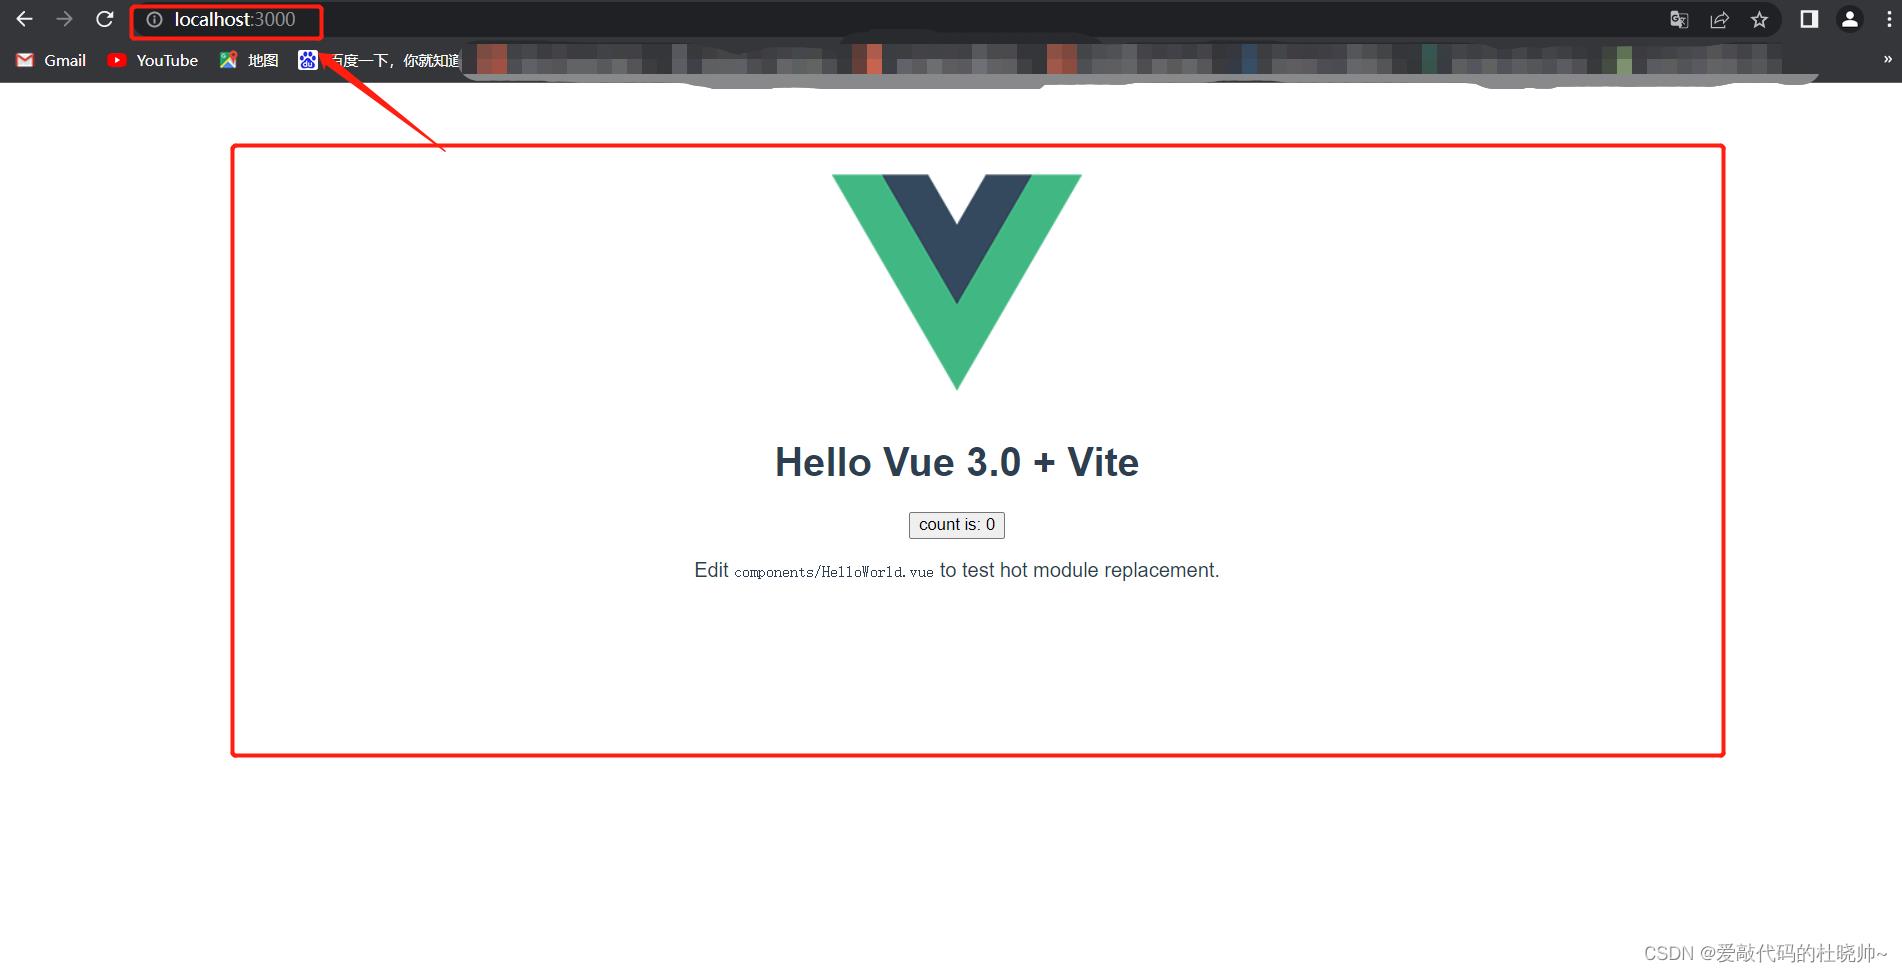
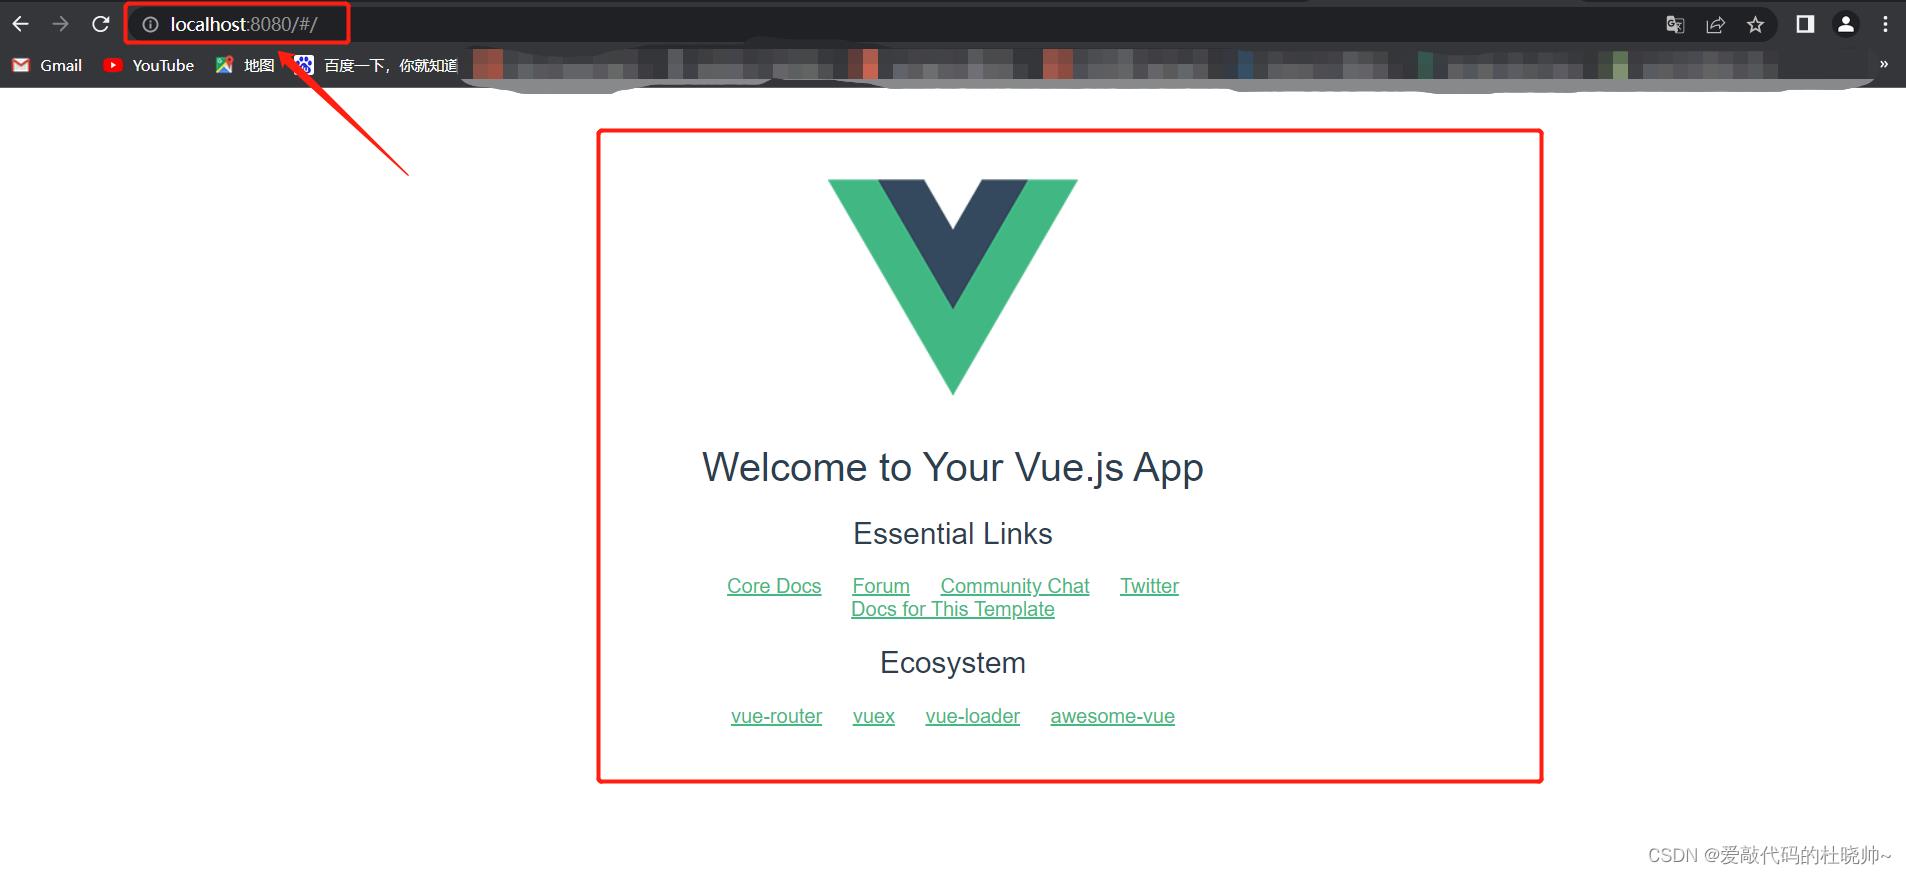
执行完成之后,启动项目,复制访问地址在浏览器地址页面即可访问成功了,如下图:
webpack打包
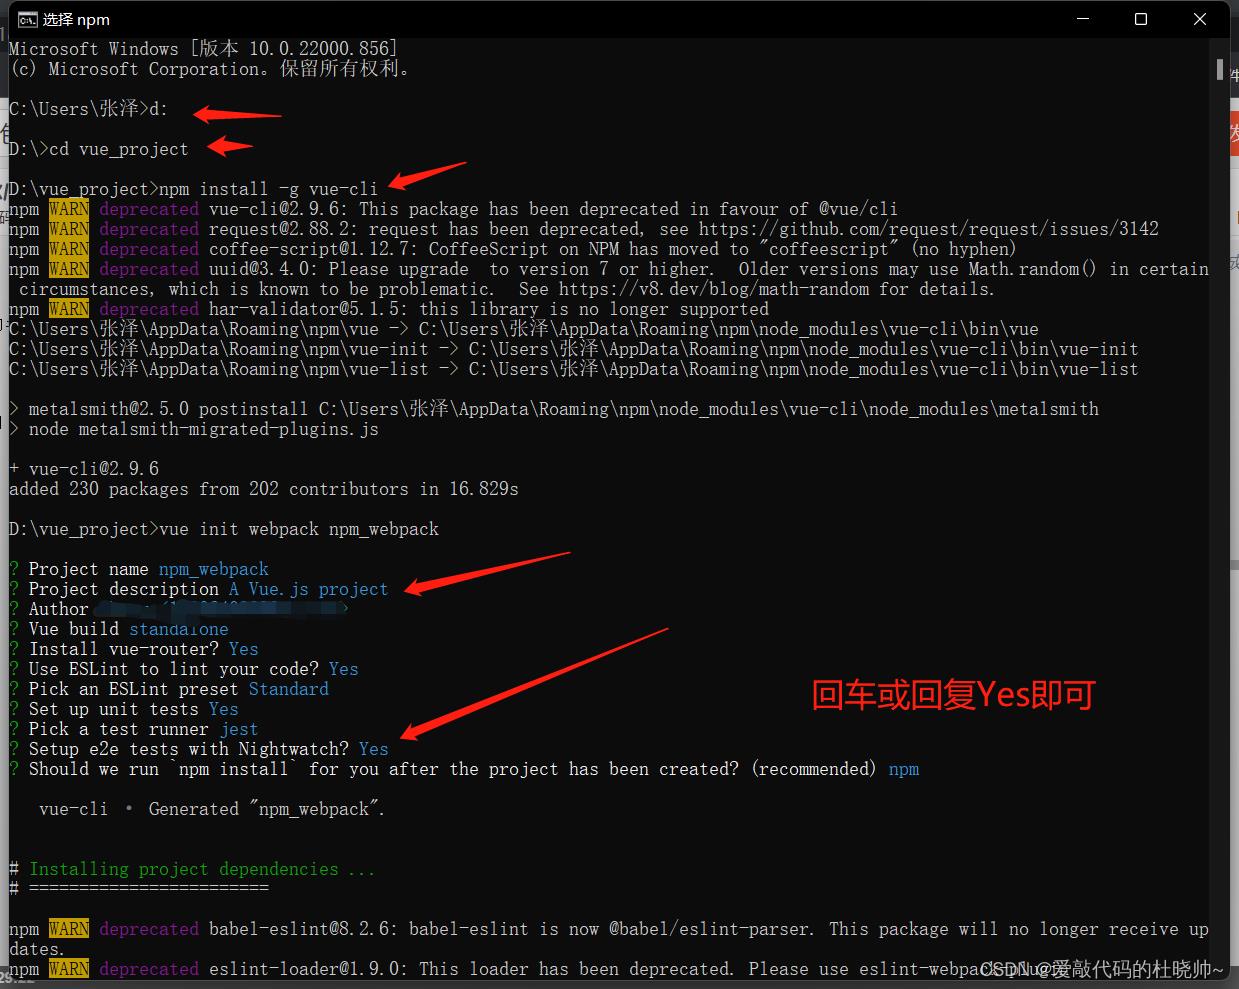
利用webpack进行打包就会比Vite更慢,因为他需要的东西更多;下面是打包的一些命令,包括切换镜像源使打包速度更快,当我们执行完第三行的时候,会有很多选项,我们直接回车,然后回复的地方直接Yes就好,如下图所示:
npm install -g cnpm --registry=http://registry.npm.taobao.org (换成国内的淘宝镜像源,打包速度更快)
cnpm install -g vue-cli
vue init webpack npm_webpack (自定义自己项目的名称)
cd npm_webpack
npm install (这个时候这个选项没有,可以直接cd到自己创建的项目启动即可)
npm run dev (启动项目)
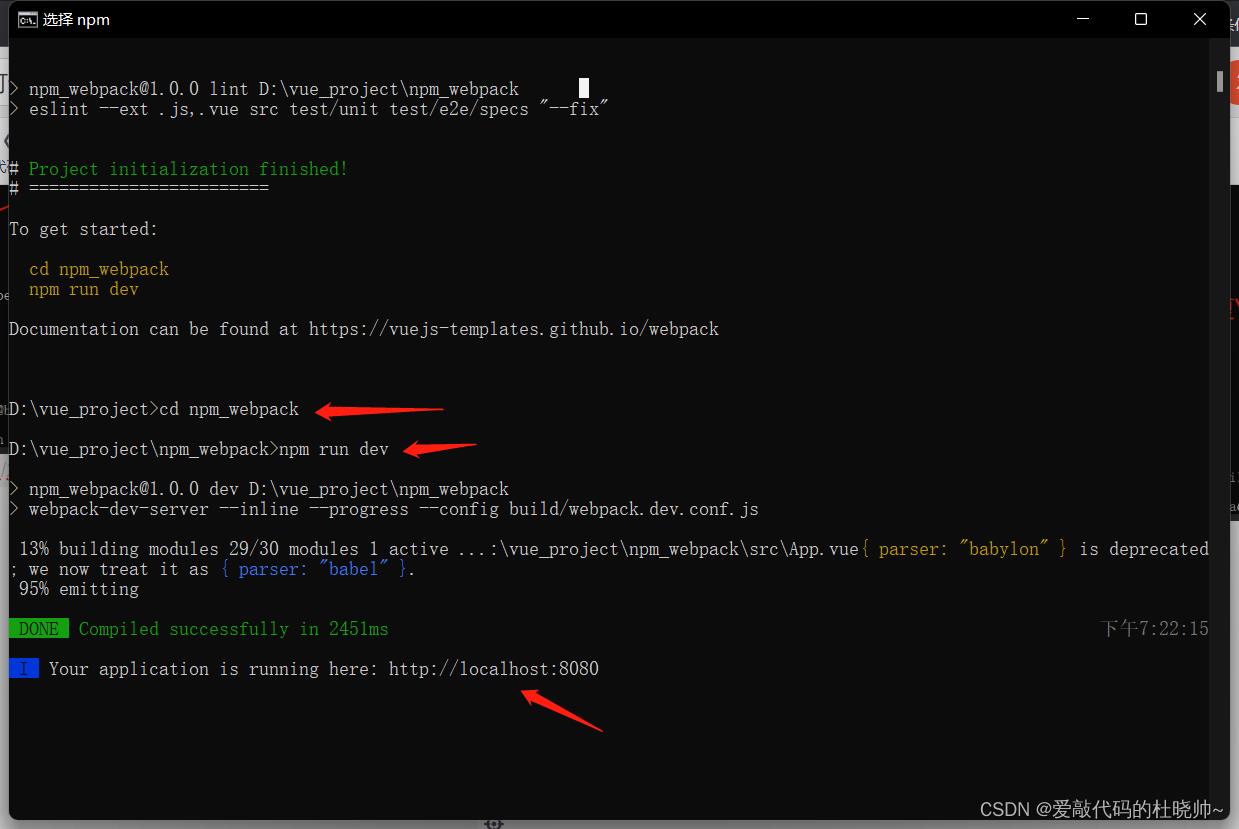
完成之后启动就会给出访问的地址,复制地址粘贴到浏览器即可访问,如下图:
总结
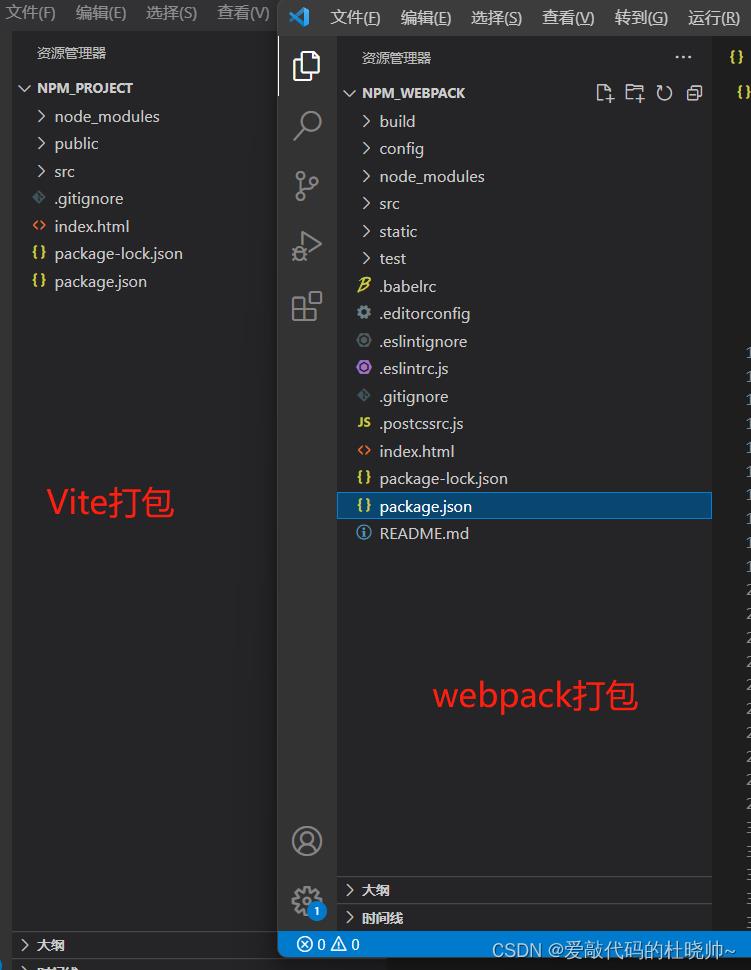
对于这两者我们看他们的目录结构就知道,Vite更简洁,启动的当然也就更快了;而且Vite是Vue的创始人尤雨溪创建并目前在维护的,所以更适合于Vue一些,目前博主也是会采用Vite去进行打包,这两者具体的差别,大家可以自己去了解了解。
本文主要是帮博主记录并回顾一下是如何创建(打包)Vue项目的,后续就会更新前端的内容了,毕竟已经打包好了,就可以开始写前端了,如果这篇文章帮助到了你,可以给个支持哦😁😁😁

以上是关于Vue3+vite2 博客前端开发的主要内容,如果未能解决你的问题,请参考以下文章
