图表插件dygraphs.js插件使用
Posted doubleting
tags:
篇首语:本文由小常识网(cha138.com)小编为大家整理,主要介绍了图表插件dygraphs.js插件使用相关的知识,希望对你有一定的参考价值。
本文旨在记录自己的使用过程
dygraphs其实和echarts差不多,个人觉得前者的自我定制功能很强且不是基于canvas所以性能较echarts会好很多。下面开始:
1、准备一个div
<div id="container_dy" style="width:600px; height:300px;"></div>
2、数据准备及数据格式要求
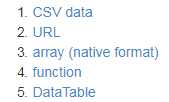
dygraphs官网对数据格式给出了五种说明(http://dygraphs.com/data.html)

开发过程中我们使用到的csv data格式,其他格式请查官网详细介绍。
使用ajax请求,请求后台处理好的数据
var data =
"2011-01-01," + Math.random()*100 + "
" +
"2011-01-02," + Math.random()*100 + "
" +
"2011-01-03," + Math.random()*100 + "
" +
"2011-01-04," + Math.random()*100 + "
" +
"2011-01-05," + Math.random()*100 + "
" +
"2011-01-06," + Math.random()*100 + "
" +
"2011-01-07," + Math.random()*100 + "
" +
"2011-01-08," + Math.random()*100 + "
" +
"2011-01-09," + Math.random()*100 + "
" +
"2011-01-10," + Math.random()*100 + "
" +
"2011-01-11," + Math.random()*100 + "
" +
"2011-01-12," + Math.random()*100 + "
" +
"2011-01-13," + Math.random()*100 + "
" +
"2011-01-14," + Math.random()*100 + "
" +
"2011-01-15," + Math.random()*100 + "
" +
"2011-01-16," + Math.random()*100 + "
" +
"2011-01-17," + Math.random()*100 + "
" +
"2011-01-18," + Math.random()*100 + "
" +
"2011-01-19," + Math.random()*100 + "
" +
"2011-01-20," + Math.random()*100 + "
" +
"2011-01-21," + Math.random()*100 + "
" +
"2011-01-22," + Math.random()*100 + "
" +
"2011-01-23," + Math.random()*100 + "
" +
"2011-01-24," + Math.random()*100 + "
" +
"2011-01-25," + Math.random()*100 + "
" +
"2011-01-26," + Math.random()*100 + "
" +
"2011-01-27," + Math.random()*100 + "
" +
"2011-01-28," + Math.random()*100 + "
" +
"2011-01-29," + Math.random()*100 + "
" +
"2011-01-30," + Math.random()*100 + "
" +
"2011-01-31," + Math.random()*100 + "
";
上面格式就是csv格式。
3、画图
核心方法
var g = new Dygraph(div,
                data,
                {
                  option1: value1,
                  option2: value2,
                  ...
                });
div : 页面定义好的图形容器,document.getElementById("id");
data: 后台处理好的返回到前台的数据,如上csv格式;
{}里面填写插件为这个图准备的一些属性,如:legend等,官网给了好多,选择自己要使用的即可。详情参考http://dygraphs.com/options.html

这里使用的属性如下:
var g =
new Dygraph(
document.getElementById("div_g"),
data,
{
legend: "always",
//title:"line name",//图表的名字
titleHeight : 25,//定义图表名字文字的高度
labels: [‘Date‘,‘Value‘],//指定x轴和y轴的含义
highlightCircleSize : 5,//指定鼠标放到具体的顶点时,顶点的动态表现形式
strokeWidth : 2,//定义线条的粗细
maxNumberWidth : 30,//指定数字最大宽度
// colors : echartLineColor,//多条曲线时为数组,每条线的颜色
connectSeparatedPoints : true,//如果两点不是连续的此属性为true时,会强制连接两点
includeZero : true,//y轴是否显示0点
highlightSeriesOpts :
{
strokeWidth : 2,
strokeBorderWidth : 1,
highlightCircleSize : 5
},
legendFormatter : function(data)
{
var returnString = "";
var dataList = data.series;
var dateString = "";
for (var index = 0; index < dataList.length; index++)
{
var dataObj = dataList[index];
if (dataObj.isHighlighted)
{
if (window.event)
{
var width = parseFloat("600px");
var height = parseFloat("300px");
$("#div_g .dygraph-legend").css({
"position": "absolute",
"background":"#c3c7cc",
"opacity":"0.5",
"color":"red",
"top":window.event.offsetY > height ? (window.event.offsetY + "px")
: (window.event.offsetY + 20 + "px"),
"left":window.event.offsetX > width/2 ? (window.event.offsetX + "px")
: (window.event.offsetX + "px")});
dateString = data.xhtml;
returnString = ‘<span>date:‘
+ dateString
+ ‘<br />value:‘ + dataObj.yHTML
+ ‘</span>‘;
}
break;
}
}
return returnString;
},
//设置两轴数据显示格式和字体大小等
// axes :
// {
// x :
// { // 显示时分秒
// axisLabelFormatter : function(param)
// {
// var xx = param;
// return param.Format("yyyy-MM-dd HH:mm:ss");
// },
// axisLabelWidth : 70,
// axisLabelFontSize : 10
// },
// y :
// {
// axisLabelWidth : 80,
// axisLabelFontSize : 11
// }
// }
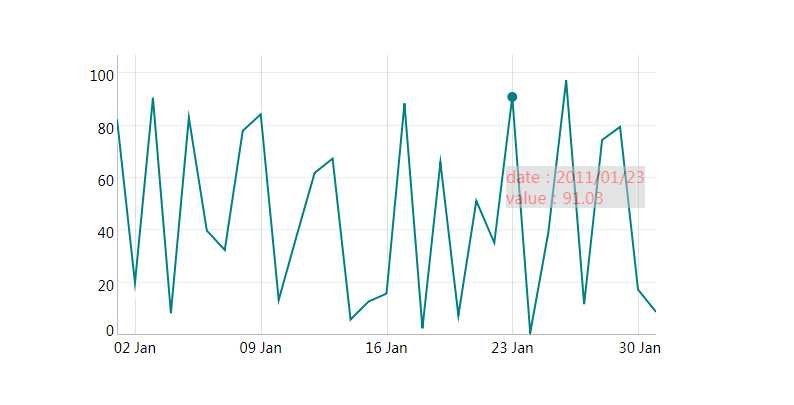
最终显示效果:

以上只是自己在项目中使用的功能,还有更多的功能需要去研究。
以上是关于图表插件dygraphs.js插件使用的主要内容,如果未能解决你的问题,请参考以下文章