三维几何学习从零开始网格上的深度学习-2:卷积网络CNN篇(Pytorch)
Posted 大米粥哥哥
tags:
篇首语:本文由小常识网(cha138.com)小编为大家整理,主要介绍了三维几何学习从零开始网格上的深度学习-2:卷积网络CNN篇(Pytorch)相关的知识,希望对你有一定的参考价值。
本文参加新星计划人工智能(Pytorch)赛道:https://bbs.csdn.net/topics/613989052
从零开始网格上的深度学习-2:卷积网络CNN篇
引言
本文主要内容如下:
- 介绍网格上基于
面元素的卷积操作 - 参考最新的CNN网络模块-
ConvNeXt1:A ConvNet for the 2020s,构造网格分类网络
一、概述
1.1 卷积操作简述
卷积网络的核心:卷积操作就是数据元素特征与周围元素特征加权求和的一个计算过程。由卷积层实现,包括步长、卷积核大小等参数。
详情可百度或参考2:python 关于CNN的一些思考-2022
1.2 网格上的面卷积

无论水密or非水密的网格,其上的面并不是规则排列的。但对于三角形网格来说,每个面周围存在三个面,借助以上特性可对每个面构造1
×
\\times
× 4的卷积区域,然后借助Pytorch即可轻松将CNN应用到网格的面上,称其为面卷积。
二、核心代码
2.1 面卷积
主要参考MeshCNN3:A Network with an Edge中边卷积的代码即可,自己造的轮子没人家的好用…
- 让网格面及其邻面形成 ∣ F ∣ × |F| \\times ∣F∣× 4的矩阵结构, ∣ F ∣ |F| ∣F∣是面的个数。类似2D图像的长 × \\times ×宽
- 调用Pytorch中的Conv2d 或 Conv1d即可
class FaceConv(nn.Module):
    """
        Face convolution with convolution region (参考 MeshCNN)
    """

    def __init__(self, dim_in, dim_out, k, groups=1, bias=True):
        super(FaceConv, self).__init__()
        self.conv = nn.Conv2d(dim_in, dim_out, kernel_size=(1, k), groups=groups, bias=bias)
        self.k = k

    def __call__(self, edge_f, mesh):
        return self.forward(edge_f, mesh)

    def forward(self, x, mesh):
        if self.k == 1:
            # x = x.squeeze(-1)
            x = self.conv(x)
        else:
            x = x.squeeze(-1)
            G = torch.cat([self.pad_gemm(i, x.shape[2], x.device) for i in mesh], 0)  # batchsize
            G = self.create_GeMM(x, G)
            x = self.conv(G)
        return x

    def flatten_gemm_inds(self, Gi):
        (b, ne, nn) = Gi.shape
        ne += 1
        batch_n = torch.floor(torch.arange(b * ne, device=Gi.device).float() / ne).view(b, ne)
        add_fac = batch_n * ne
        add_fac = add_fac.view(b, ne, 1)
        add_fac = add_fac.repeat(1, 1, nn)
        Gi = Gi.float() + add_fac[:, 1:, :]
        return Gi

    def create_GeMM(self, x, Gi):
        Gishape = Gi.shape
        padding = torch.zeros((x.shape[0], x.shape[1], 1), requires_grad=True, device=x.device)
        x = torch.cat((padding, x), dim=2)
        Gi = Gi + 1
        Gi_flat = self.flatten_gemm_inds(Gi)
        Gi_flat = Gi_flat.view(-1).long()
        odim = x.shape
        x = x.permute(0, 2, 1).contiguous()
        x = x.view(odim[0] * odim[2], odim[1])
        f = torch.index_select(x, dim=0, index=Gi_flat)
        f = f.view(Gishape[0], Gishape[1], Gishape[2], -1)
        f = f.permute(0, 3, 1, 2).contiguous()   # 不加contiguous有时候会报错 - 中断训练

        return f

    def pad_gemm(self, m, xsz, device):
        padded_gemm = torch.tensor(m.mesh_nb[:, 0:self.k - 1], device=device).float().requires_grad_()
        padded_gemm = torch.cat((torch.arange(len(m.faces), device=device).float().unsqueeze(1), padded_gemm), dim=1)
        padded_gemm = F.pad(padded_gemm, (0, 0, 0, xsz - len(m.faces)), "constant", 0)
        padded_gemm = padded_gemm.unsqueeze(0)
        return padded_gemm
2.2 网络框架
网络框架主要参考ConvNeXt1:A ConvNet for the 2020s

- 主要借用了其中的
ConvNeXt Block,通道可分离卷积 - LN - conv1x1up - GELU - conv1x1dn - 由于本文使用数据集较小,主要由几个Block串联组成分类网络
class TriCNN(nn.Module):
    def __init__(self, dim_in, dims, classes_n=30):
        super(TriCNN, self).__init__()
        self.dims = dims[0:]
        self.first_conv = FaceConv(dim_in, dims[0], k=4, groups=1, bias=True)
        self.first_ln = nn.LayerNorm(dims[0], eps=1e-6)
        self.conv1x1up = nn.Conv1d(dims[0], dims[0] * 2, 1)
        self.act = nn.GELU()
        self.conv1x1dn = nn.Conv1d(dims[0] * 2, dims[0], 1)
        for i, dim in enumerate(self.dims[:]):
            setattr(self, 'Block'.format(i), Block(dim, k=4))
        self.last_ln = nn.LayerNorm(dims[-1], eps=1e-6)

        # cls
        self.gp = nn.AdaptiveAvgPool1d(1)
        self.dp1 = nn.Dropout(0.5)
        self.fc = nn.Linear(self.dims[-1], classes_n)

    def forward(self, x, mesh):
        x = x.permute(0, 2, 1).contiguous()
        # 1.first Block
        x = self.first_conv(x, mesh)
        x = x.squeeze(-1)
        x = x.permute(0, 2, 1).contiguous()
        x = self.first_ln(x)
        x = x.permute(0, 2, 1).contiguous()
        x = self.conv1x1up(x)
        x = self.act(x)
        x = self.conv1x1dn(x)

        # 2.Blocks
        for i in range(len(self.dims) - 1):
            x = getattr(self, 'Block'.format(i))(x, mesh)

        # 3.final
        x = x.squeeze(-1)
        x = x.permute(0, 2, 1).contiguous()
        x = self.last_ln(x)
        x = x.permute(0, 2, 1).contiguous()

        # 4.cls
        x = self.gp(x)
        x = x.view(-1, self.dims[-1])
        x = self.dp1(x)
        x = self.fc(x)
        return x


class Block(nn.Module):
    def __init__(self, dim, k=10, bias=True):
        super(Block, self).__init__()
        self.conv = FaceConv(dim, dim, groups=dim, k=k, bias=bias)
        self.ln = nn.LayerNorm(dim,eps=1e-6)
        self.conv1x1up = nn.Conv1d(dim, dim * 2, 1)
        self.act = nn.GELU()
        self.conv1x1dn = nn.Conv1d(dim * 2, dim, 1)
        self.w = nn.Parameter(torch.zeros(1))

    def forward(self, x, mesh):
        identity = x
        x = self.conv(x, mesh)
        x = x.squeeze(-1)
        x = x.permute(0, 2, 1).contiguous()
        x = self.ln(x)
        x = x.permute(0, 2, 1).contiguous()
        x = self.conv1x1up(x)
        x = self.act(x)
        x = self.conv1x1dn(x)
        x = x * self.w
        x = x + identity
        return x
三、基于CNN的网格分类
数据集是SHREC’11 可参考三角网格(Triangular Mesh)分类数据集 或 MeshCNN
3.1 分类结果

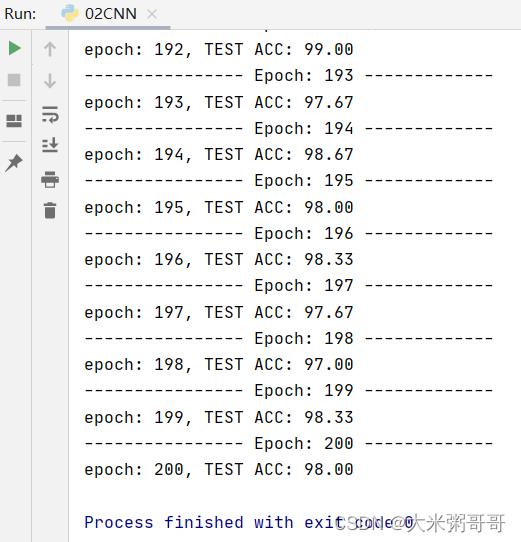
学习率还是有点高,权重波动很大,期间最高准确率是99.67

不得不提一句,其在网格分割上的准确率不如
UNet形式的网络,也可能是没加入池化的锅…
3.2 全部代码
DataLoader代码请参考4:从零开始网格上的深度学习-1:输入篇(Pytorch)
import torch
import torch.nn as nn
import torch.nn.functional as F
from DataLoader_shrec11 import DataLoader
from DataLoader_shrec11 import Mesh
class TriCNN(nn.Module):
def __init__(self, dim_in, dims, classes_n=30):
super(TriCNN, self).__init__()
self.dims = dims[0:]
self.first_conv = FaceConv(dim_in, dims[0], k=4, groups=1, bias=True)
self.first_ln = nn.LayerNorm(dims[0], eps=1e-6)
self.conv1x1up = nn.Conv1d(dims[0], dims[0] * 2, 1)
self.act = nn.GELU()
self.conv1x1dn = nn.Conv1d(dims[0] * 2, dims[0], 1)
for i, dim in enumerate(self.dims[:]):
setattr(self, 'Block'.format(i), Block(dim, k=4))
self.last_ln = nn.LayerNorm(dims[-1], eps=1e-6)
# cls
self.gp = nn.AdaptiveAvgPool1d(1)
self.dp1 = nn.Dropout(0.5)
self.fc = nn.Linear(self.dims[-1], classes_n)
def forward(self, x, mesh):
x = x.permute(0, 2, 1).contiguous()
# 1.first Block
x = self.first_conv(x, mesh)
x = x.squeeze(-1)
x = x.permute(0, 2, 1).contiguous()
x = self.first_ln(x)
x = x.permute(0, 2, 1).contiguous()
x = self.conv1x1up(x)
x = self.act(x)
x = self.conv1x1dn(x)
# 2.Blocks
for i in range(len(self.dims) - 1):
x = getattr(self, 'Block'.format(i))(x, mesh)
# 3.final
x = x.squeeze(-1)
x = x.permute(0, 2, 1).contiguous()
x = self.last_ln(x)
x = x.permute(0, 2, 1).contiguous()
# 4.cls
x = self.gp(x)
x = x.view(-1, self.dims[-1])
x = self.dp1(x)
x = self.fc(x)
return x
class Block(nn.Module):
def __init__(self, dim, k=10, bias=True):
super(Block, self).__init__()
self.conv = FaceConv(dim, dim, groups=dim, k=k, bias=bias)
self.ln = nn.LayerNorm(dim,eps=1e-6)
self.conv1x1up = nn.Conv1d(dim, dim * 2, 1)
self.act = nn.GELU()
self.conv1x1dn = nn.Conv1d(dim * 2, dim, 1)
self.w = nn.Parameter(torch.zeros(1))
def forward(self, x, mesh):
identity = x
x = self.conv(x, mesh)
x = x.squeeze(-1)
x = x.permute(0, 2, 1).contiguous()
x = self.ln(x)
x = x.permute(0, 2, 1).contiguous()
x = self.conv1x1up(x)
x = self.act(x)
x = self.conv1x1dn(x)
x = x * self.w
x = x + identity
return x
class FaceConv(nn.Module):
"""
Face convolution with convolution region (参考 MeshCNN)
"""
def __init__(self, dim_in, dim_out, k, groups=1, bias=True):
super(FaceConv, self).__init__()
self.conv
2. 全连接神经网络与卷积神经网络的联系与区别。
全连接神经网络和卷积神经网络中的每一个节点就是一个神经元。
在全连接神经网络中,每相邻两层之间的节点都有边相连,于是会将每一层的全连接层中的节点组织成一列,这样方便显示连接结构。而对于卷积神经网络,相邻两层之间只有部分节点相连,为了展示每一层神经元的维度,一般会将每一层卷积层的节点组织成一个三维矩阵。
3.理解卷积计算。
以digit0为例,进行手工演算。
from sklearn.datasets import load_digits #小数据集8*8
digits = load_digits()
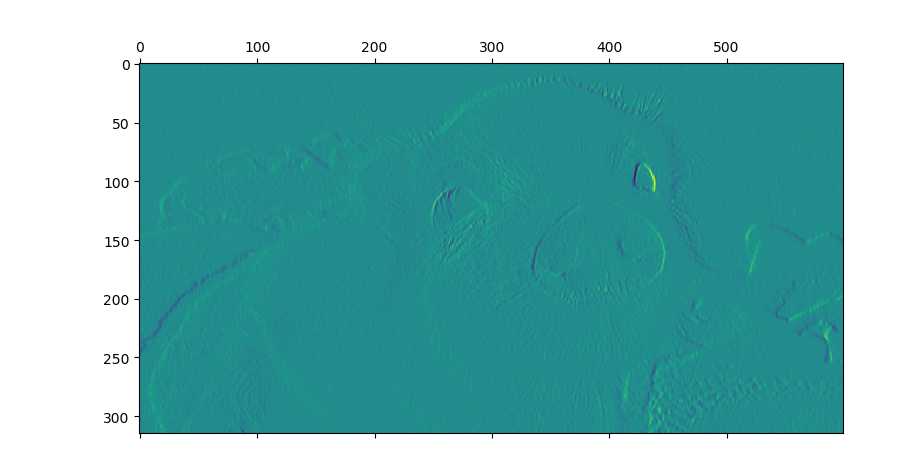
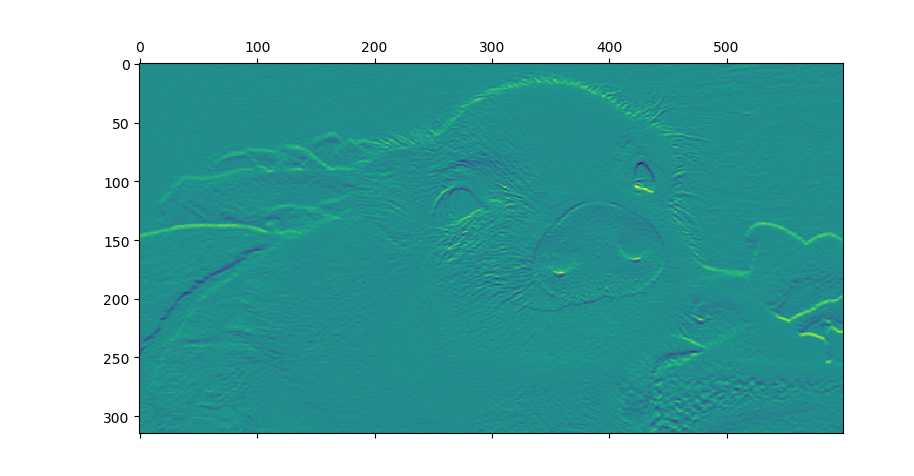
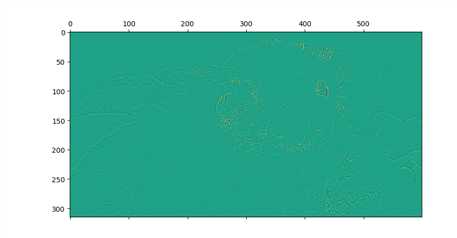
4.理解卷积如何提取图像特征。
读取一个图像;
以下矩阵为卷积核进行卷积操作;
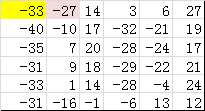
显示卷积之后的图像,观察提取到什么特征。
1
0
-1
1
0
-1
1
0
-1
1
1
1
0
0
0
-1
-1
-1
-1
-1
-1
-1
8
-1
-1
-1
-1
卷积API
scipy.signal.convolve2d
tf.keras.layers.Conv2D
1
2
3
4
5
6
7
8
9
10
11
12
13
14
15
16
17
18
19
20
21
from PIL import Image
import matplotlib.pyplot as plt
import numpy as np
from scipy.signal import convolve2d
I = Image.open(r‘C:Userslucas-lywDesktop img.jpg‘)
L = I.convert(‘L‘)
pig = np.array(I)
pigg = np.array(L)
k1 = np.array([[1, 0, -1], [1, 0, -1], [1, 0, -1]])
k2 = np.array([[1, 1, 1], [0, 0, 0], [-1, -1, -1]])
k3 = np.array([[-1, -1, -1], [-1, 8, -1], [-1, -1, -1]])
pig1 = convolve2d(pigg, k1, boundary=‘symm‘, mode=‘same‘)
pig2 = convolve2d(pigg, k2, boundary=‘symm‘, mode=‘same‘)
pig3 = convolve2d(pigg, k3, boundary=‘symm‘, mode=‘same‘)
plt.matshow(pig1)
plt.matshow(pig2)
plt.matshow(pig3)
5. 安装Tensorflow,keras
以上是关于三维几何学习从零开始网格上的深度学习-2:卷积网络CNN篇(Pytorch)的主要内容,如果未能解决你的问题,请参考以下文章