b站黑马程序员C++视频学习笔记-文件操作
Posted XFF不秃头
tags:
篇首语:本文由小常识网(cha138.com)小编为大家整理,主要介绍了b站黑马程序员C++视频学习笔记-文件操作相关的知识,希望对你有一定的参考价值。
文件操作
一、文件的分类
- 文本文件:以文本的ASCII码形式存储在计算机中
- 二进制文件:以文本的二进制形式存储在计算机中
操作文件有三个类:
1、ofstream 写操作
2、ifstream 读操作
3、fstream 读写操作
二、文本文件
(一)写文件
读文件有以下步骤:
1、注意要包含头文件
#include<fstream>
2、创建流对象
ofstream ofs;
3、打开文件
ofs.open("文件路径",打开方式);
文件打开方式有这几种:
| 打开方式 | 解释 |
|---|---|
| ios::in | 为输入(读)而打开文件 |
| ios::out | 为输出(写)而打开文件 |
| ios::ate | 初始位置:文件尾 |
| ios::app | 所有输出附加在文件末尾 |
| ios::trunc | 如果文件已存在则先删除该文件再创建 |
| ios::binary | 二进制方式 |
4、写数据
ofs<<"写入的数据";
5、关闭文件
ofs.close();
注意:文件打开方式是可以组合起来使用的,只要利用 | 操作符就可以了
如:用二进制方式写文件 ios::binary | ios::out
#include<iostream>
using namespace std;
#include<fstream>//头文件包含

//文本文件 写文件

void test01()
	//1、包含头文件 fstream
	//2、创建流对象

	ofstream ofs;

	//3、指定打开方式
	ofs.open("test.txt", ios::out);

	//4、写内容
	ofs << "姓名:张三" << endl;
	ofs << "性别:男" << endl;
	ofs << "年龄:18" << endl;

	//5、关闭文件
	ofs.close();


int main()
	test01();

	system("pause");

	return 0;
此时没有写文件路径,那么默认的就是创建在所在项目同级的目录下
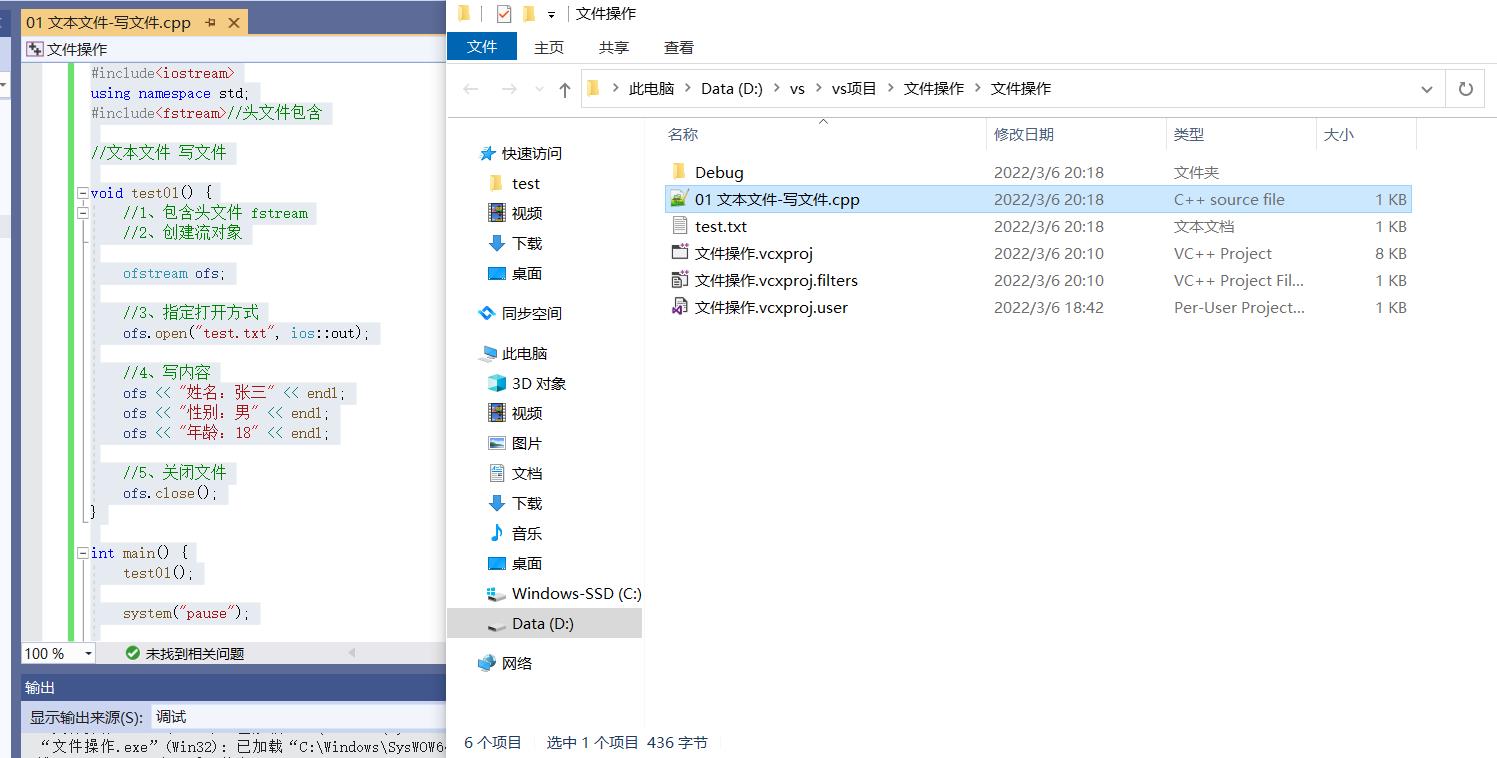
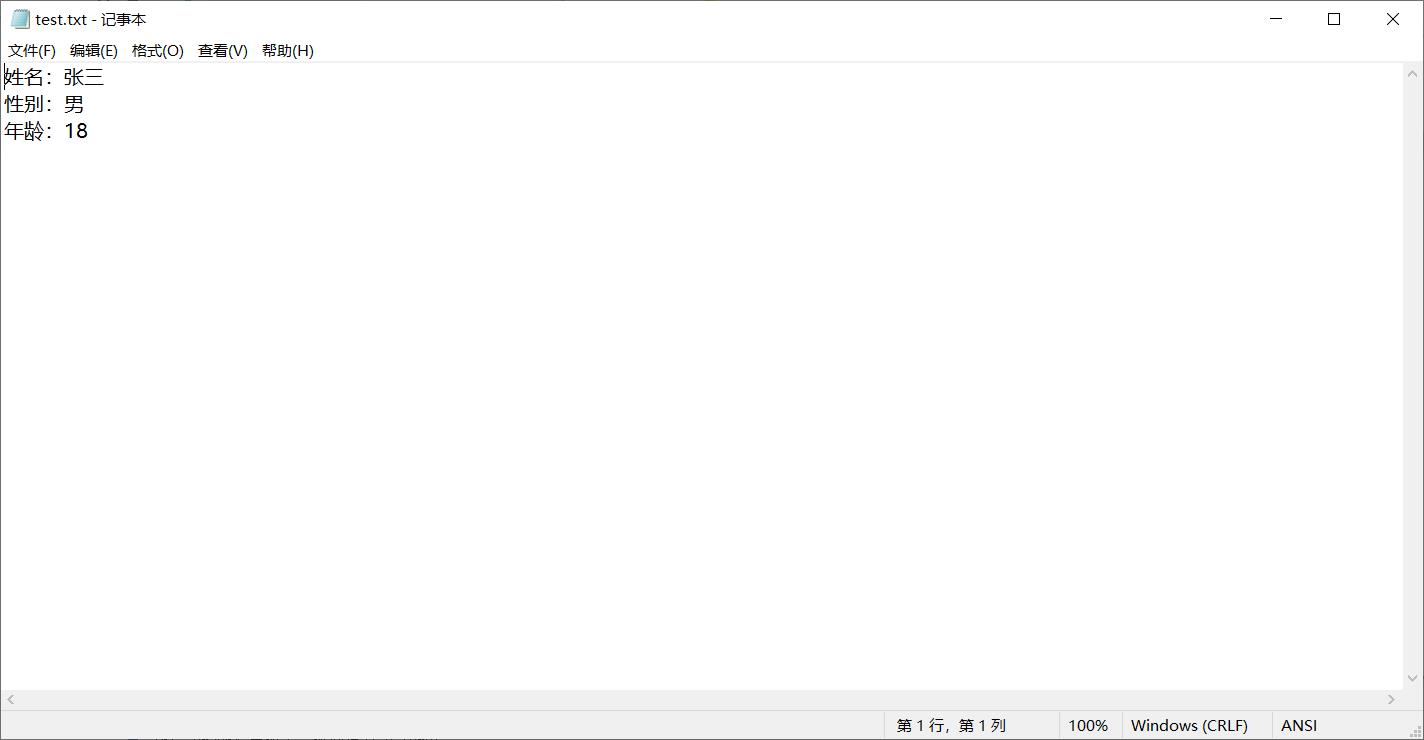
打开test.txt文件,可以看到里面的内容:
(二)读文件
写文件有以下步骤:
1、注意要包含头文件
#include<fstream>
2、创建流对象
ifstream ifs;
3、打开文件,并判断文件是否打开成功
ifs.open("文件路径",打开方式);
4、读数据
四种方式读取
- 第一种:定义一个字符数组buf[1024],全部初始化为0,然后用这个字符数组来接收读到的数据。再使用ifs >> buf,这个就像cin一样,可以看做是输入
	char buf[1024] =  0 ;
	while (ifs >> buf) //一行一行读取
		cout << buf<<endl;
- 第二种:也是用字符数组来接收读到的数据,不过用到的是ifs.getline(buf, sizeof(buf)),这个是ifstream的类对象ifs中含有的成员函数getline(),第一个参数是字符数组的首地址,第二个参数是大小
	char buf[1024] =  0 ;
	while (ifs.getline(buf, sizeof(buf)))
		cout << buf << endl;
- 第三种:使用全局函数istream&getline(istream& is, string& str),功能是将流 istream& is 中的字符串存到string& str 当中去
	string buf;
	while( getline(ifs,buf))
		cout << buf << endl;
- 第四种:一个字符一个字符地读,这种不推荐使用。c = ifs.get()) != EOF
其中 EOF 就是end of flie
	char c;
	while((c = ifs.get()) != EOF) //一个字符一个字符读到字符c中,判断下是否读到文件尾了,如果没有读到文件尾,则一直读
		cout << c;
5、关闭文件
ifs.close();
完整代码如下:
#include<iostream>
using namespace std;
#include<fstream>
#include<string>

//文本文件 读文件
void test01()
	//1、包含头文件#include<fstream>

	//2、创建流对象
	ifstream ifs;
	//3、打开文件 并判断文件是否打开成功
	ifs.open("test.txt", ios::in);//打开方式 读
	if (!ifs.is_open())
		cout << "文件打开失败!" << endl;
		return;

	//4、读数据

	//第一种
	//char buf[1024] =  0 ;//定义一个字符数组 初始化为0 用字符数组来接收读到的数据
	//while (ifs >> buf) //一行一行读取
	//	cout << buf<<endl;
	//

	//第二种
	//char buf[1024] =  0 ;
	//while (ifs.getline(buf, sizeof(buf))) //ifstream的类对象ifs中含有成员函数getline函数,可以将TXT文件中的内容一行一行的读取,每次读取之后将内容存入buf中。
	//	cout << buf << endl;
	//

	//第三种
	//string buf;
	//while( getline(ifs,buf)) //全局函数getline,将输入流ifs作为函数参数传入getline中,并且将读取的数据存在之前就创建好的数组字符串变量buf中
	//	cout << buf << endl;
	//

	//第四种(不推荐)
	char c;
	while((c = ifs.get()) != EOF) //一个字符一个字符读到字符c中,判断下是否读到文件尾了,如果没有读到文件尾,则一直读
		cout << c;


	//5、关闭文件
	ifs.close();


int main()
	test01();

	system("pause");

	return 0;
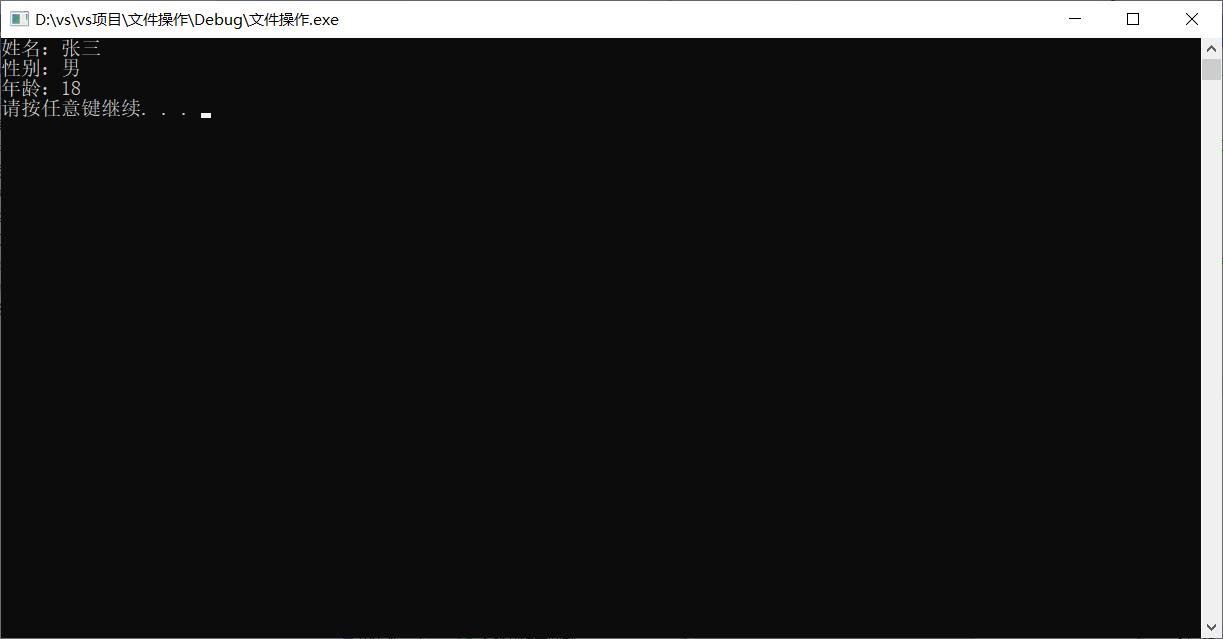
运行结果为:
三、二进制文件
如果要以二进制的方式对文件进行读写操作,那么打开方式要指定为ios::binary
(一)写文件
打开方式指定为ios::out | ios::binary
通过ofstream和ostream 类的write 成员函数将二进制数据写入文件
write(addressOfBuffer, numberOfBytes),第一个参数是缓冲区的地址,第二个参数是字节数。但是还有一个问题,就是缓冲区中的数据可能是整型、浮点型等等,而这个write成员函数并不会区分这些,只会把缓冲区看成是一个字节数组,因为 C++ 不支持指向字节的指针,因此 write 函数将指定缓冲区的地址是指向 char 的指针,在实际使用时,对原本的指针进行强制类型转换就行了,也就是这样:
write(char *addressOfBuffer, int numberOfBytes);
#include<iostream>
using namespace std;
#include<fstream>

//二进制文件 写文件
class Person

public:
	char mName[64];//姓名
	int mAge;//年龄
;

void test01()
	//1、包含头文件#include<fstream>

	//2、创建流对象
	ofstream ofs;

	//3、打开文件
	ofs.open("person.txt", ios::out | ios::binary);

	//4、写文件
	Person p =  "张三",18 ;
	ofs.write((const char*)&p, sizeof(Person));//如果直接对p取地址,则是一个Person型,要强制转成const char型

	//5、关闭文件
	ofs.close();


int main()

	test01();
	system("pause");

	return 0;
可见 文件夹中已经多了person.txt这个文件

(二)读文件
打开方式指定为ios::in | ios::binary
利用成员函数read(char *addressOfBuffer, int numberOfBytes)来读文件
#include<iostream>
using namespace std;
#include<fstream>

class Person

public:
	char mName[64];
	int mAge;
;

void test01()
	//1、包含头文件#include<fstream>

	//2、创建流对象
	ifstream ifs;

	//3、打开文件,并判断文件是否打开成功
	ifs.open("person.txt",ios::in|ios::binary);
	if (!ifs.is_open())
		cout << "文件打开失败!" << endl;
		return;


	//4、读文件
	Person p;
	ifs.read((char*)&p, sizeof(p));
	cout << "姓名: " << p.mName << " 年龄: " << p.mAge << endl;

	//5、关闭文件
	ifs.close();


int main()
	test01();

	system("pause");

	return 0;
运行结果为:
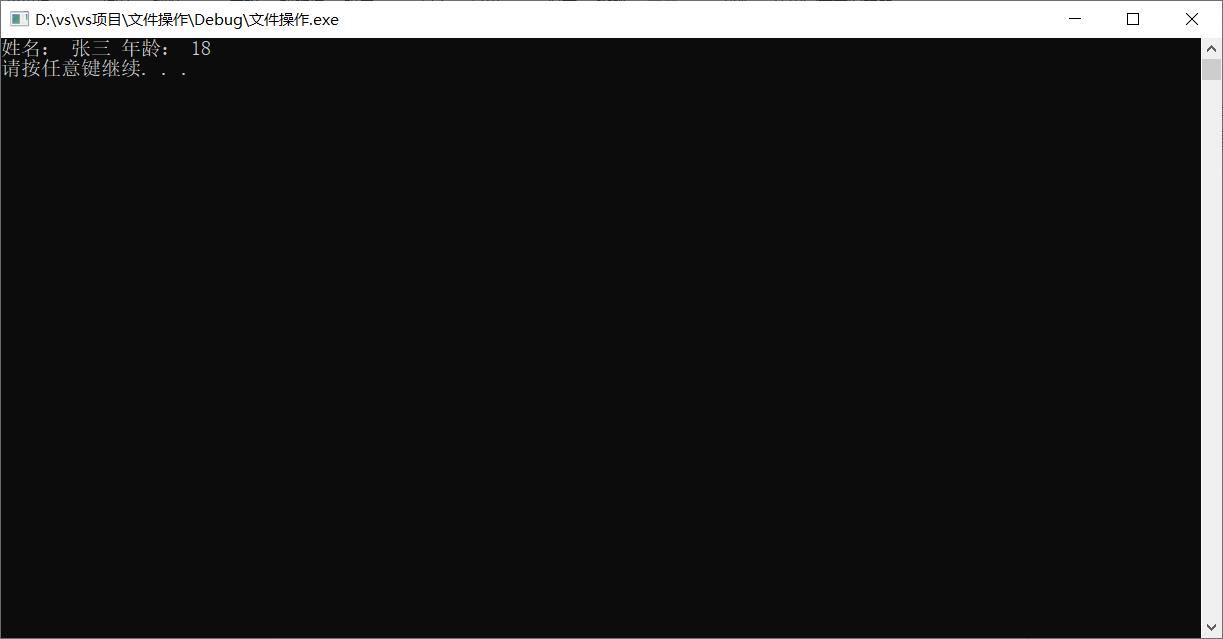
已经正确显示数据
1内存分区模型
C++在程序执行时,将内存大方向划分为4个区域
- 代码区:存放函数体的二进制代码,由操作系统进行管理的。
- 全局区:存放变量和静态变量以及常量。
- 栈区:由编译器自动分配释放,存放函数的参数值,局部变量等。
- 堆区:由程序员分配和释放,若程序员不释放,程序结束时由操作系统回收。
内存四区的意义:
不容区域存放的数据,赋予不同的生命周期,给我们更大的灵活编程。
1.1 程序运行前:
在程序编译后,生成了exe可执行程序,未执行程序前分为两个区域。
代码区:
存放CPU执行的机器指令。
(代码区是共享的,共享的目的是对于频繁被执行的程序,只需要在内存中有一份代码即可)
(代码区是只读的,使其只读的原因是防止程序意外地修改了它的指令)
全局区:
全局变量、全局常量、静态变量存放在此。
(全局区的数据在程序结束后由操作系统释放)
 #include <iostream>
 #include <string>
 using namespace std;

 //全局变量
 int g_a = 10;
 int g_b = 10;

 //全局常量
 const int c_g_a = 10;
 const int c_g_b = 10;

 //全局字符串变量
 string g_s_a = "hello c++";
 string g_s_b = "bye bye c++";
 //全局字符串变量
 const string c_g_s_a = "hello c++";
 const string c_g_s_b = "bye bye c++";

 int main()

     //局部变量
     int a = 10;
     int b = 10;

     //局部常量
     const int c_l_a = 10;
     const int c_l_b = 10;

     //局部字符串变量
     string sa = "hello world";
     string sb = "hello c++";

     //局部字符串常量
     const string c_sa = "hello c++";
     const string c_sb = "bye bye c++";

     //打印 局部变量、局部常量 的地址
     cout << "局部变量a地址为: " << (int)&a << endl;
     cout << "局部变量b地址为: " << (int)&b << endl;
     cout << "局部常量c_l_a地址为: " << (int)&c_l_a << endl;
     cout << "局部常量c_l_b地址为: " << (int)&c_l_b << endl;

     cout << "局部字符串变量地址为: " << (int)&sa << endl;
     cout << "局部字符串变量地址为: " << (int)&sb << endl;

     cout << "局部字符串常量地址为: " << (int)&c_sa << endl;
     cout << "局部字符串常量地址为: " << (int)&c_sb << endl;

     //静态变量
     static int s_a = 10;
     static int s_b = 10;


     //打印 静态变量、全局变量、全局常量、字符串变量的 地址
     cout << "静态变量s_a地址为: " << (int)&s_a << endl;
     cout << "静态变量s_b地址为: " << (int)&s_b << endl;

     cout << "全局变量g_a地址为: " << (int)&g_a << endl;
     cout << "全局变量g_b地址为:" << (int)&g_b << endl;


     cout << "全局常量c_g_a地址为: " << (int)&c_g_a << endl;
     cout << "全局常量c_g_b地址为: " << (int)&c_g_b << endl;


     cout << "全局字符串变量地址为: " << (int)&g_s_a << endl;
     cout << "全局字符串变量地址为: " << (int)&g_s_b << endl;

     cout << "全局字符串常量地址为: " << (int)&c_g_s_a << endl;
     cout << "全局字符串常量地址为: " << (int)&c_g_s_b << endl;


     system("pause");

     return 0;
运行结果
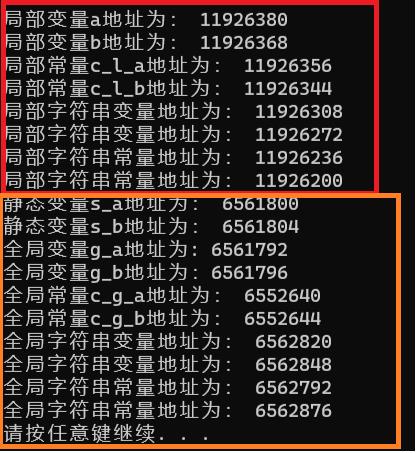
总结:
C++中在程序运行前分为全局区和代码区
代码区特点是共享和只读
全局区中存放全局变量、全局常量、静态变量。
局部区中存放局部变量、局部常量
1.2 程序运行后
栈区:
由编译器自动分配释放,存放函数的参数值,局部变量等。
(注意:不要返回局部变量的地址,栈区开辟的数据由编译器自动释放)
如:
 #include <iostream>

 using namespace std;

 int* func()

     int a = 10;
     return &a;


 int main()

     int* p = func();

     cout << *p << endl;
     cout << *p << endl;

     system("pause");

     return 0;
运行结果:

第一次输出*p时为正常结果,这是因为编译器考虑到函数func中局部变量a的地址可能还会用到,所以没有释放,第二次输出就是个随机数了。
堆区:
由程序员分配释放,若程序员不释放,程序结束时由操作系统回收。
在C++中主要利用new在堆区开辟内存。
示例:
 #include <iostream>

 using namespace std;

 int* func()

     int *a = new int(10);
     return a;


 int main()

     int* p = func();

     cout << *p << endl;
     cout << *p << endl;

     system("pause");

     return 0;
运行结果:

总结:
堆区数据由程序员管理开辟和释放
堆区数据利用new关键字进行开辟内存
1.3 new操作符
C++中利用 new 操作符在堆区开辟数据,堆区开辟的数据,由程序员手动开辟、手动释放,释放利用操作符 delete
【语法】[new 数据类型]
利用new创建的数据,会返回该数据对应类型的指针。
示例1:基本语法
#include <iostream>

using namespace std;

int* func()

    int *a = new int(10);
    return a;


int main()

    int* p = func();

    cout << *p << endl;
    cout << *p << endl;

    //利用delete释放堆区数据
    delete p;
    //cout << *p << endl;    //报错,释放的空间不可访问

    system("pause");

    return 0;
总结:释放的空间不可访问
示例2:开辟数组
 #include <iostream>

 using namespace std;

 int main()

     int* arr = new int[10];

     for (int i = 0; i < 10; i++)

         arr[i] = i + 100;


     for (int i = 0; i < 10; i++)

         cout << arr[i] << endl;


     //释放数组delete后加[]
     delete[] arr;

     system("pause");

     return 0;
以上是关于b站黑马程序员C++视频学习笔记-文件操作的主要内容,如果未能解决你的问题,请参考以下文章
