SpringCloud 三种服务调用方式,你知道几种?
Posted 不会敲代码的谌
tags:
篇首语:本文由小常识网(cha138.com)小编为大家整理,主要介绍了SpringCloud 三种服务调用方式,你知道几种?相关的知识,希望对你有一定的参考价值。
搭建服务测试环境
测试中,服务发现层采用Netflix的Eureka搭建。
主要步骤如下:
1.引入Eureka所需依赖
<!--eureka服务端--> <dependency>
<groupId>org.springframework.cloud </groupId>
<artifactId>spring-cloud-starter-eureka-server </artifactId>
</dependency>
<!--客户端-->
<dependency>
<groupId>org.springframework.cloud </groupId>
<artifactId>spring-cloud-starter-eureka </artifactId>
</dependency>
2.修改配置文件
服务端:
eureka: instance:
hostname: eureka9001.com #eureka服务端的实例名称
instance-id: eureka9001
client:
register-with-eureka: false #false表示不向注册中心注册自己
fetch-registry: false # #false 表示自己就是注册中心,职责就是维护服务实例,并不需要去检索服务
service-url:
defaulteZone: http://127.0.0.1:9001
客户端1:
server: port: 8002
spring:
application:
name: licensingservice
eureka:
instance:
instance-id: licensing-service-8002
prefer-ip-address: true
client:
register-with-eureka: true
fetch-registry: true
service-url:
defaultZone: http://127.0.0.1:9001/eureka/,
客户端2:
server: port: 8002
spring:
application:
name: licensingservice
eureka:
instance:
instance-id: licensing-service-8002
prefer-ip-address: true
client:
register-with-eureka: true
fetch-registry: true
service-url:
defaultZone: http://127.0.0.1:9001/eureka/,
一组微服务的不同实例采服务名相同,不同的实例Id区分,分别对应,spring.application.name 和eureka.instance.instance-id。
3.启动服务
服务端:
@SpringBootApplication@EnableEurekaServer
public class EurekaServerPort9001_App
public static void main(String[] args)
SpringApplication.run(EurekaServerPort9001_App .class,args);
客户端:
@SpringBootApplication@RefreshScope
@EnableEurekaClient
public class LicenseApplication_8002
public static void main(String[] args)
SpringApplication.run(LicenseApplication_8002 .class, args);
4.测试
进入到Eureka服务端地址,我这是127.0.0.1:9001,可以查看注册到注册中心的服务。
如图:
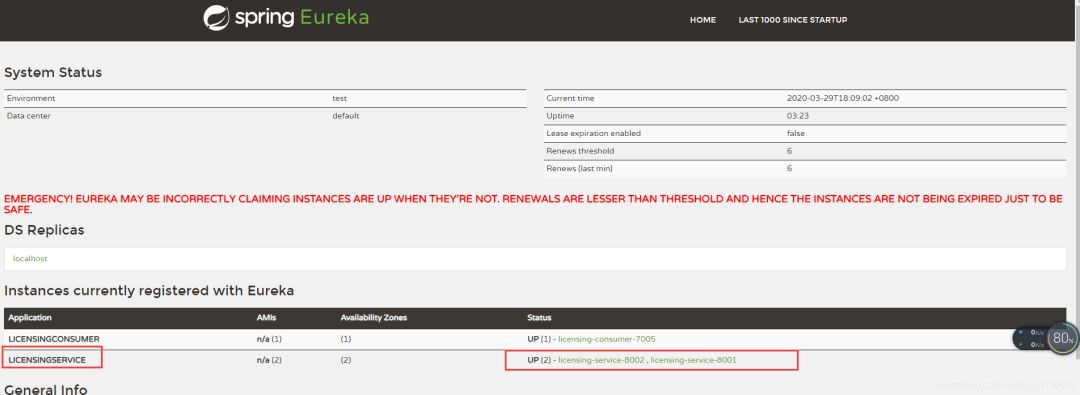
注意事项:Eureka通过三次心跳检测均通过,服务才会成功注册到注册中心,默认每次间隔10s,及初次启动服务需等待30s才能在Eureka中看到注册服务。
消费者搭建
1.Discover Client方式
微服务中服务既是消费者也可以是调用者,因此消费者配置和上面服务配置大体一致,依赖及配置参考上面服务端搭建方式。启动主类添加EnableEurekaClient注释:
@SpringBootApplication@EnableEurekaClient
@EnableDiscoveryClient
public class ConsumerApplication_7002
public static void main(String[] args)
SpringApplication.run(ConsumerApplication_7002 .class, args);
核心配置类:
@Componentpublic class ConsumerDiscoveryClient
@Autowired
private DiscoveryClient discoveryClient;
public ServiceInstance getServiceInstance()
List<ServiceInstance> serviceInstances = discoveryClient.getInstances( "licensingservice");
if (serviceInstances.size() == 0)
return null;
return serviceInstances.get( 0);
public String getUrl(String url)
ServiceInstance serviceInstance= this.getServiceInstance();
if (serviceInstance== null)
throw new RuntimeException( "404 ,NOT FOUND");
String urlR=String.format(url,serviceInstance.getUri().toString());
return urlR;
通过DiscoveryClient从Eureka中获取licensingservice服务的实例数组,并返回第一个实例。
测试Controller
@RestController@RequestMapping( "test")
public class TestController
//注意必须new,否则会被ribbon拦截器拦截,改变URL行为
private RestTemplate restTemplate= new RestTemplate();
@Autowired
private ConsumerDiscoveryClient consumerDiscoveryClient;
@RequestMapping( "/getAllEmp")
public List<Emp> getAllLicense()
String url=consumerDiscoveryClient.getUrl( "%s/test/getAllEmp");
return restTemplate.getForObject(url,List .class);
测试:
- 调试信息
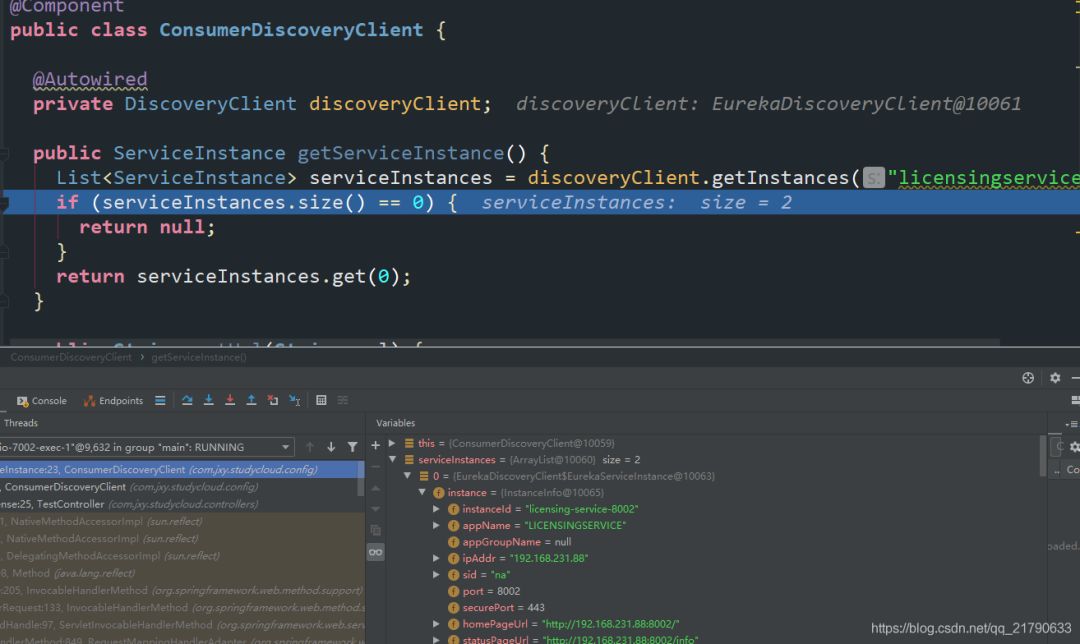 从该图可以直观看到licensingservice,拥有两个服务实例,并可以查看实例信息。
- 页面返回信息
 成功查询到数据库存储信息。
2.Ribbon功能的Spring RestTemplate方式
依赖同上。
核心配置类:
//指明负载均衡算法@Bean
public IRule iRule()
return new RoundRobinRule();
@Bean
@LoadBalanced //告诉Spring创建一个支持Ribbon负载均衡的RestTemplate
public RestTemplate restTemplate()
return new RestTemplate();
设置负载均衡方式为轮询方式。
测试类:
@RestController@RequestMapping( "rest")
public class ConsumerRestController
@Autowired
private RestTemplate restTemplate;
private final static String SERVICE_URL_PREFIX = "http://LICENSINGSERVICE";
@RequestMapping( "/getById")
public Emp getById(Long id)
MultiValueMap<String, Object> paramMap = new LinkedMultiValueMap<String, Object>();
paramMap.add( "id", id);
return restTemplate.postForObject(SERVICE_URL_PREFIX + "/test/getById", paramMap, Emp .class);
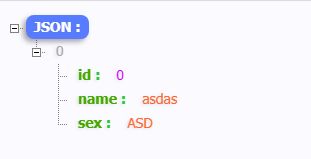
测试结果:
- 第一次:

- 第二次:

- 第三次:
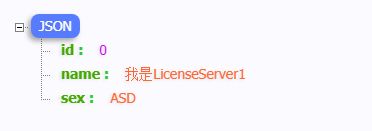 因为采用轮询负载均衡方式分别调用不同服务实例,未区别,将name做出了一定更改。
以上两种方式对比,Ribbon方式是对第一种方式的封装且内置不同的负载算法,支持自定义。使用更加简单,但此两次均需编写RestTemplate的请求方法,较为繁琐且容易出错,第三种方式Feign客户端则极大的降低了开发难度和提升速度。
3.feign客户端方式
引入依赖:
<dependency> <groupId>org.springframework.cloud </groupId>
<artifactId>spring-cloud-starter-feign </artifactId>
</dependency>
主要代码:
@FeignClient(value = "LICENSINGSERVICE",fallbackFactory = ServiceImp .class)public interface ServiceInterface
@RequestMapping( "/test/getById")
Emp getById(@RequestParam("id") Long id);
@RequestMapping( "/test/getLicenseById")
License getLicenseById(@RequestParam("id") Long id);
@RequestMapping( "/test/getAllEmp")
List<Emp> getAllLicense();
@Component
public class ServiceImp implements FallbackFactory<ServiceInterface>
@Override
public ServiceInterface create(Throwable throwable)
return new ServiceInterface()
@Override
public Emp getById(Long id)
Emp emp = new Emp();
emp.setName( "i am feign fallback create");
return emp;
@Override
public License getLicenseById(Long id)
return null;
@Override
public List<Emp> getAllLicense()
return null;
;
采用接口模式开发,通过注解指明服务名以及后备方法,在服务表现不佳时,方便返回默认的结果,而不是一个不友好的错误。
主启动类:
@SpringBootApplication@EnableEurekaClient
@EnableFeignClients
public class Consumer_feign_Application_7004
public static void main(String[] args)
SpringApplication.run(Consumer_feign_Application_7004 .class, args);
测试类:
@RestController@RequestMapping( "rest")
public class ConsumerRestController
@Autowired
private ServiceInterface serviceInterface;
@Autowired
private RestTemplate restTemplate;
@RequestMapping( "/getById")
public Emp getById(Long id)
return serviceInterface.getById(id);
测试结果:
- 正常测试:

- 关闭两个服务实例,模拟服务实例死亡:
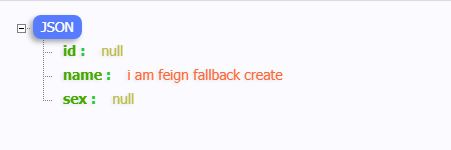 Feign除了能简化服务调用,也可以实现当调用的服务失败时,友好的反馈信息。
此三种调用方式,由低至上,从不同层次实现了SpringCloud中的微服务互相调用。
springcloud -- sleuth+zipkin整合rabbitMQ详解
为什么使用RabbitMQ?
我们已经知道,zipkin的原理是服务之间的调用关系会通过HTTP方式上报到zipkin-server端,然后我们再通过zipkin-ui去调用查看追踪服务之间的调用链路。但是这种方式存在一个隐患,如果微服务之间与zipkin服务端网络不通,或调用链路上的网络闪断,http通信收集方式就无法工作。而且zipkin默认是将数据存储在内存中的,如果服务端重启或宕机,就会导致数据丢失。
所以我们不仅将数据存储在zipkin-serve中,同时还能通过某个消息存储的容器将本次调用其他服务的消息数据进行持久化存储,这样不就可以解决问题吗?结合RabbitMQ证好解决了这一问题,再发一份到消息队列中去。
安装RabbitMQ
查找镜像
- 进入docker hub镜像仓库地址:https://hub.docker.com/_/rabbitmq?tab=description ,选择带有 "management" 的版本(包含管理界面)
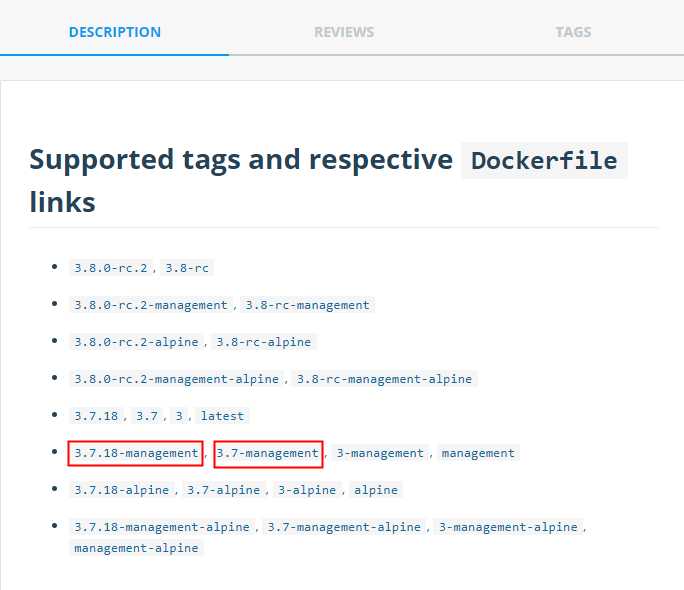
- docker 搜素下载
docker search rabbitmq:management

拉取镜像
docker pull rabbitmq:3.7.7-management // 1

docker pull rabbitmq:management // 2
运行rabbitMQ
docker run -d --name rabbitmq3.7.7 -p 5672:5672 -p 15672:15672此方式默认用户名:guest,密码:guest,手动配置参考:
-d 后台运行容器;
--name 指定容器名;
-p 指定服务运行的端口(5672:应用访问端口;15672:控制台Web端口号);
-v 映射目录或文件;
--hostname 主机名(RabbitMQ的一个重要注意事项是它根据所谓的 “节点名称” 存储数据,默认为主机名);
-e 指定环境变量;(RABBITMQ_DEFAULT_VHOST:默认虚拟机名;RABBITMQ_DEFAULT_USER:默认的用户名;RABBITMQ_DEFAULT_PASS:默认用户名的密码)
查看正在运行的容器
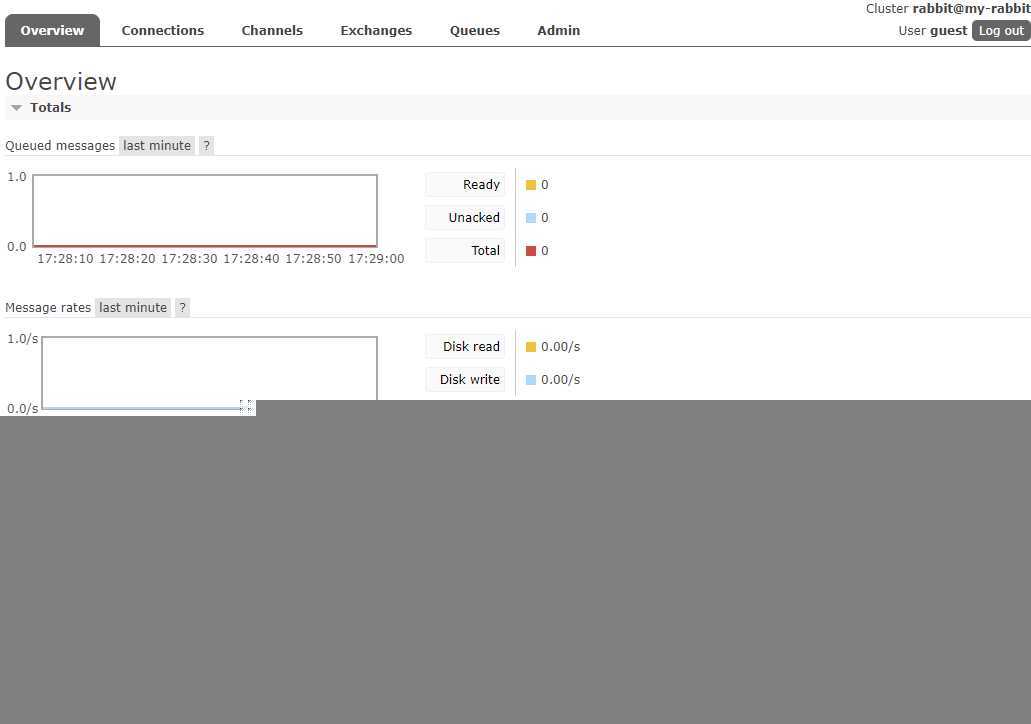
docker container ps访问rabbitMQ WEB管理界面
访问地址 http://192.168.2.28:15672/#/queues,这时候应该是啥也没有的
zipkin-server
上一篇文章用的是docker快速启动,这篇文章用jar包启动模式,因为配置方便,不用写docker-compose.yml 环境配置文件
- 下载jar包,地址 https://search.maven.org/remote_content?g=io.zipkin&a=zipkin-server&v=LATEST&c=exec
- 运行jar包
java -jar zipkin-server-2.17.0-exec.jar --zipkin.collector.rabbitmq.addresses=localhost后面的--zipkin.collector.rabbitmq.addresses=localhost 就是RabbitMQ的配置,这是默认的
如果要自己指定的用户名和密码可以参考下面的启动命令:
java -jar zipkin-server-2.17.0-exec.jar --zipkin.collector.rabbitmq.addresses=localhost --zipkin.collector.rabbitmq.username=guest --zipkin.collector.rabbitmq.password=guest- 可配置的环境变量参考表
| 属性 | 环境变量 | 描述 |
|---|---|---|
| zipkin.collector.rabbitmq.concurrency | RABBIT_CONCURRENCY | 并发消费者数量,默认为 1 |
| zipkin.collector.rabbitmq.connection-timeout | RABBIT_CONNECTION_TIMEOUT | 建立连接时的超时时间,默认为 60000 毫秒,即 1 分钟 |
| zipkin.collector.rabbitmq.queue | RABBIT_QUEUE | 从中获取 span 信息的队列,默认为 zipkin |
| zipkin.collector.rabbitmq.uri | RABBIT_URI | 符合 RabbitMQ URI 规范 的 URI,例如 amqp://user:pass@host:10000/vhost |
如果设置了URL,则以下属性将被忽略
| 属性 | 环境变量 | 描述 |
|---|---|---|
| zipkin.collector.rabbitmq.addresses | RABBIT_ADDRESSES | 用逗号分隔的 RabbitMQ 地址列表,例如 localhost:5672,localhost:5673 |
| zipkin.collector.rabbitmq.password | RABBIT_PASSWORD | 连接到 RabbitMQ 时使用的密码,默认为 guest |
| zipkin.collector.rabbitmq.username | RABBIT_USER | 连接到 RabbitMQ 时使用的用户名,默认为 guest |
| zipkin.collector.rabbitmq.virtual-host | RABBIT_VIRTUAL_HOST | 使用的 RabbitMQ virtual host,默认为 / |
| zipkin.collector.rabbitmq.use-ssl | RABBIT_USE_SSL | 设置为 true 则用 SSL 的方式与 RabbitMQ 建立链接 |
启动时终端界面

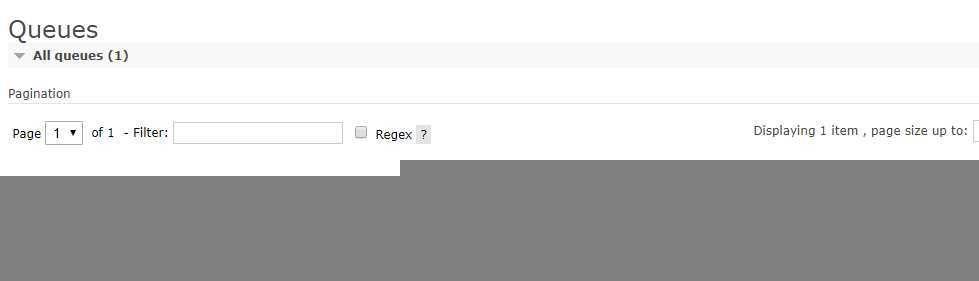
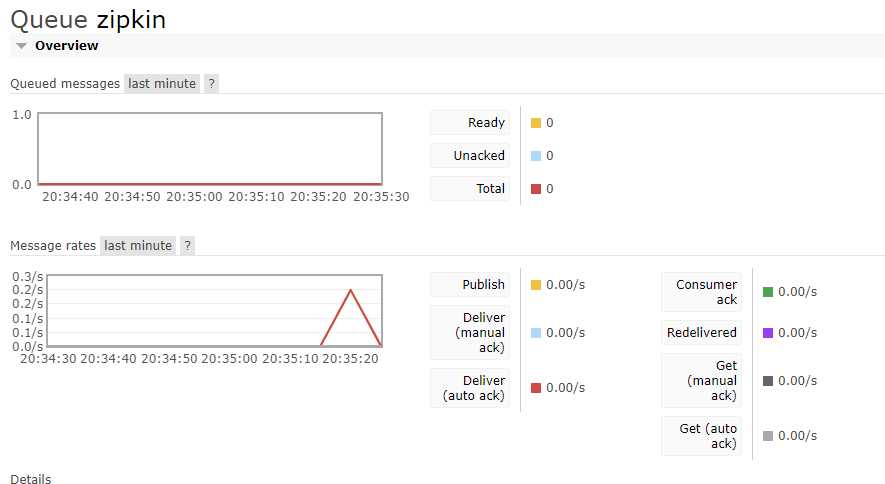
此时再查看以下RabbitMQ,有一个地址已经连接上了
zipkin也已经启动
配置微服务
- 各微服务中加入以下依赖
<dependency>
    <groupId>org.springframework.cloud</groupId>
    <artifactId>spring-cloud-starter-zipkin</artifactId>
</dependency>
<dependency>
    <groupId>org.springframework.amqp</groupId>
    <artifactId>spring-rabbit</artifactId>
</dependency>
参考上一篇文章 springcloud --- spring cloud sleuth和zipkin日志管理(spring boot 2.18)
其他的不用改,也有人在微服务中添加了下面的配置,但效果是一样的,可以试一下
#如果是使用rabbitmq则需要下面的配置
spring.zipkin.sender.type= rabbit
#添加rabbitmq的配置
spring.rabbitmq.host=localhost
spring.rabbitmq.port=5672
spring.rabbitmq.username=guest
spring.rabbitmq.poassword=guest
spring.rabbitmq.listener.direct.retry.enabled=true
spring.rabbitmq.listener.simple.retry.enabled=true
启动微服务测试
启动微服务,发起一个请求,观察变化如下:
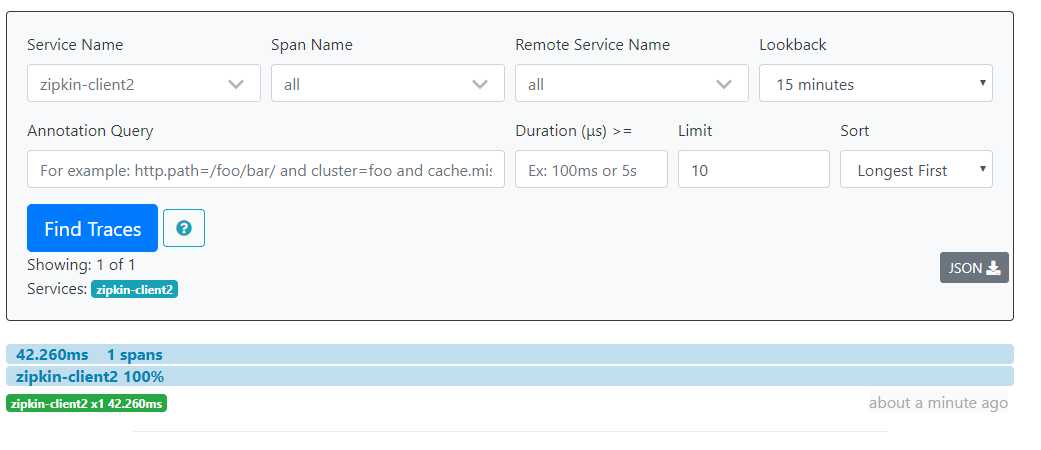
到此我们的服务已经调试成功!
参考文章:https://blog.csdn.net/zhangcongyi420/article/details/100809550
进阶中的菜鸟,欢迎留言探讨,指正不足!
以上是关于SpringCloud 三种服务调用方式,你知道几种?的主要内容,如果未能解决你的问题,请参考以下文章