wangeditor5在vue3中的全使用过程(图片上传附件上传工具栏配置编辑器配置)
Posted 小钟要学习!!!
tags:
篇首语:本文由小常识网(cha138.com)小编为大家整理,主要介绍了wangeditor5在vue3中的全使用过程(图片上传附件上传工具栏配置编辑器配置)相关的知识,希望对你有一定的参考价值。
1、参考官方的wangeditor5-for-vue3的开发手册
官方文档地址:https://clinfc.github.io/wangeditor5-for-vue3/guide/
说明为说明要编写这编博客文章?
官方文档的使用手册对于新手来说比较的难看懂,写的也不够详细,源码的封装比较深。写博客的目的是为了详细讲解一个适合项目使用的wangeditor的基本全过程,适合直接复制使用和修改(原官方文档使用原生js编写)
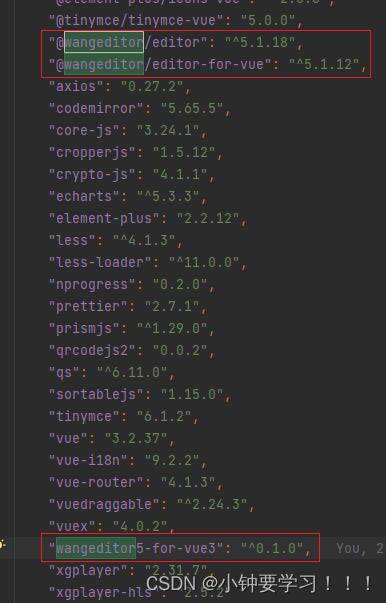
2、下载编辑器的依赖
npm install @wangeditor/editor --save
npm install @wangeditor/editor-for-vue@next --save

# 下面是vue3单独的组件,上面两个是旧的

npm install @wangeditor/editor wangeditor5-for-vue3
21.、新旧组件对比
下面的组件只是作为一个对比,不详细讲
旧组件
根据看与编辑器分开封装组件
<template>
    <div style="border: 1px solid #ccc">
      <Toolbar
        style="border-bottom: 1px solid #ccc"
        :editor="editorRef"
        :defaultConfig="toolbarConfig"
        :mode="mode"
      />
      <Editor
        style="height: 500px; overflow-y: hidden;"
        v-model="valuehtml"
        :defaultConfig="editorConfig"
        :mode="mode"
        @onCreated="handleCreated"
      />
    </div>
</template>
新组件
WeEditor组件将WeToolbar和WeEditable组件封装在了一个组件中,使用更方便。
<template>
  <we-editor
    toolbar-class="toolbar"
    editable-class="editable"
    toolbar-style="border: 1px solid #d9d9d9"
    editable-style="border: 1px solid #d9d9d9"
    :toolbar-option="toolbar"
    :editable-option="editable"
    :toolbar-reloadbefore="onToolbarReloadBefore"
    :editable-reloadbefore="onEditableReloadBefore"
    v-model="formData.jarr"
    v-model:json="formData.jstr"
    v-model:html="formData.html"
  />
</template>
3、入门使用<we-editor>组件
创建一个新的vue页面来编写当前demo
3.1、使用上面的新组件
3.2、编写js代码
<script>
// 引入 wangeditor5 样式
import '@wangeditor/editor/dist/css/style.css'

import  WeEditor, useWangEditor  from 'wangeditor5-for-vue3'
import  defineComponent, shallowReactive  from 'vue'
export default defineComponent(
	name: "wangeditor",
	components:  WeEditor ,
	setup()
		// 编辑器配置
		const editableOption =

		// 菜单栏配置
		const toolbarOption =

		// 防抖时长。当会触发重载的配置项发生变化 365ms 后,编辑器会重载
		const reloadDelary = 365

		// 对于上面的三个对象,经过 useWangEditor 处理后,返回的 editable 和 toolbar 分别对应编辑器和菜单栏的配置项
		const  editable, toolbar  = useWangEditor(
			editableOption,
			toolbarOption,
			reloadDelary
		)

		// 开启只读模式【不可编辑】
		editable.config.readOnly = false

		// 不要使用 reactive/ref,应该使用 shallowReactive/shallowRef 来接收 json array 数据
		const formData = shallowReactive( jarr: [], jstr: '', html: '' )

		// 在可编辑的重新加载之前
		function onEditableReloadBefore(inst)
			console.log(inst)
			console.log('editable 即将重载: ' + new Date().toLocaleString())


		// 在工具栏上重新加载之前
		function onToolbarReloadBefore(inst)
			console.log(inst)
			console.log('toolbar 即将重载: ' + new Date().toLocaleString())


		return  editable, toolbar, formData, onEditableReloadBefore, onToolbarReloadBefore
	,
)
</script>
useWangEditor的官方说明
经过 useWangEditor 处理后,返回的 editable 和 toolbar 分别对应编辑器和菜单栏的配置项,不过此时的配置项对象具备了响应式特性,我们可以直接修改 editable/toolbar 对应属性来更新或重载编辑器。
如果传入的 editableOption 和 toolbarOption 是响应式数据,内部将自动解除与之前的关联,也就意味着经过 useWangEditor 处理后得到的 editable 和 toolbar 配置对象,即使内容发生变化也不会触发之前的依赖更新!!!
大白话:可以在useWangEditor之后的对象中编写,也可以直接在editableOption对象中编写好再进过useWangEditor处理,不建议各自写一点,因为会覆盖,要么在前面写要么在后面写
3.3、编写样式
原来组件上面通过
toolbar-style="border: 1px solid #d9d9d9"editable-style="border: 1px solid #d9d9d9"来指定了工具栏和编辑器的样式边框,通过查看DOM元素赋值如下
<style>
/*工具栏样式*/
.toolbar
	border: 1px solid #d9d9d9;margin-bottom: 10px;

/*工具栏剧中显示*/
.w-e-toolbar
	justify-content: center !important;

/*编辑器样式*/
.editable
	border: 1px solid #d9d9d9;
	min-height: 800px;
	width: 850px;
	margin: 30px auto 150px auto;
	background-color: #fff;
	box-shadow: 0 2px 10px rgb(0 0 0 / 12%);
	border: 1px solid #e8e8e8;

</style>
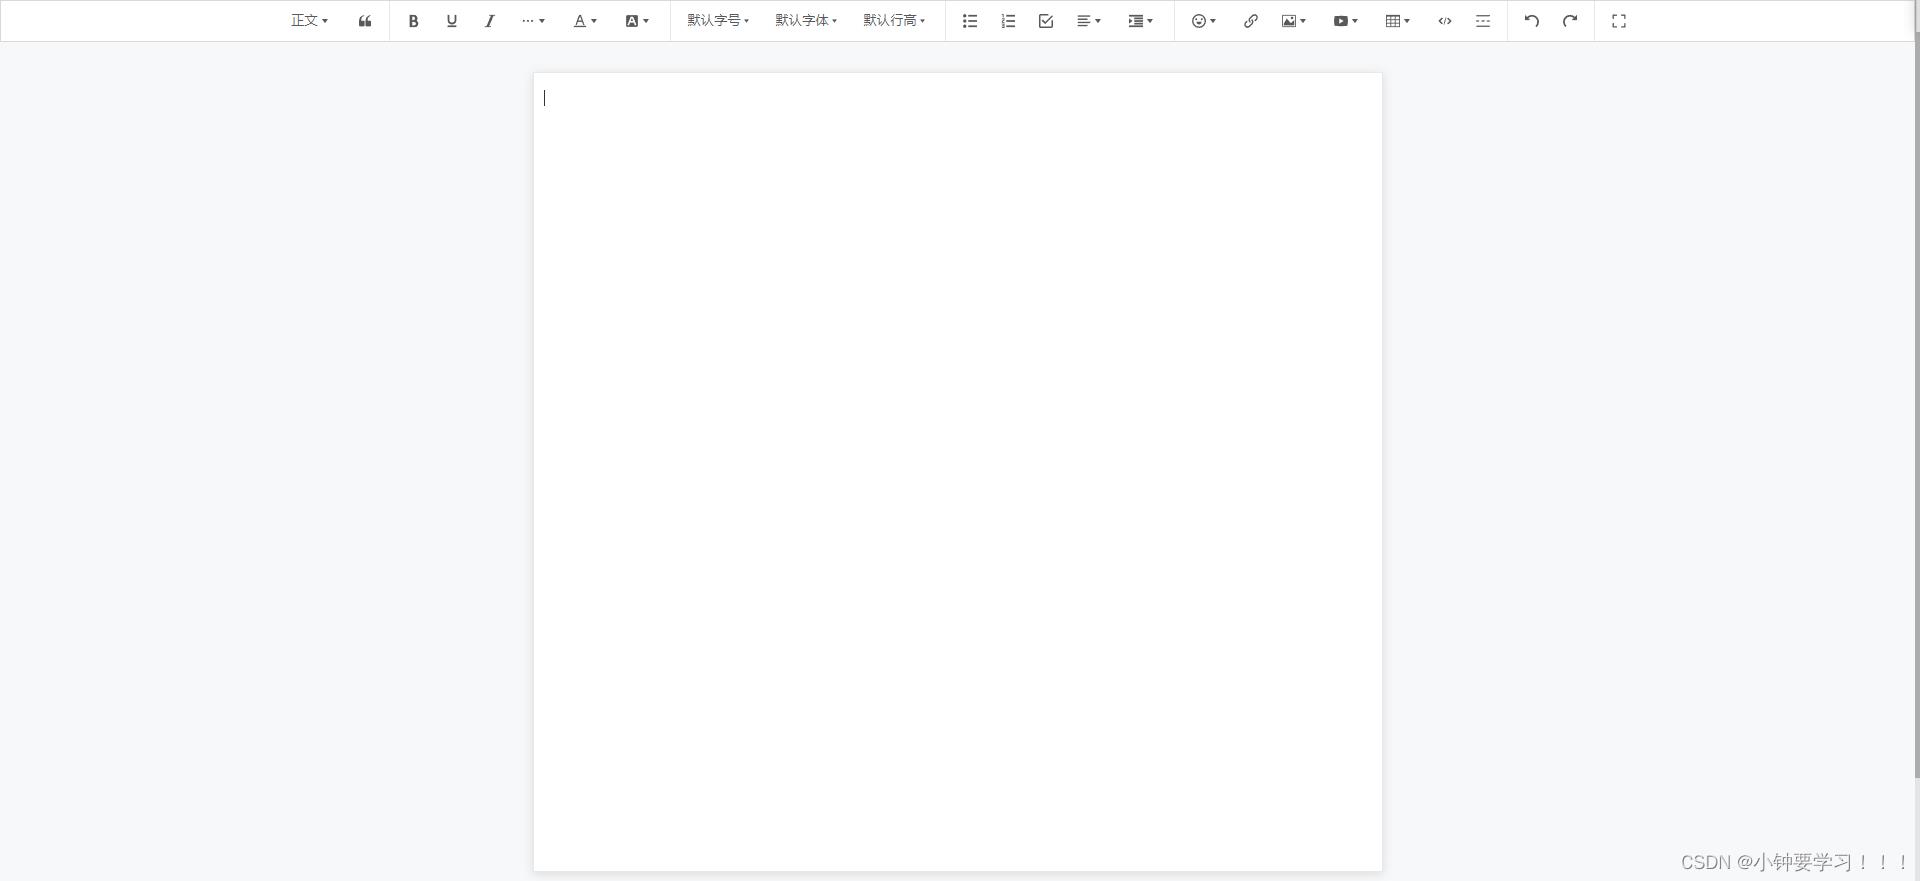
初始化效果
4、工具栏的修改(toolbarOption)
关于工具栏的排序以及菜单的配置的获取,根据官网的语句通过vue方法获取我暂时没弄懂,所以通过原生的方式获取
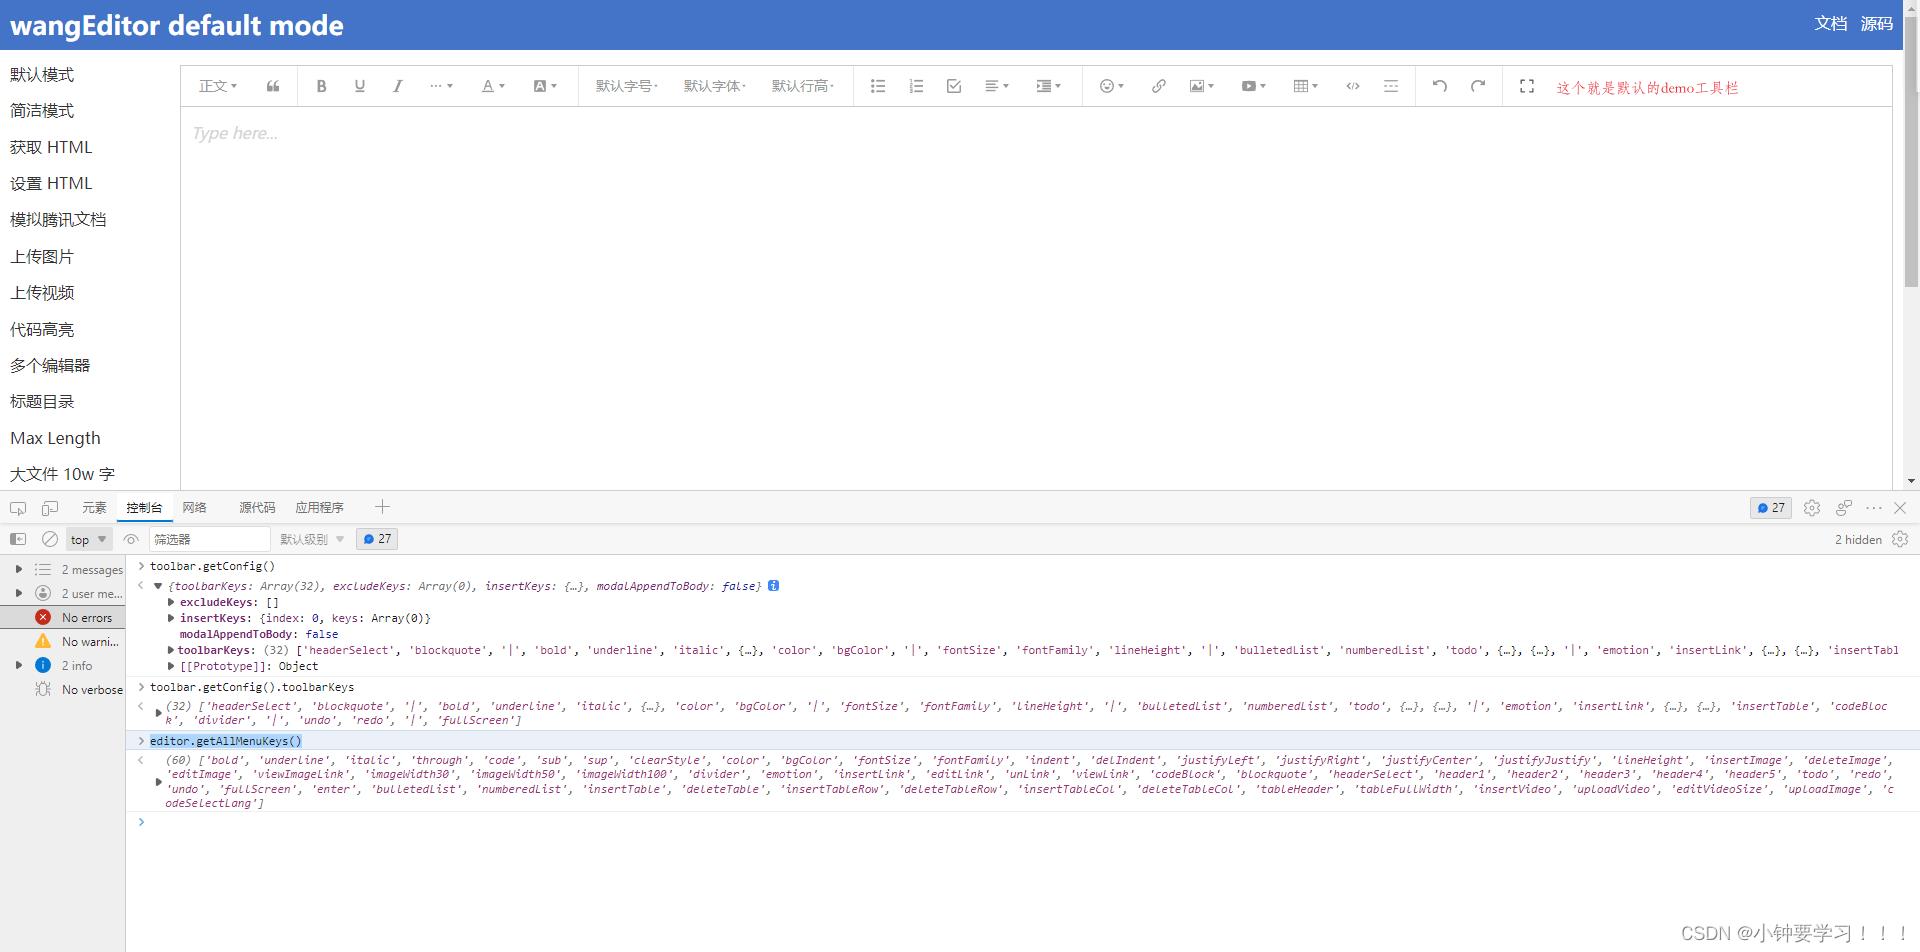
4.1、获取工具栏默认配置
进入官方提供的Demo示例,按F12输入如下命令查看工具栏的默认配置
toolbar.getConfig()
4.2、查看当前工具栏的默认配置
toolbar.getConfig().toolbarKeys
4.3、查询编辑器注册的所有菜单 key (可能有的不在工具栏上)
editor.getAllMenuKeys()
4.4、操作过程
官方demo地址:https://www.wangeditor.com/demo/index.html
4.5、工具栏模式对比及修改

方式一,直接在菜单栏配置对象里面写
// 菜单栏配置
const toolbarOption =
    mode: 'simple' // 指定简介模式
方式二、通过useWangEditor转换后的toolbar进行重新
注意:后面的配置会覆盖前面的配置,所以当前设置的模式为
default被后面所覆盖了默认配置建议在
toolbarOption写好在通过useWangEditor转换
// 对于上面的三个对象,经过 useWangEditor 处理后,返回的 editable 和 toolbar 分别对应编辑器和菜单栏的配置项
const  editable, toolbar  = useWangEditor(
    editableOption,
    toolbarOption,
    reloadDelary
)

toolbar.mode = 'default'
4.6、重新配置工具栏,显示哪些菜单,以及菜单的排序、分组
根据上面的4.2步骤获取到了当前默认的工具栏配置如下,与工具栏一一对应
[
    "headerSelect",
    "blockquote",
    "codeBlock",
    "|",
    "bold",
    "underline",
    "italic",

        key: "group-more-style",
        title: "更多",
        iconSvg: "<svg viewBox=\\"0 0 1024 1024\\">" +
            "<path d=\\"M204.8 505.6m-76.8 0a76.8 76.8 0 1 0 153.6 0 76.8 76.8 0 1 0-153.6 0Z\\"></path>" +
            "<path d=\\"M505.6 505.6m-76.8 0a76.8 76.8 0 1 0 153.6 0 76.8 76.8 0 1 0-153.6 0Z\\"></path>" +
            "<path d=\\"M806.4 505.6m-76.8 0a76.8 76.8 0 1 0 153.6 0 76.8 76.8 0 1 0-153.6 0Z\\"></path>" +
            "</svg>",
        menuKeys: ["through", "code", "sup", "sub", "clearStyle"]
    ,
    "color",
    "bgColor",
    "|",
    "fontSize",
    "fontFamily",
    "lineHeight",
    "|",
    "bulletedList",
    "numberedList",
    "todo",

        key: "group-justify",
        iconSvg: "<svg viewBox=\\"0 0 1024 1024\\"><path d=\\"M768 793.6v102.4H51.2v-102.4h716.8z m204.8-230.4v102.4H51.2v-102.4h921.6z m-204.8-230.4v102.4H51.2v-102.4h716.8zM972.8 102.4v102.4H51.2V102.4h921.6z\\"></path></svg>",
        title: "对齐",
        menuKeys: ["justifyLeft", "justifyRight", "justifyCenter", "justifyJustify"]
    ,

        key: "group-indent",
        title: "缩进",
        iconSvg: "<svg viewBox=\\"0 0 1024 1024\\"><path d=\\"M0 64h1024v128H0z m384 192h640v128H384z m0 192h640v128H384z m0 192h640v128H384zM0 832h1024v128H0z m0-128V320l256 192z\\"></path></svg>",
        menuKeys: ["indent", "delIndent"]
    ,
    "|",
    "emotion",
    "insertLink",

        key: "group-image",
        title: "图片",
        iconSvg: "<svg viewBox=\\"0 0 1024 1024\\"><path d=\\"M959.877 128l0.123 0.123v767.775l-0.123 0.122H64.102l-0.122-0.122V128.123l0.122-0.123h895.775zM960 64H64C28.795 64 0 92.795 0 128v768c0 35.205 28.795 64 64 64h896c35.205 0 64-28.795 64-64V128c0-35.205-28.795-64-64-64zM832 288.01c0 53.023-42.988 96.01-96.01 96.01s-96.01-42.987-96.01-96.01S682.967 192 735.99 192 832 234.988 832 288.01zM896 832H128V704l224.01-384 256 320h64l224.01-192z\\"></path></svg>",
        menuKeys: ["insertImage", "uploadImage"]
    ,

        key: "group-video",
        title: "视频",
        iconSvg: "<svg viewBox=\\"0 0 1024 1024\\"><path d=\\"M981.184 160.096C837.568 139.456 678.848 128 512 128S186.432 139.456 42.816 160.096C15.296 267.808 0 386.848 0 512s15.264 244.16 42.816 351.904C186.464 884.544 345.152 896 512 896s325.568-11.456 469.184-32.096C1008.704 756.192 1024 637.152 1024 512s-15.264-244.16-42.816-351.904zM384 704V320l320 192-320 192z\\"></path></svg>",
        menuKeys: ["insertVideo", "uploadVideo"]
    ,
    "insertTable",
    "divider",
    "|",
    "undo",
    "redo",
    "|",
    "fullScreen"
]
通过如下方法重新配置简介模式下的工具栏
注意:如果想在
useWangEditor处理后的toolbar对象修改,必须要在toolbarOption对象里面先创建空的一个config配置空对象后面才能修改到(来源一个网友的说法)
// 菜单栏配置
const toolbarOption =
    mode: 'simple', // 指定简介模式
    config:
        toolbarKeys:[
            "fontSize",'header1', 'header2', 'header3','header4','|',
            'blockquote',"code","codeBlock",'|',
            'bold', 'underline', 'italic', 'through', 'color', 'bgColor', 'clearStyle', '|',
            'bulletedList', 'numberedList', 'todo', 'justifyLeft','justifyCenter', 'justifyRight', '|',
            'insertLink',

                key: 'group-image',
                title: '图片',
                iconSvg: "<svg viewBox=\\"0 0 1024 1024\\"><path d=\\"M959.877 128l0.123 0.123v767.775l-0.123 0.122H64.102l-0.122-0.122V128.123l0.122-0.123h895.775zM960 64H64C28.795 64 0 92.795 0 128v768c0 35.205 28.795 64 64 64h896c35.205 0 64-28.795 64-64V128c0-35.205-28.795-64-64-64zM832 288.01c0 53.023-42.988 96.01-96.01 96.01s-96.01-42.987-96.01-96.01S682.967 192 735.99 192 832 234.988 832 288.01zM896 832H128V704l224.01-384 256 320h64l224.01-192z\\"></path></svg>",
                menuKeys: ['insertImage', 'uploadImage']
            ,
            "insertTable",
            "|",
            "undo","redo"
        ]
简洁效果如下
后面再加入个
附件上传的插件菜单

5、菜单配置(editableOption)
根据官网描述:wangEditor 从 V5 版本开始,工具栏配置和菜单配置(如配置颜色、字体、链接校验、上传图片等)分离了
菜单配置是什么?就是上图中的选择默认字体大小类的内容,也就是工具栏的菜单功能实现
5.1、查看编辑器配置
可通过
editor.getConfig()查看编辑器默认配置根据下图观察,editor后面使用的是getConfig是一个配置,所以下面的配置页要写在config对象里面
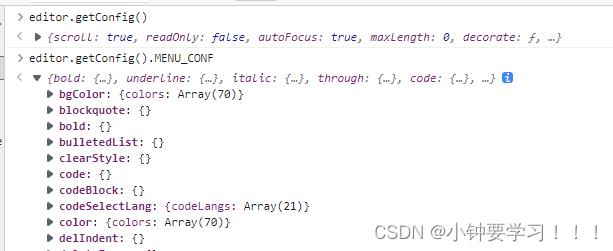
在4的步骤中使用
editor.getAllMenuKeys()以及获取到了所有的菜单key,就可以进行下一步的菜单配置了
5.2、配置默认字号
如何查看keys和配置项?通过上图就可以看出对应的key,找到
fontSize,点击进去就有fontSizeList数组了,根据里面的写法进行编写即可
// 编辑器配置
const editableOption =
    config:
        MENU_CONF:
            fontSize:
                fontSizeList: [
                    // 元素支持两种形式
                    //   1. 字符串;
                    //   2.  name: 'xxx', value: 'xxx'
                    '16px',
                    '20px',
                     name: '26px', value: '26px' ,
                    '40px',
                ]
效果如下
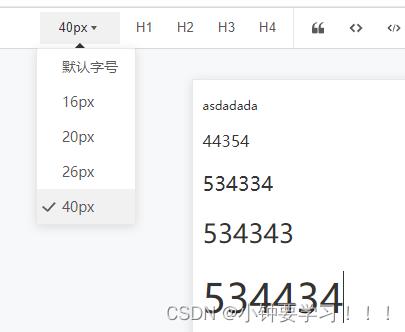
5.3、图片上传配置
根据查询的ket查看如何配置

实现
我这里引入了
ElementUI的插件所以可以使用this.$message.success($file.name 上传成功, res)作为提示后台的上传地址
server需要自己编写能实现上传文件再进行测试官方上传文件的返回类型
// 成功返回

 "errno": 0, // 注意:值是数字,不能是字符串
 "data":
     "url": "xxx", // 图片 src ,必须
     "alt": "yyy", // 图片描述文字,非必须
     "href": "zzz" // 图片的链接,非必须


// 失败返回

 "errno": 1, // 只要不等于 0 就行
 "message": "失败信息"
我的是通过
customInsert自定义返回类型
// 编辑器配置
const editableOption =
    config:
        placeholder:"请在这里输入内容...",
        MENU_CONF:
            // 配置默认字号
            // 配置上传图片
            uploadImage:
                // 请求路径
                server: "api/sysUser/uploadImg",
                // 后端接收的文件名称
                fieldName: "file",
                maxFileSize: 1 * 1024 * 1024, // 1M
                // 上传的图片类型
                allowedFileTypes: ["image/*"],
                // 小于该值就插入 base64 格式(而不上传),默认为 0
                base64LimitSize: 10 * 1024, // 10MB
                // 自定义插入返回格式【后端返回的格式】
                customInsert(res, insertFn)
                    if(res.code != 200 && res.success == false)
                        ElMessage.error("上传文件失败,"+res.message)
                        return

                    insertFn(res.data.url, res.data.alt, res.data.href)
                ,
                // 携带的数据
                meta:
                    token: 'eyJhbGciOiJIUzUxMiJ9.eyJleHAiOjE2NjM0MjQ5MzEsInN1YiI6ImFkbWluIiwiaWF0IjoxNjYzNDIzMTMxOTAyfQ.McM6MZ6N9dQnAKym-9_TqAv6gjRWqf72Q4MTnMlS9AeIM-DhCjaJJrUMYbB8hs5r-HXYSXbs5O5pk9f_KUbGQg'
                ,
                // 将 meta 拼接到 url 参数中,默认 false
                metaWithUrl: true,
                // 单个文件上传成功之后
                onSuccess(file, res)
                    if(res.code == 200 && res.success)
                        ElMessage.success(`$file.name 上传成功`)
                        return
                    else
                        ElMessage.warning(`$file.name 上传出了点异常`)
                        return

                    // console.log(`$file.name 上传成功`, res)
                    //ElMessage.success(`$file.name 上传成功`, res)
                ,
                // 单个文件上传失败
                onFailed(file, res)
                    console.log(res)
                    ElMessage.error(`$file.name 上传失败`)
                ,
                // 上传错误,或者触发 timeout 超时
                onError(file, err, res)
                    console.log(err, res)
                    ElMessage.error(`$file.name 上传出错`)
                ,
测试结果
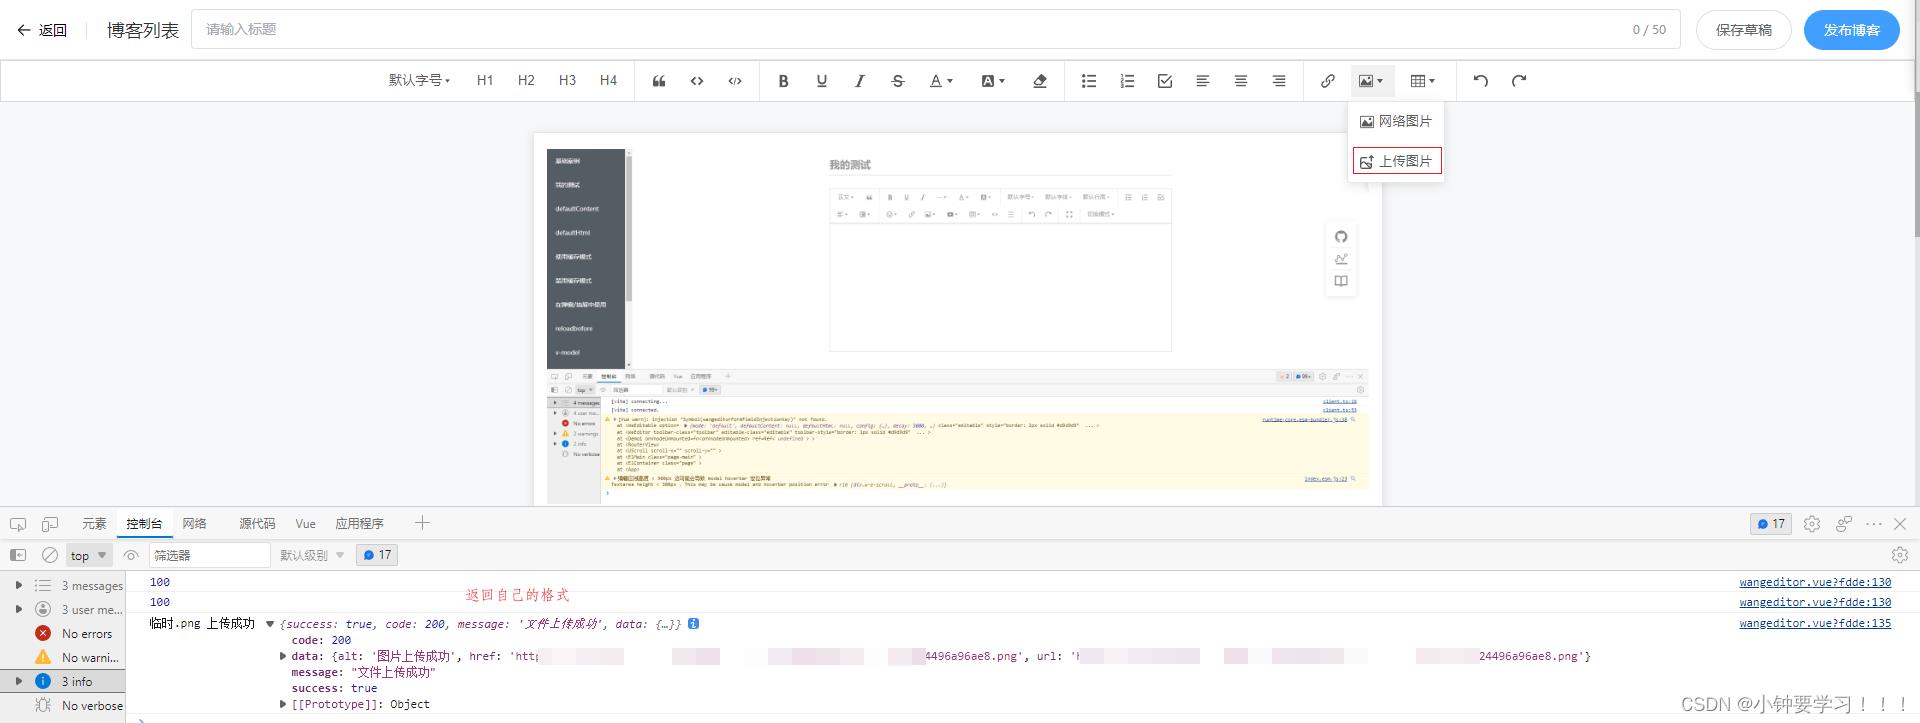
5.4、视频上传
目前没有搞过,以后研究
6、上传附件插件使用
官方插件地址:https://github.com/wangeditor-team/wangEditor-plugin-upload-attachment
6.1、下载依赖
-
安装yarn
npm install --global yarn # 检查是否成功 yarn --version -
安装插件依赖
这是官网指定的,里面同时也包含了
wangeditor5的全套依赖,使用的是yarn进行管理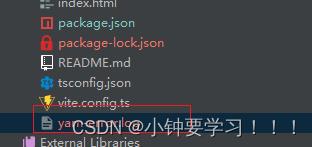
yarn add @wangeditor/plugin-upload-attachment跟着上面步骤走的就通过下面的方式获取到(原先已近下载了其他依赖)
npm i @wangeditor/plugin-upload-attachment -s -
查看

6.2、【注意】该文档要求 @wangeditor/editor 版本 >=5.1.16
6.3、注册到编辑器
import  Boot  from '@wangeditor/editor'
import attachmentModule from '@wangeditor/plugin-upload-attachment'
import  WeEditor, useWangEditor  from 'wangeditor5-for-vue3'

// 注册。要在创建编辑器之前注册,且只能注册一次,不可重复注册。
Boot.registerModule(attachmentModule)
在app.vue里面就能实现一次的注册

6.4、编辑器配置上传附件菜单
注意:如果在useWangEditor处理后的editable使用也需要在editableOptionconfig.MENU_CONF.uploadAttachment的空对象
我是一类ElementUI的消息提示组件,如果复制那一段可能编译报错,自己修改
// 编辑器配置
const editableOption =
  config:
    hoverbarKeys:
      attachment:
        menuKeys: ['downloadAttachment'], // “下载附件”菜单
      ,
    ,
    MENU_CONF:
      	// 上传附件
        uploadAttachment:
            server: 'http://localhost:8081/api/sysUser/blogFileUpload',
            fieldName: 'file',
            maxFileSize: 100 * 1024 * 1024, // 100M
            // 携带的数据
            meta:
                token: 'eyJhbGciOiJIUzUxMiJ9.eyJleHAiOjE2NjM0MTQ1MjAsInN1YiI6ImFkbWluIiwiaWF0IjoxNjYzNDEyNzIwMDE5fQ.nFAEtMqduzValgDAsMUXeM0OSIlYK4hi8cjTSAL52jMgFwfuOUVNEbdT91abs1rdNXKjEtrymbn_2aO1Q2h26Q'
            ,
            // 在上传之前
            onBeforeUpload(file)
                console.log('onBeforeUpload', file)
                return file // 上传 file 文件
                // return false // 会阻止上传
            ,
            // 关于进展
            onProgress(progress)
                console.log('onProgress', progress)
            ,
            // 成功回调
            onSuccess(file, res)
                if(res.errno === 0)
                    ElMessage.success(`vue动态添加删除富文本(wangEditor)

关于动态删除wangeditor的数据不更新
如何使用wangeditor可以看我上一篇vue+wangEditor (富文本编辑器)
在这个项目中需要富文本,并且还要动态添加删除,动态添加删除到是不困难,但是用到了删除富文本功能时页面数据不更新的问题,借鉴了https://blog.csdn.net/EnjoyLearning_zn/article/details/109079330中的思路,并用js实现。
思路
删除之前先,获取富文本里的所有内容,然后再删除指定内容,销毁富文本,再重新创建富文本,最后将获取的内容设置到富文本里。
动态添加删除富文本
<template>
  <div>
    <div v-for="(v, i) of box" :key="i">
      <div style="float: left" :ref="v.ref"></div>
      <el-button
        style="float: left"
        icon="el-icon-minus"
        @click="delbox(i)"
        circle
      ></el-button>
    </div>
    <div style="clear: both"></div>
    <el-button @click="crebox()">添加</el-button>
  </div>
</template>
<script>
import E from "wangeditor";
export default {
  data() {
    return {
      box: [
        {
          ref: "box",
          editor: "editor",
        },
      ],
      num: 0,
    };
  },
  methods: {
    //删除
    delbox(i) {
      //先把所有富文本内容提出来
      let arr = [];
      for (let q = 0; q < this.box.length; q++) {
        arr.push(this.box[q].editor.txt.html());
      }
      //在按下标删除
      arr.splice(i, 1);
      this.box = [];
      //重新创建富文本
      for (let w = 0; w < arr.length; w++) {
        setTimeout(() => {
          this.crebox(arr[w]);
        }, 15);
      }
    },
    //添加
    crebox(val) {
      this.num++;
      let ref = "box" + this.num;
      this.box.push({
        ref,
      });
      let box = this.box[this.box.length - 1];
      setTimeout(() => {
        box.editor = new E(this.$refs[ref]);
        box.editor.config.height = 70;
        box.editor.create();
        if (val) {
          box.editor.txt.html(val);
        }
      }, 10);
    },
  },
  mounted() {
    this.box[0].editor = new E(this.$refs.box);
    this.box[0].editor.config.height = 70;
    this.box[0].editor.create();
  },
};
</script>

最后就是获取富文本内容
for (let i = 0; i < this.box.length; i++) {
	console.log(this.box[i].editor.txt.html());
}
以上是关于wangeditor5在vue3中的全使用过程(图片上传附件上传工具栏配置编辑器配置)的主要内容,如果未能解决你的问题,请参考以下文章